We’ve technically been in this new apartment in Germany for roughly two months, and it was only yesterday that we figured out how to register and pay for electricity. 🤦♀️ Good news, we can backdate it. 😆
I say technically back in Germany because we arrived from Ecuador and almost immediately left for the United States. We had about ten days in Germany to get into and set up our new apartment, and then we flew home for Christmas.
Those first few days after we arrived were roughhh… We landed on December 13th. We got the keys to the apartment and went to a Christmas party for Shane’s lab on the 14th. Then, we moved all our stuff in on the 15th. Truth be told, we don’t have much stuff. We also don’t have a car. So, we had to rent a moving van to bring what felt like entirely too much crap from our storage unit to the new apartment. Did I mention the apartment is on the top floor?
On top of that, we don’t have much stuff! So, we were off to Ikea and other stops for, oh, ya know, a bed to sleep in! It was a busy few days… all the while speaking Spanish to the Germans and getting really strange looks. ha.
Plus side, we reinstated our annual Christmas market visit. 😁
Then, on Christmas Day we were off to the US!
Spoiler alert. Traveling on Christmas was not as magical as the movies make it seem, to our disappointment! Maybe it was just the Munich airport, or we happened to end up in the wrong terminals, but they weren’t decorated, there was no holiday music, and people were generally grumpy (in hindsight, it makes sense). Doesn’t matter. The flights were cheap, and we spent a wonderful month at home with family and friends!
Shane’s been back to work for nearly a month now, and we’re readjusting to life in Germany. Leaving Ecuador, we were both concerned that Germany would feel a bit boring or that we wouldn’t enjoy being there. At this point, I think it’s safe to say we feel completely neutral about it. I’ve talked about this before, but in Ecuador, I feel like I had daily moments of “I love this country” or something to that effect. So far, I haven’t hated being back, but I also haven’t been over-the-top happy to be back. Just somewhere in the middle.
Honestly, it feels like we lived two separate lives, which I guess, in a way, we did. Imagine an avatar in the Sims game, where you can just pick them up and place them where you want. This is how I feel. Someone picked me up and placed me in Ecuador, where we created this new life based on a new culture, new rules, and new experiences. Consequently, you become a slightly different version of yourself–an Ecuadorian version.
Shane said he was Daniel, said with a Spanish accent, for example (which is actually true; he generally went by his first name, Daniel, instead of Shane, which was hard to pronounce for a lot of people. “Buenos dias Shaun-ey!“).
Now, my avatar has been picked up and placed back in Germany, where I’m back to the European version of me. We moved back to the same city, same neighborhood, and same job (for Shane). Did Ecuador even exist?!
Ok, obviously, it did, and that’s dramatic, but hopefully you see my point.
Whitney (como Whitney Houston!) y Daniel de Tena, Ecuador.
We’ve had a few reverse culture shocks, I’d say. First, the daylight. We were so accustomed to our 12-hour light-dark cycle that I could immediately tell what time it was based on the light when I woke up. When we arrived in Germany, the sunrise was at 8 am and sunset at 4:20 pm. It was a shock when I woke up that first morning at 7:30 am, assumed it was 5:30 am, and quickly found out it was two hours later than I thought!
Also, so many people smoke! I mean, there are cigarette dispensers at the bus stops. I completely forgot about this. And the water is so hard, and the air is so dry! Coming from the jungle, I think my body went into panic mode the first week, with all the moisture sucked out of my skin. Because of the hardness of the water, we’ve bought filters for the shower and the washing machine, which brings me to my next shock—the immediate availability of everything! I mean, I bought a TV for our apartment online and picked it up two hours later, and we’ve ordered from Amazon with next-day delivery more than I’d prefer.
I think our biggest reverse culture shock, though, is how outside of society we feel now that we’re back and don’t speak German. Finally, in Spanish, we could understand random conversations in the street and confidently manage nearly any interaction; we were living life in Spanish. Here, we don’t say more than “good morning” or “hello” to our neighbors because we can’t. We can both read enough German to navigate signs and basic necessities, but I couldn’t form a full sentence to order at a restaurant, for example (smiling, nodding, and pointing is a life-saver). You inherently feel more isolated when you don’t speak the language, which is something I forgot after spending 2+ years building my Spanish capacity. On the other hand, we only have a year, maybe a bit more, in Germany before we’re off to who knows where, and I know the effort it takes for me to properly learn a language. I’m just not sure I have it in me for such a temporary period.
There have been some fun things about being back in Germany, however! It’s been enjoyable putting the apartment together. I can genuinely say that I like our apartment, especially compared to our basement apartment with no kitchen and no windows to the outside world. We were super excited about buying rugs and a vacuum cleaner (is that called getting old?). And, after 12 years together, we finally bought our first couch! 😆
Our first (furnished) Munich apartment.Our current Munich apartment. Definitely a window upgrade!
We’re also getting back into running, which, quite frankly, was boring in Tena because the only good place to run was laps in the park. Our apartment is essentially next to the large city park with trails and a river, and Munich is known for its green space, which makes running interesting! I also can’t complain about the availability of ingredients and the selection at the grocery stores, which has made cooking fun again (however, black beans are weirdly hard to find). Honestly, I really can’t complain.
Anyway, that’s our little life update. We’ve mostly just been re-setting our routines and readjusting to European life. Soon, we’ll be making a quick trip to the Netherlands to visit friends and pick up the last of our things. So, until then…
It seems like both yesterday and a thousand years ago we were packing our bags for Ecuador. Now that we’re back in Germany, I wanted to reflect on our experience living there. Without a doubt, we are different people now than when we arrived, in a good way! So, here we go.
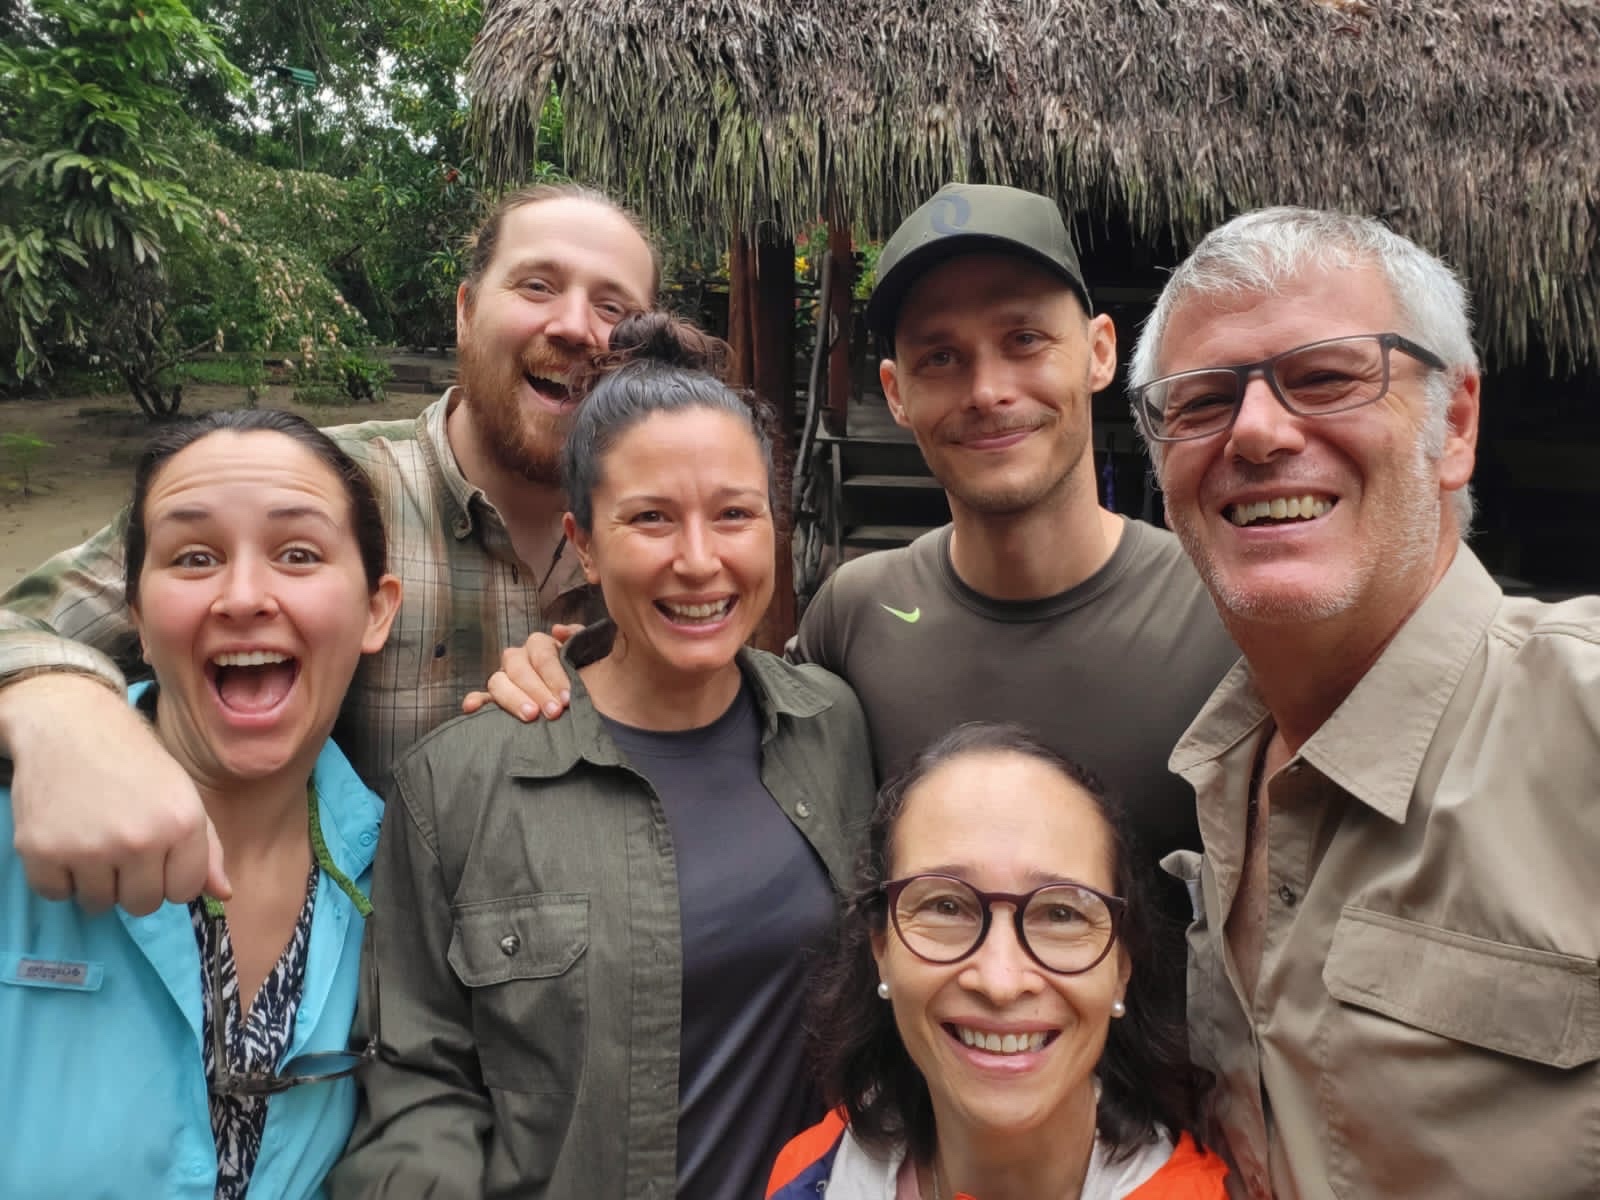
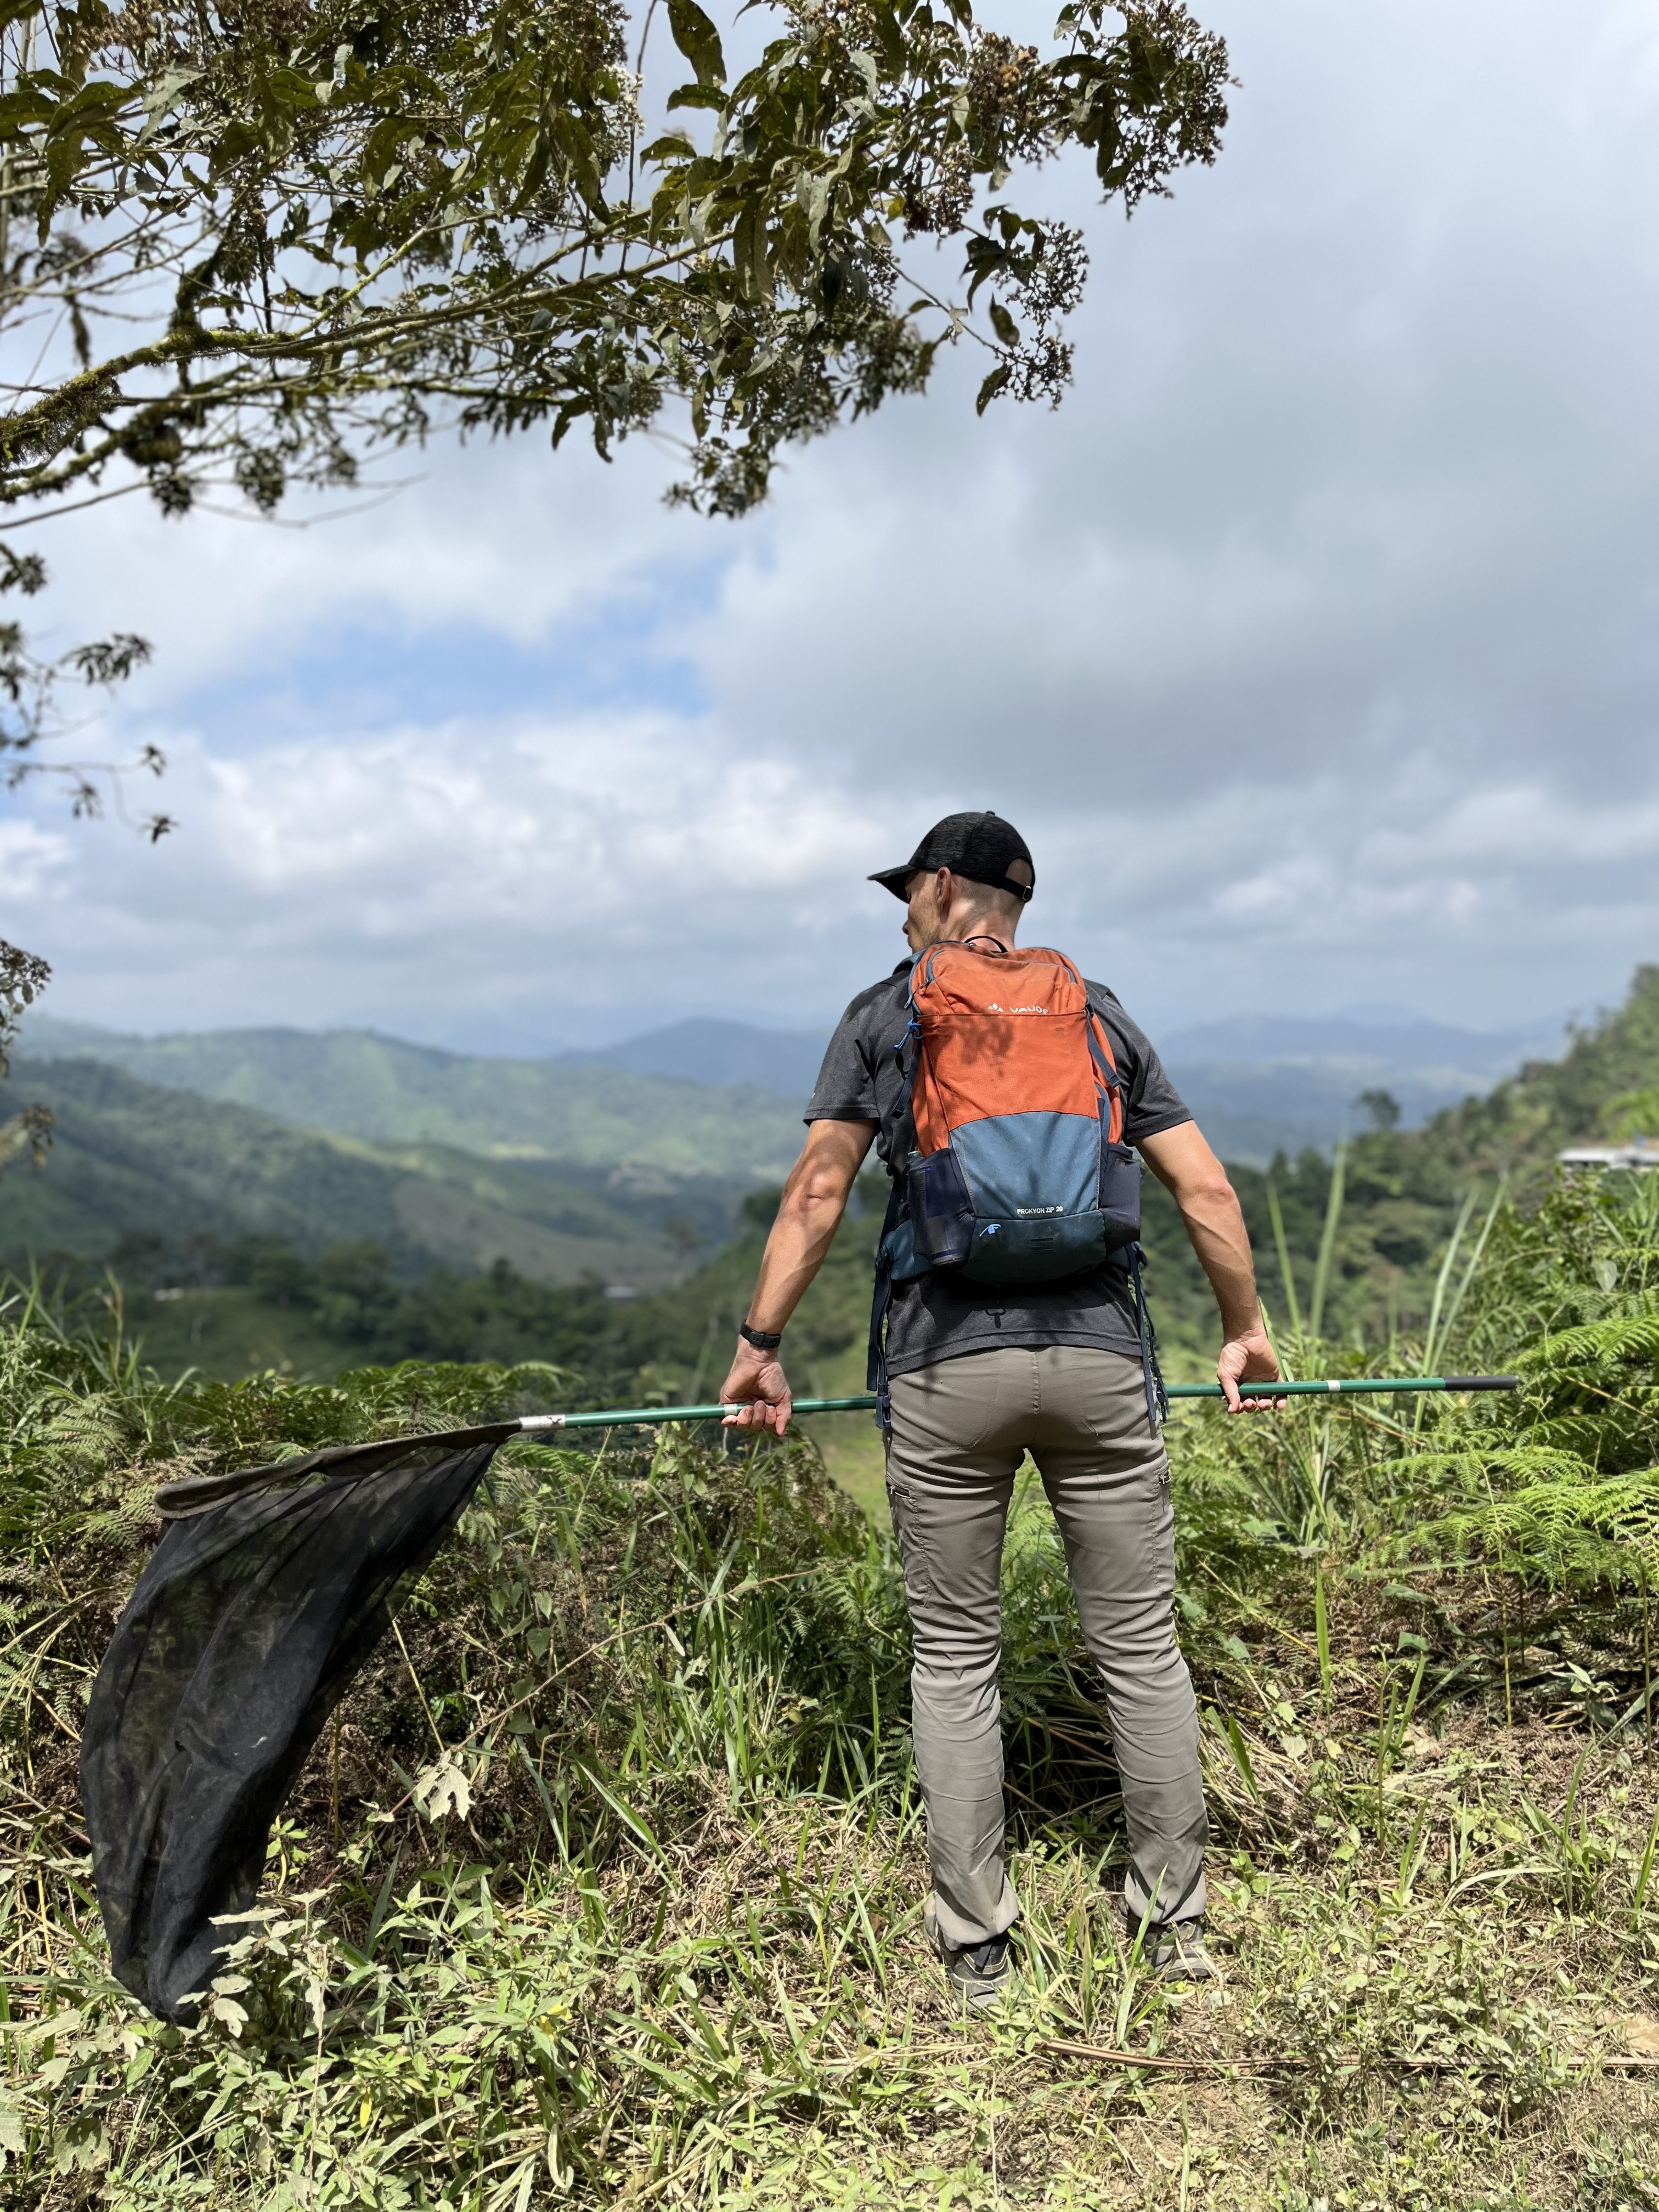
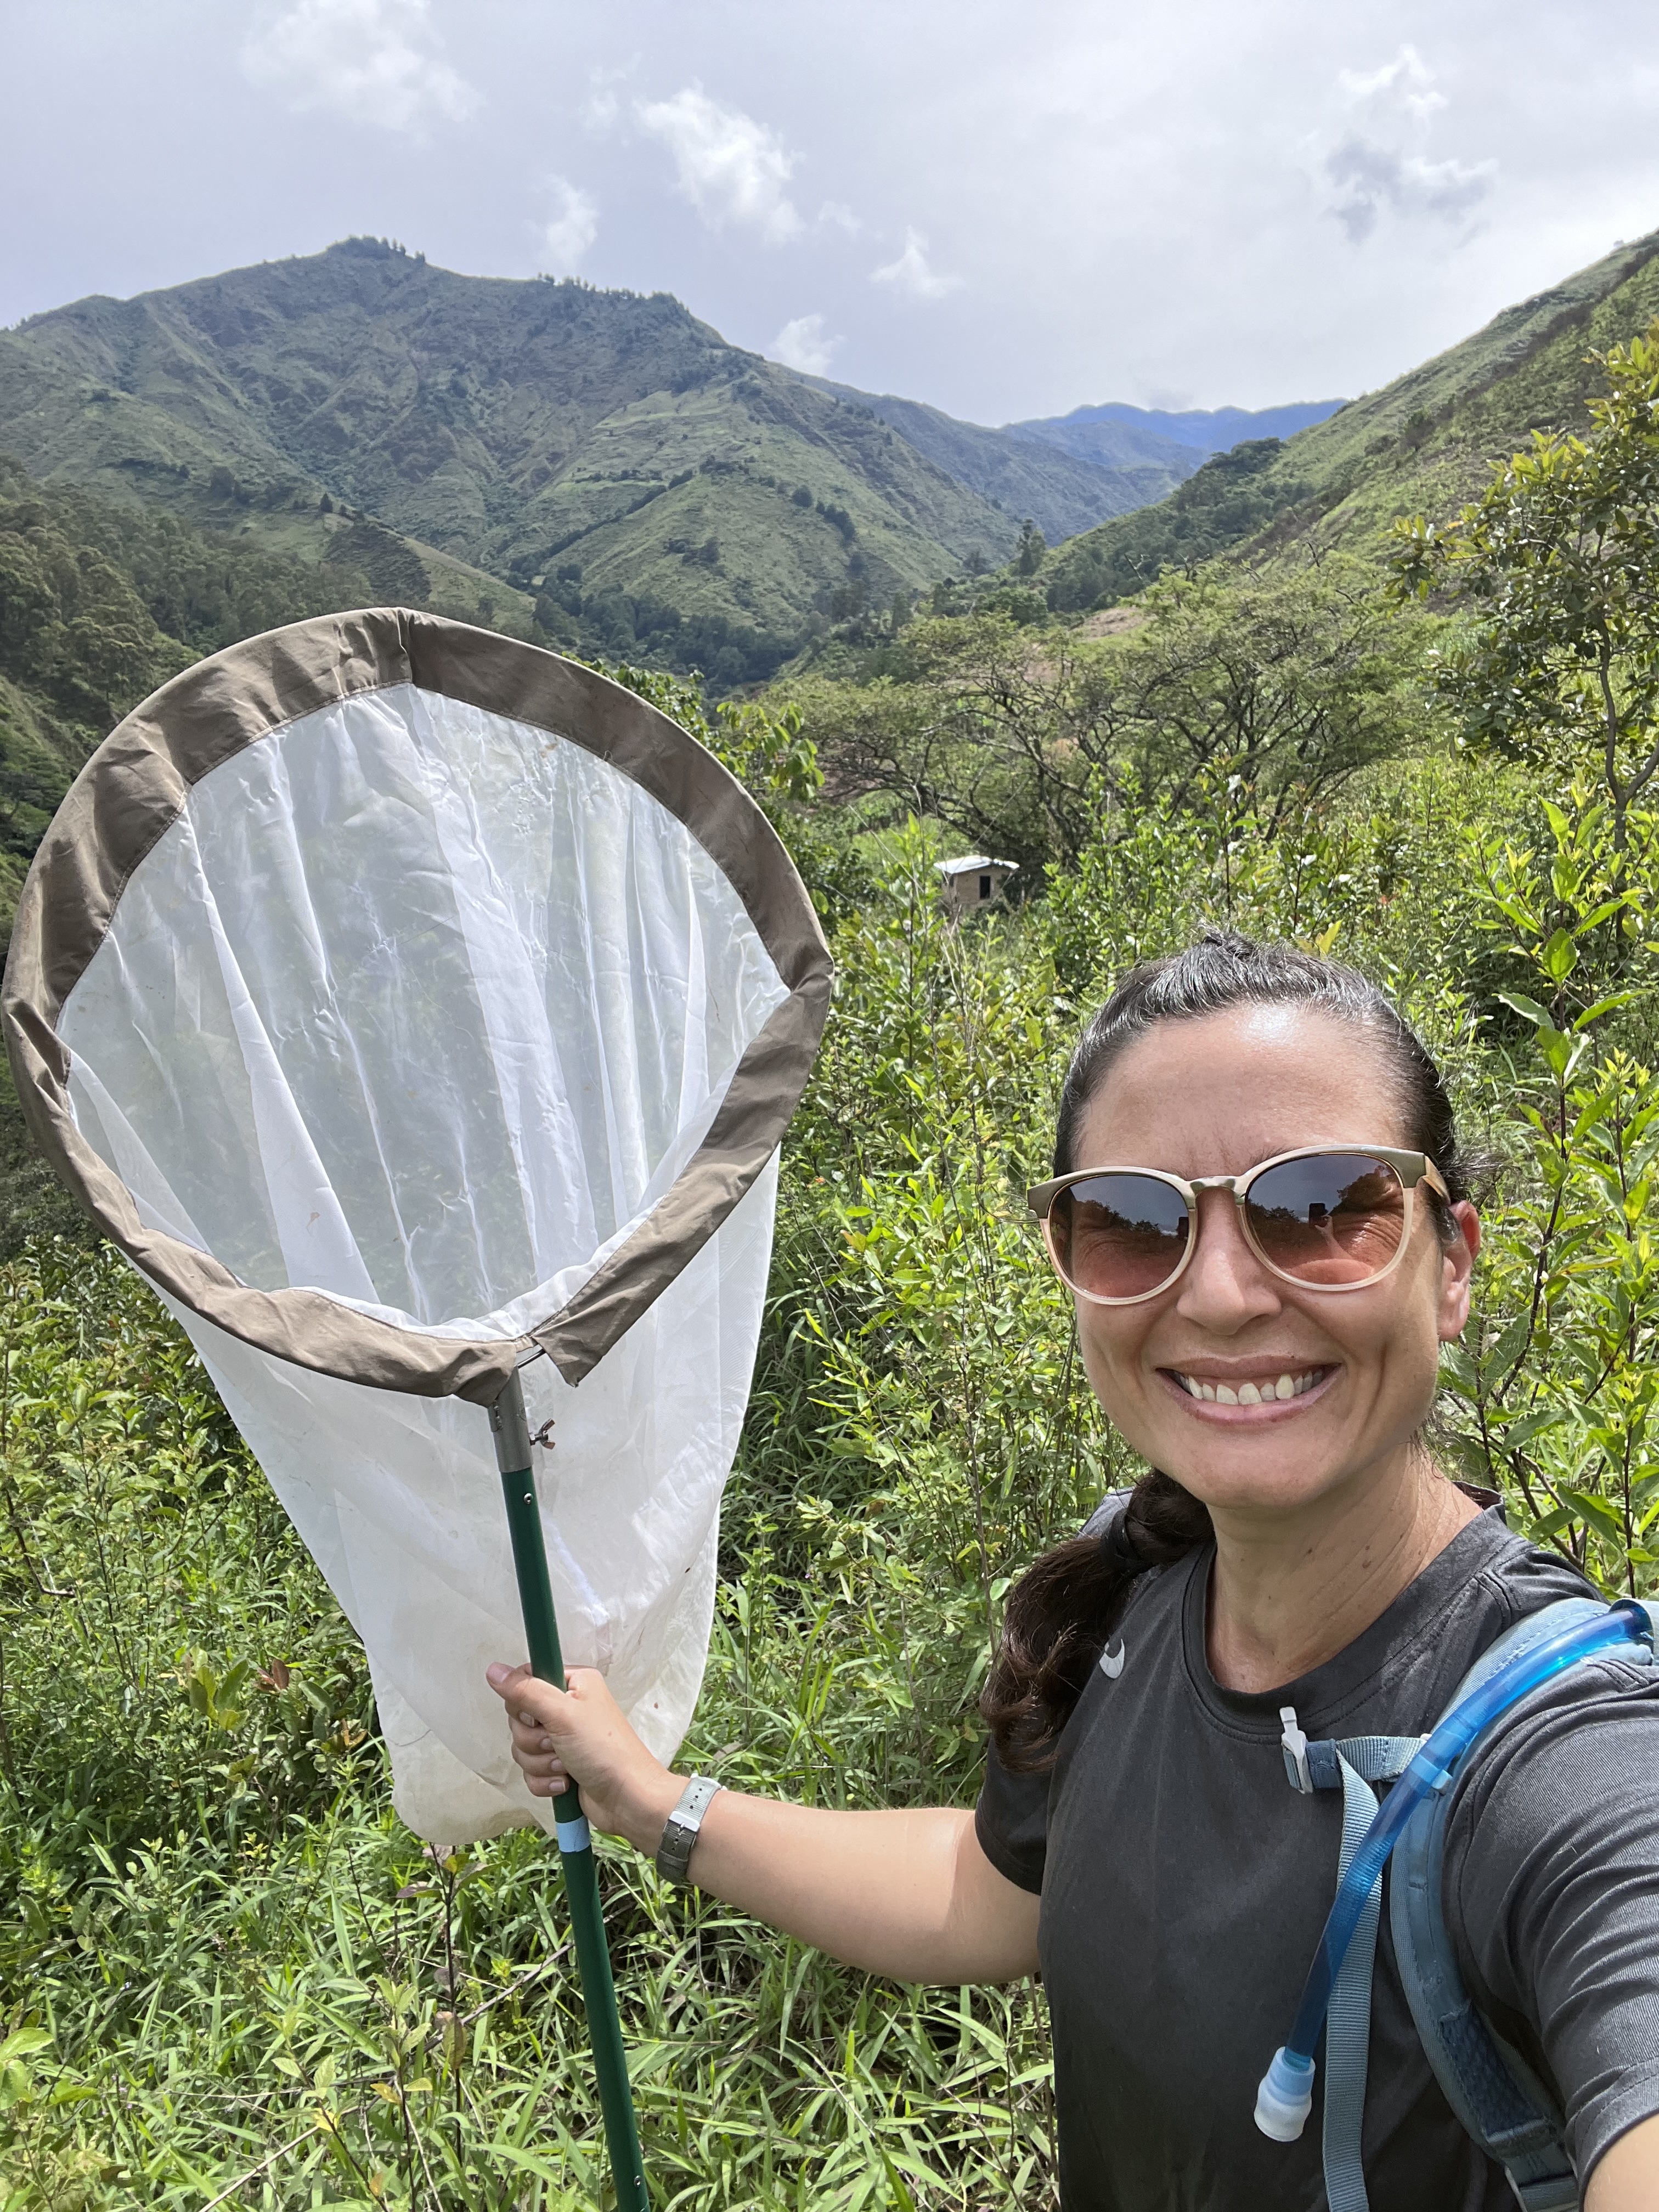
The Ecuador Dream Team on our first butterfly collecting trip.
First, this sounds obvious, but life in Ecuador is different than life in the United States or Europe. Even more, life in Tena is different than life in the cities, like Quito or Cuenca. That complete shift in lifestyle was one of the things I looked forward to the most before we moved. In reality, we had no idea what to expect, so we arrived with no expectations, ready to adapt to whatever the situation may be.
This was particularly hard in the beginning, given we spoke no Spanish (and very few spoke English), and EVERYTHING seemed chaotic. Not to mention that Shane and I are planners. It’s how I cope with uncertainty; I’m going to control all the pieces that I can control so I can let go of the rest. Well, when we first arrived, I had very little control over anything. 😆 In fact, we would relinquish much of that control to José (Shane’s master’s student at the time) and Lucie (the other postdoc) who could speak Spanish. This was particularly tough for Shane, who was there to co-lead a project. At that time, the insectaries for the butterflies were still being built, and Shane had to talk with the construction guy through Lucie and José, which drove him crazy that he couldn’t do it himself.
The insectaries, the day after we arrived.
We’d also end up letting go of our lifelong and type-A personality-driven desire to be on time (well, sort of, haha). Once, when my Sister and Terry visited, we stayed at the Anaconda Lodge and had a long chat one afternoon with the owner. He offhandedly said something like, “If you’re going to worry about being 10 or 15 minutes late, you’re in the wrong country.” That really stuck with us, and we’d often quote that to each other when the other was panicking about time.
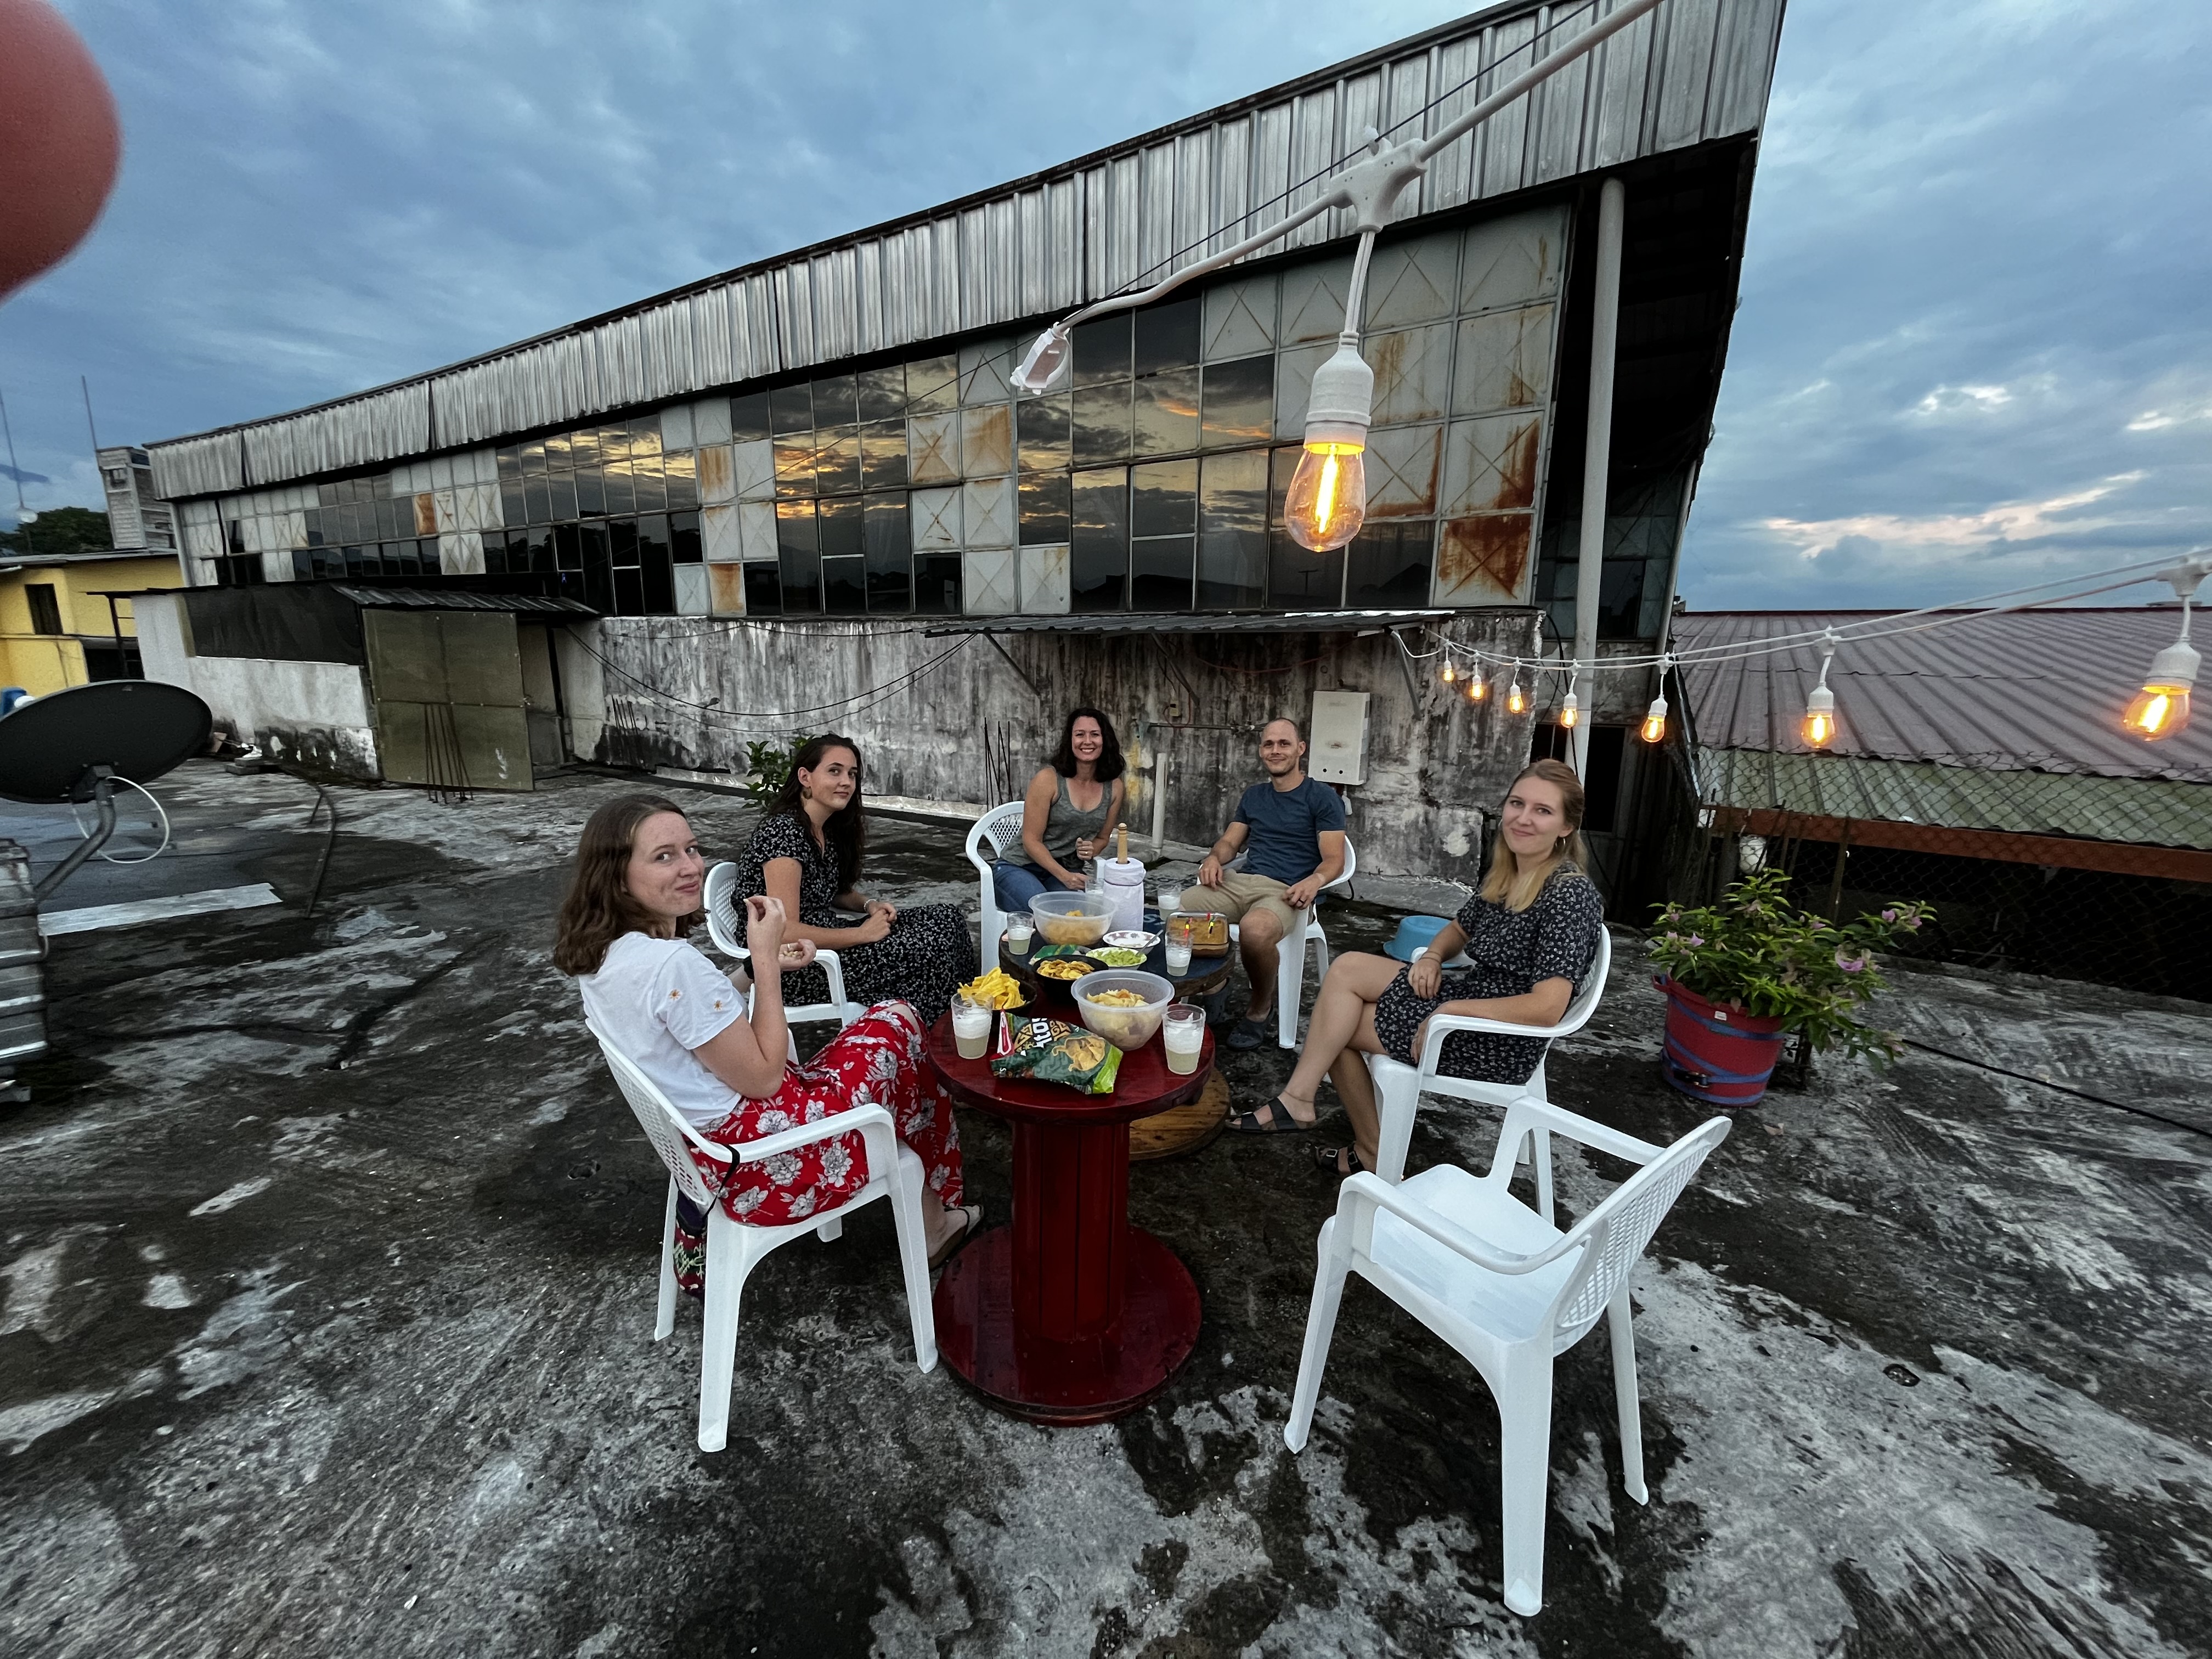
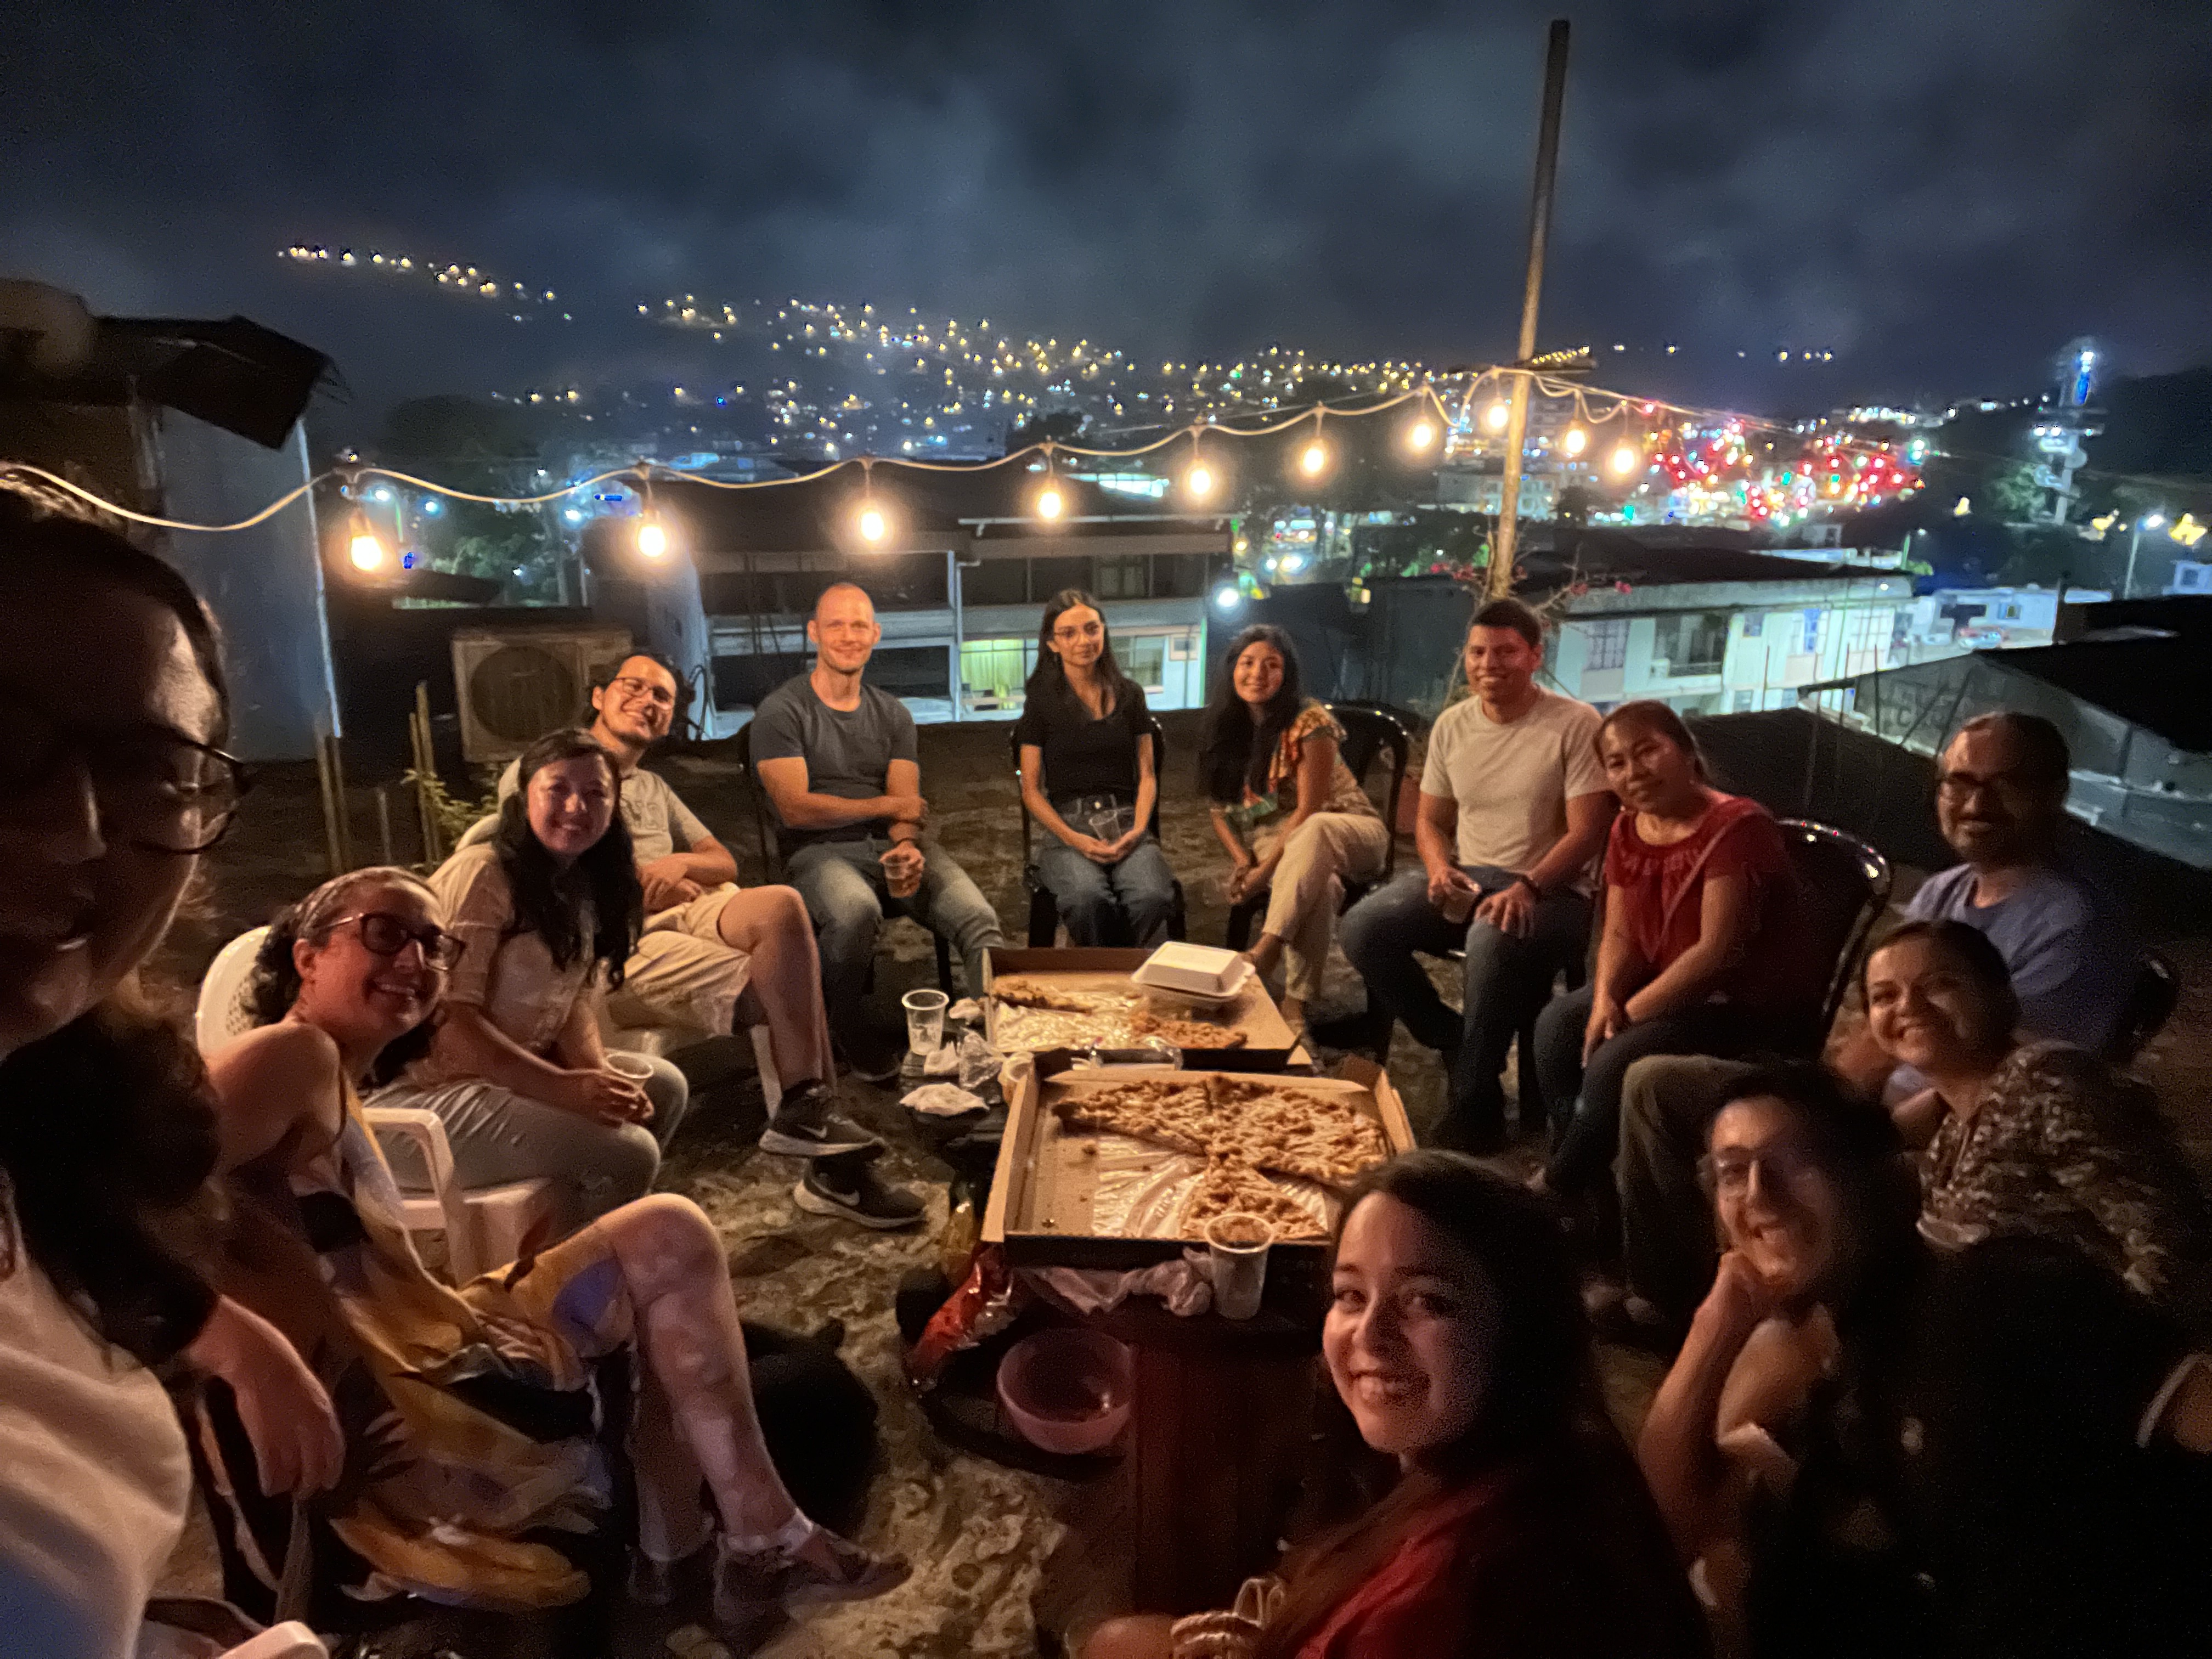
Now, don’t get me wrong. I still HATE to be late, but I came to expect it from everyone else, whether that be social activities, the bus schedules, or even appointment times. Sometimes, we had pizza nights on our roof for the lab, and it turned into a running joke that the party started at 7:30 pm for us but 8:30 pm for the Ecuadorians. Like anything, once you know what to expect, it gets better. Unless you’re Shane, and it’s a Sunday morning, and you’ve been sitting on the bus for 20 minutes waiting for it to leave with no clue what time it will actually leave. That waiting never got easier.
With the owners of Anaconda Lodge in Tena.
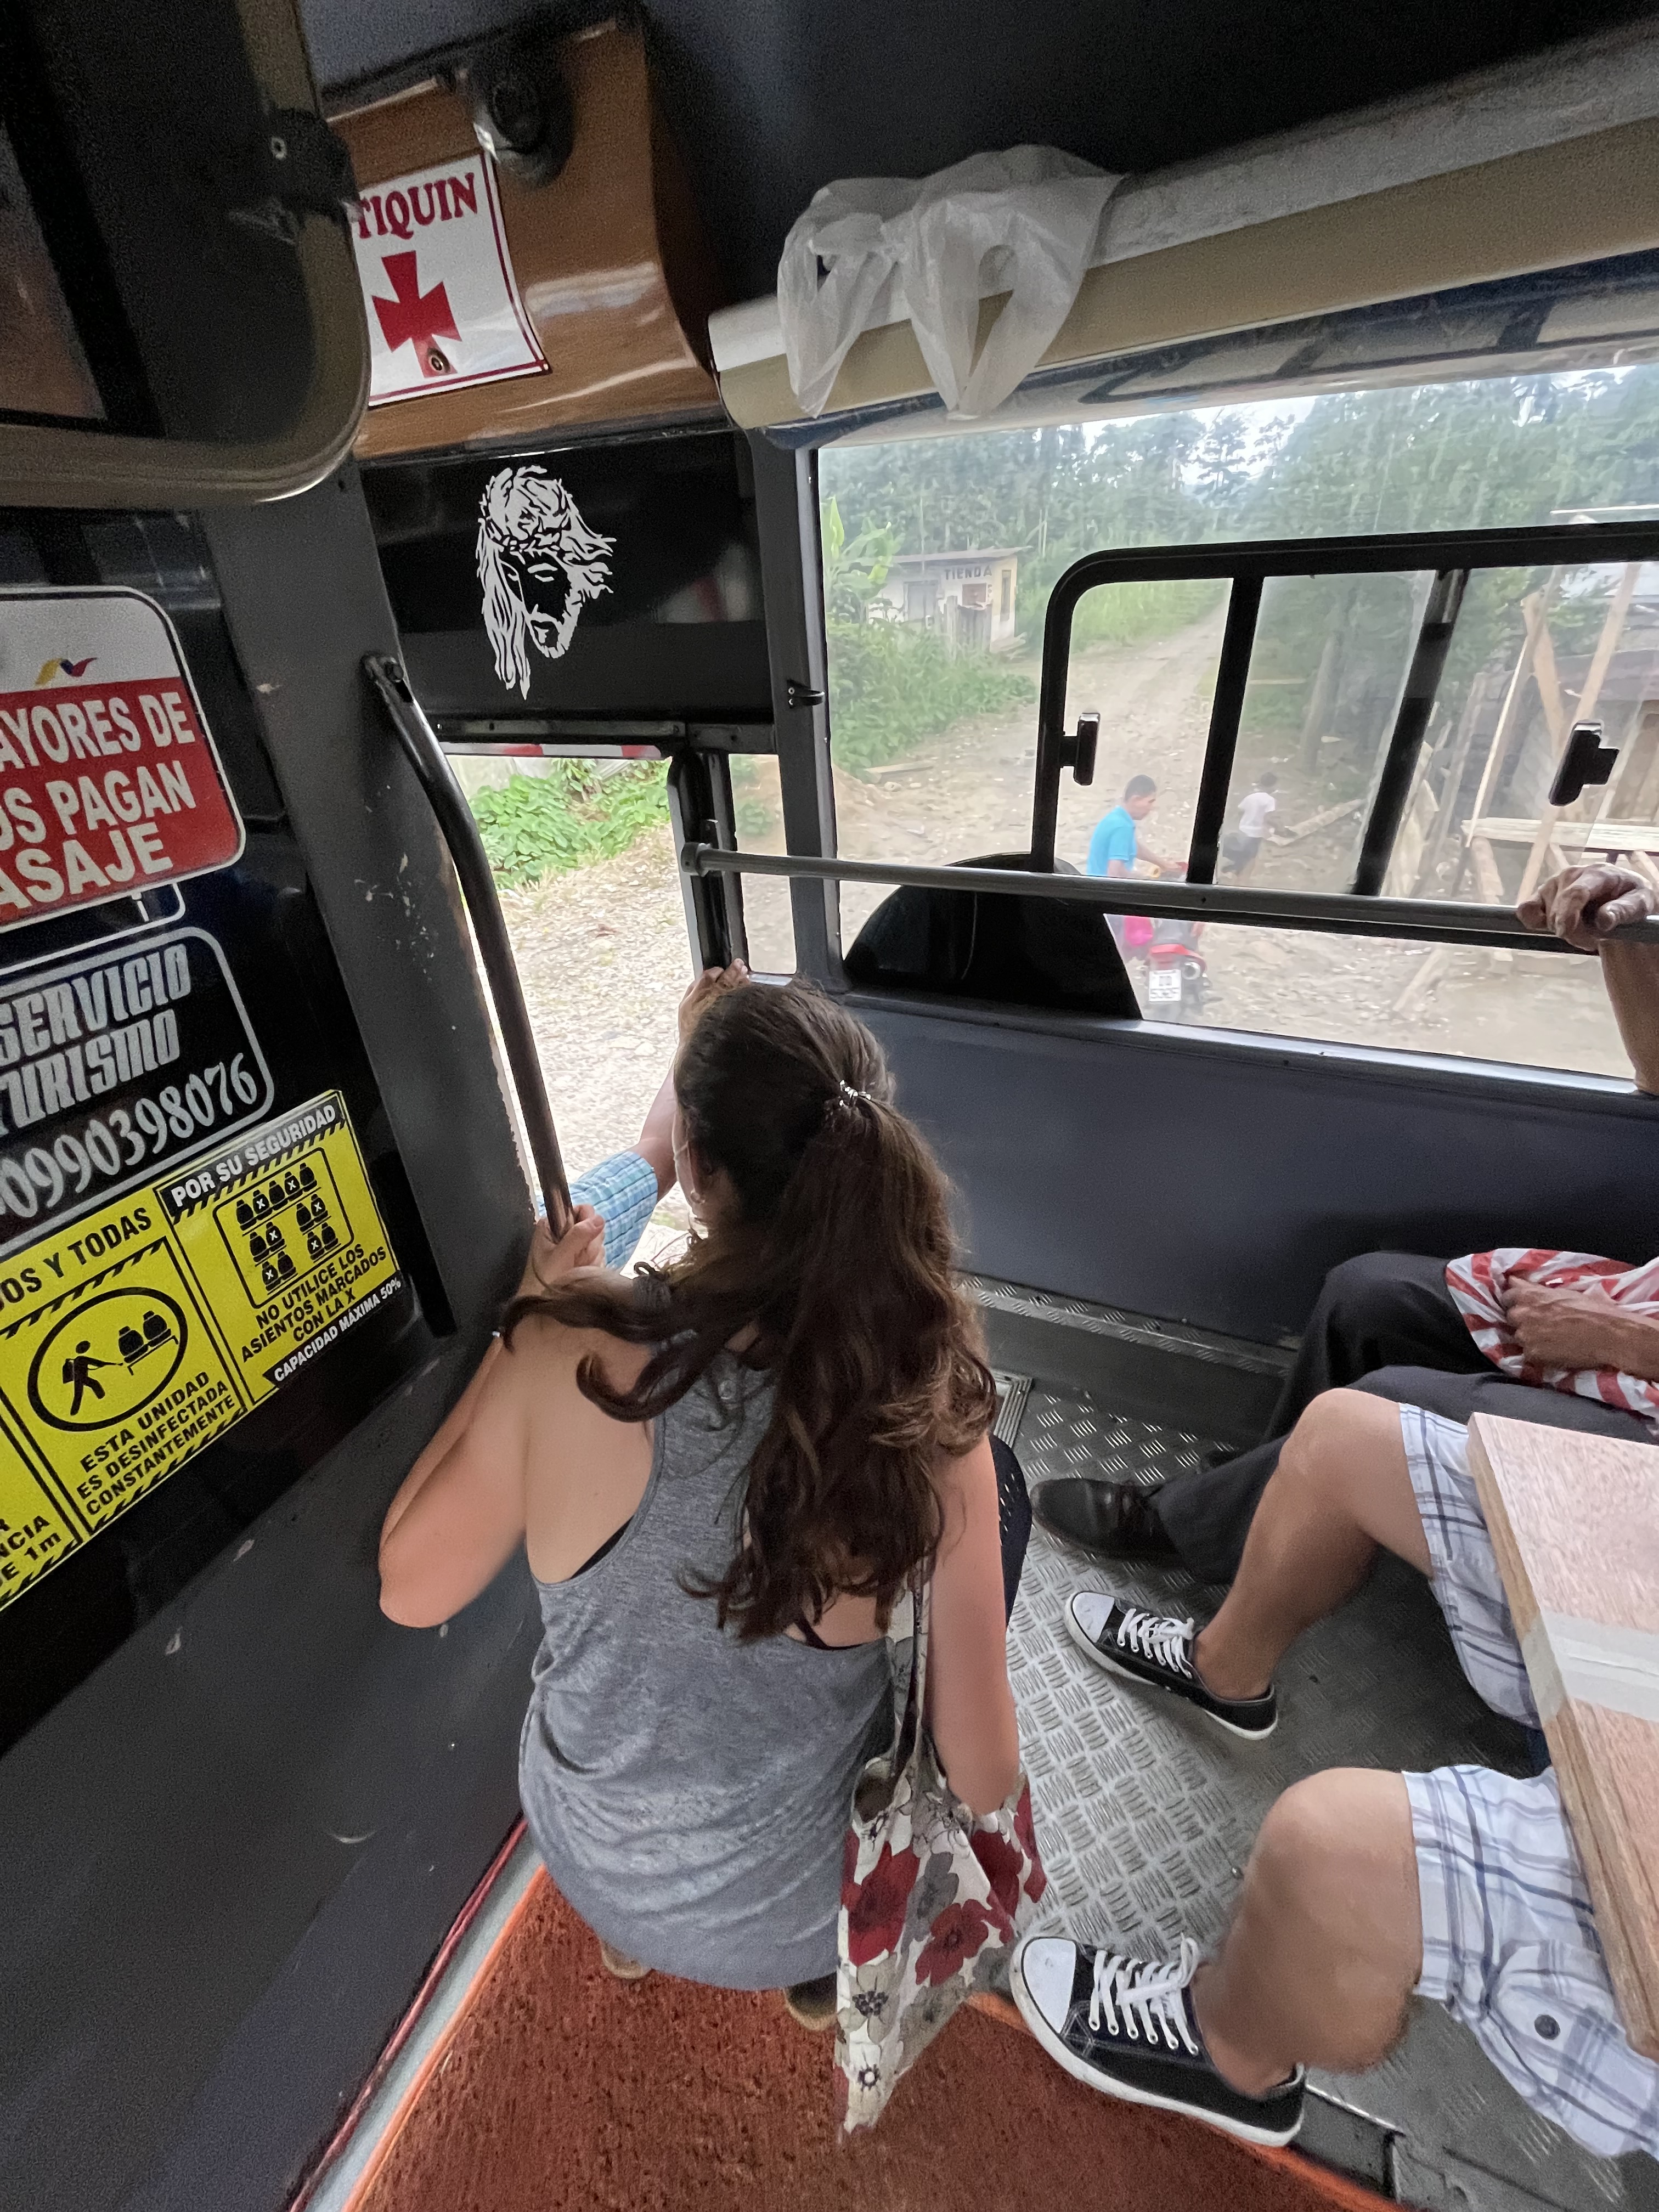
Overall, I’d describe life in Ecuador as organized chaos. Somehow, everything always works out. You just have to trust the system! For example, in Tena, there are very few designated bus stops. To get on, you simply flag down the bus. To get off, you yell ‘gracias!’ when you’re close to where you want to get off; then, they stop. How in the hell are you supposed to know this as an extranjero (foreigner)? Who knows.
Relatedly, Ecuador has no postal system (minus one Fed-Ex-type of delivery service). Our address was literally Calle Juan Montalvo, Tena. The street name and city. That’s it. Yet, somehow, if you needed to send things between cities, most commonly via the national bus line (pay ahead of time, and your package goes under the bus), it always arrived. You just provided the name, city, and phone number of the person receiving the package.
Lucie, waiting to yell out ‘gracias!’ on our way to yoga.
Another thing we had to get used to is WhatsApp and Facebook. Everything goes through these two platforms. Business information, the news, food deliveries, and making appointments. If you need to contact someone, you go via one of these platforms, primarily WhatsApp. At first, I hated this. Why do people not have websites? Why can I only get my information from Facebook? (which I generally try NOT to do given the rampant misinformation.) The answer is simple. Websites are expensive, and these platforms are free.
Over time, I came to really enjoy this. First, it’s SO much easier to text in Spanish than it is to call or speak in person. Plus, you can always translate the message to make sure you understand it correctly. Second, it’s so efficient. Why go through these contact forms and blah blah when you can go straight to the source? I ended up with numbers for taxis, laundry services, bus companies, nail salons, and pizza places. Shane’s group had contacts for soil, fertilizer, plants, etc. I’m going to really miss that system!
The convergence of Rio Pano and Rio Tena.
I’m (we’re) going to miss a lot about life in Tena. It’s hard to describe, but life moved at a different pace there. It felt more relaxed than life in the United States in the sense that people (in general) aren’t working for the next best thing. This pressure to make more money so you can buy the new car, the new house, the new *insert item*, from our perspective, wasn’t like that.
I say that with a major asterisk, though, because people in Tena hustle. The vendedores (sellers) work early morning to evening hours and often seven days a week because they need to live. They need to feed their families. Poverty is a notorious problem in the Amazon region. But man, you can buy literally anything from a street vendor, and I love that. Kitchen spoons (best ones I’ve ever owned), inflated kid pools (on sunny hot days), portable fans, speakers, charger cables, rugs, hairdryers, fully assembled shelves, jewelry, shoes… the list goes on! I think my favorite vendor was a man with a cart selling dog and cat collars, but the cart played “We Wish You a Merry Christmas” in meows and barks on a loop, regardless of the time of year. 😆 I’ll also really miss the man selling morocho (a typical warm drink made from corn) in the early morning. I could tell what time it was by the sound of his voice yelling, “MOOOOOOROOOOCHHOOOOOO!!!” echoing through the streets around the same time every day.
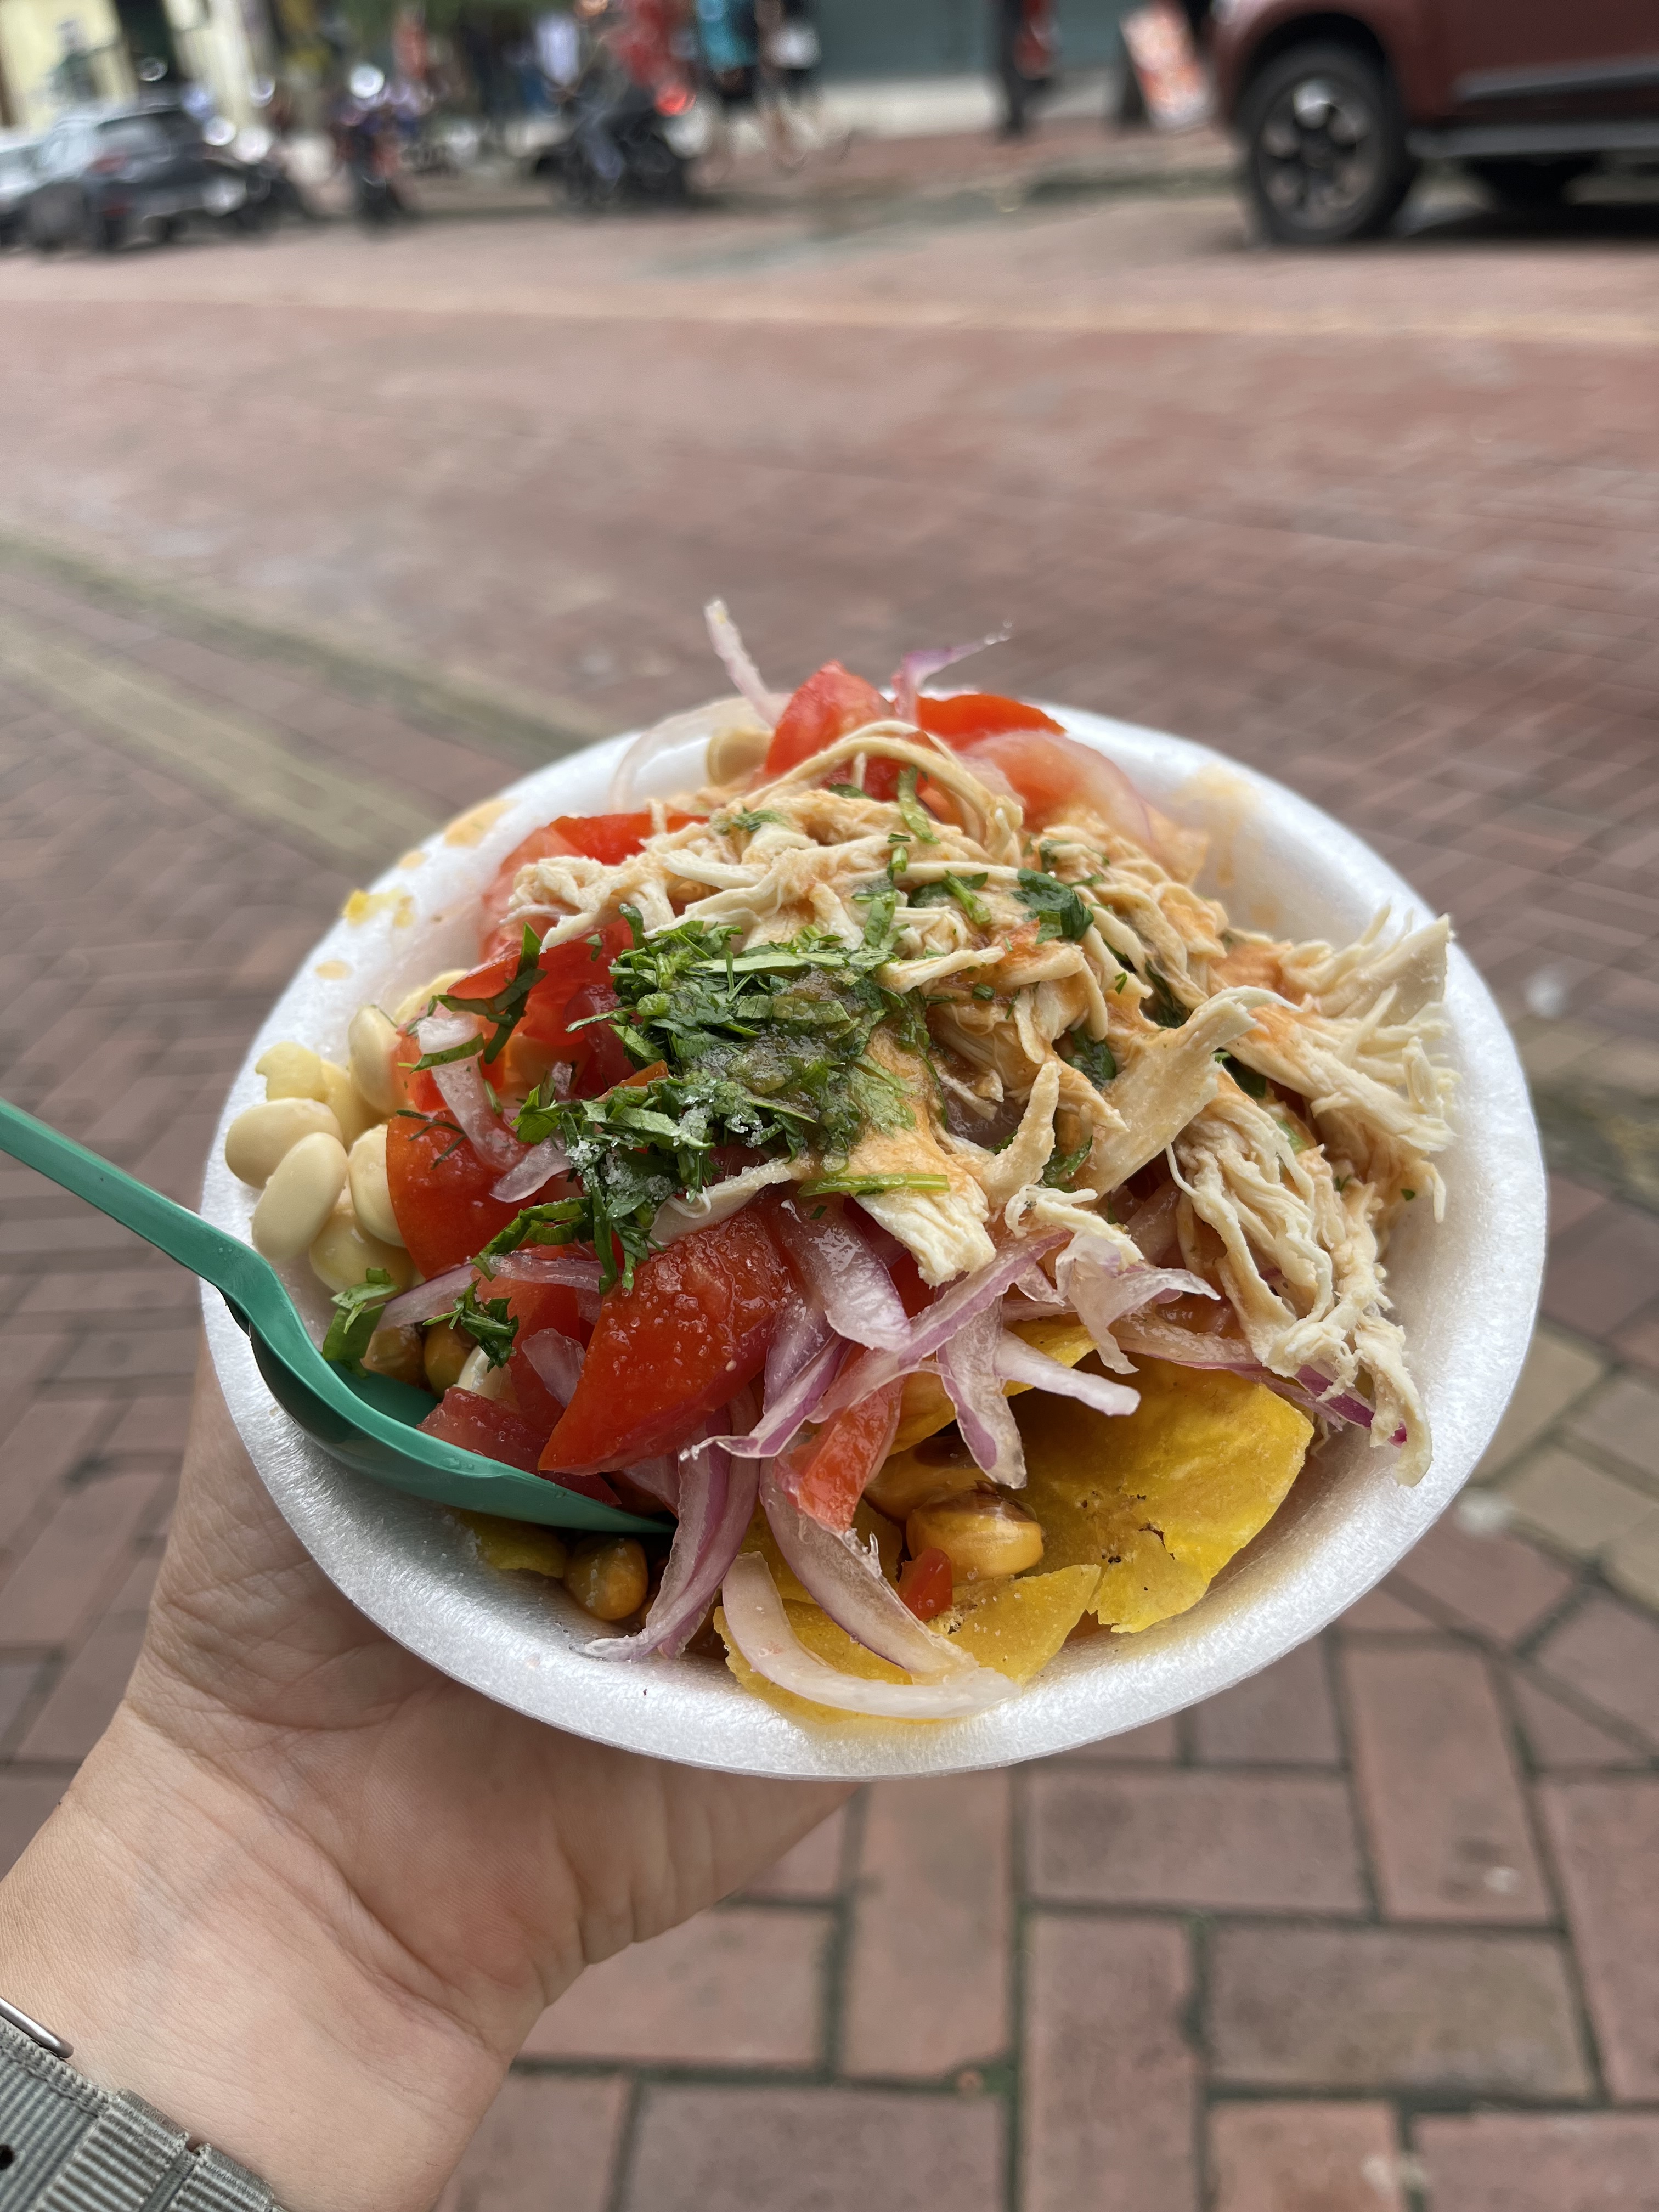
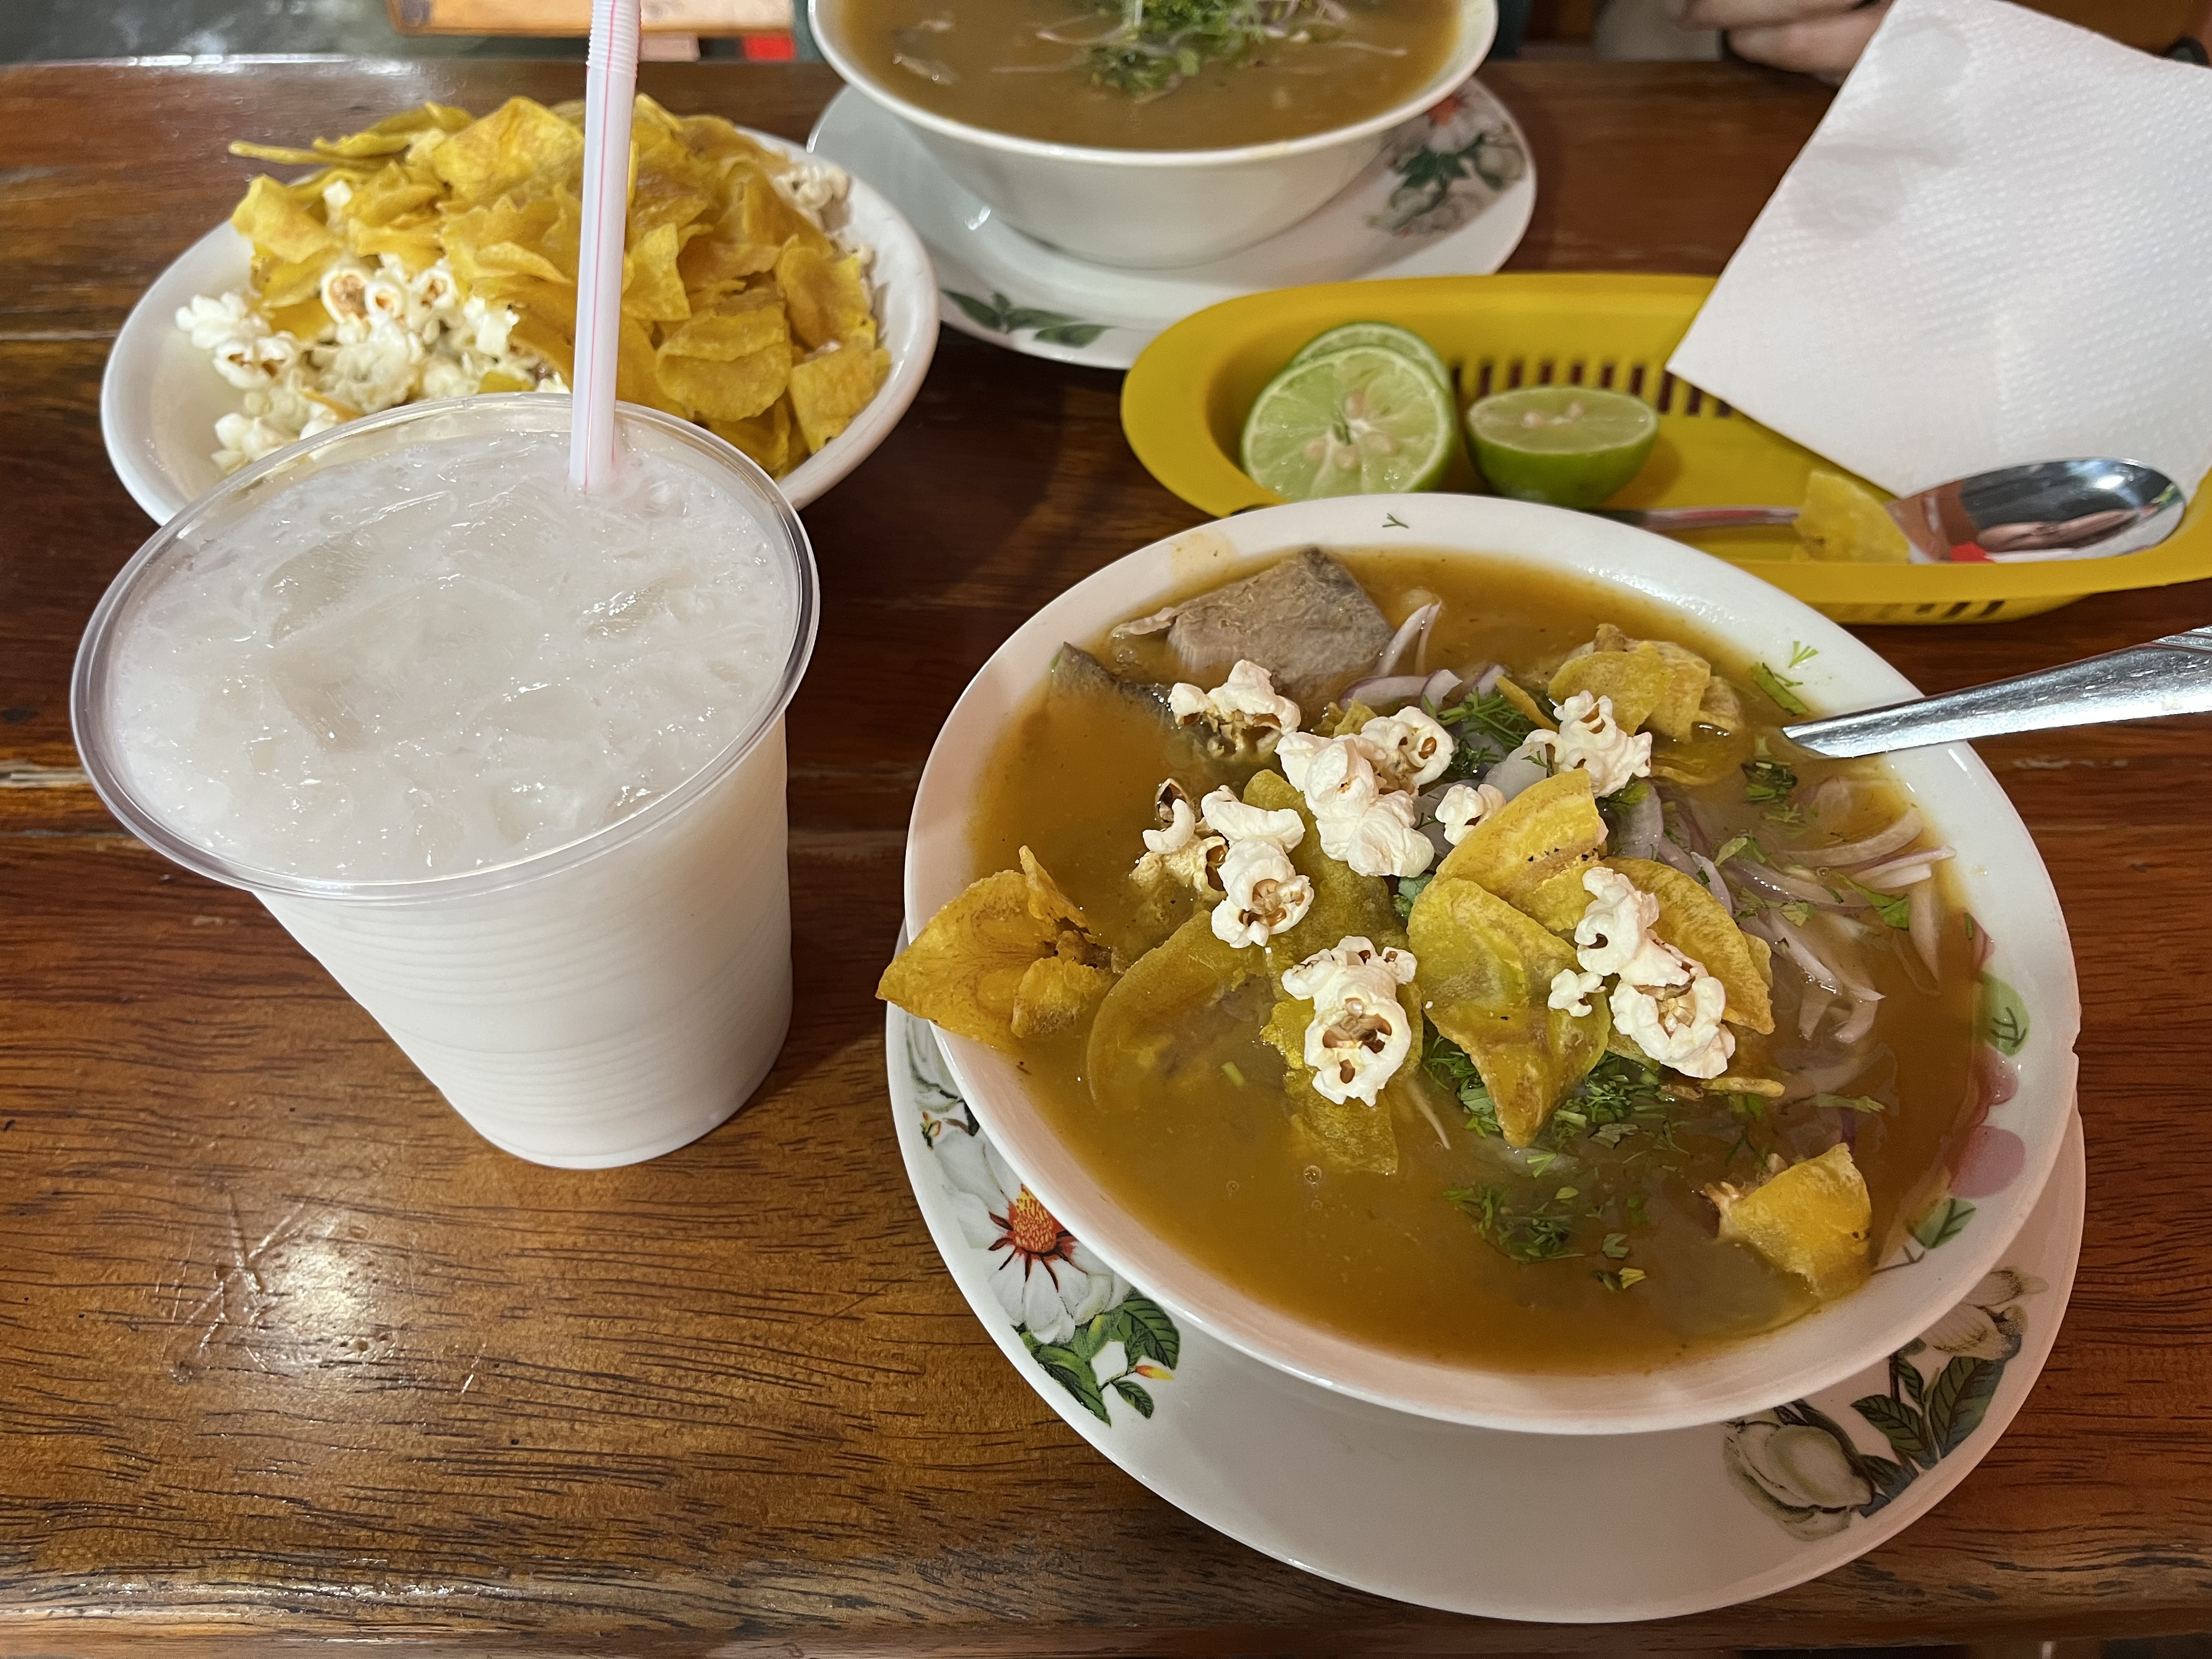
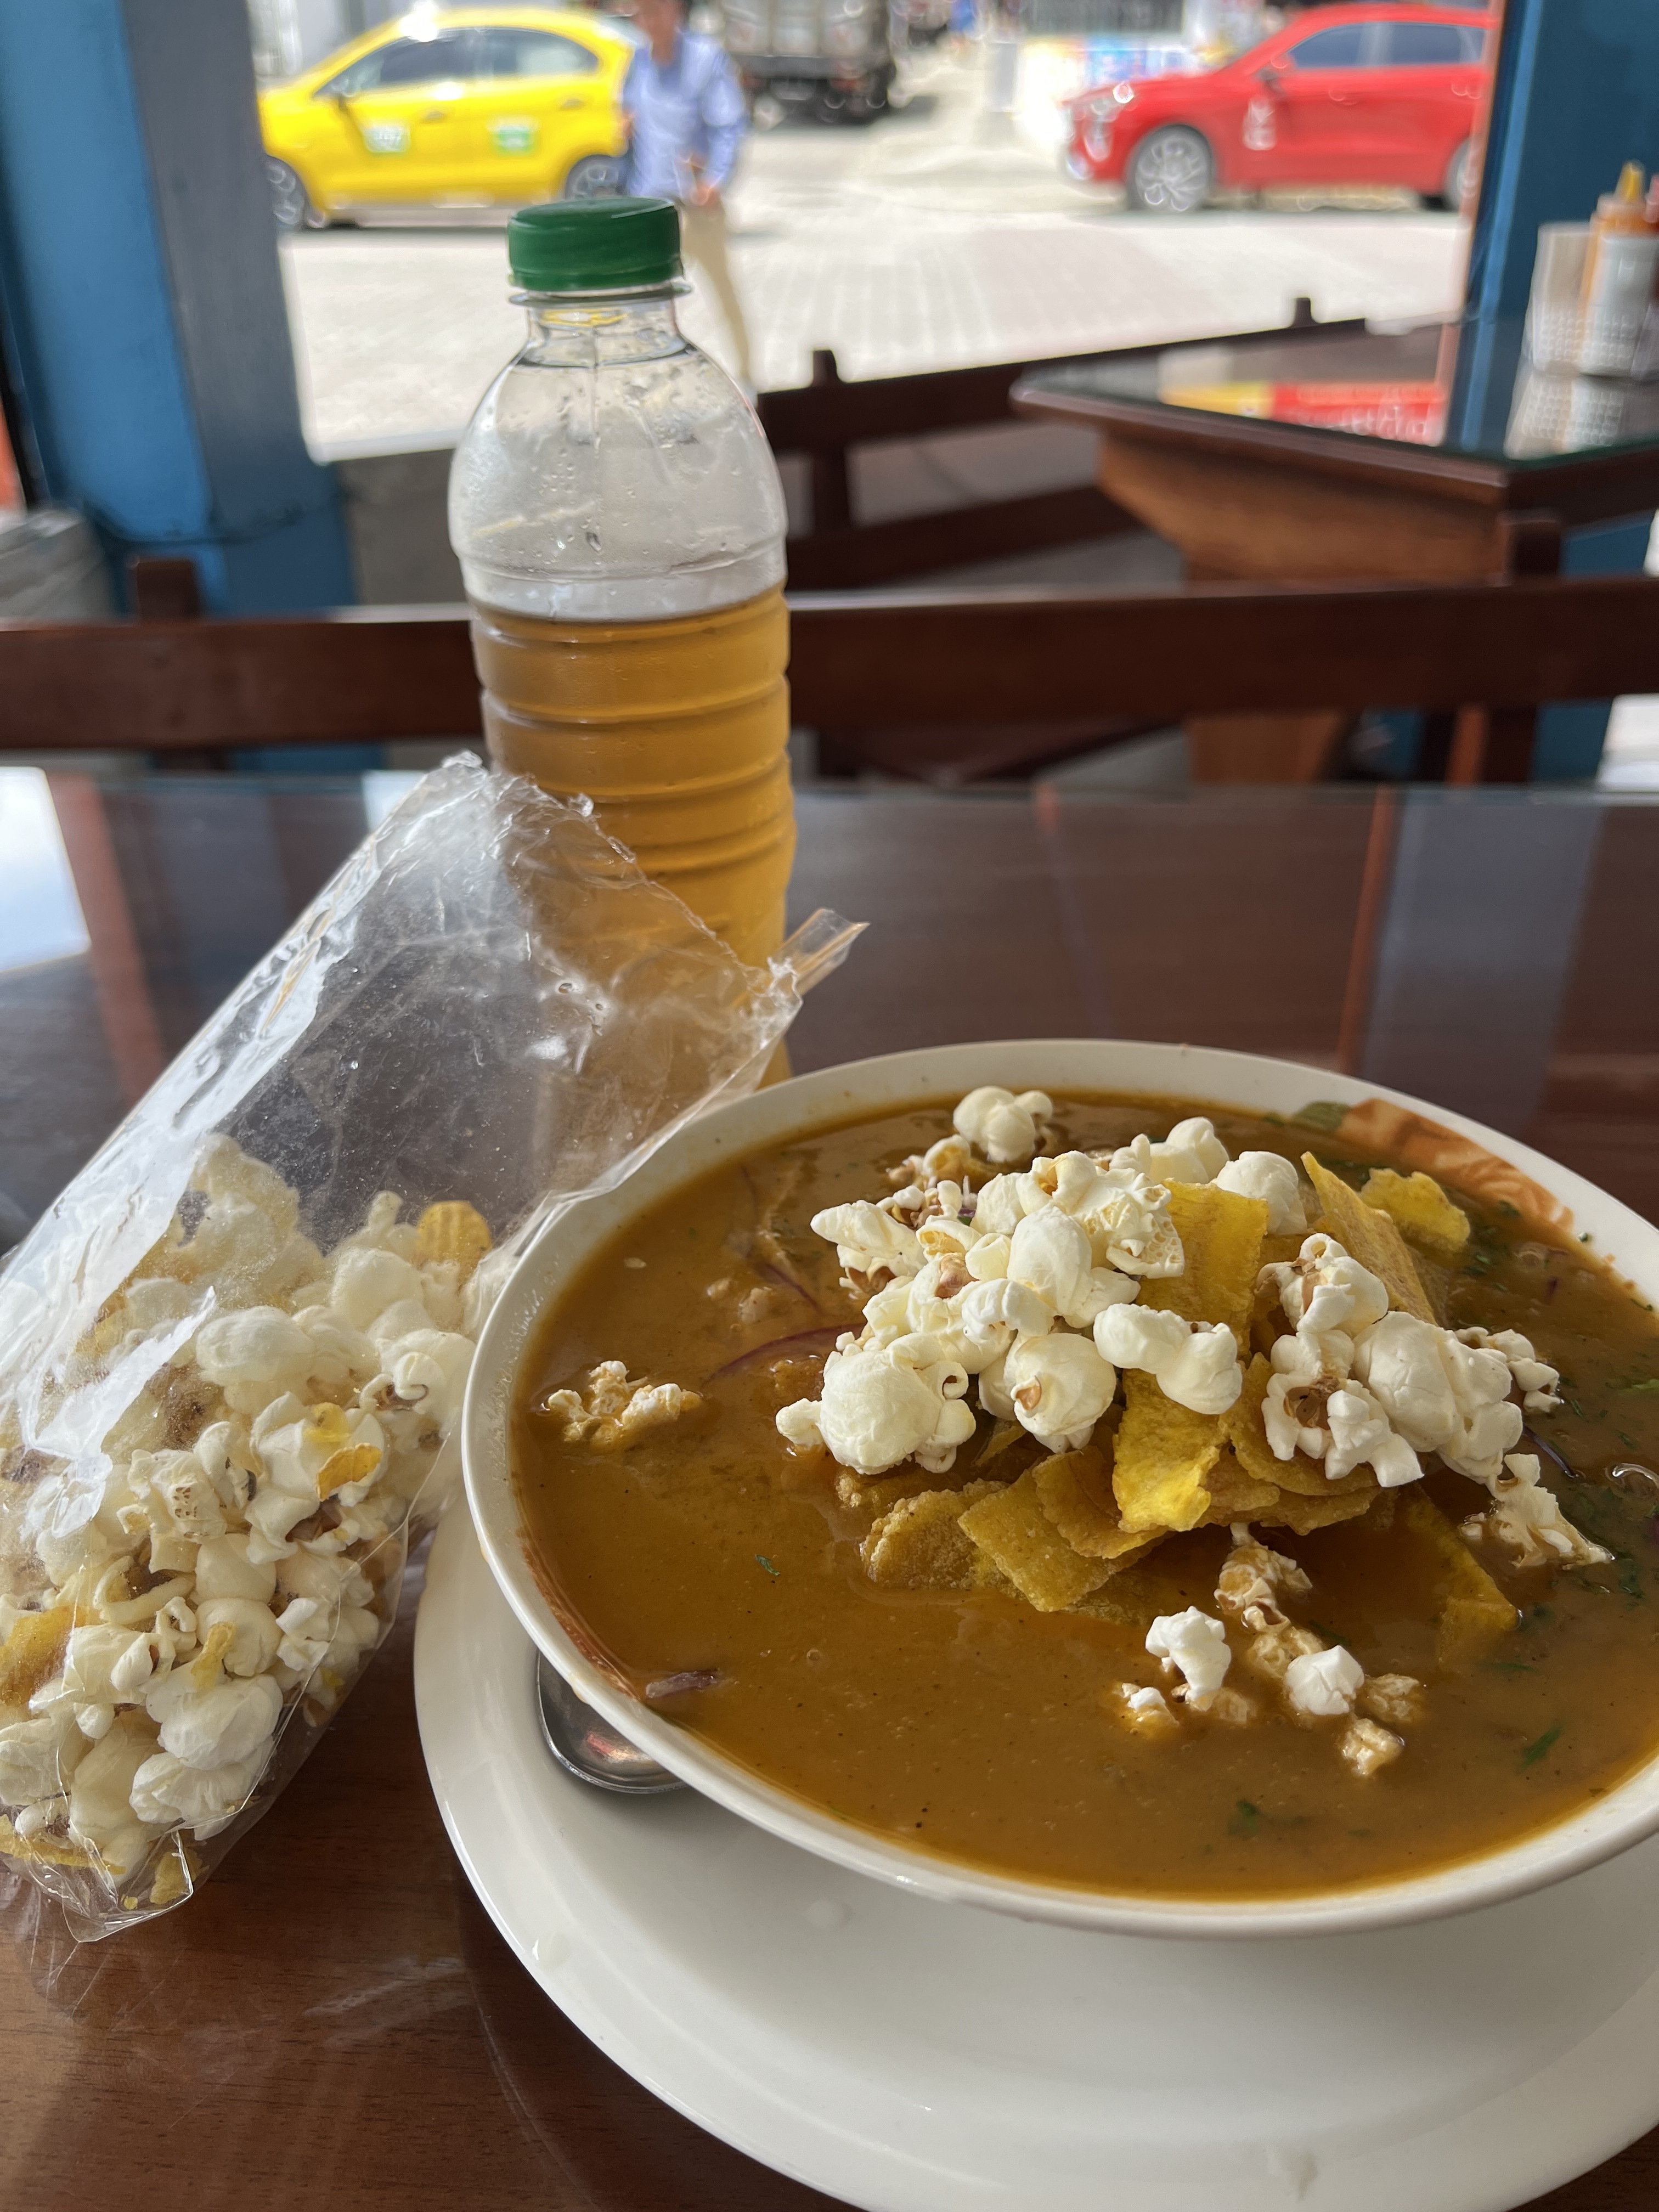
And you can’t forget the food; I think we kept the coco juice, pan de yuca, and cevichocho carts in business.
Cevichocho.Encebollado with a coco(nut) juice.
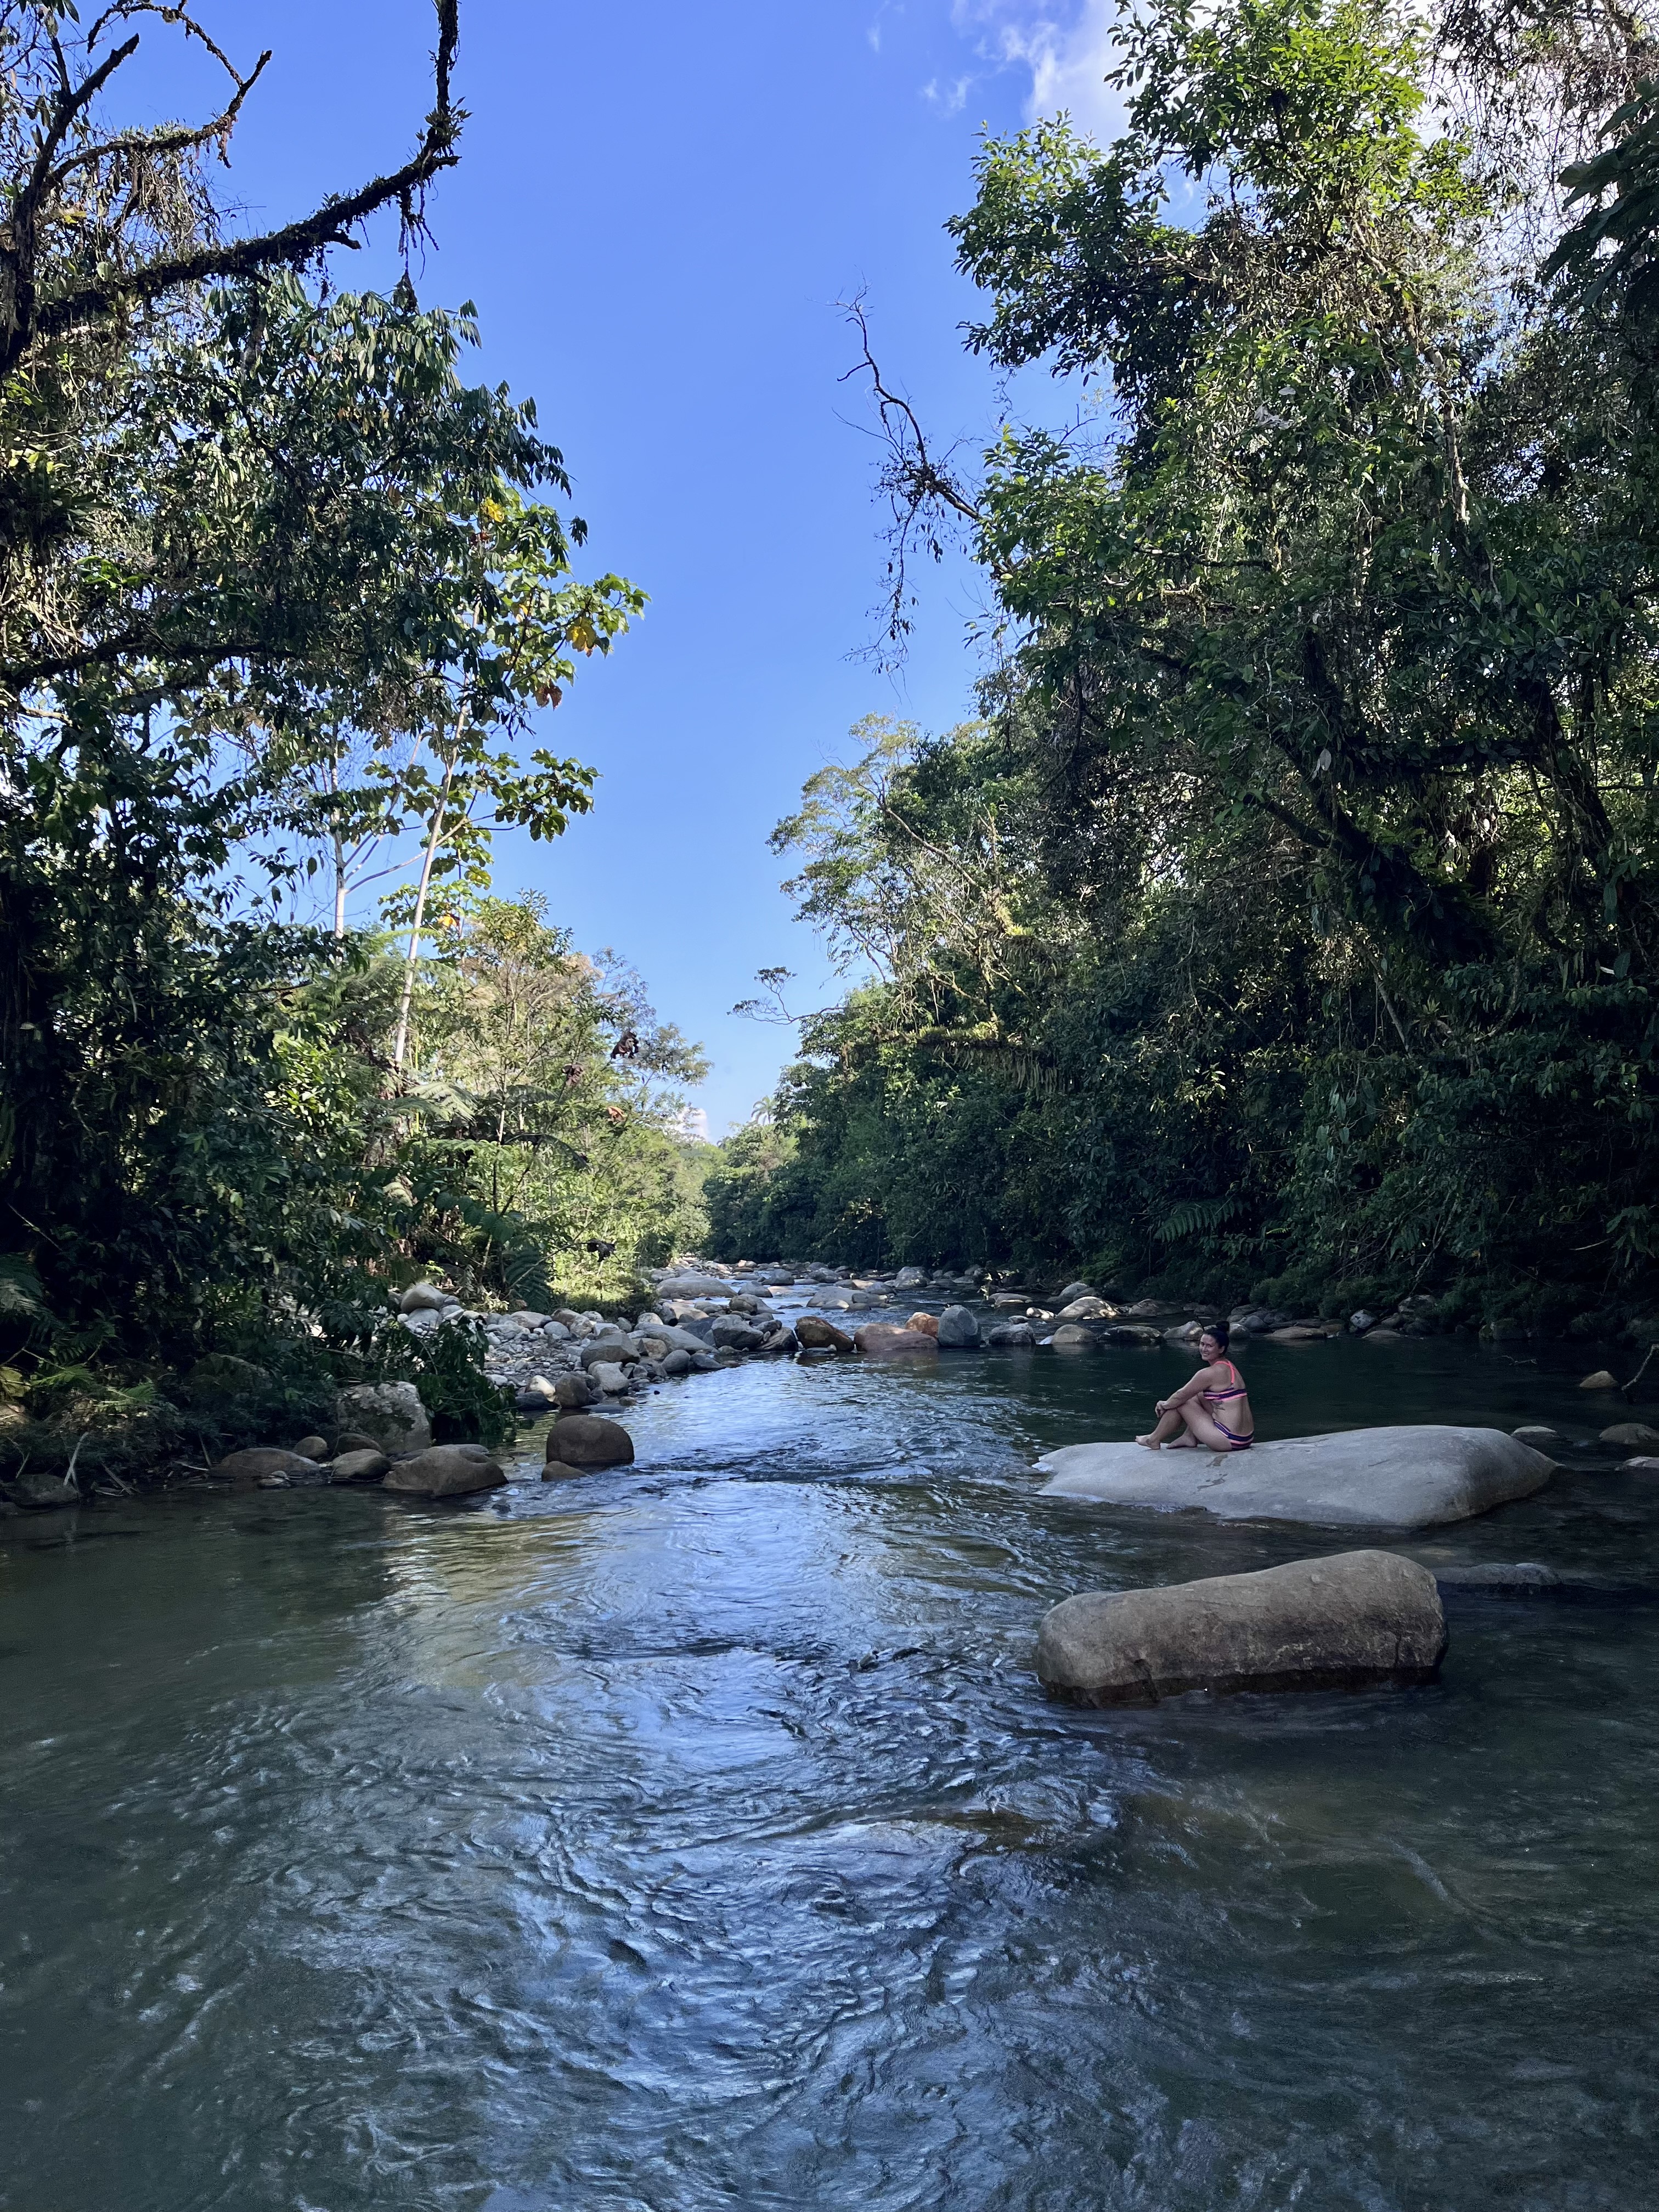
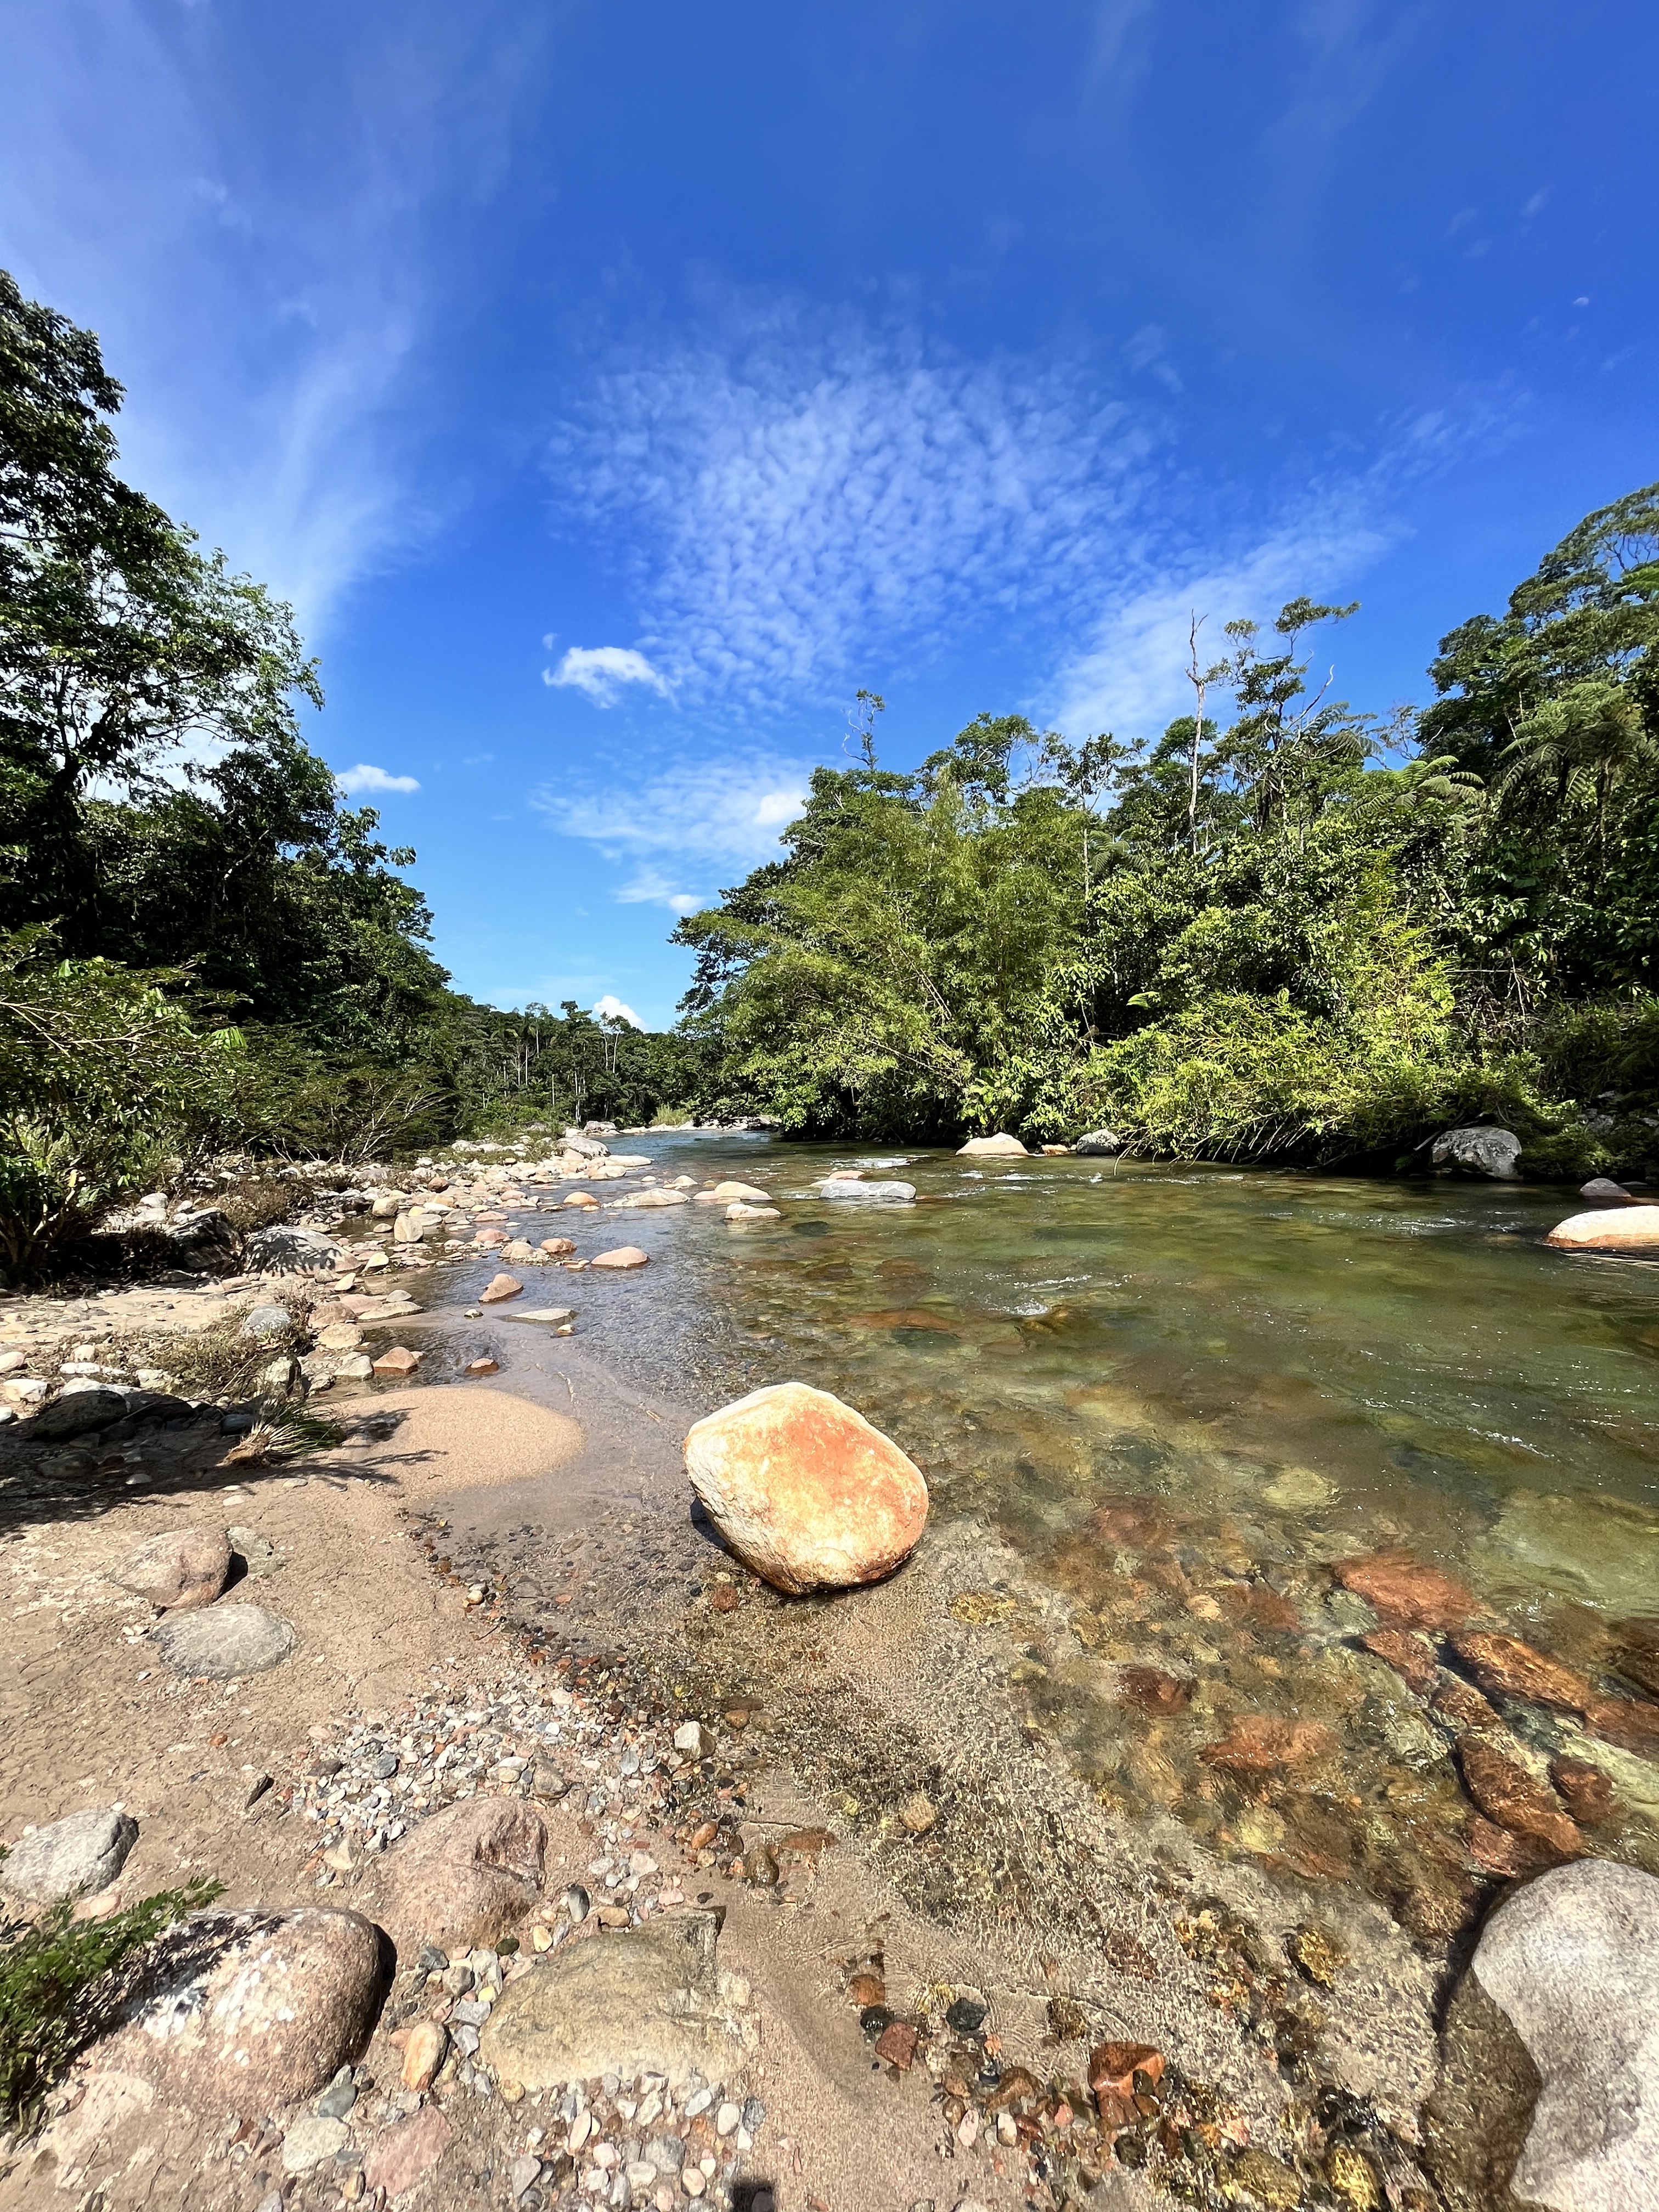
The other special thing about living in Tena is that it’s in the Amazon region, called la Amazonía or el Oriente. Obviously, the surrounding nature is spectacular, and spending the afternoon at the river is a common pastime. However, Ecuador has over 25 recognized ethnic groups, many of which are indigenous and call the Amazon region home, for example, the Huaorani people, who weren’t contacted until the 1950s. Many indigenous people speak Kichwa, a derivative of Quechua (from the Incas), and it’s quite common to hear people referred to as “Kichwa,” which has become synonymous with “of indigenous origin.” However, it’s important to note there are many languages and independent cultures among this group. Nonetheless, leave any of the cities in the Amazon region (Tena and Puyo, for example), and you’ve entered various Kichwa communities.
All this to say that these groups were unknown to us before we moved to Tena, and it has been a great pleasure to learn their history and culture (and a few Kichwa words, e.g., achachay! very cold!).
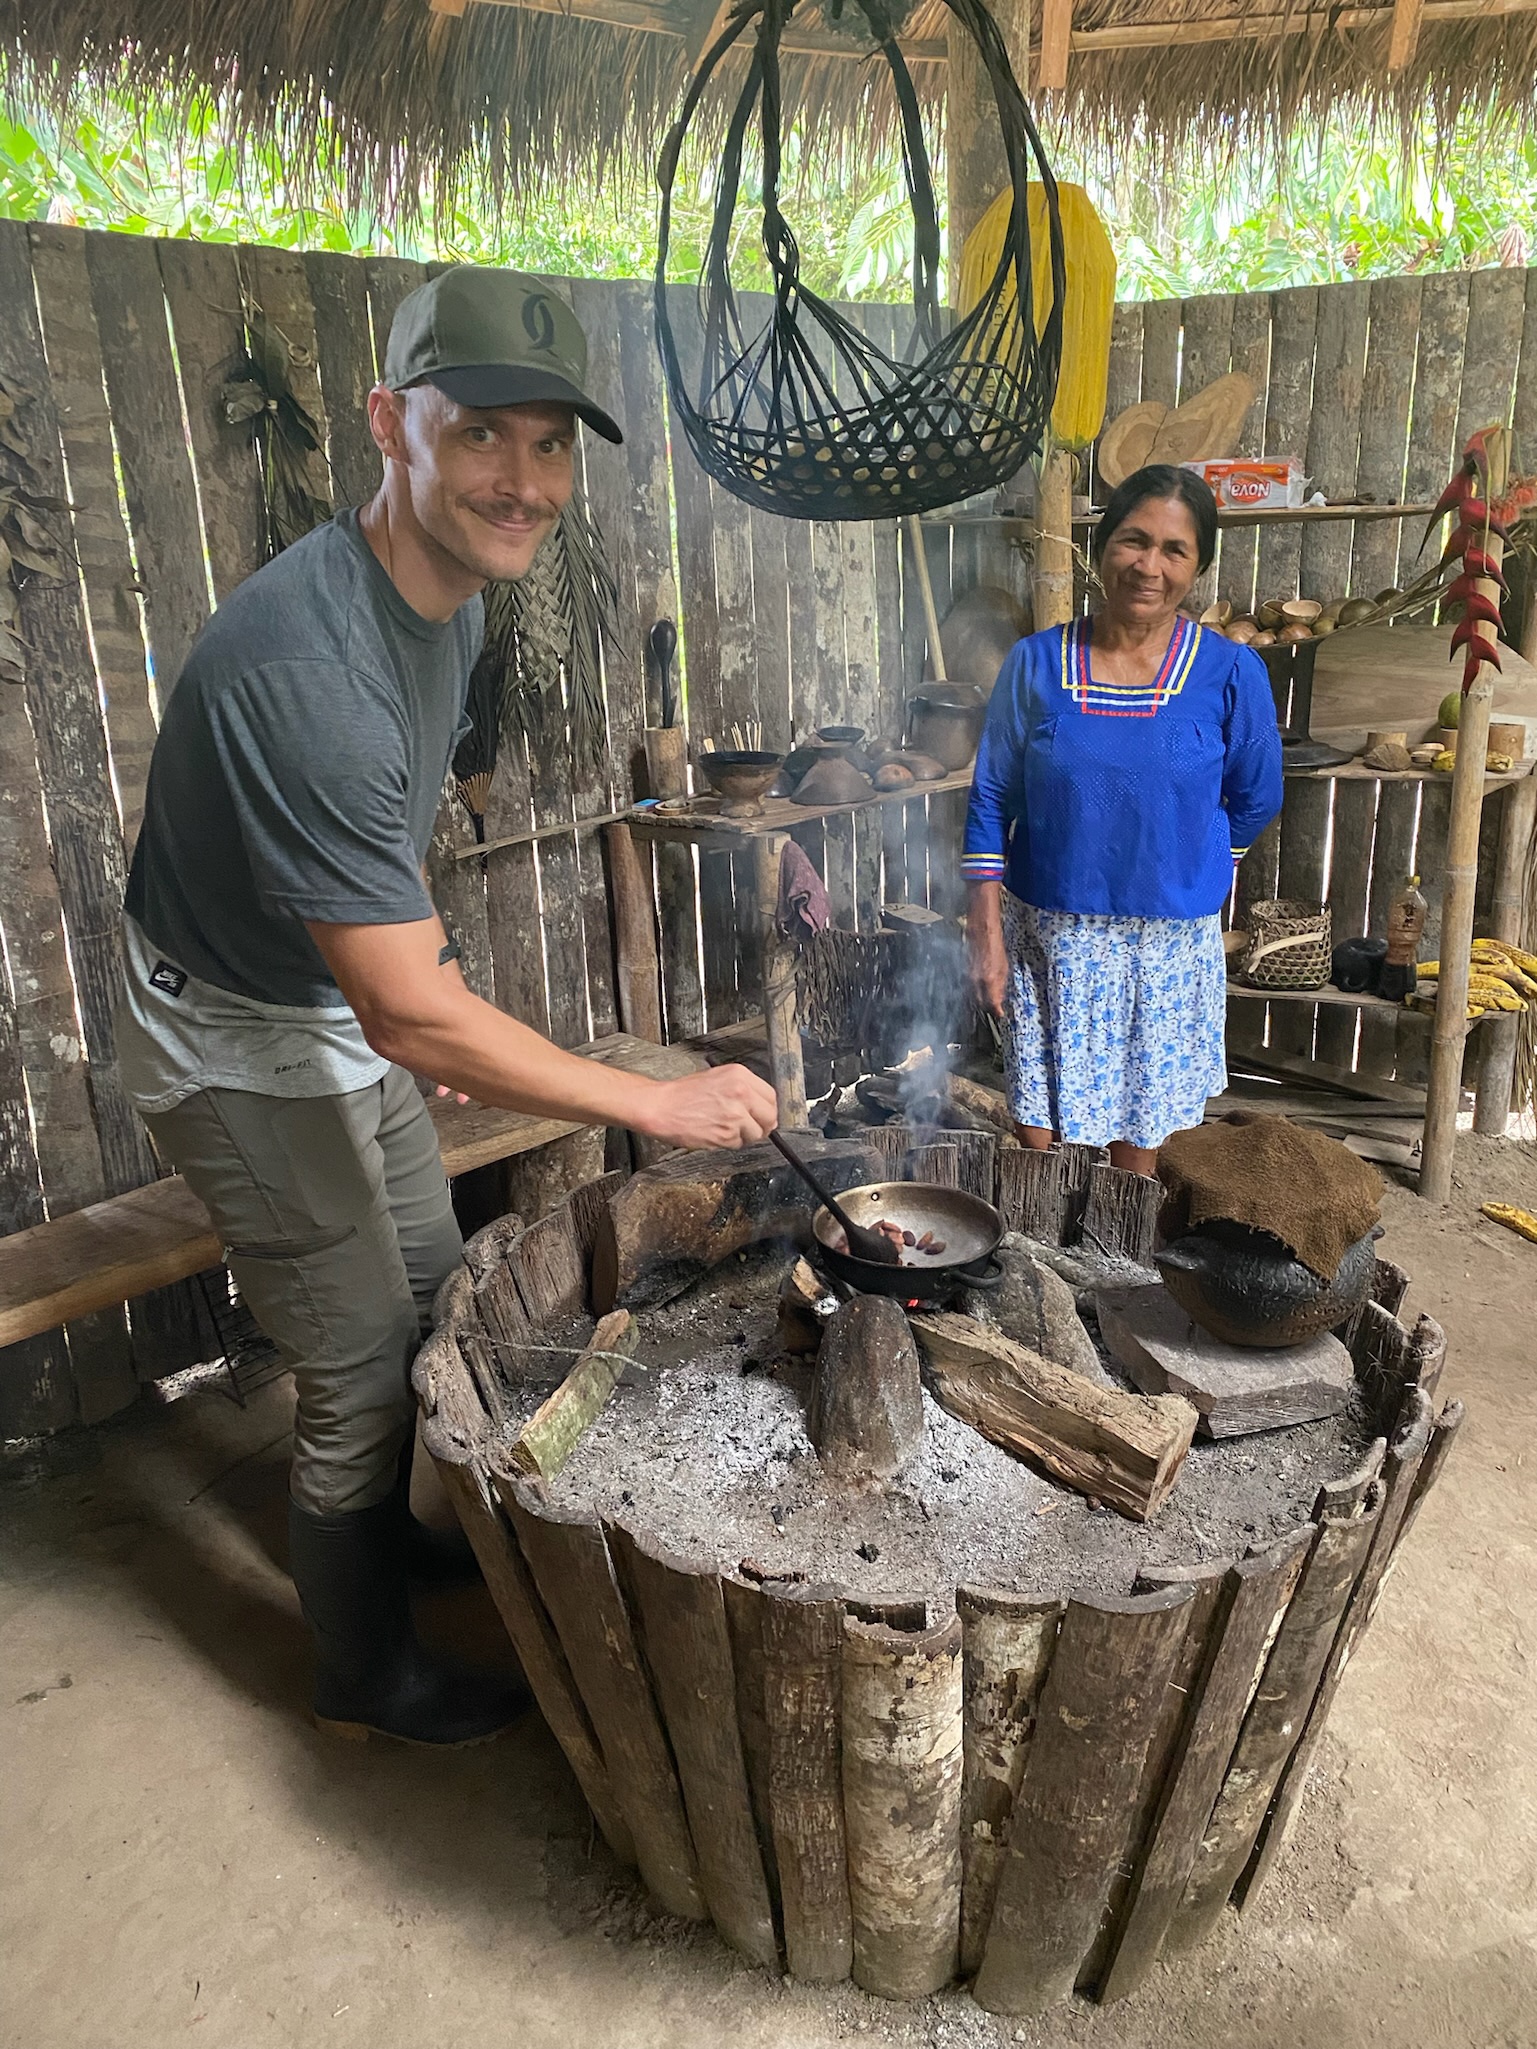
Of note, I went on a few community tours during our time in Tena, which has the potential to be really awkward and make you feel like you’re exploiting the community. However, the ones I went on did not feel like that at all. In fact, the guides were either from that community or had a direct connection, and the people were happy to share a piece of their life with us. Usually, this included a demonstration of how something is prepared, for example, yuca bread, chocolate, or natural fibers. Honestly, the best tour I did was through the Hakuna Matata Lodge near Tena (look into their Explorer package). All this to say, don’t be afraid to try one of these tours (but do be aware of ones that keep exotic pets for tourism purposes, as these aren’t ethical tourism practices).
Learning to make yuca flour.Learning to make chocolate.Traditional foods for breakfast during one of our tours.
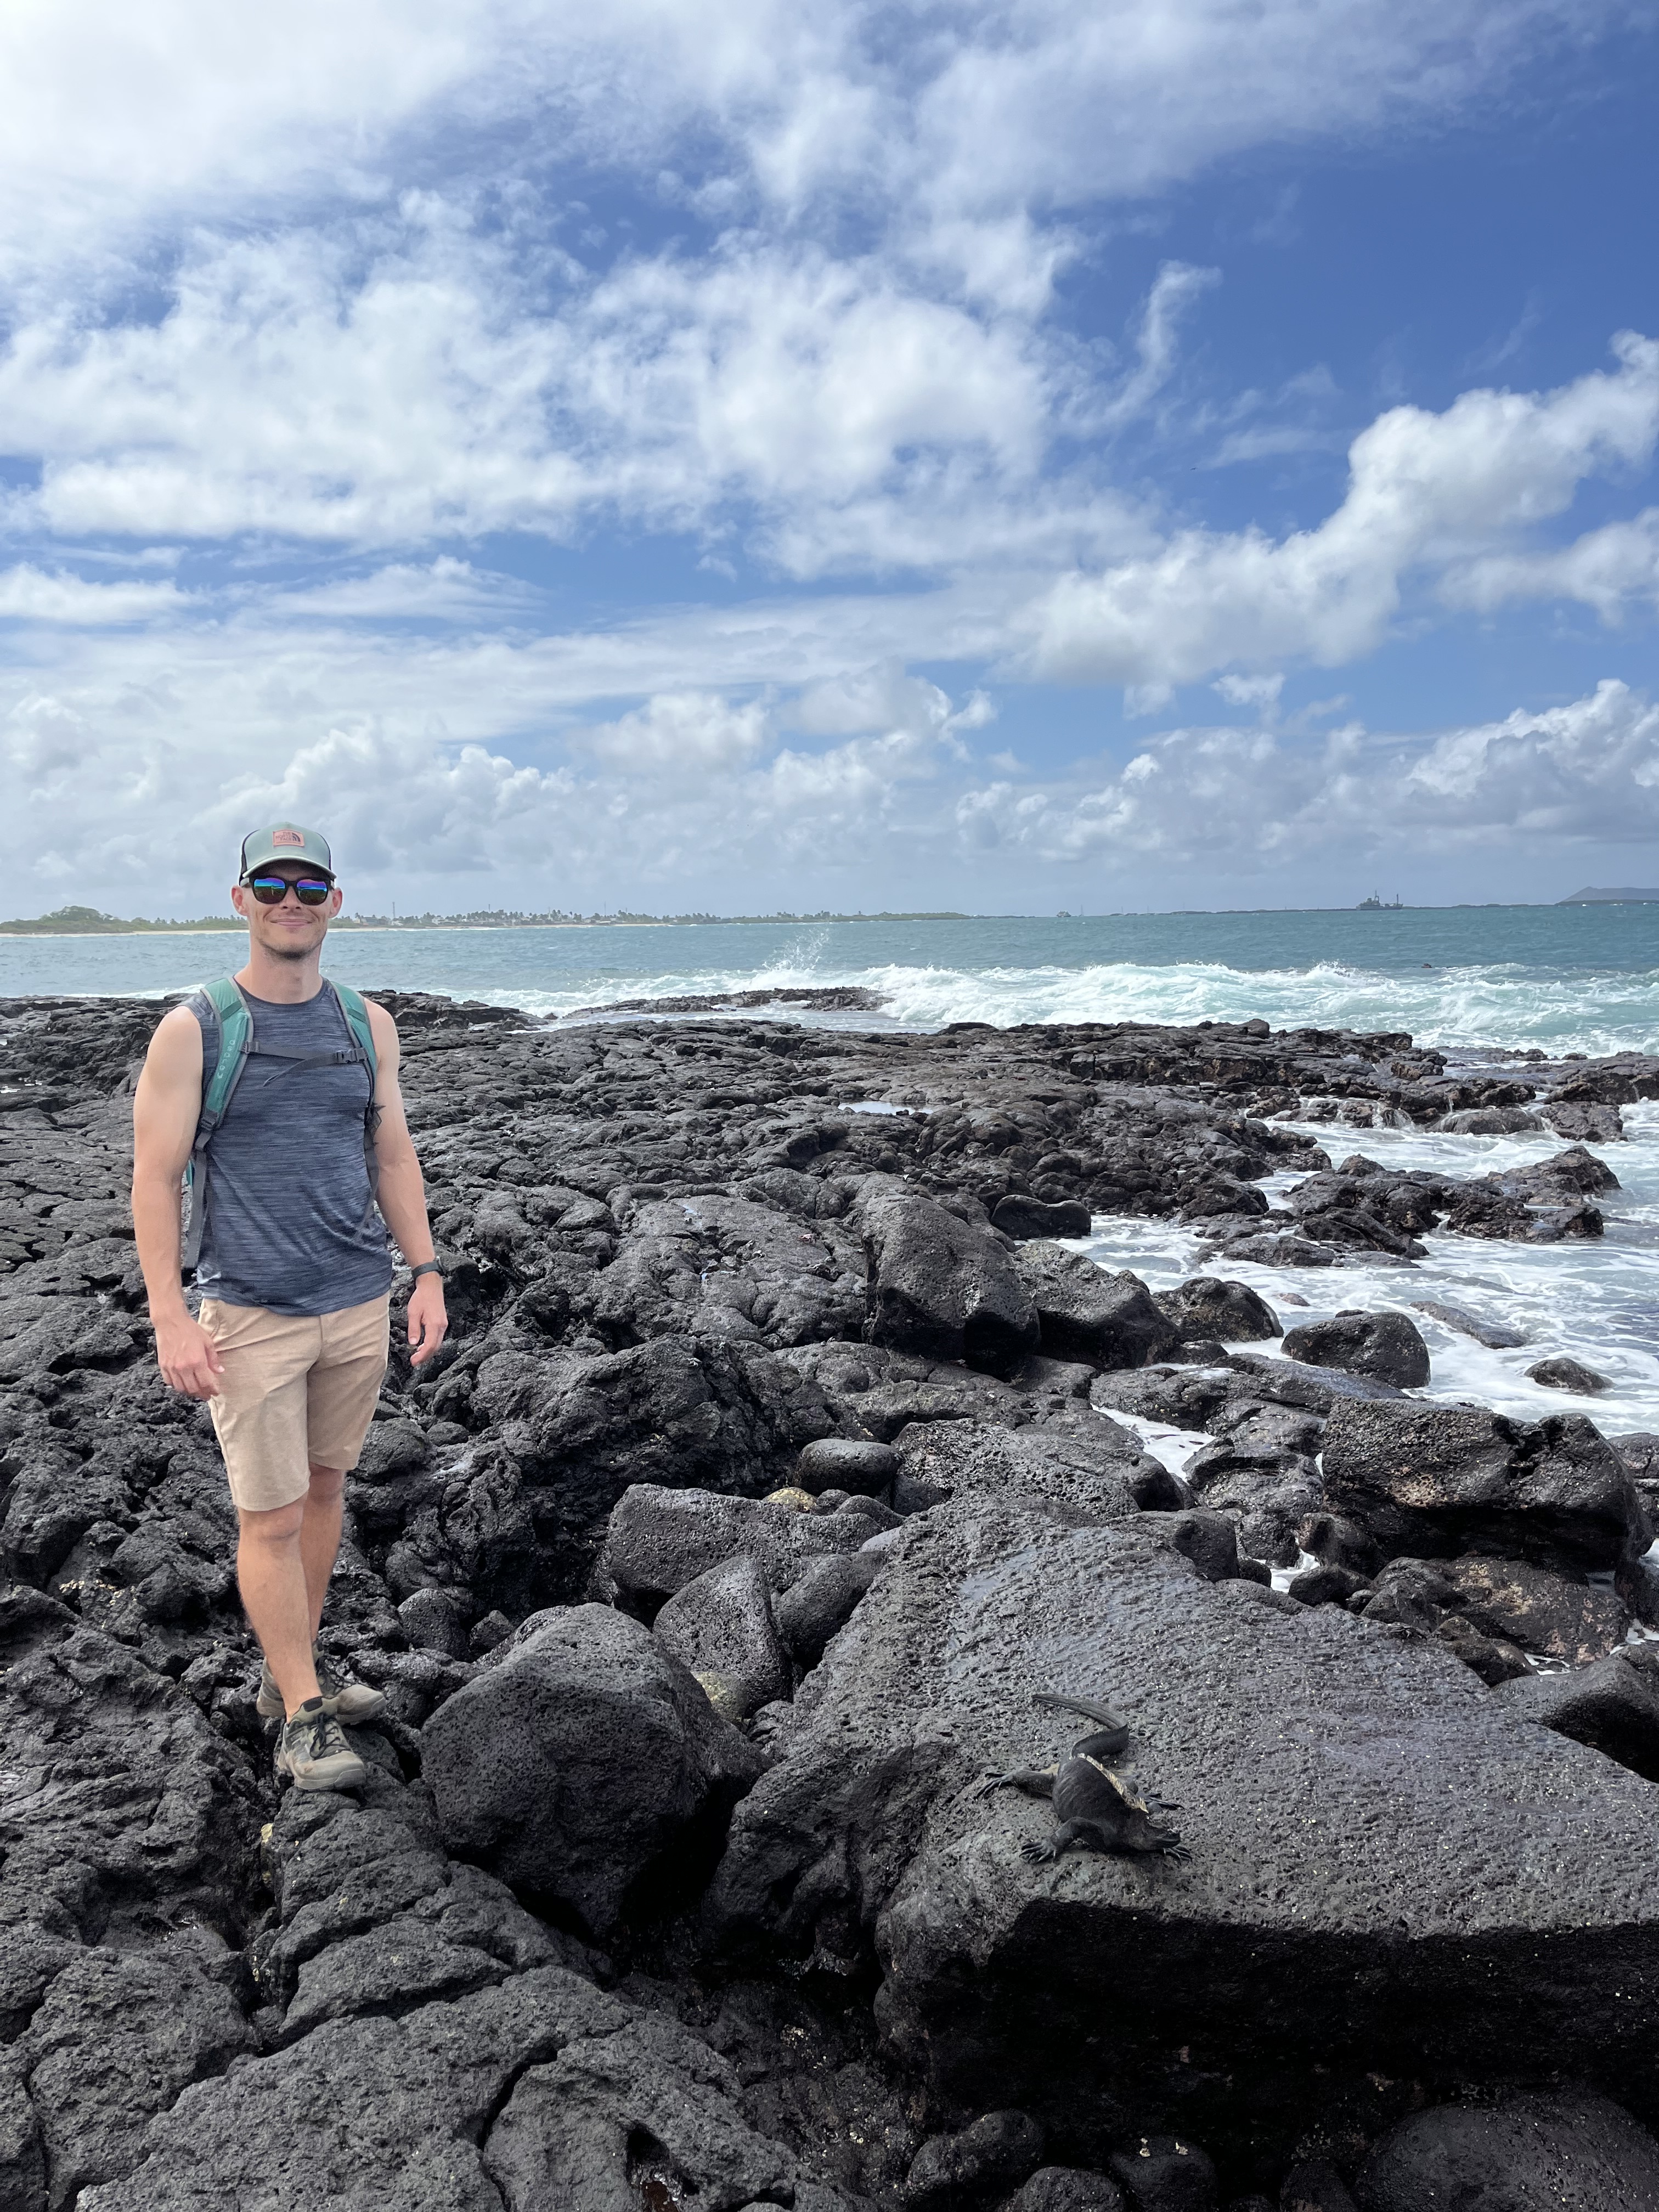
As I mentioned earlier, Ecuador’s nature and landscape are incredible. I cannot overstate my love for la naturaleza in this country! If we’ve talked about Ecuador’s nature, then you will have certainly heard my spiel on the topography changes from Quito to Tena. That’s the thing. For such a small country, the landscape is so diverse! In one day, you can be on the coast, in the high Andes mountains, or in the Amazon jungle. (Ok, maybe not in one day because driving takes forever; the roads are so curvy!) This country started my love for birds (lookin’ at you, Choco and Yellow-throated Toucans!) and coatis (which I didn’t know existed). The Galapagos and our hike to Quilotoa were amazing, sure. But some of my favorite memories were wandering around looking for butterflies in Balsas, Buena Ventura, and Vilcabamba.
Hiking in Vilcabamba.Tortuga Bay in the Galápagos Islands.Quilotoa.Under a Ceiba (or Kapok) tree in Cuyabeno Nature Reserve.Local swimming spots in Tena.Balenario “Puka Urku” outside of Tena.Butterfly spotting outside of Balsas.San Roquito, near Balsas.Our first trip to the “Las Gatitas” collecting site outside of Balsas, where I spotted my first toucan!
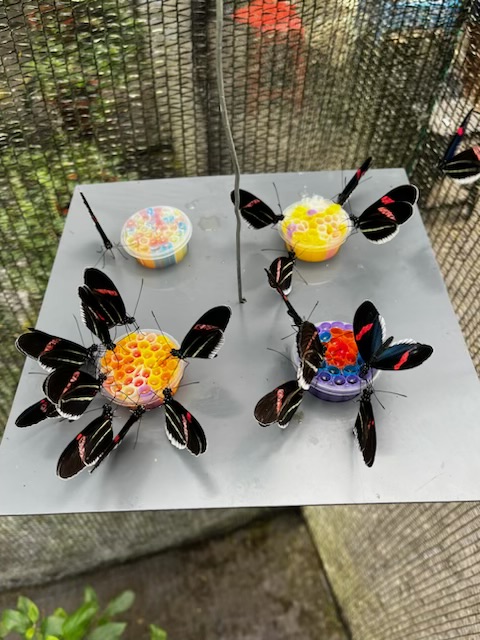
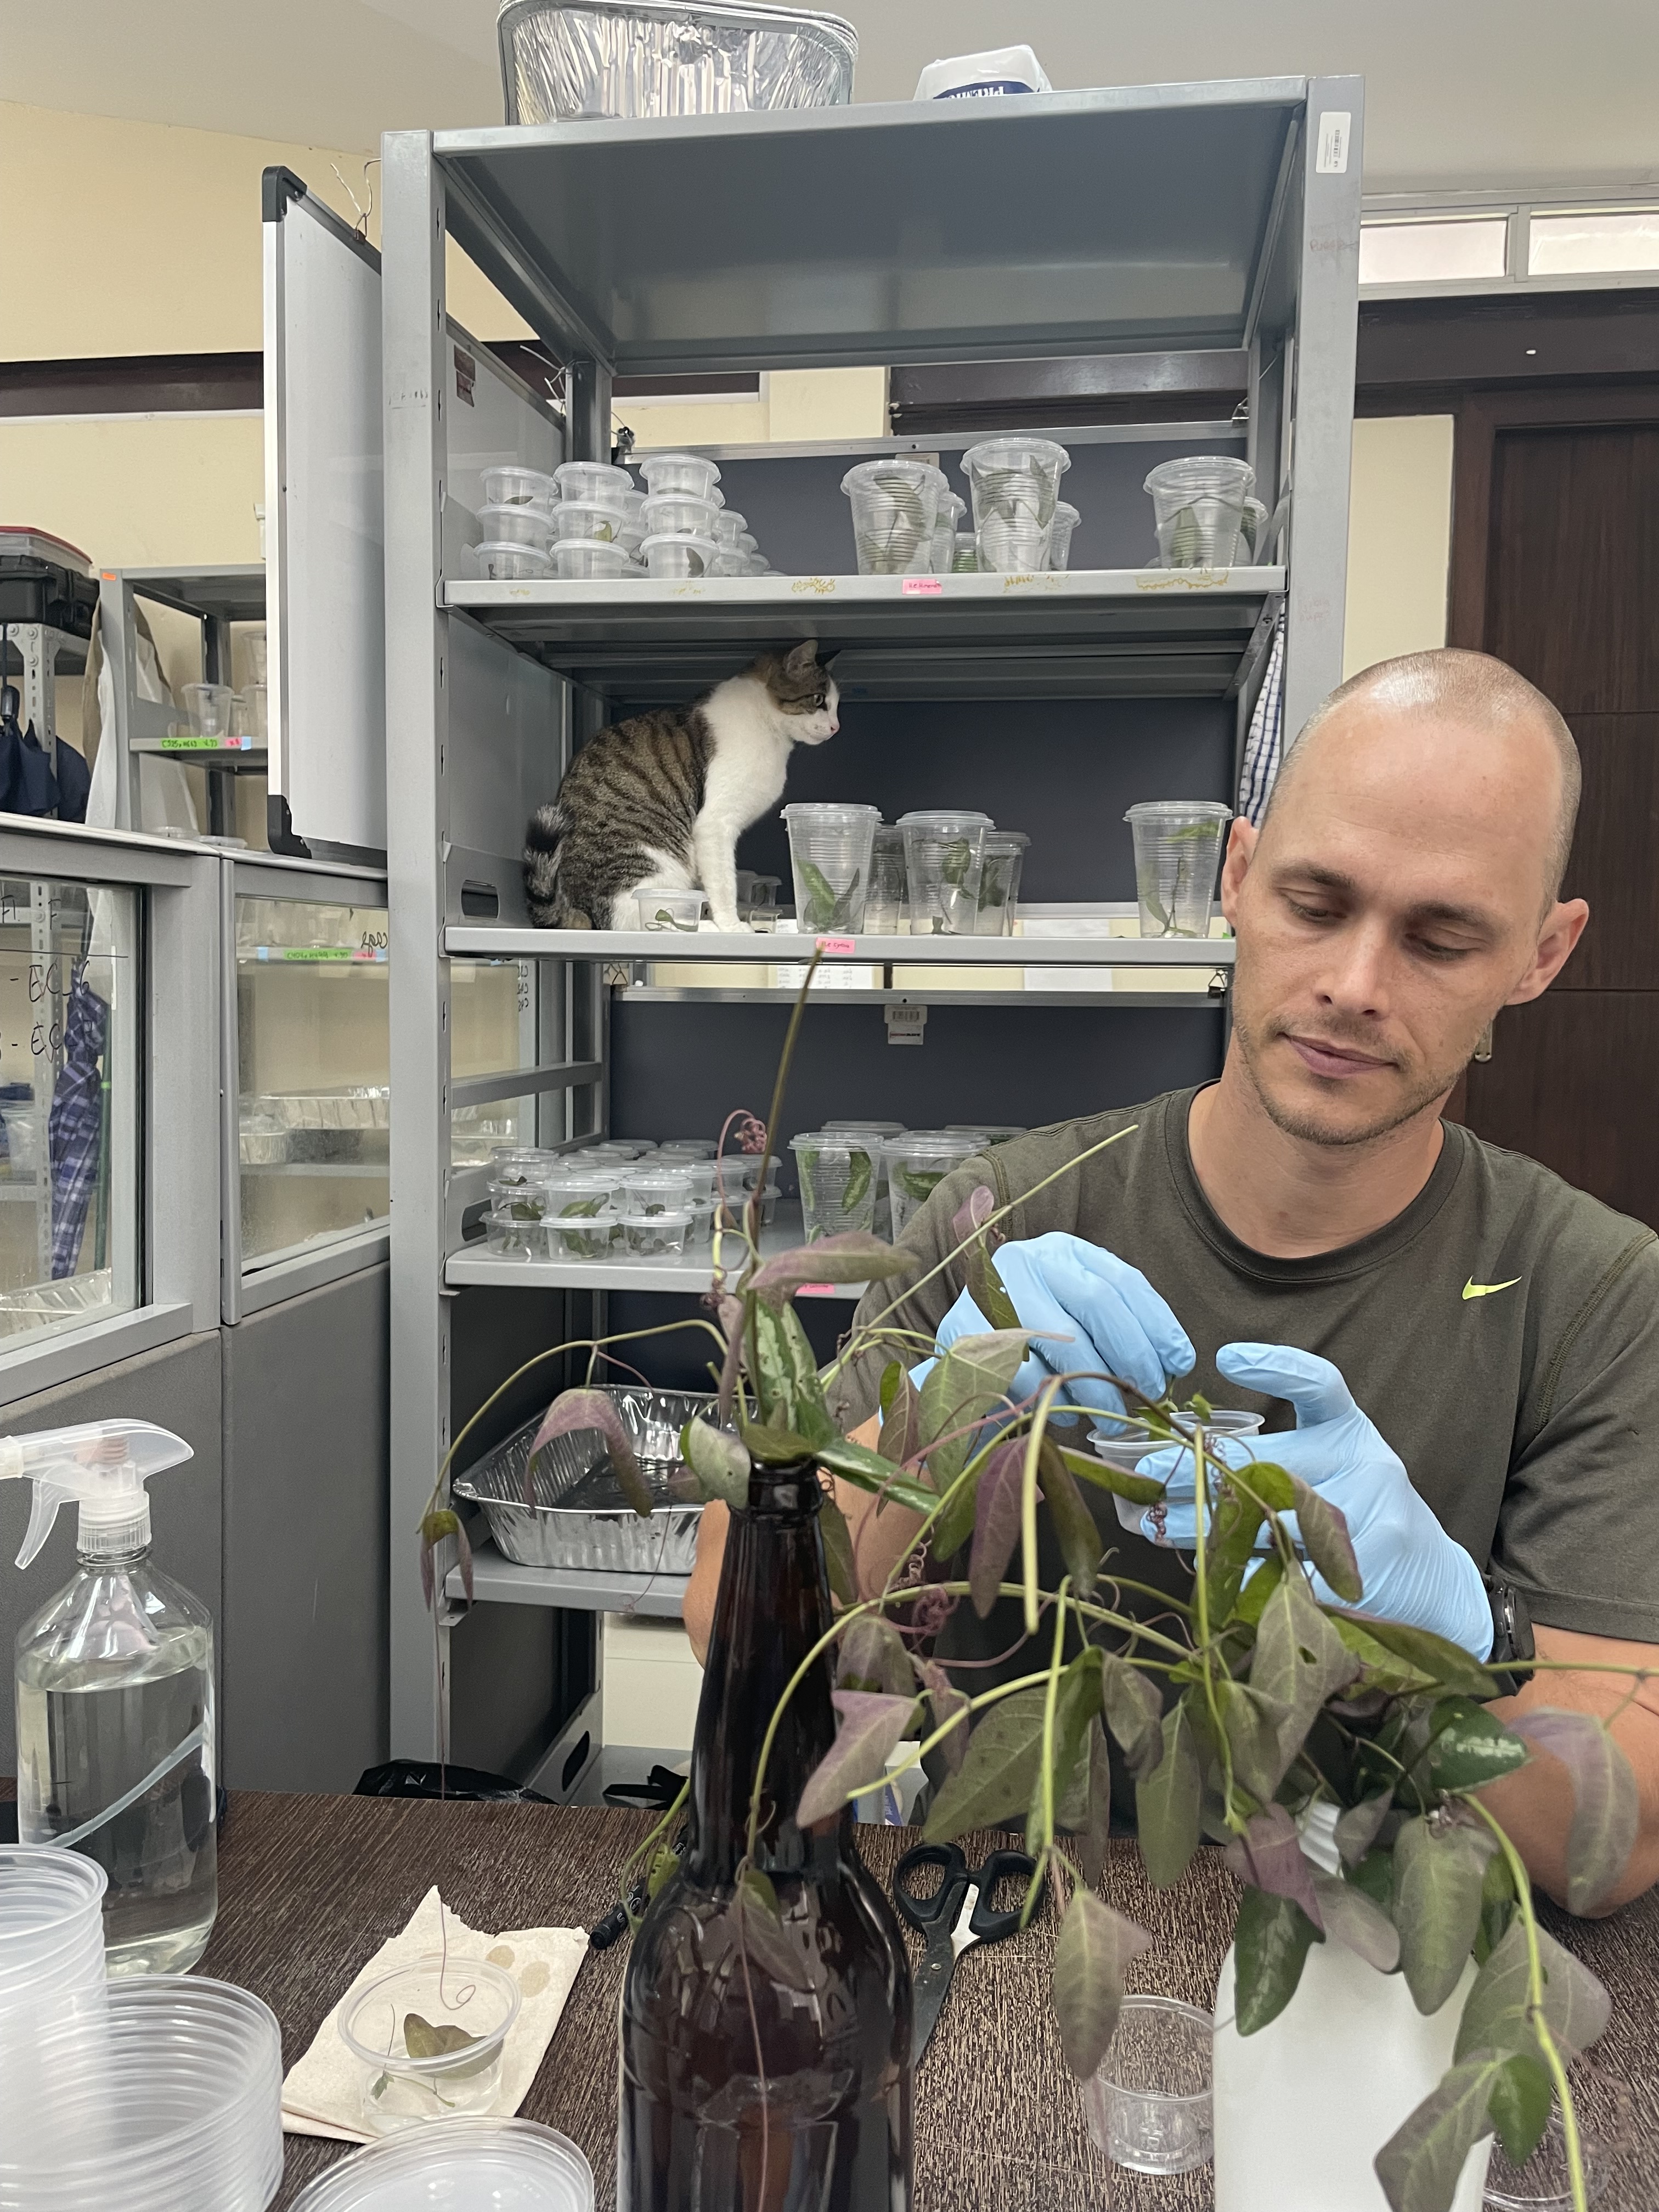
Speaking of butterflies, let’s talk about them since they are the entire reason we were there! I won’t go into butterfly logistics or what Shane thought about working at the university in Tena. That’s something I hope Shane will talk about in a later post once he’s a bit more recovered from the stress of, yup, working with butterflies.
On the surface, working with butterflies sounds relatively easy. But, in reality, you have three key aspects: the plants that feed the caterpillars, the caterpillars that become butterflies, and the adult butterflies. At any given moment, if any of these three collapse, your entire system is at risk. And, go figure, very rarely did anything go smoothly simultaneously. Not to mention that animal care is an daily activity. So, as much as we loved our time in Tena, it was a bit tainted by the work. Well, not the work itself, but the amount of work and the relentless nature of it.
Shane worked six (if not seven) days a week for over two years. On the other side, I was home by myself six (if not seven) days a week for over two years. Don’t get me wrong, I’m great at being by myself, but it also gets old. Even with assistants, time off for Shane was a true struggle since there was often too much work for Shane and the assistants together. If you took away one person, and it became even more overwhelming. And, if the assistants needed days off, for example, for Ecuadorian public holidays, then I became a research assistant for the day.
Hungry hungry Cyrbia!
I love living abroad and the challenges that come with it, but this work scenario challenged us, professionally for Shane and personally for us both. It left no time for much of anything else, which changed the dynamic of our relationship. A simple example is meal planning and grocery shopping, which we used to do together and enjoyed doing (as crazy as that may seem). However, since Shane was at work, it all defaulted to me. He had no brain space left for anything other than keeping the project afloat. And I had to make some serious adjustments in my expectations of what he could give and the reality of our day-to-day life.
I say all this because I think it’s easy to look at life abroad with rose-colored glasses, both from our perspective and an outsider’s perspective. It’s easy to talk about all the wonderful and exciting things about living abroad because it IS all those things! However, it can and will be challenging in various ways, and it’s important to acknowledge those challenges. Moving somewhere where you don’t know anyone, where you don’t speak the language, where literally every mundane task requires that extra bit of effort; it’s not for everyone. I think we’re a bit addicted to those day-to-day challenges, but it doesn’t mean that some days (or weeks or months) aren’t really hard.
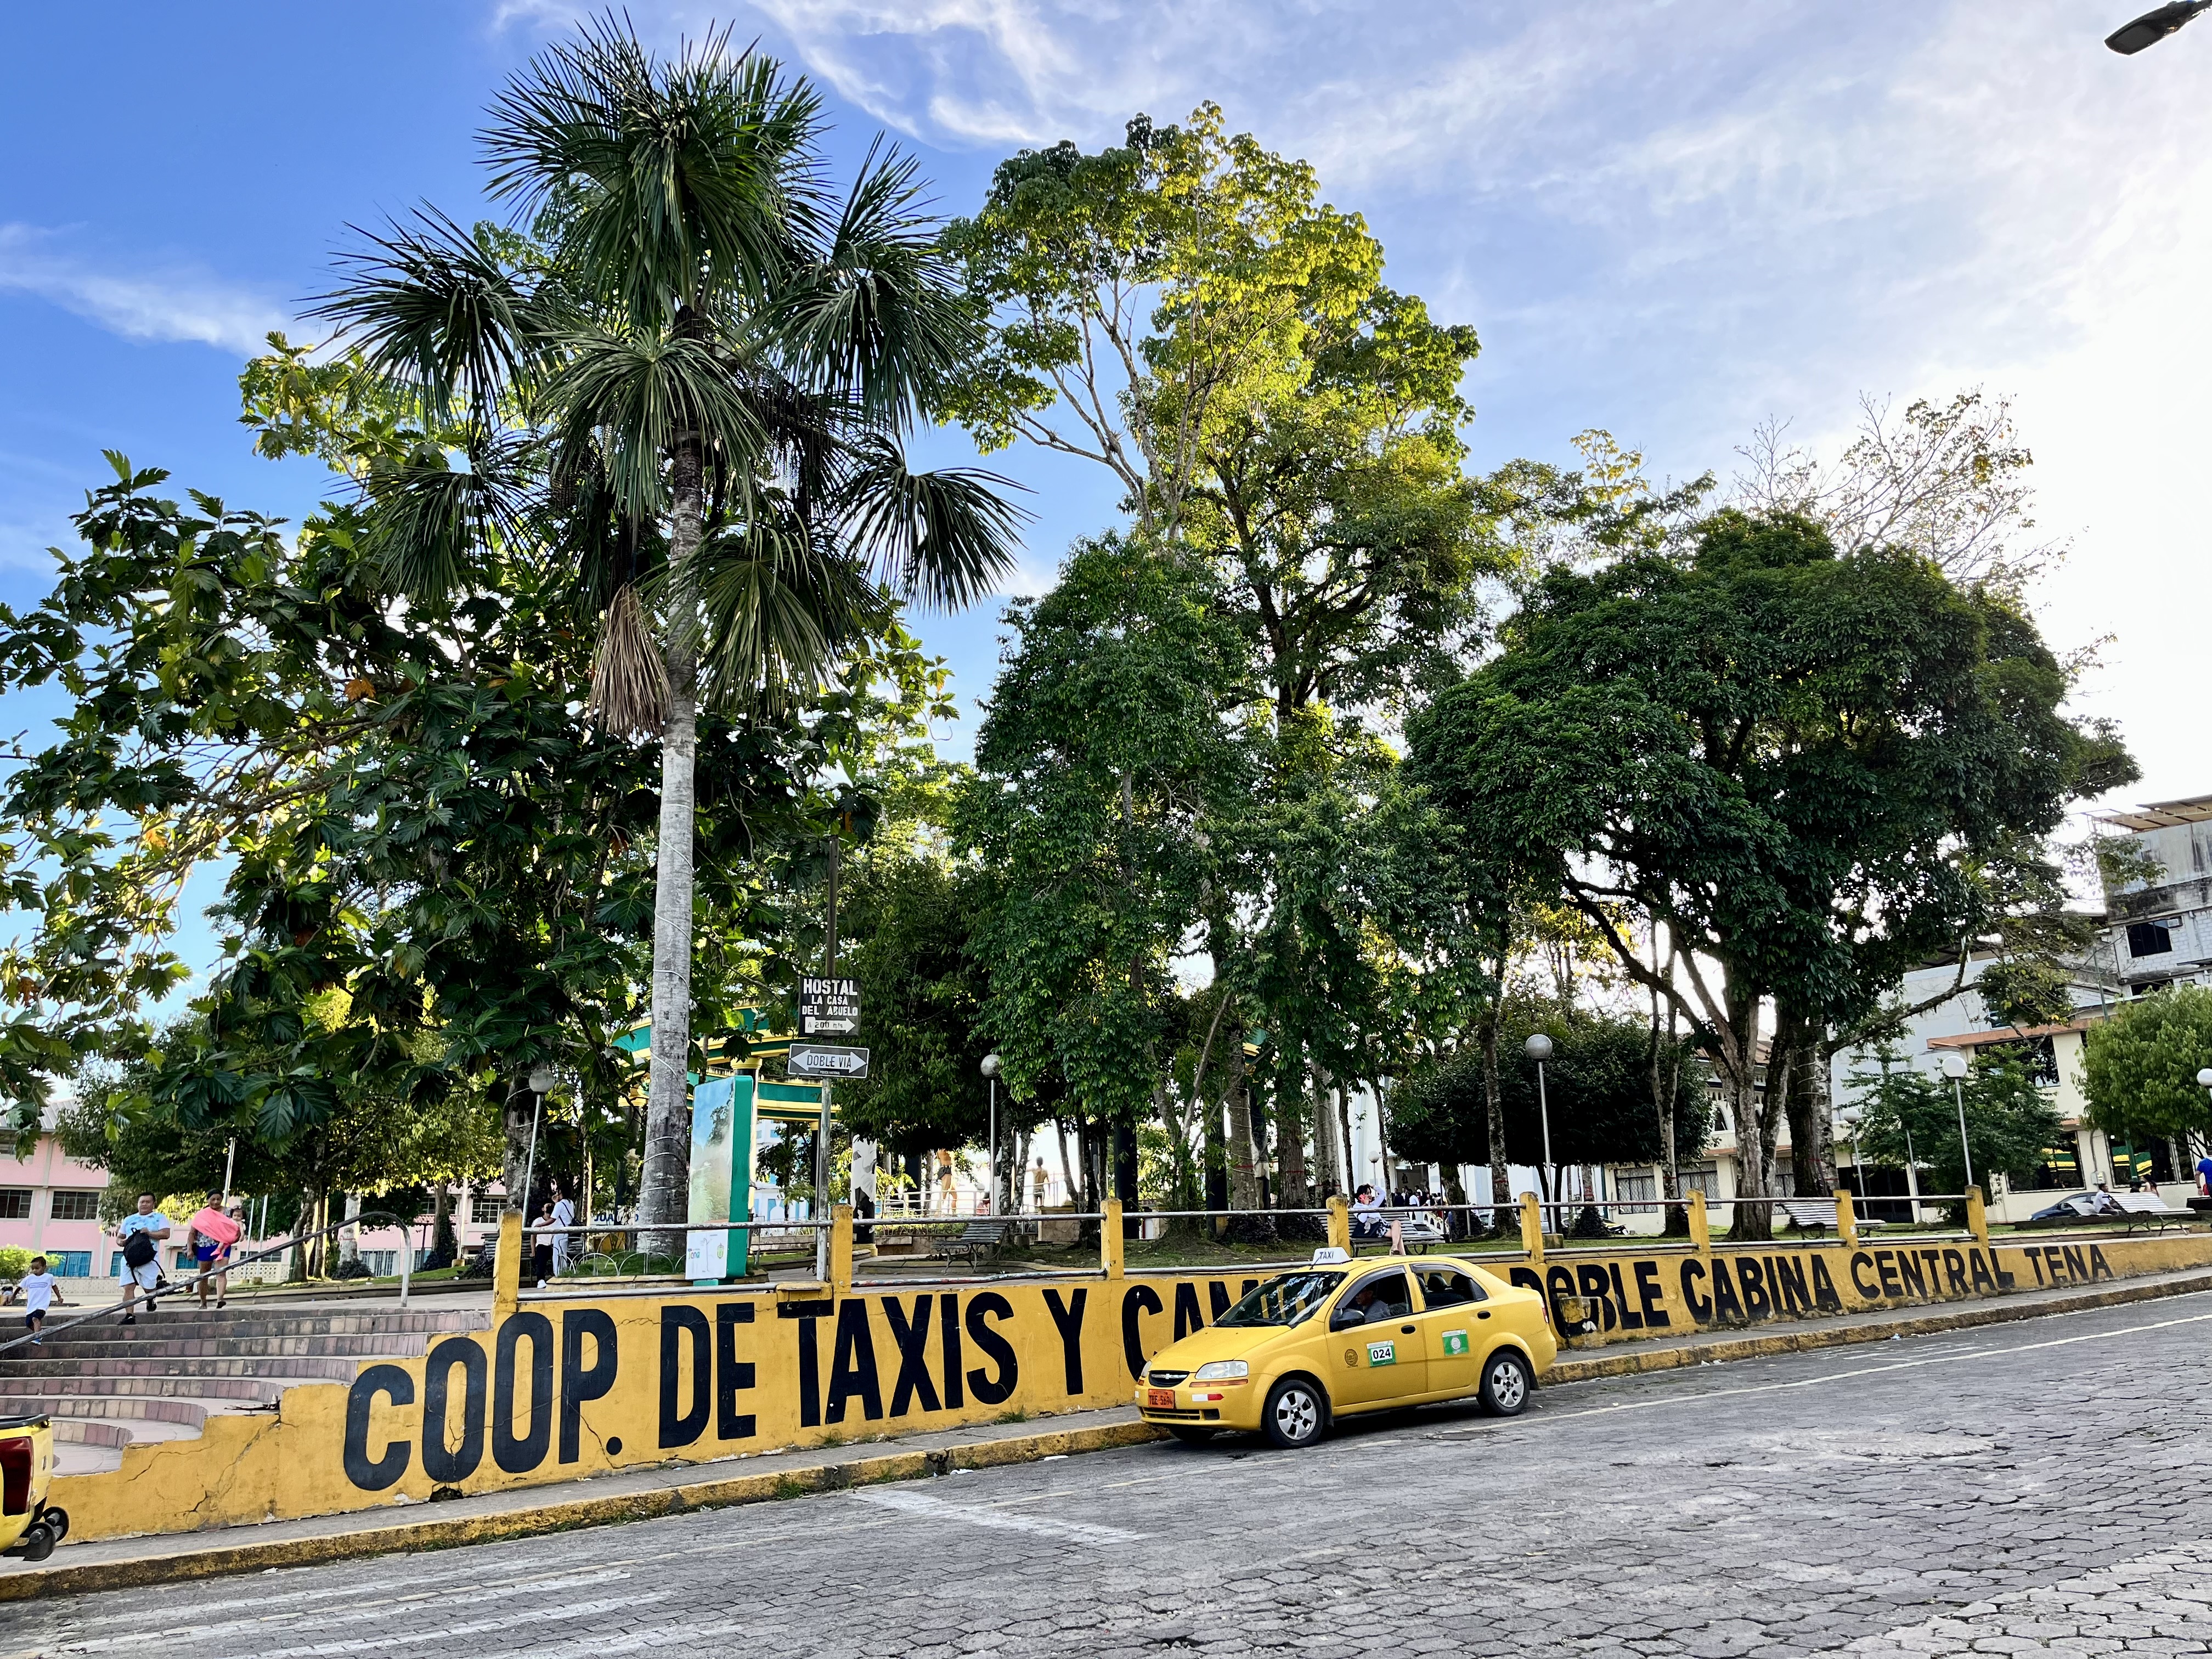
Parque Central in Tena.
And, while I’m being serious, I think it’s important to acknowledge that we lived a very privileged life in Ecuador. A European salary and my freelance work goes a long way, and life isn’t that easy for a lot of Ecuadorians, especially those in el Oriente. Not to mention, workers’ rights are quite poor, and primary/secondary education in the Amazon isn’t great. We are also healthy people, so other than one trip to the public health clinic thanks to a wasp sting (which was FREE, by the way), we didn’t need to rely on the healthcare system, which can vary in quality. As a whole, we were shielded from some key elements of society that greatly affect quality of life.
The wasp sting reaction. Of note, it was a 45 min trip from the university to the clinic in Tena. Another thing to consider when living in any rural area.
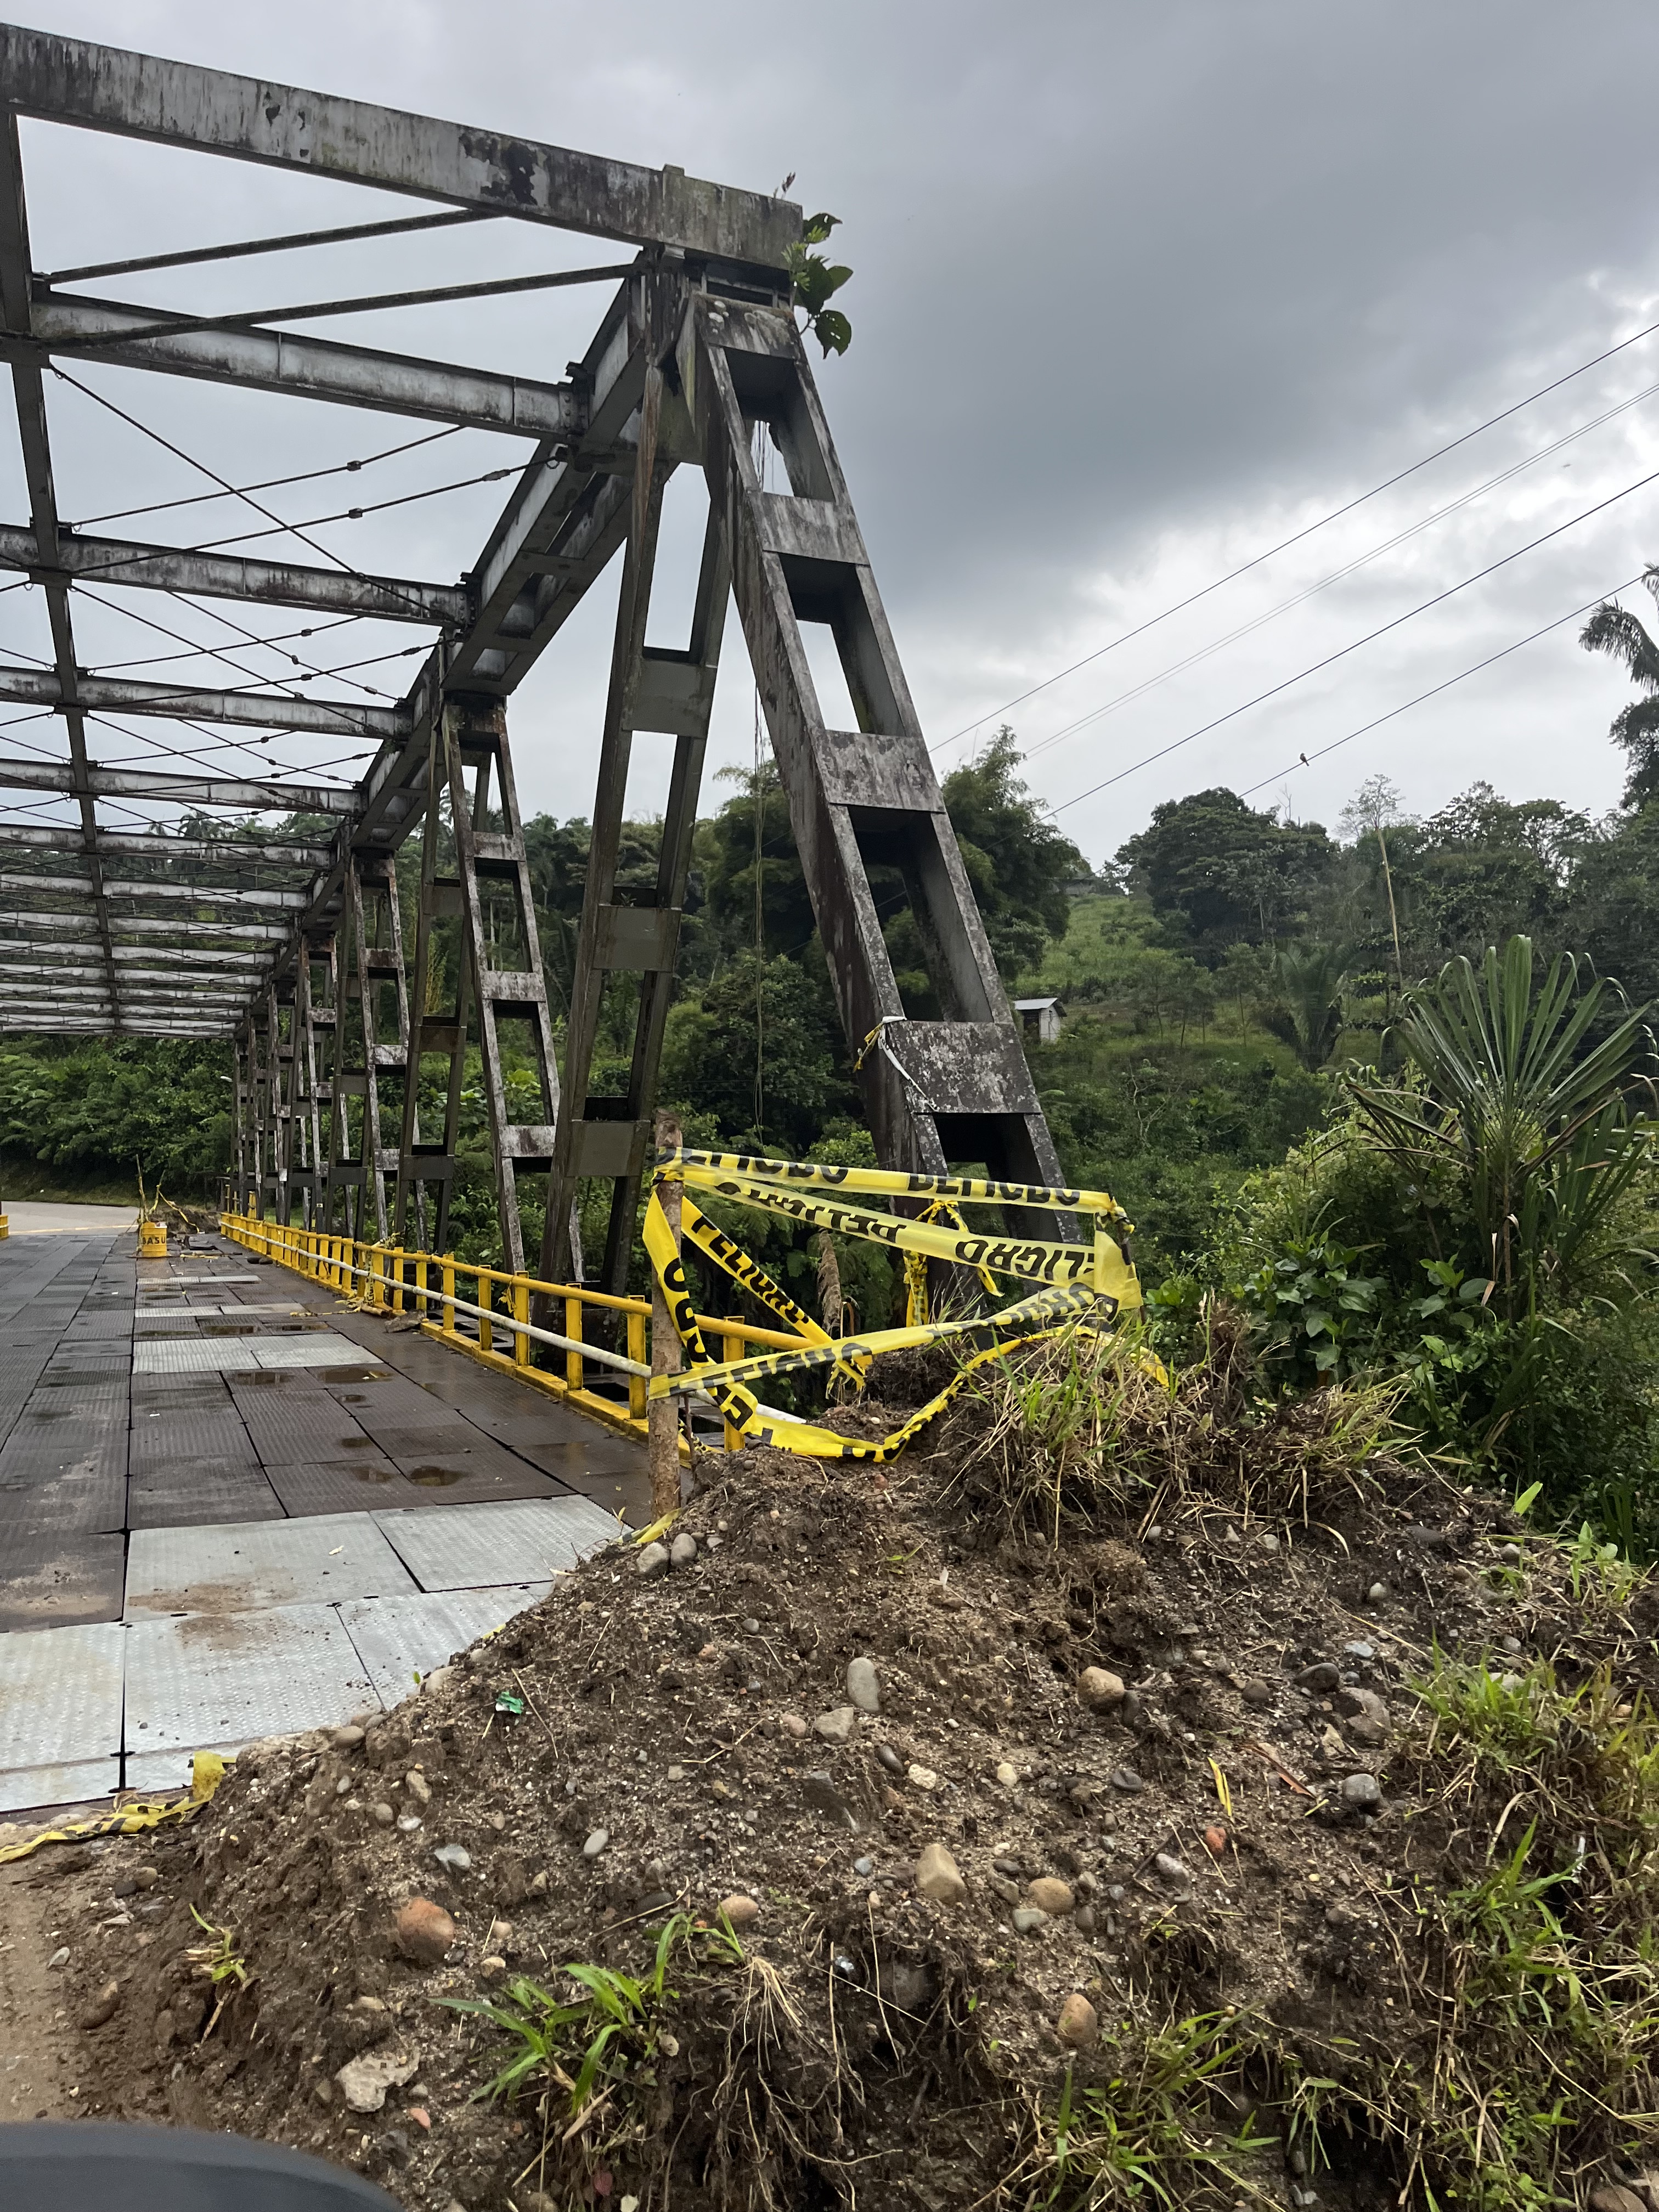
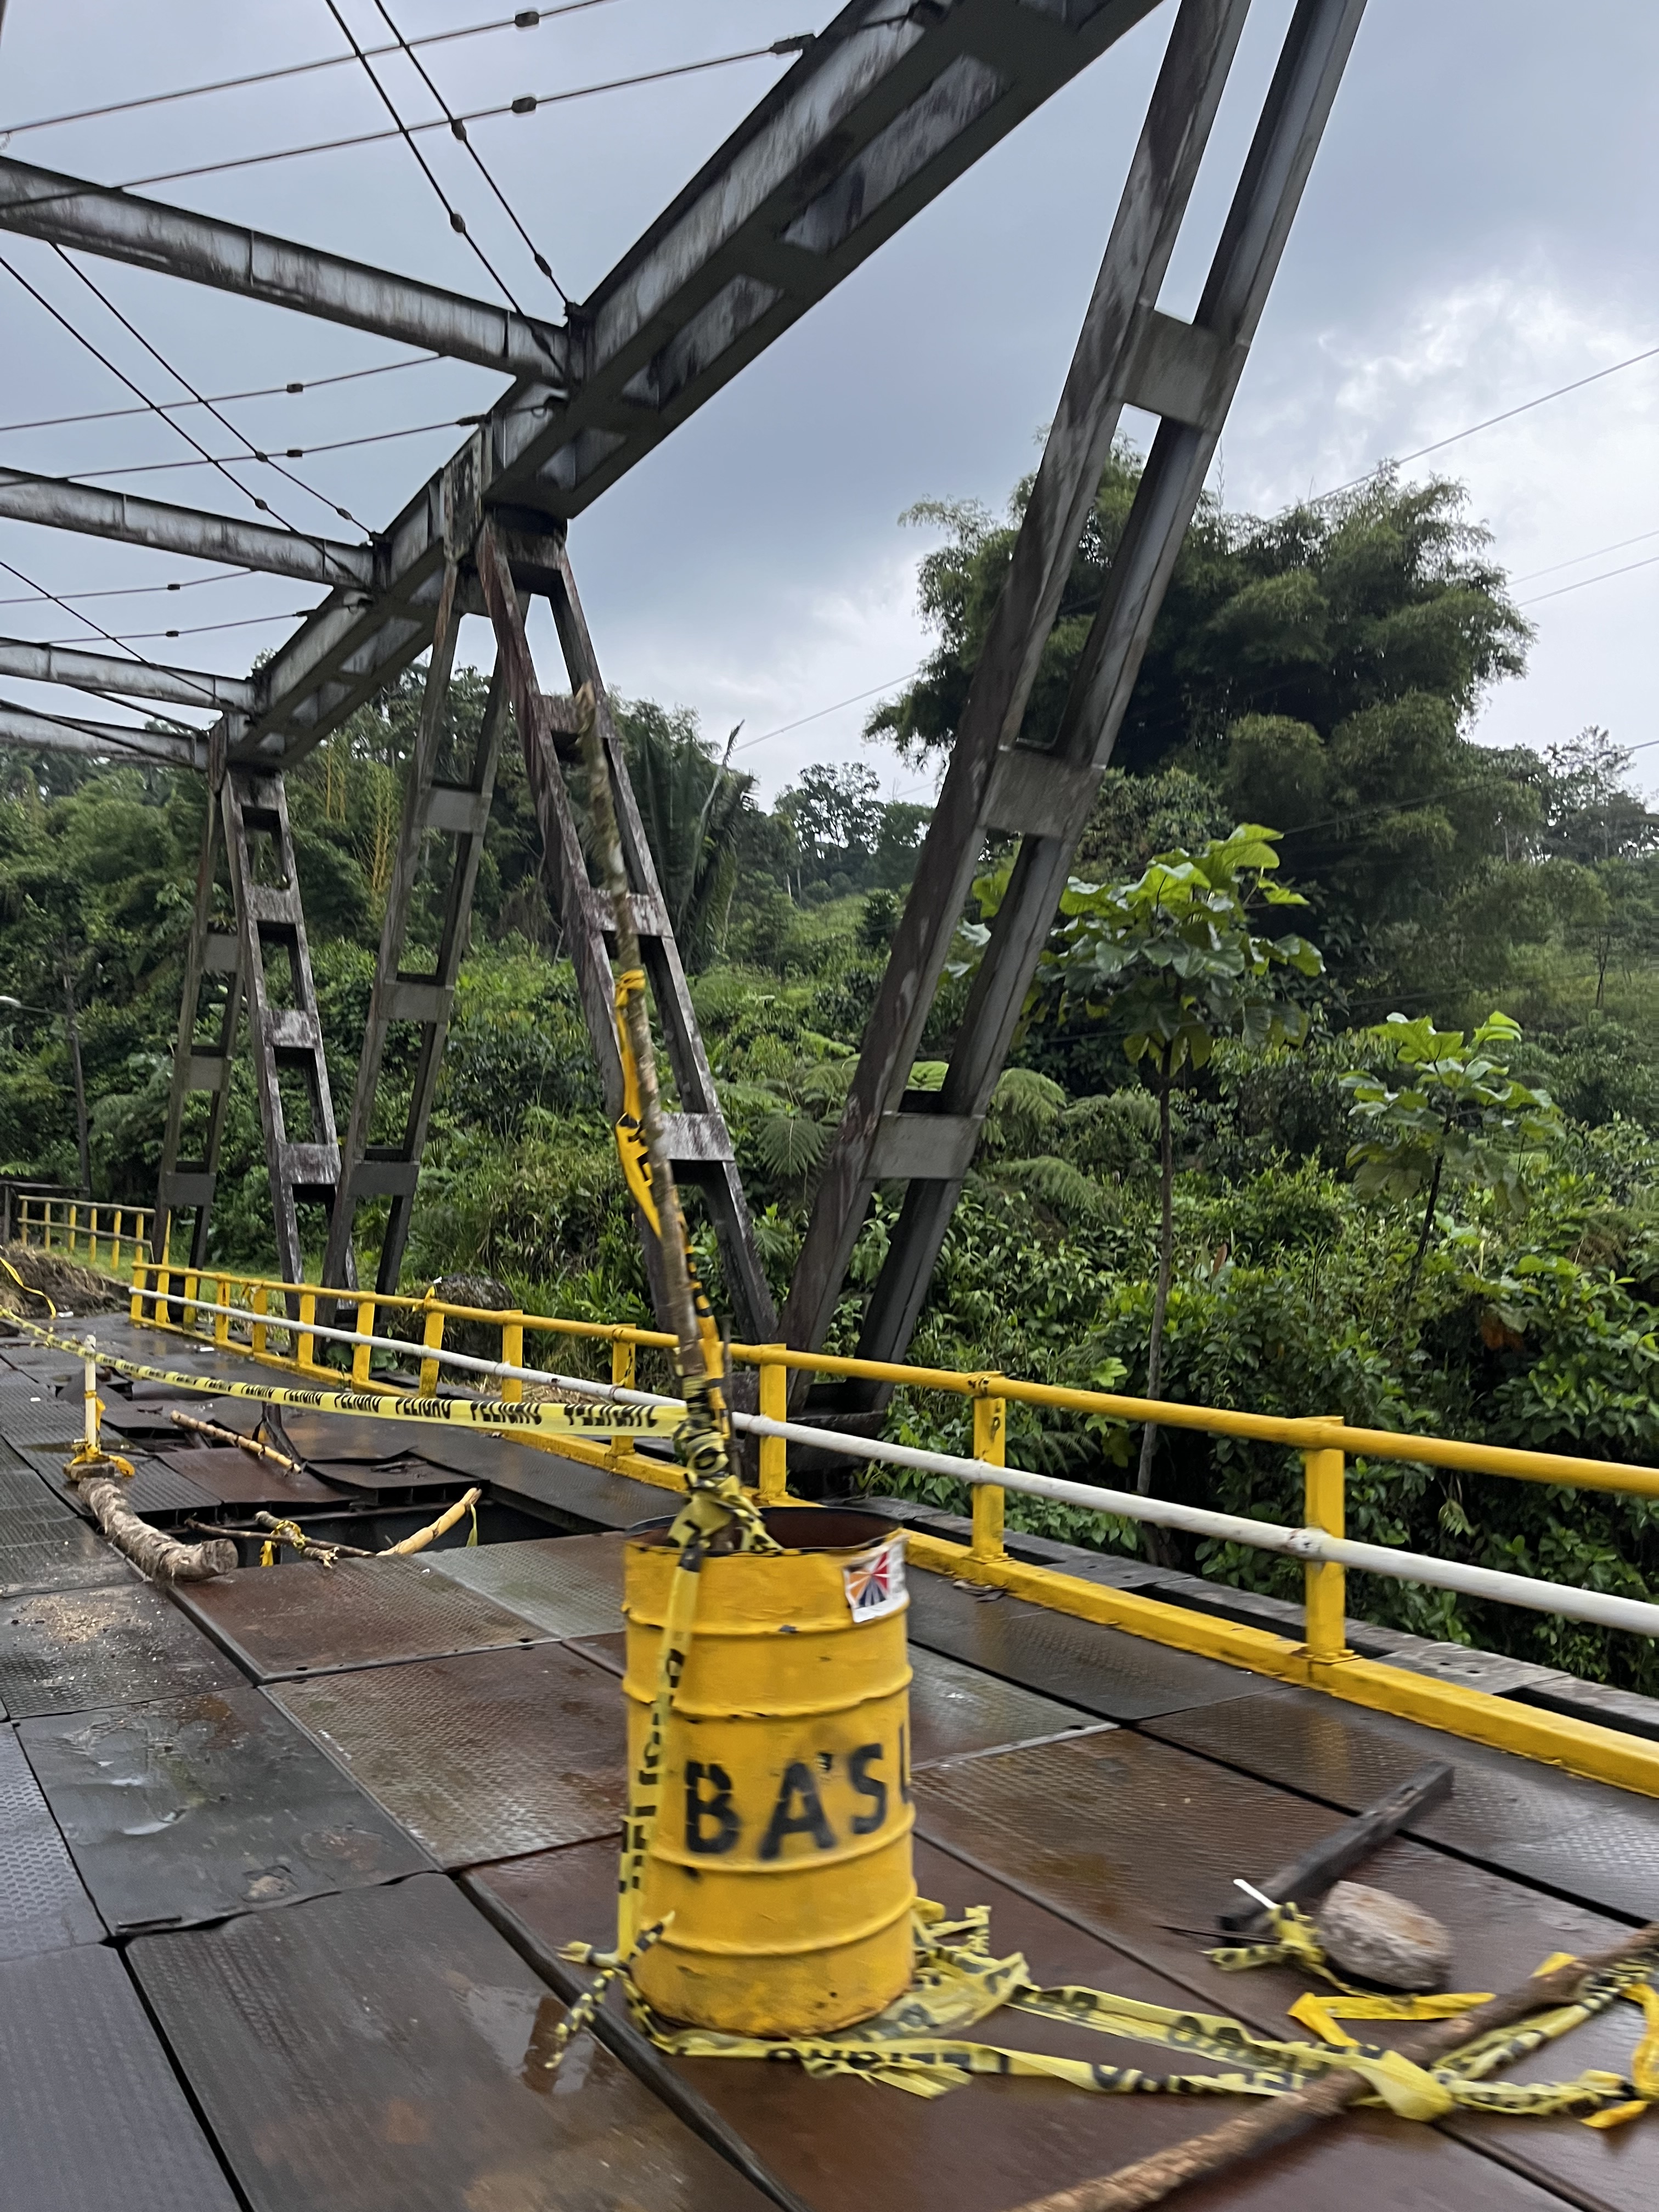
Also, since being back in Germany, we’ve been starkly reminded of how advantaged life is here. For example, in Tena, the need for emergency medical services was often announced on the news channels on Facebook; you can dial 911, which works sometimes, but the infrastructure isn’t as equipped in Tena as it is in Europe or the US. Another example. There is only one road from Quito to Tena with two key bridges, one of which we ended up nicknaming “the death bridge” because trucks and motorcycles literally fell through it, even after it was “fixed.” Moreover, in Tena (and most of Ecuador), the water is not safe to drink. For this reason, we used a Berkey water filter (purchased in the US and brought to Ecuador), and carried cups of water to the bathroom to brush our teeth. (breaking this habit has been surprisingly hard!) Now, we continue to use our water filter because we like the taste of filtered water, not because it’s a necessity. Germans may not prefer to drink tap water, but there is no safety issue. And we can flush the toilet paper again! (also a hard habit to break 🤣 – donde está elbaño bin?)
The temporarily “fixed” death bridge, which was still in use.
While we were in Ecuador, these things just became normal. Eventually, you don’t think twice about it. As a result, our requirements for life have shifted; there’s a difference between what you need and what you want. Clean drinking water is a necessity. An ant-free home is a want. 😉
These little ants were everywhere. You could not escape them.
Jokes aside, in the same way living in a 30 m2 basement apartment with no kitchen sink (ever washed dishes in the bathroom…every single day?) completely changed our perspective on our apartment requirements (e.g., ground-level or above, windows, sink in the kitchen), living in Tena shifted our perspective on what’s required for life (e.g., a clean and safe place to live and clean water).
Another huge shift in attitude for us was our perspective on language learning. We spent six years in the Netherlands, and I could understand quite well (and had a Dutch-English work situation), but I would never say I spoke Dutch. We were in Germany during the covid lockdown, so beyond the basics (i.e., mit karte bitte! at the grocery store), we didn’t learn German. In Ecuador, Tena specifically, Spanish isn’t a want; it’s a need, and that was the driving factor we finally needed to actually learn and USE a language.
First, Spanish is FUNNNNN! Do we sound like native speakers? Hell no. But was every single person we encountered patient and helpful with our broken (but improving) Spanish? Absolutely. It was the complete opposite experience of that in the Netherlands (sorry Duchies), where I was literally laughed at for trying to speak Dutch or told to not even bother. (Stop doing that if you want people to speak Dutch!) Spanish came more naturally than Dutch or German, given its similarities to English, but that doesn’t mean it was easy. Essentially, we’ve spent every free moment for the past two years listening to podcasts in Spanish and doing Duolingo. Shane had his work colleagues who helped him every day (muchísimas gracias a Pamela, quien enseñaba Shane todos los dias, si el quería o no 😆). I took classes on line and talked with people when I could (muchísimas gracias a George, quien quería un intercambio de idiomas real y no usaba Tandem como Tinder). We arrived with essentially zero Spanish, but by the time we left, we were having parties and going to dinners entirely in Spanish. I even read Harry Potter and the Sorcerer’s Stone (I mean, Harry Potter y la Piedra Filosofal) in Spanish!
We still have work to do before Spanish is permanently in the brain, but I feel immensely proud of our progress and grateful for everyone who helped us along the way.
Tip for anyone encountering someone learning your language: don’t speak louder. Speak slower, and rephrase your sentence if they don’t understand. They will really appreciate it!
2021 Christmas party.
I think now, we’ve reached the point of the post where I’m going to just list off all the things that I’m going to miss about living in Ecuador. Ya know, for posterity. So, in no particular order…
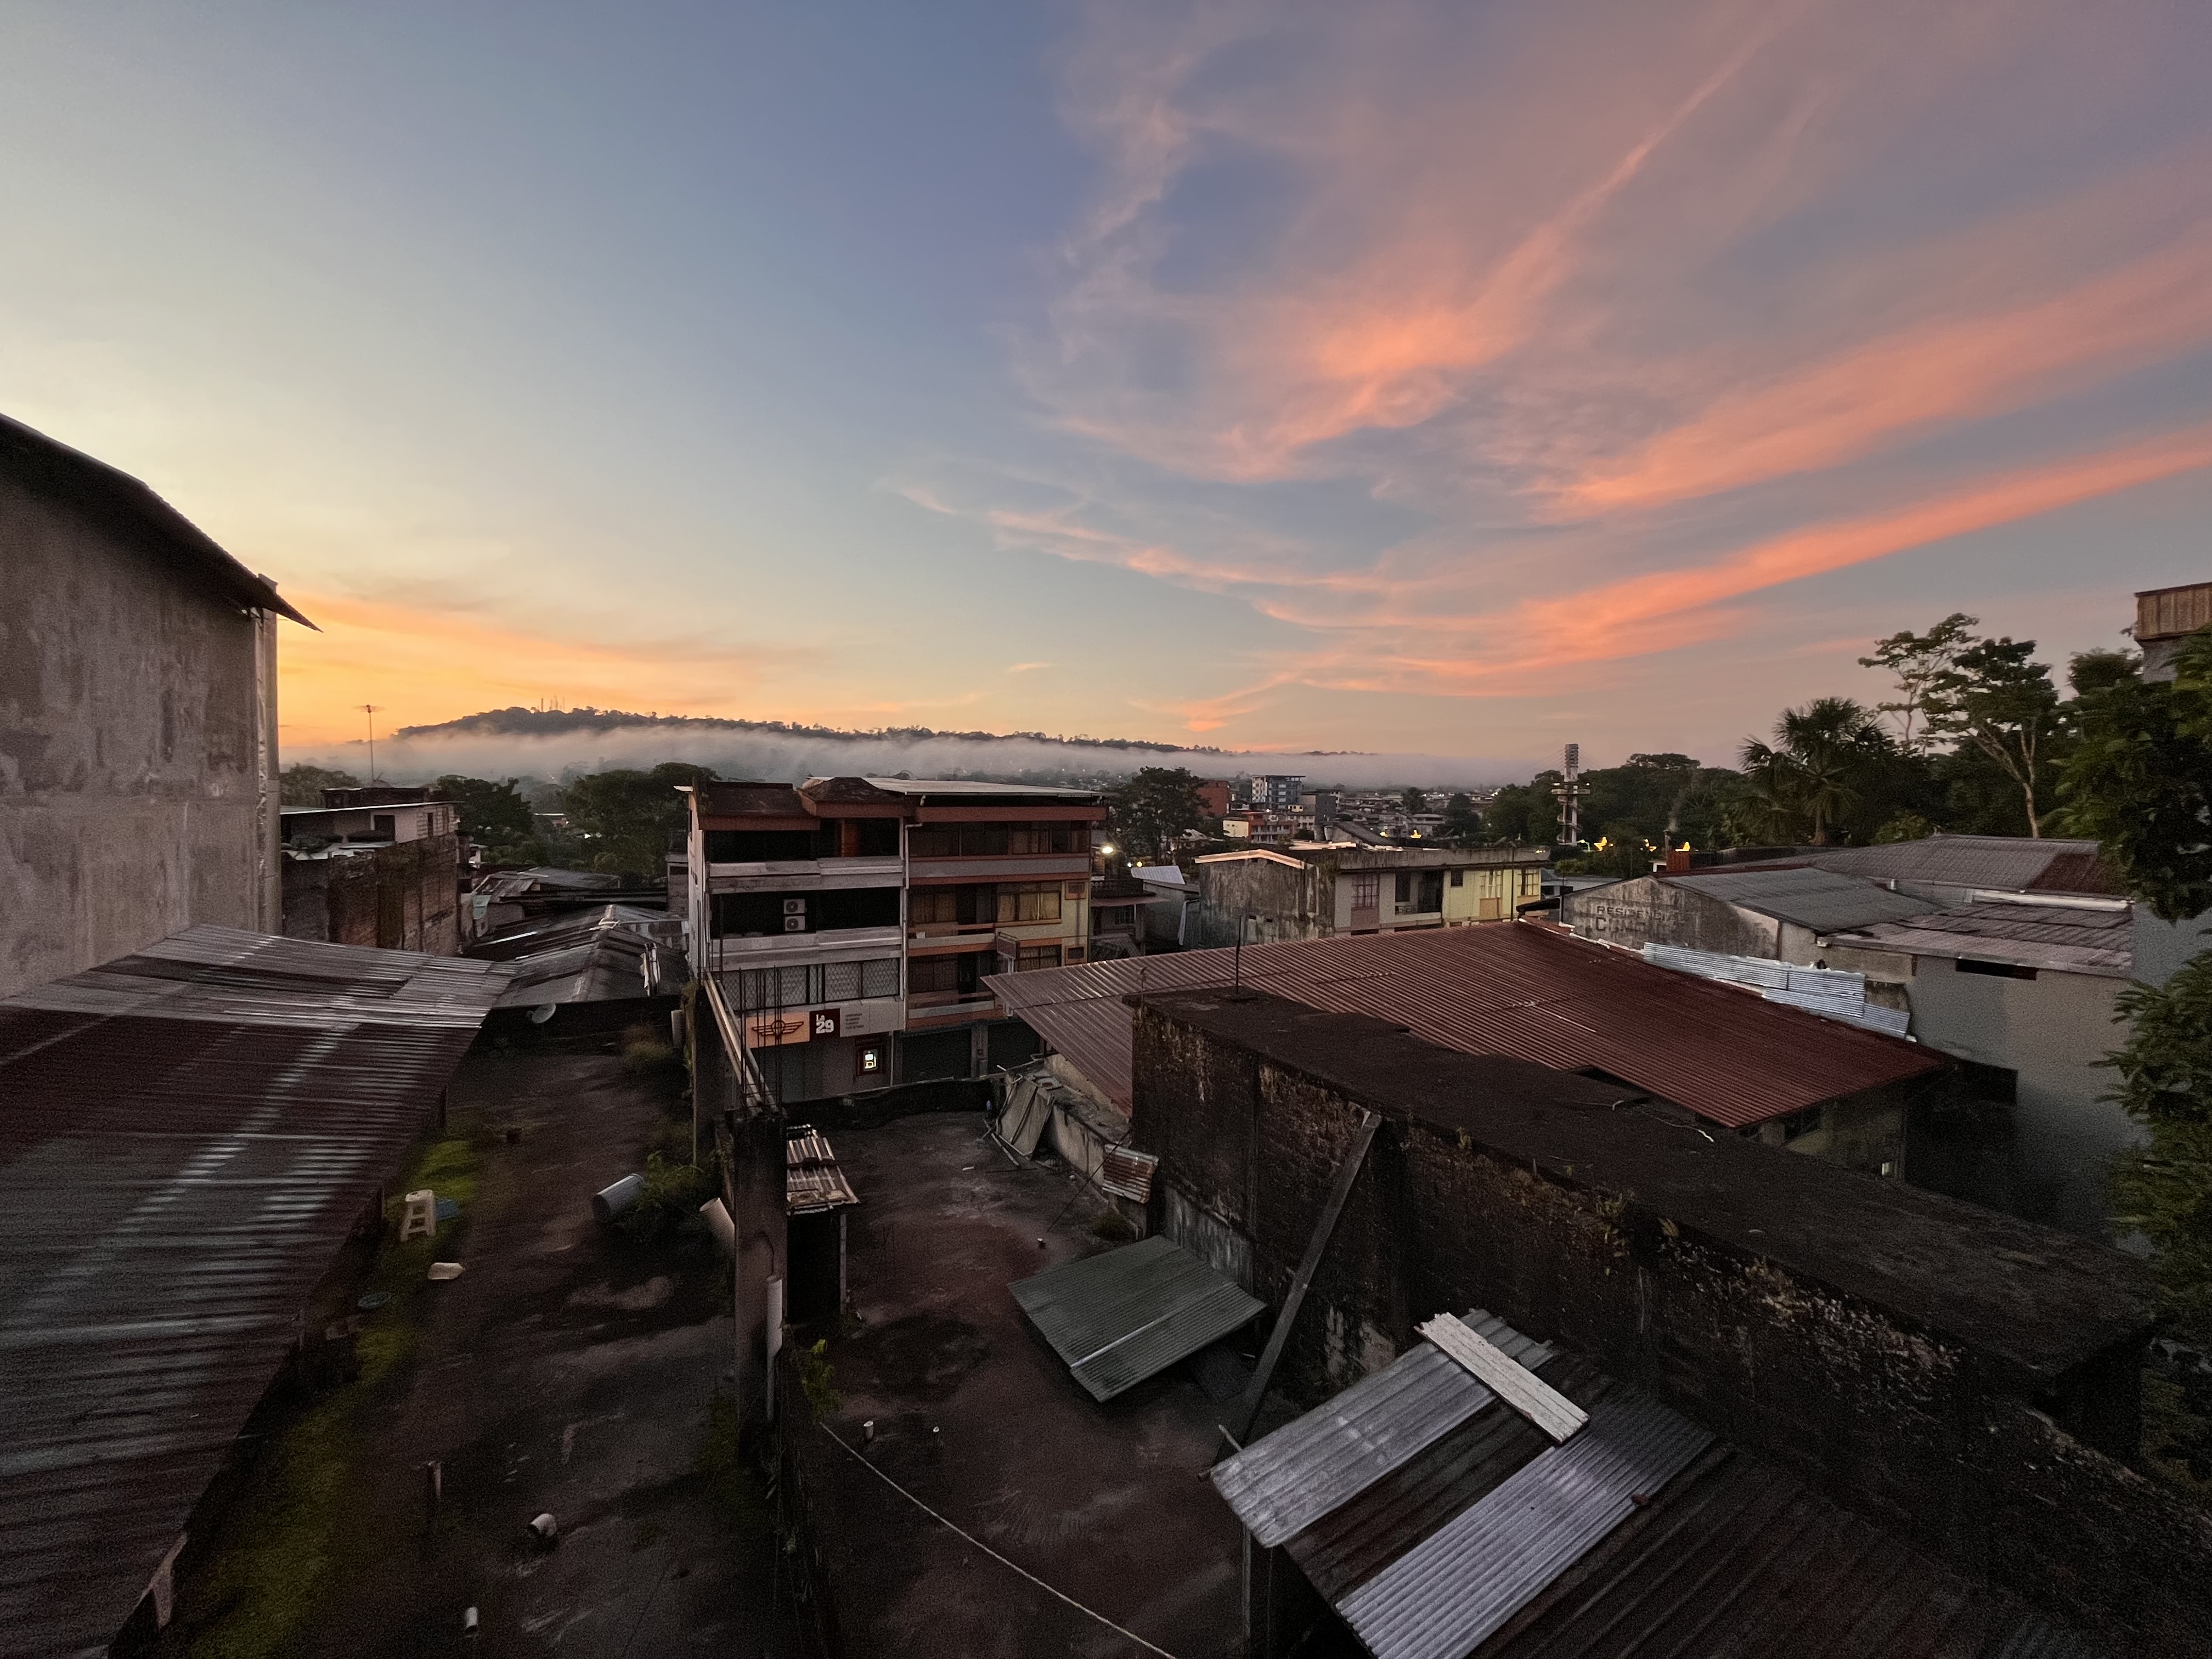
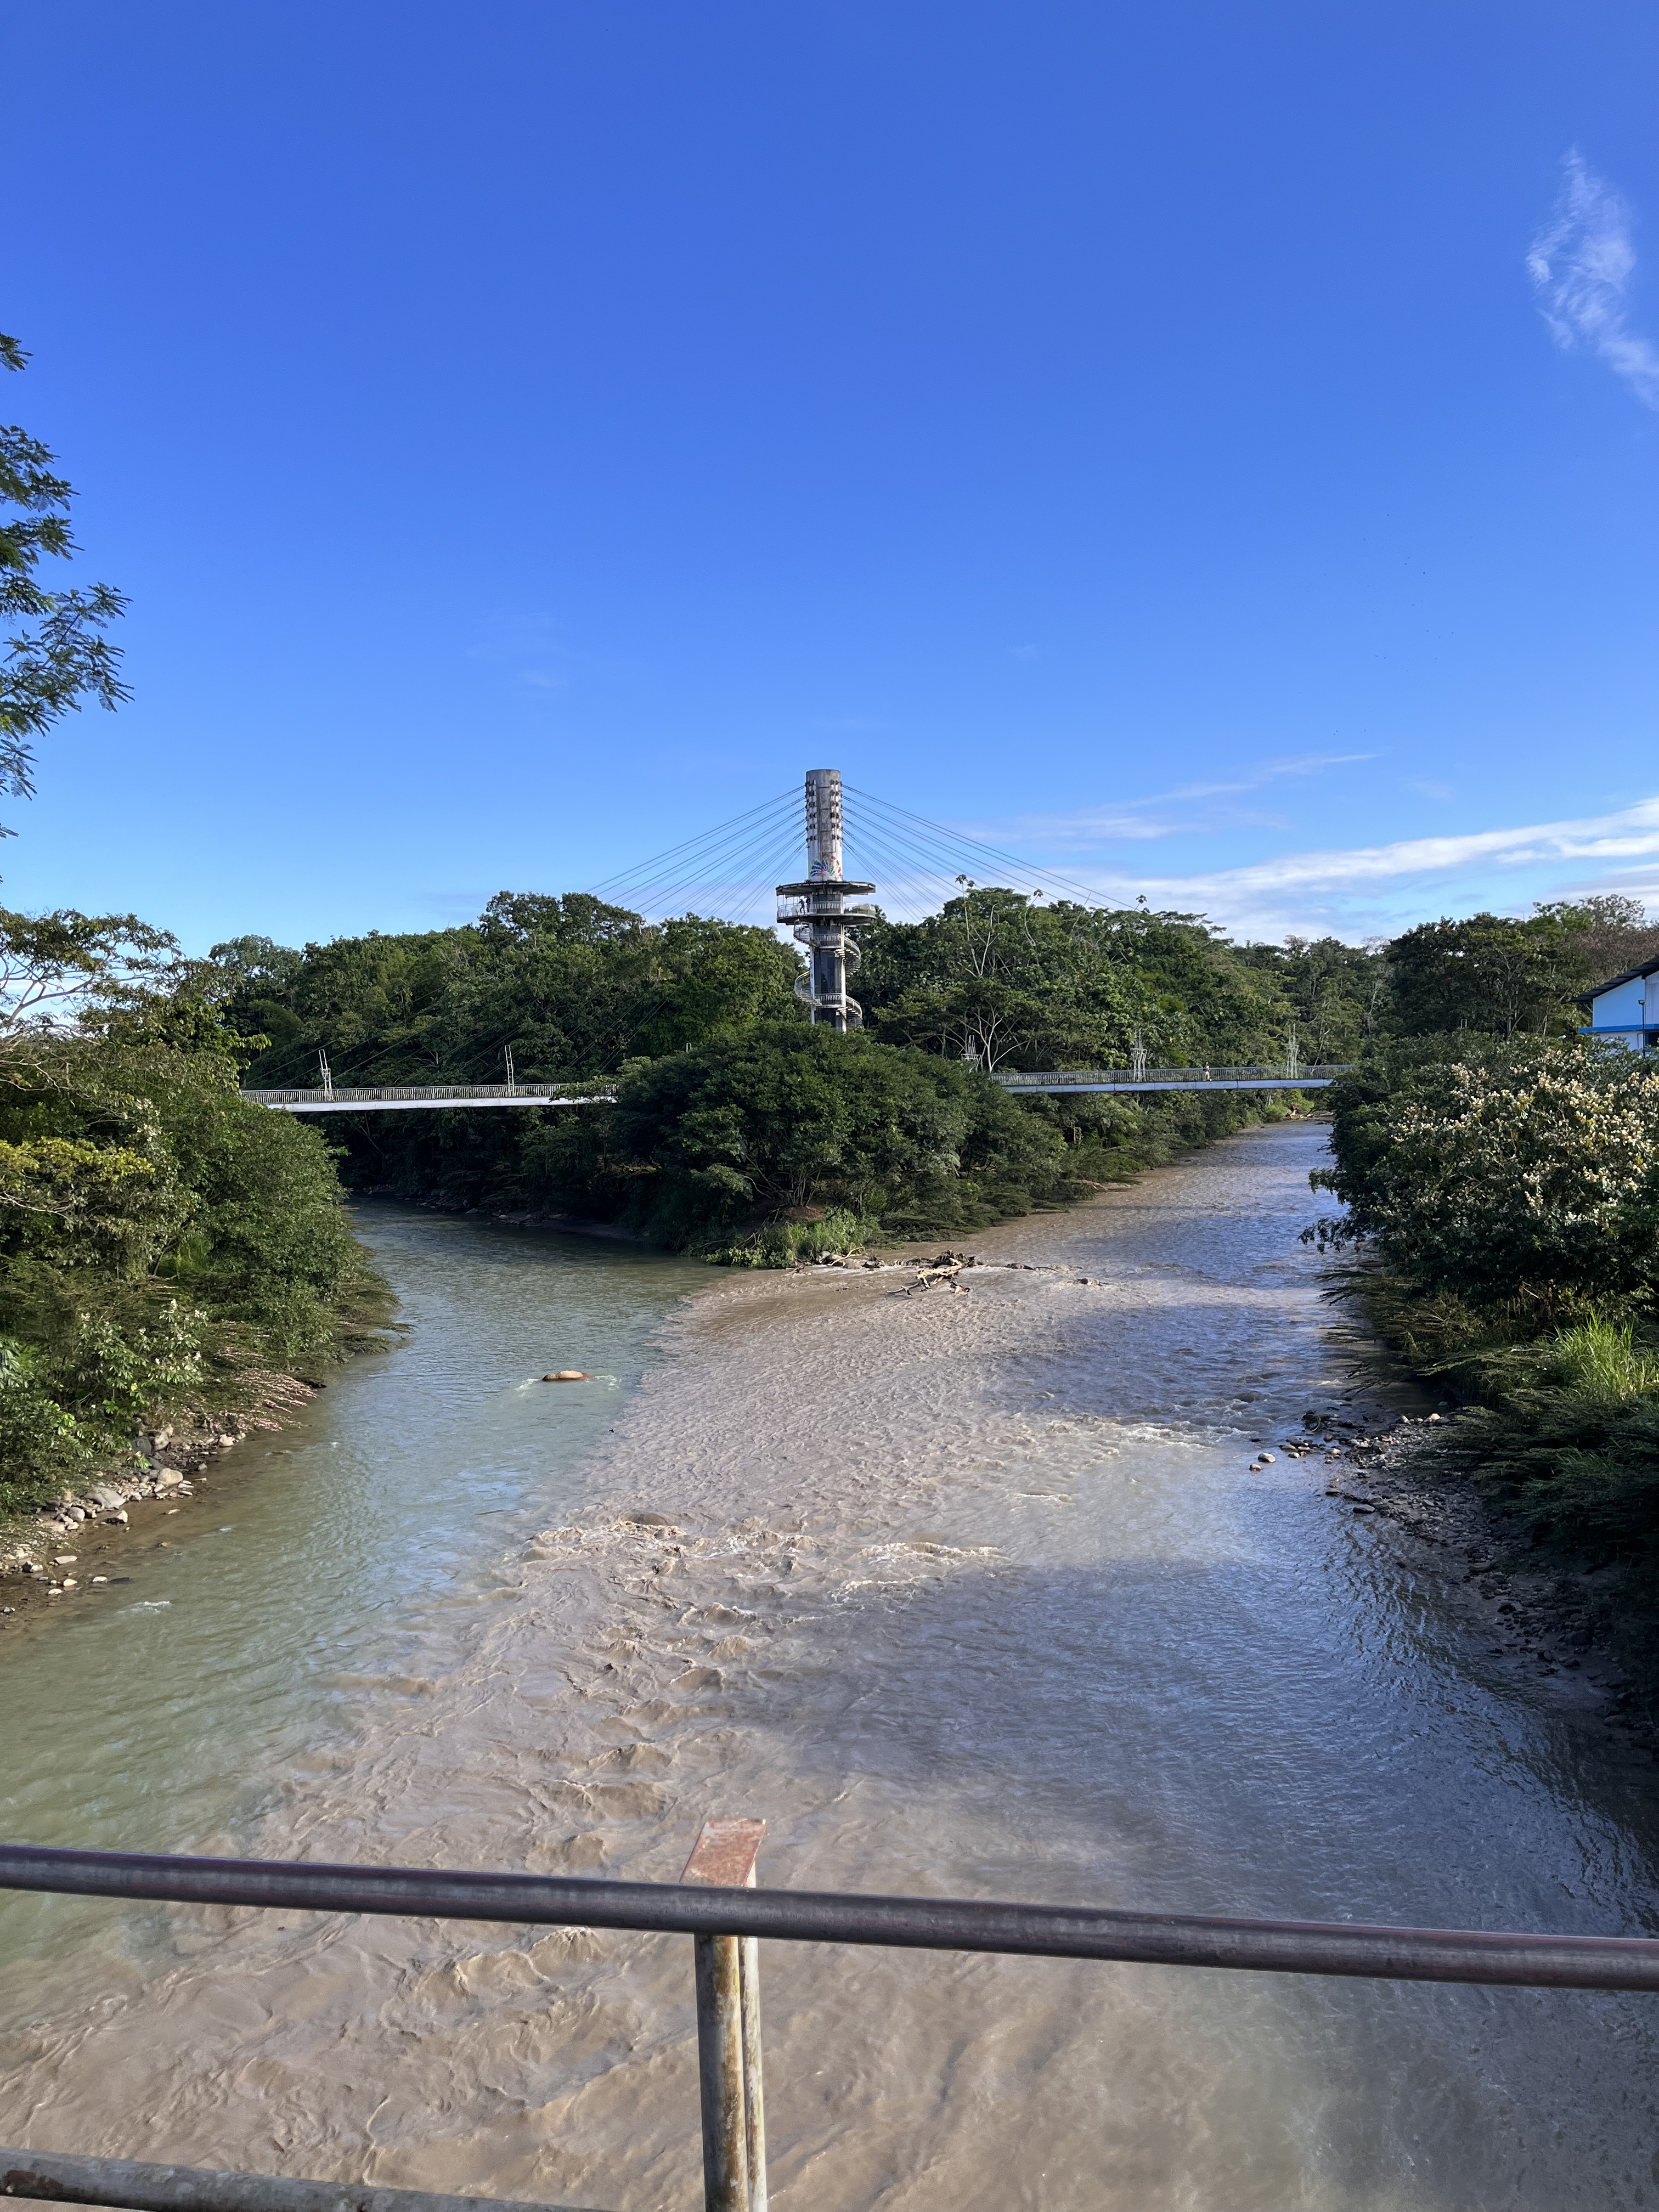
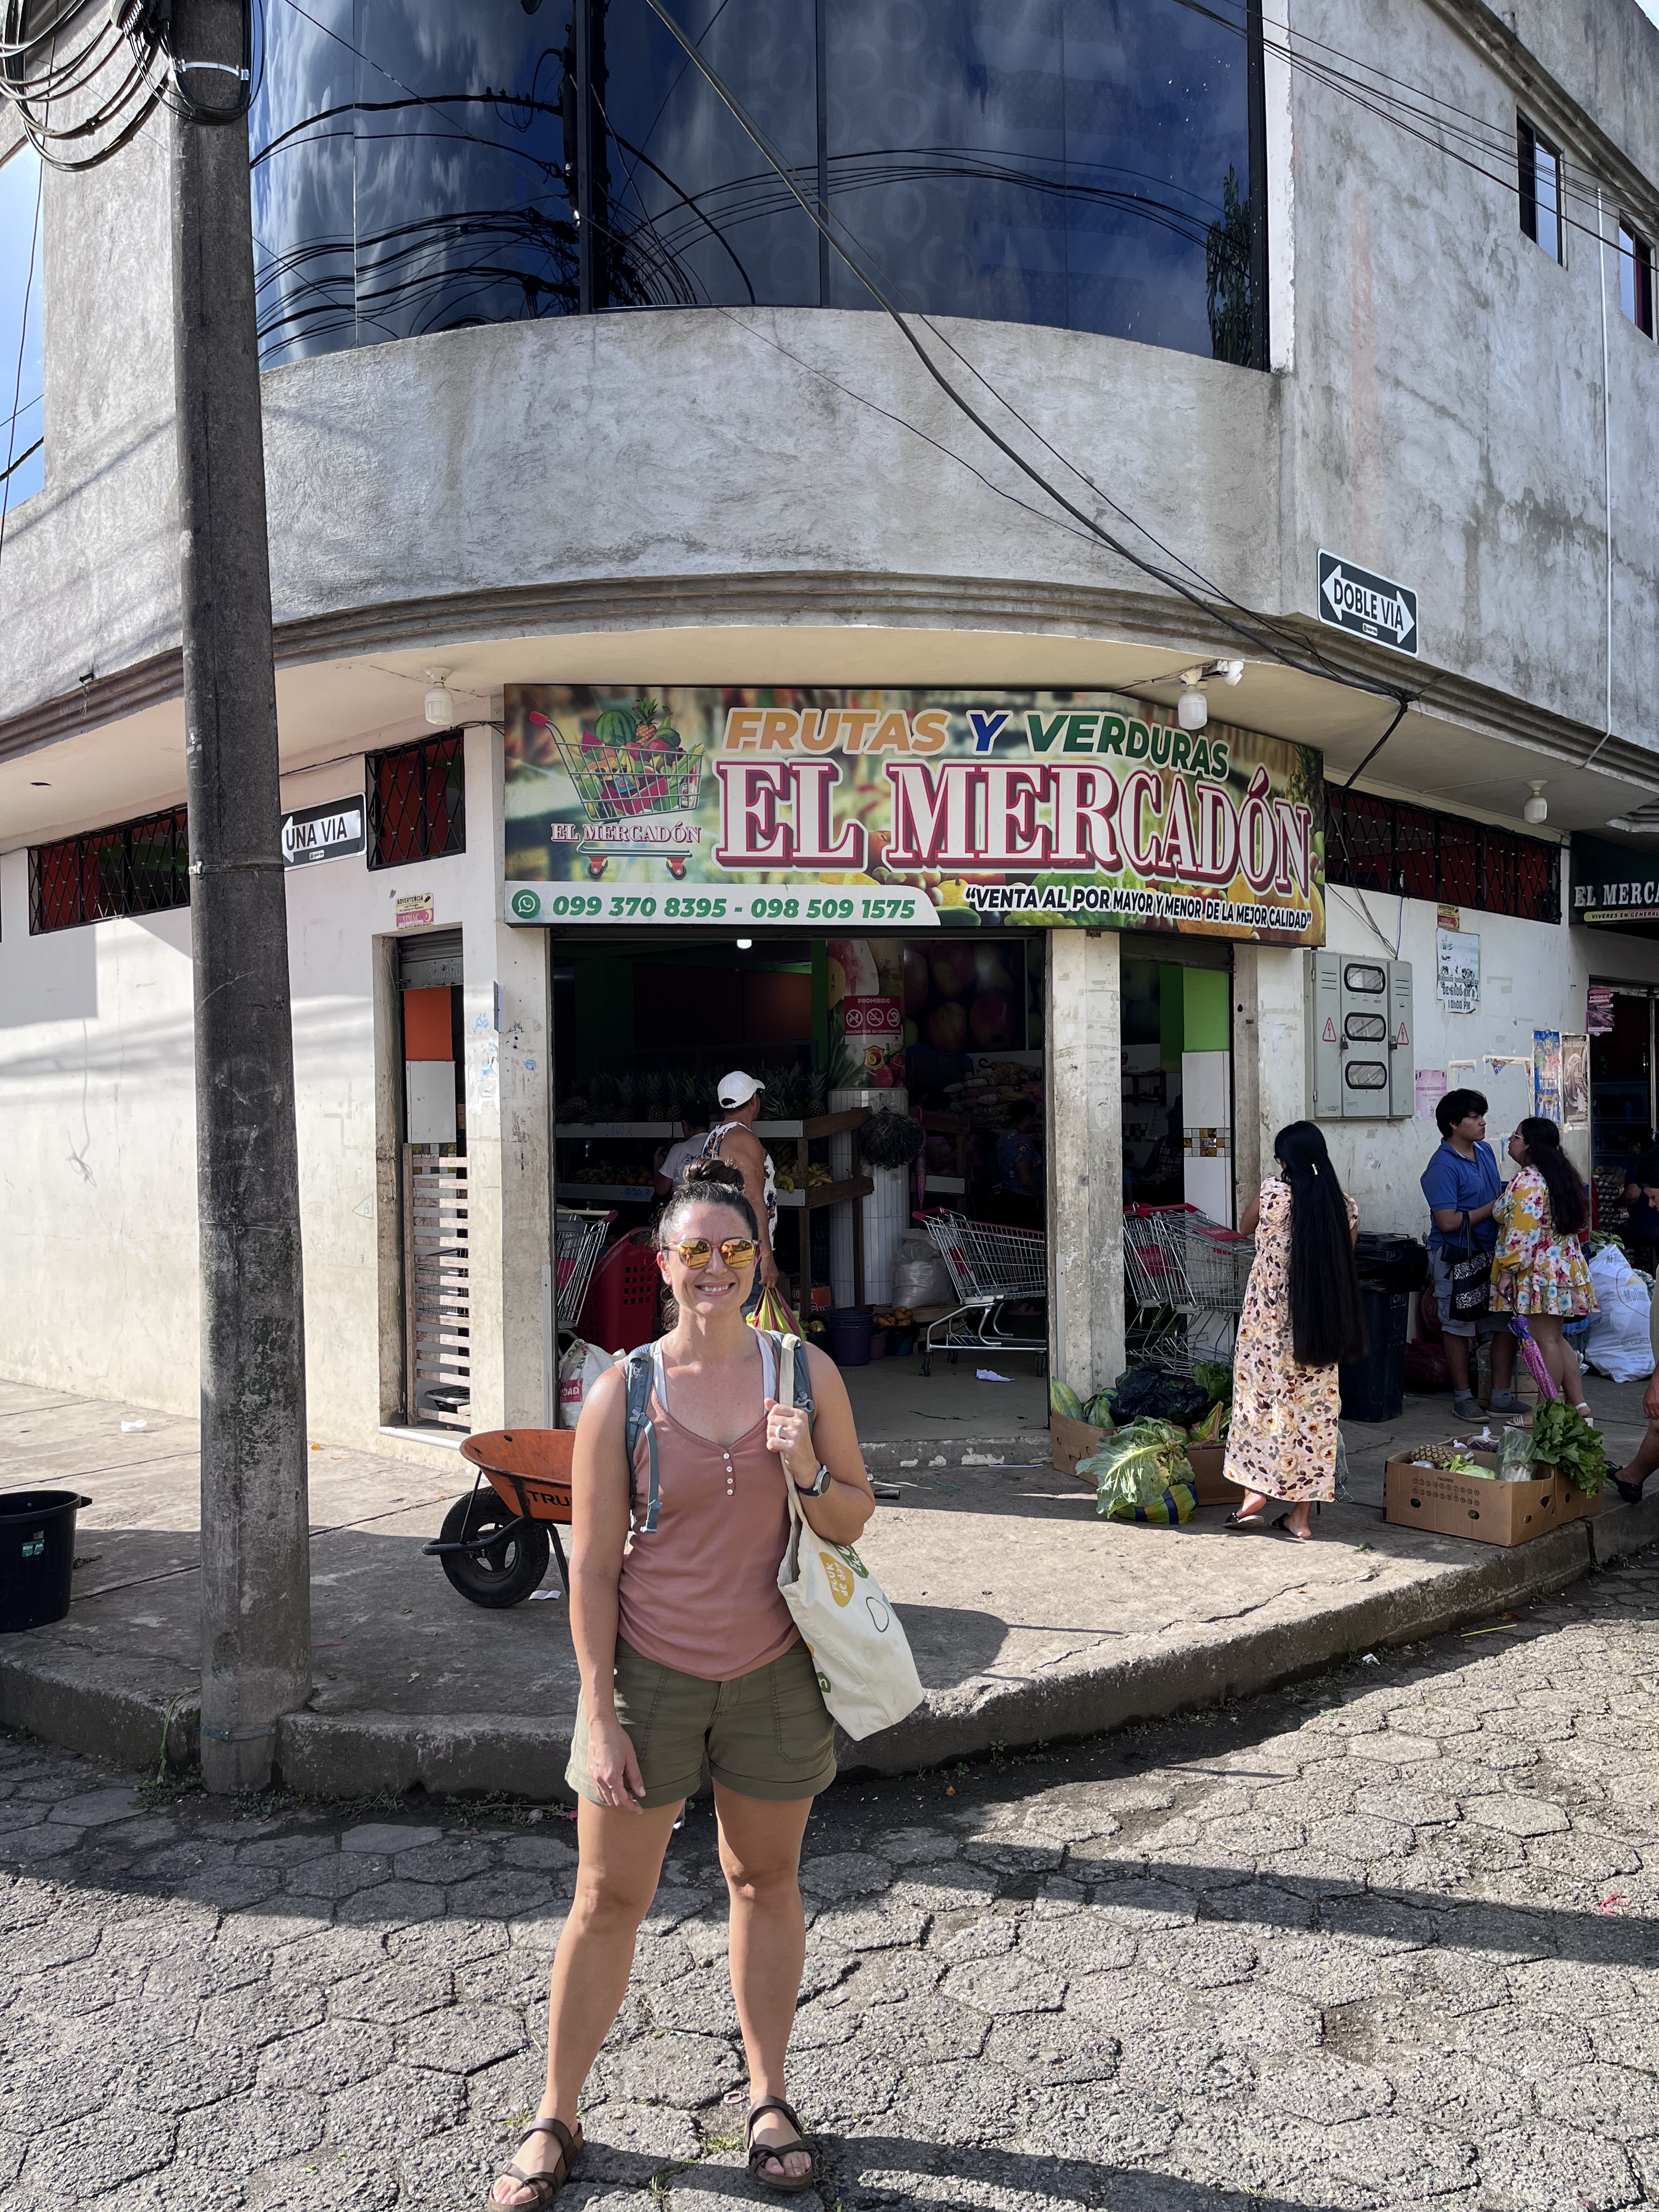
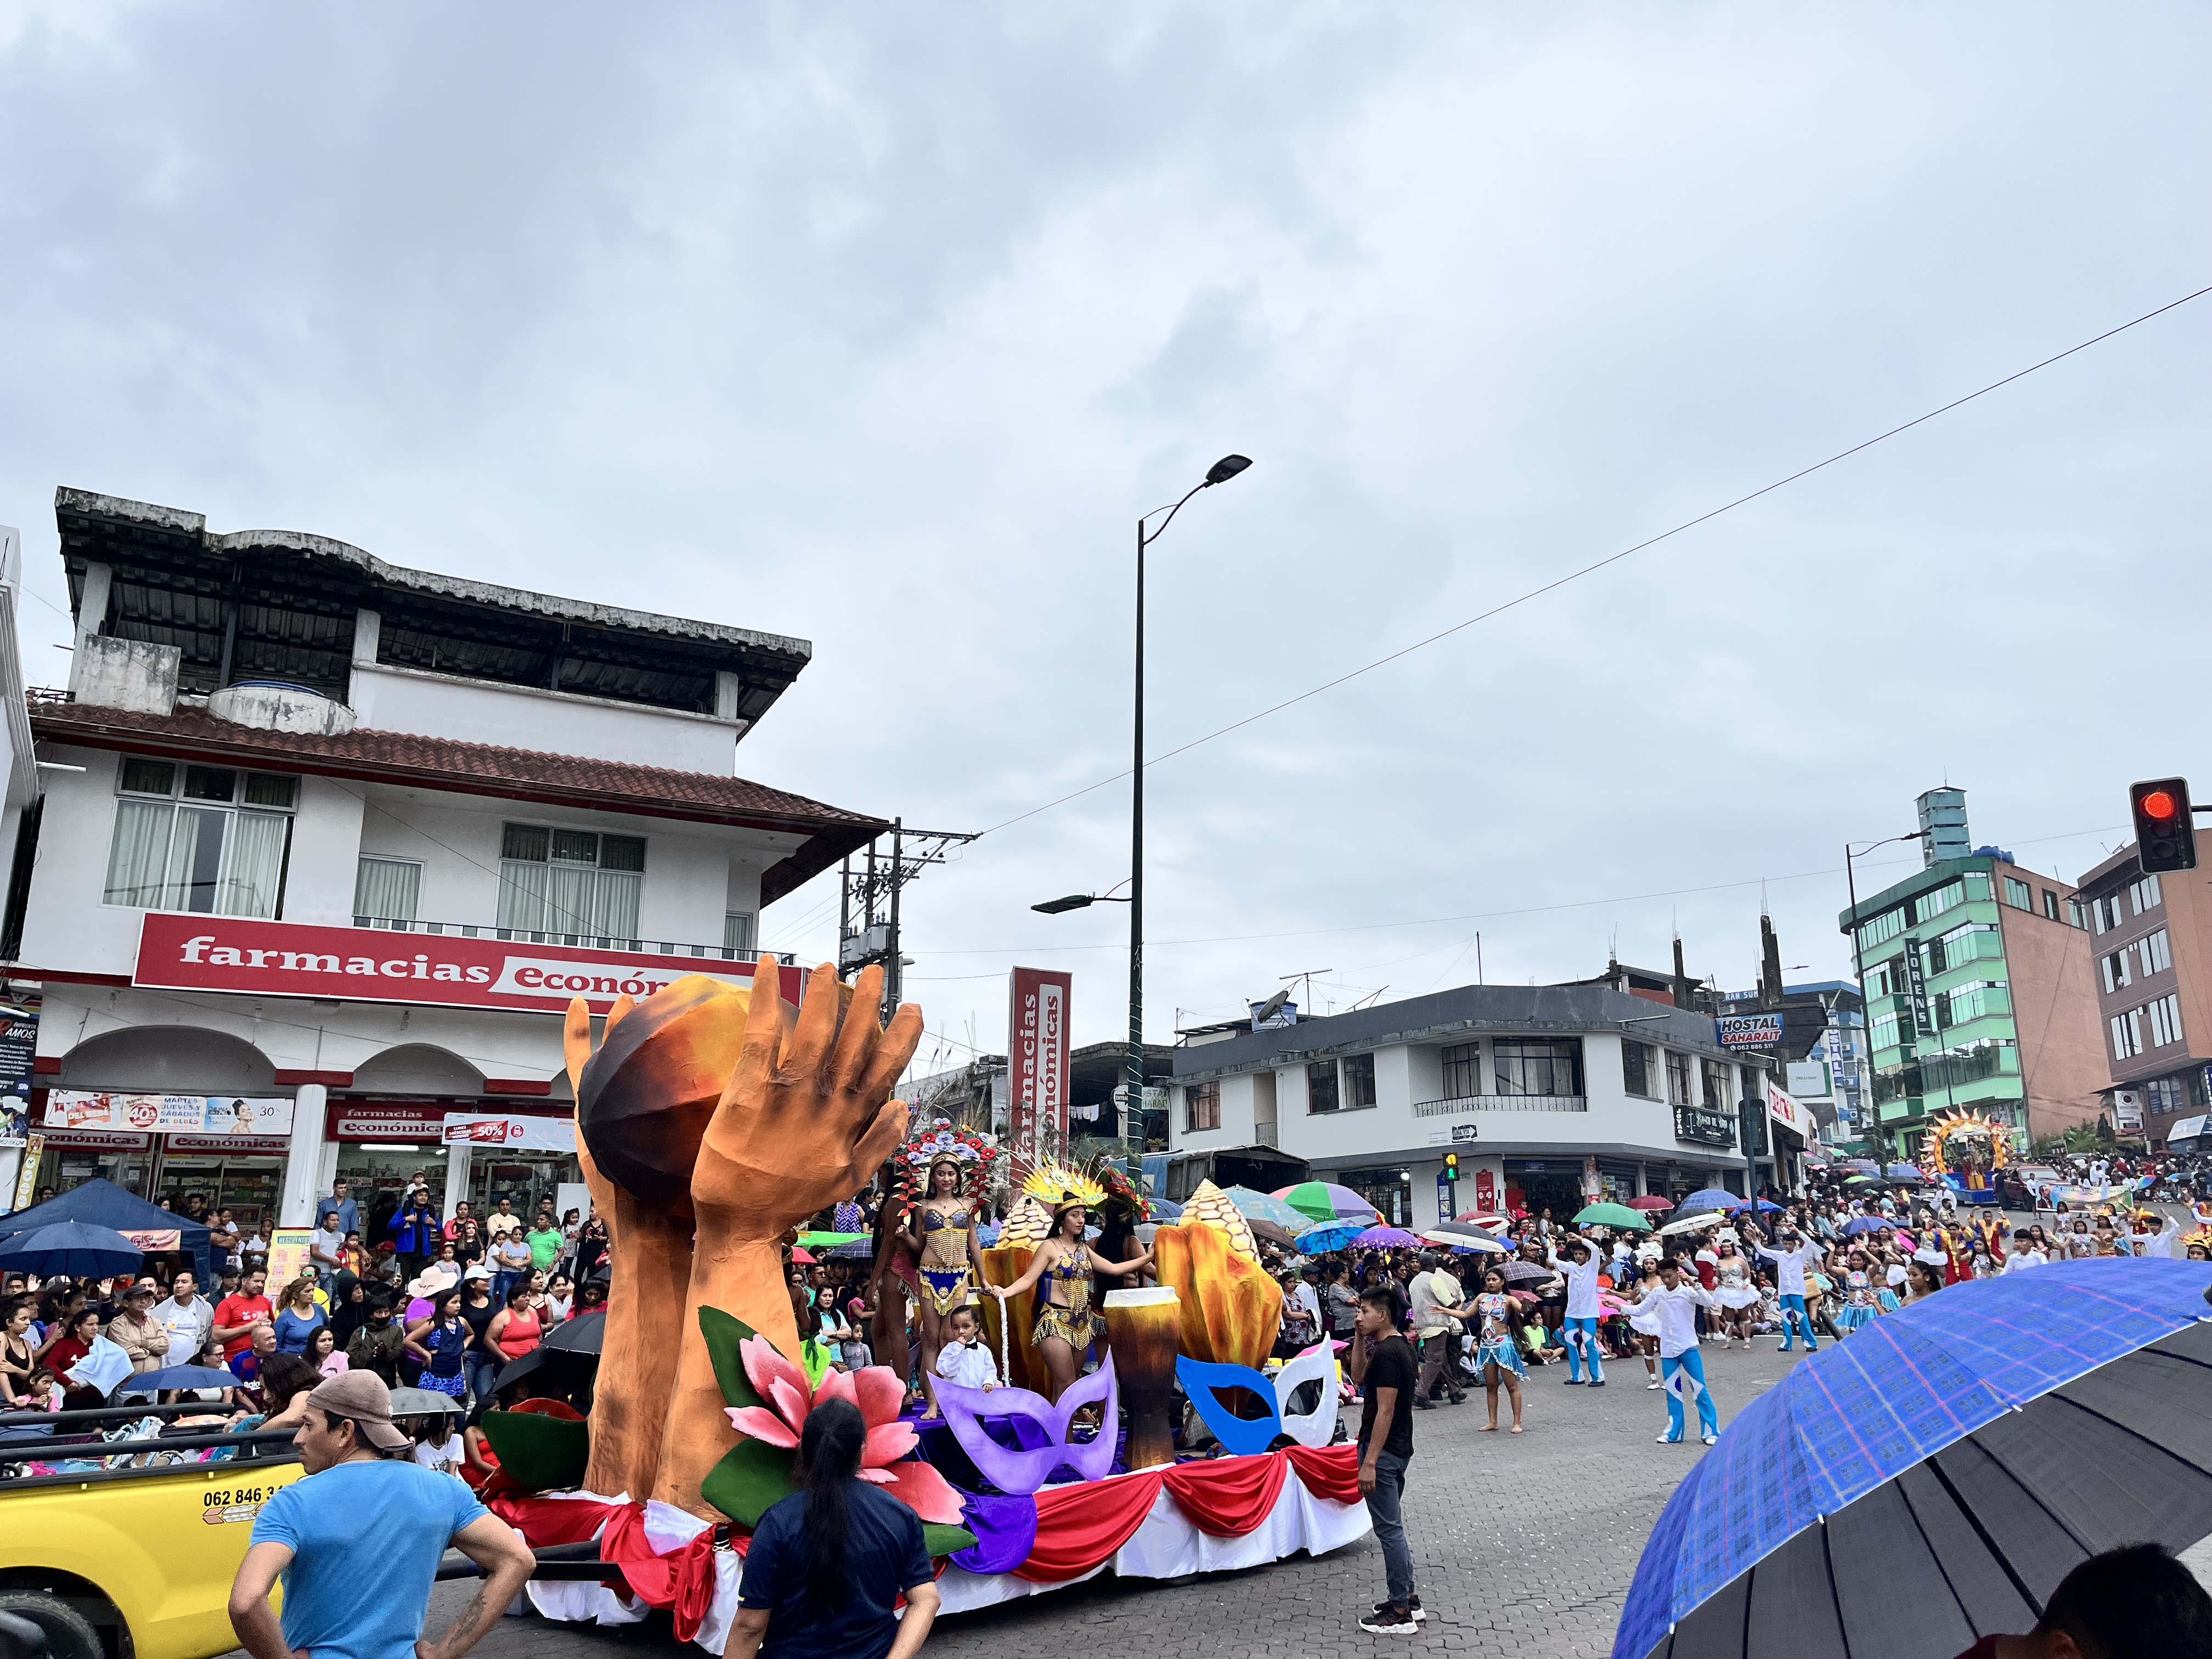
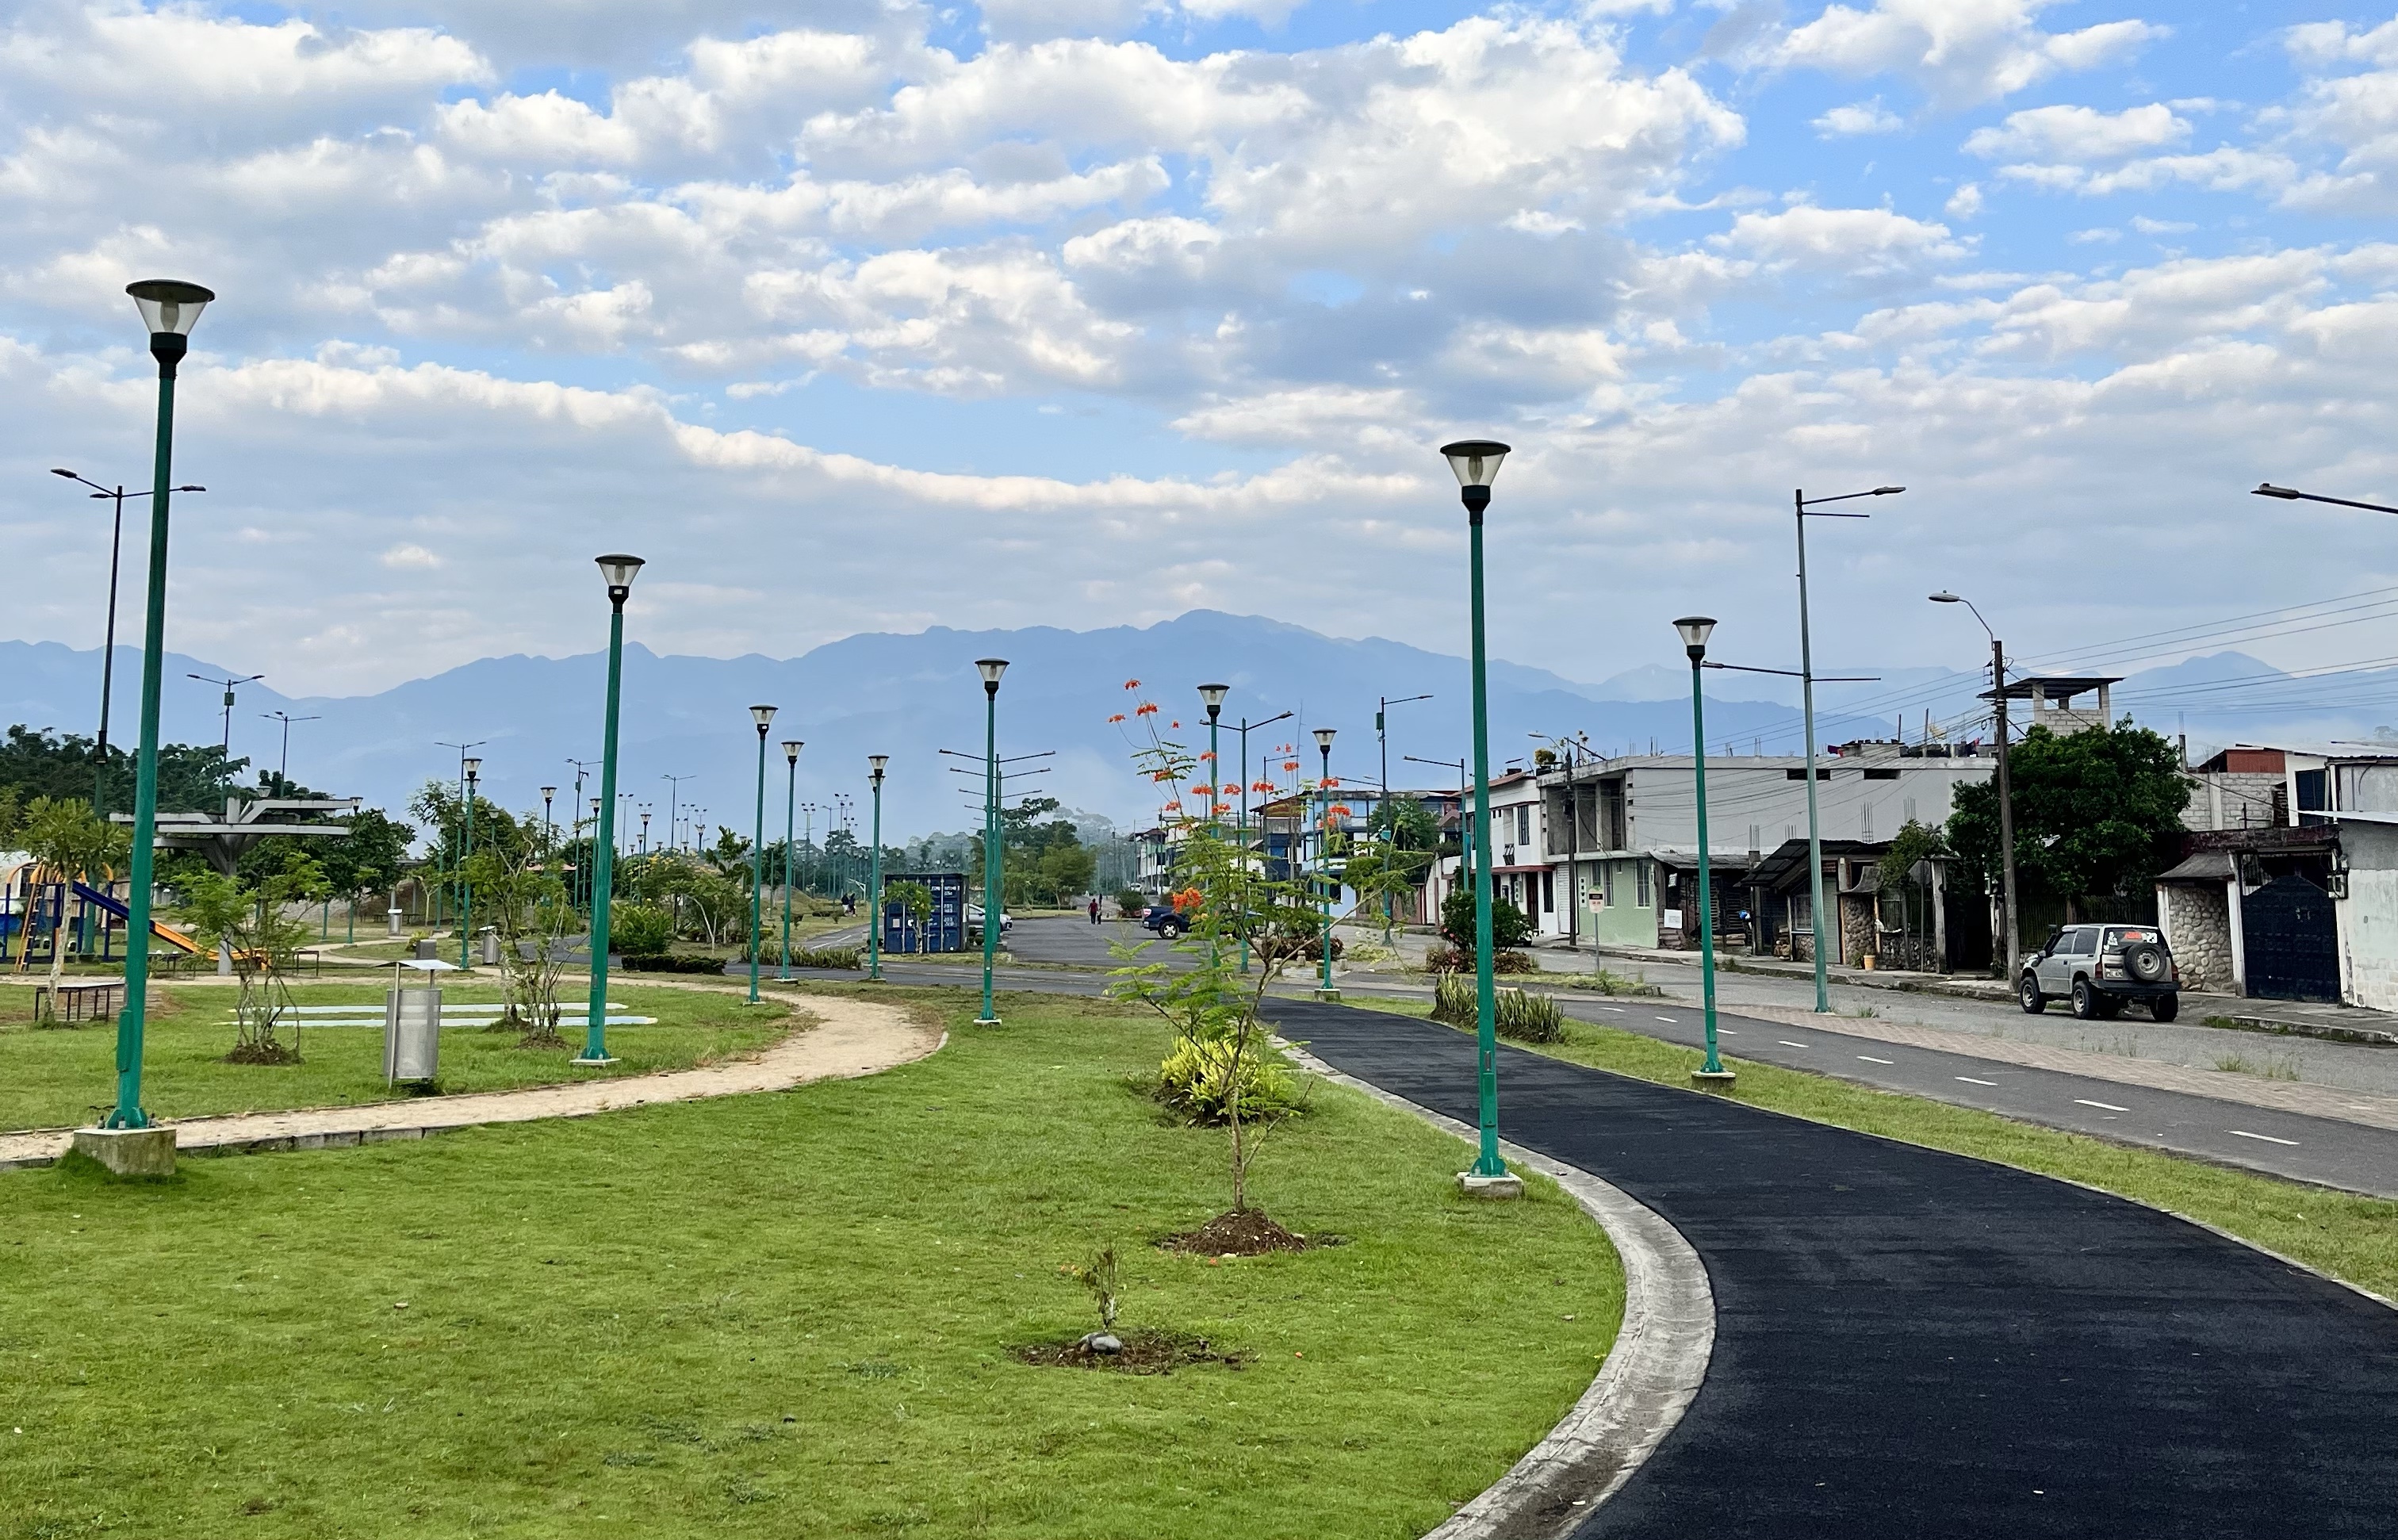
The trash truck (which played the official song of Napo to let you know it was coming), the way the fog over the river in the morning could predict the weather (fog meant it was going to be a scorcher!), Oropendulas and Rufus-collard sparrows (local birds), encebollado (the national dish of Ecuador and the best $3 lunch of all-time; I recommend Cevichería Bachita if you’re ever in Tena), Tres Hermanos (our local grocery store), leaf cutter ants, Grandma at latienda around the corner (who would give you change in candy if she was short on coins), our apartment (but not the couch), the house geckos (all named Arthur or baby Arthur), pan de yuca, the walk across the bridge to the gym in the morning, the way the river Pano and Tena converged, $1 worth of eggs in a bag, El Mercadon (the best fruit and veggie local in the city), Cafetería Hamilton (and tigrillo de yuca), the view of the Sumaco volcano from our roof, ALL THE PARADES (sometimes also viewed from the roof!), monkeys, roof party nights, el Parque Lineal (the park where I took many a walk), coco(nut) juice, the walk from Aula 11 (the lab) to the insectaries at Ikiam (the university), fried tilapia, cheap fruit, Bunker (the restaurant that finally fulfilled our dream of being a regular; they knew our order and stopped giving us menus), resort for the day (before they changed the rules), the off-tune police band, helado con queso, the lab kitty and puppies, smushy bus rides (ok, maybe not, but you can get anywhere in the country for cheap, and I like that), $1.50 per kilo laundry (wash, dry, fold, and deliver!), and cheap lunches (for example, secos for $2.50 and bollo de pescado for $3).
The view from our bedroom window. Fog meant it was going to be a super hot day!Oropendola nests.Encebollado at Cevechería Bachita in Tena.Our apartment building.The main pedestrian bridge.Convergence of the Rios Pano and Tena after rain somewhere else!A dollar’s worth of eggs.El Mercadon, the best fruit and veggie place.Tigrillo de yuca at Cafeterìa Hamilton.Volcano Sumaco from our roof.Parade for the foundation of Tena.Squirrel monkeys in Parque La Isla in Tena.Roof party with the original crew (minus José, who’s taking the picture).Parque Lineal.17 bananas for $1.Thursday nights at Bunker with Lin and Jorge.Resort of the day.Helado con queso (ice cream with cheese).Can you spot Michi (the kitty)?Princessa and Laica.Sitting together wasn’t always possible (ha).Bollo de pescado.
Last but certainly not least, the positive experience we had in Ecuador is majorly attributed to the people we met, both those that we met in passing and those who became friends. Without exaggeration, every single person we met in passing was welcoming, patient with our Spanish level, curious about what Shane did for work, and interested to hear what we liked about their country.
A todas las personas que se convertieron amigos, dijimos antes de salir, pero nuestro tiempo no seria el mismo sin ustedes. Gracias para compartir tu vida y cultura, y, mas importante, tu amistad.
And with that, sadly, life goes on, and we’re off into our next phase of life.
Pero, Ecuador siempre tendré un pedazo especial en mi corazón.Espero que nos vemos muy pronto.
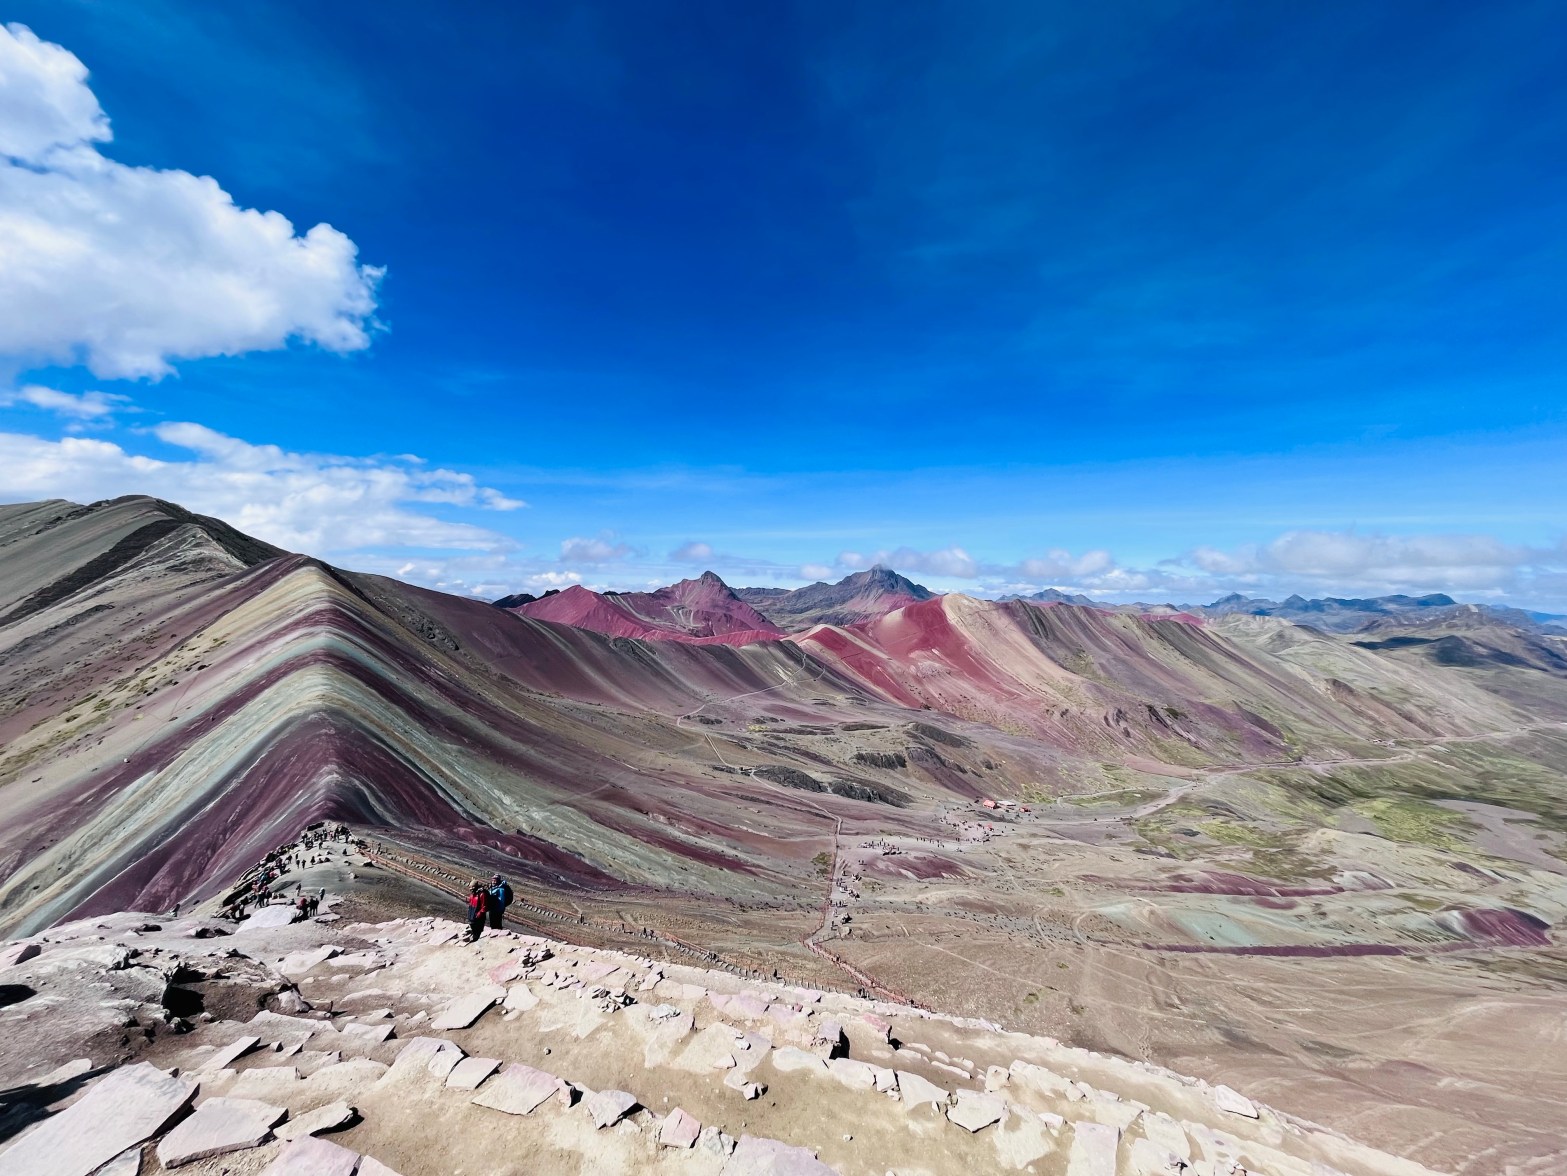
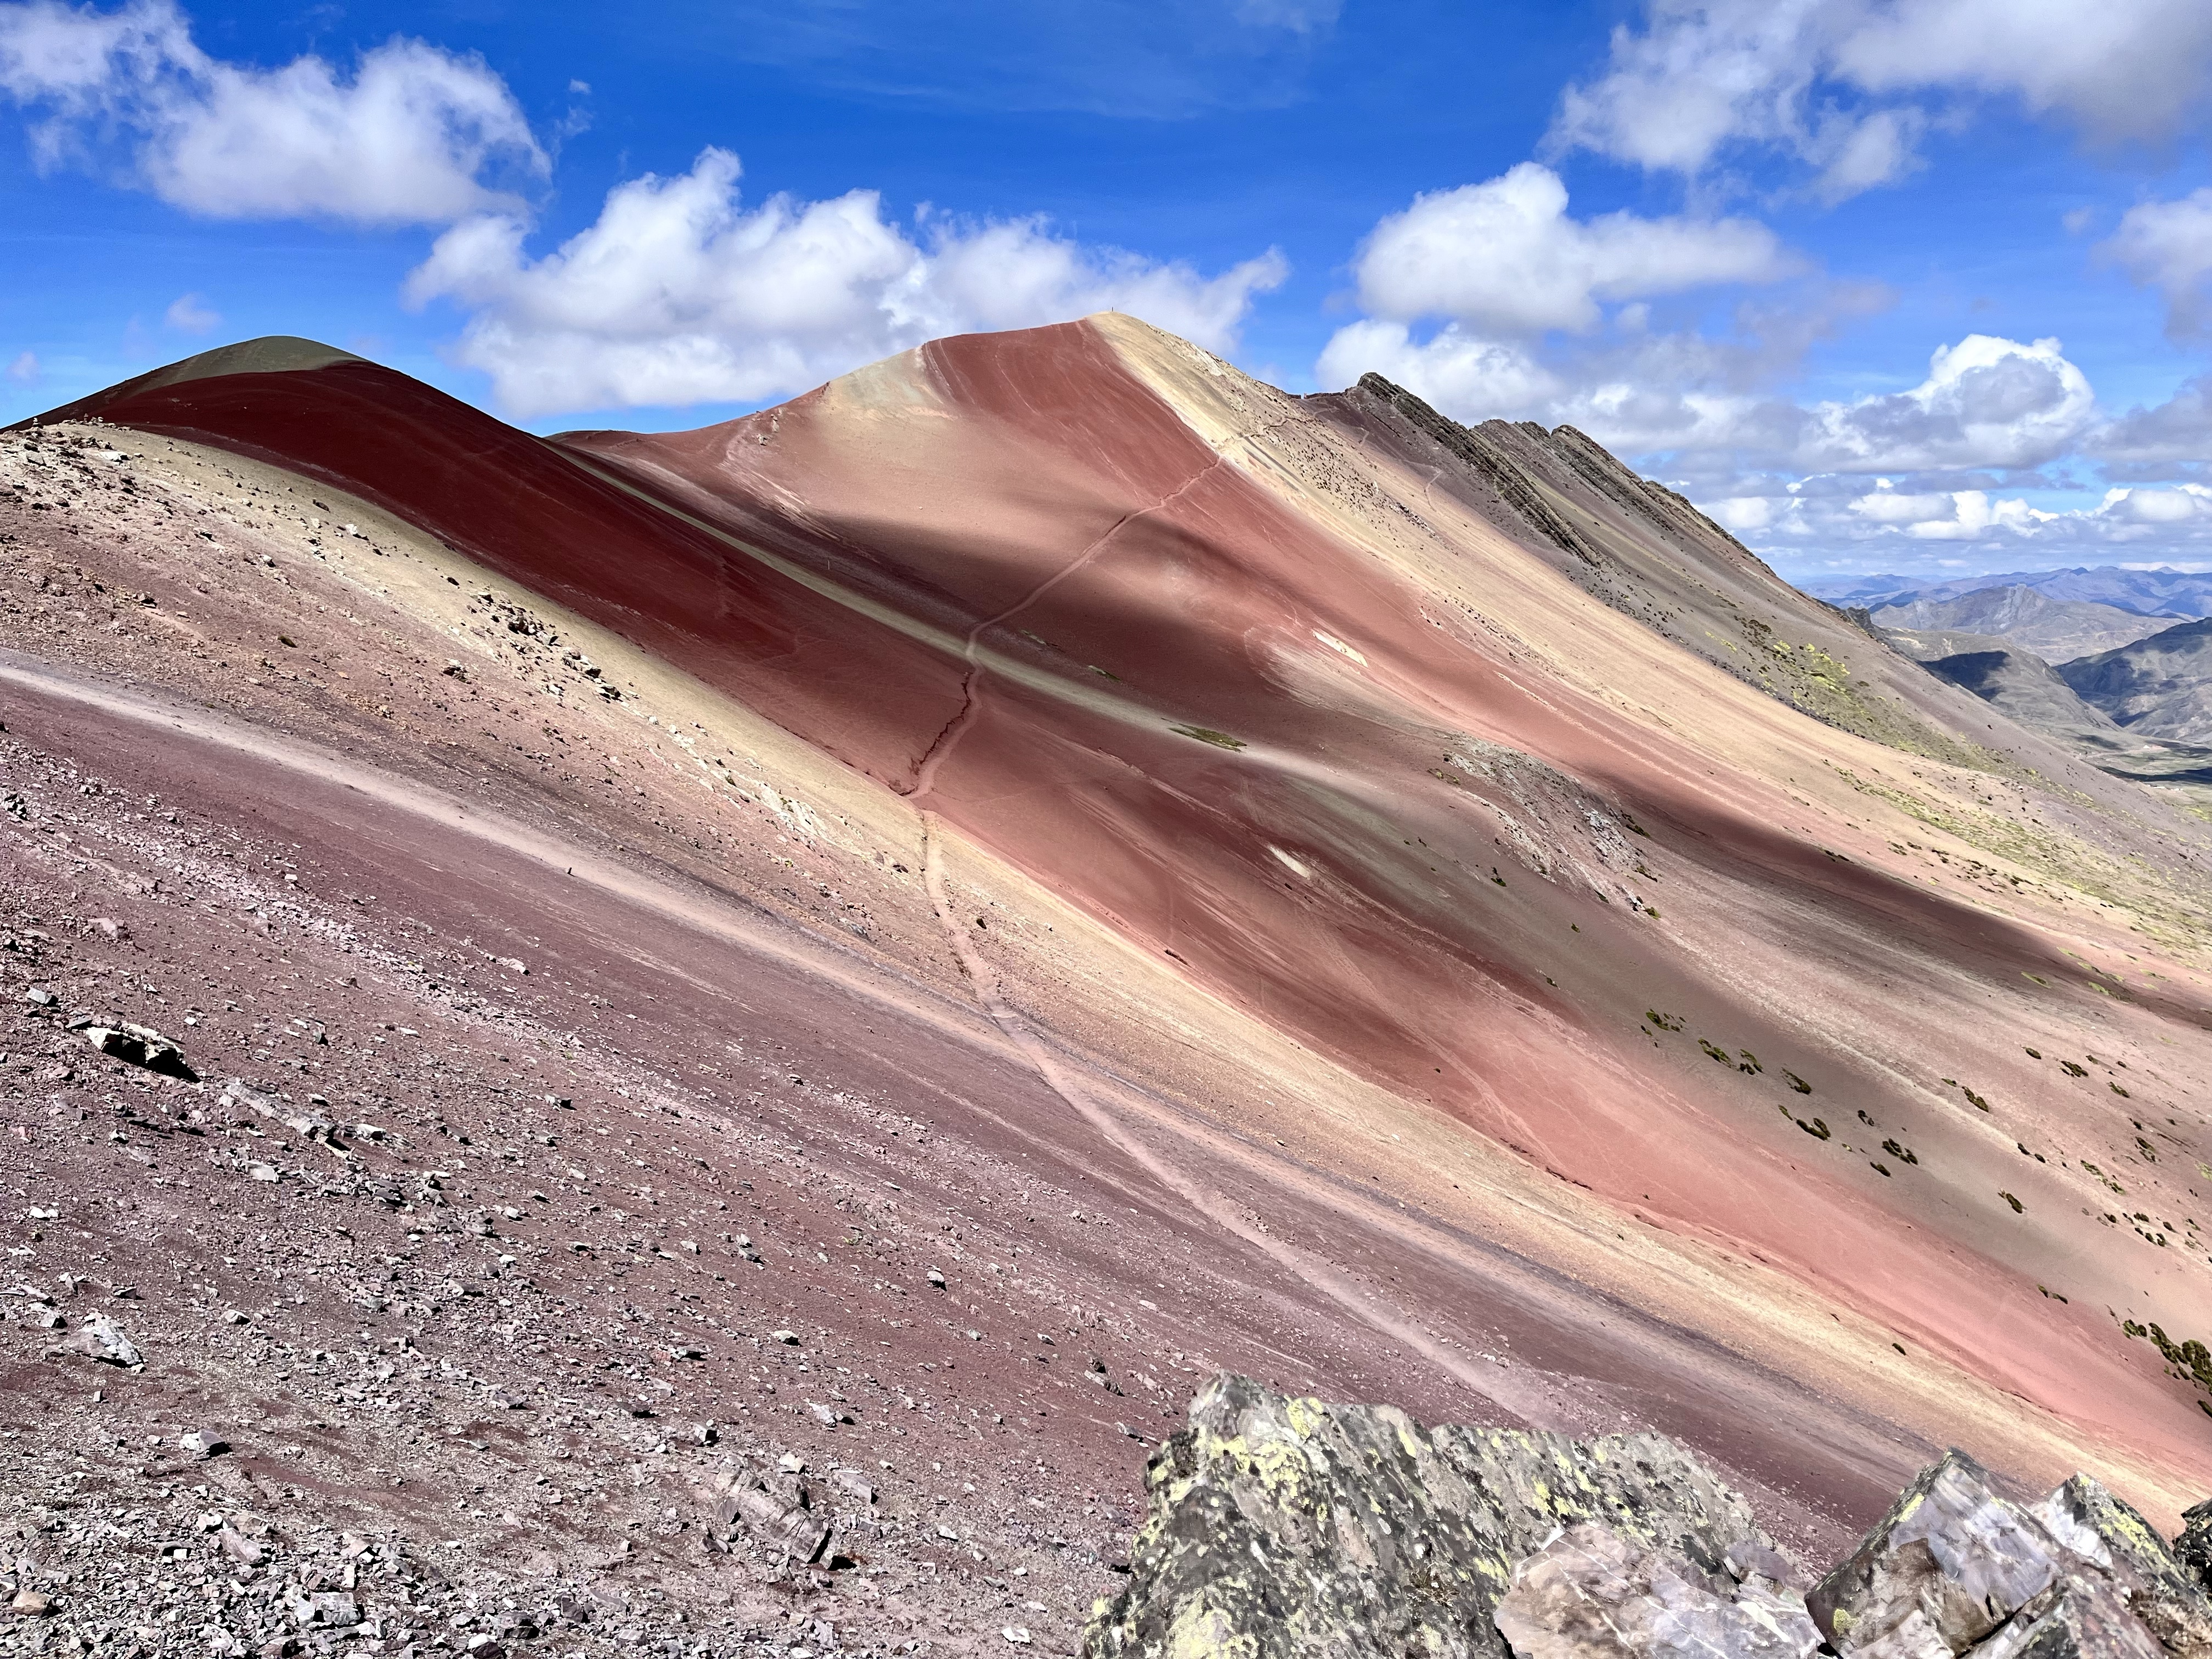
On the last of our three full days in Cusco, we scheduled a tour to Rainbow Mountain, or la Montaña de Siete Colores (the mountain of seven colors). For the record, we were exhausted by this point! The nice thing about staying in Cusco is that it’s central for various day trips into the Sacred Valley and Machu Picchu. The bad part is that most tours leave in the early morning hours. This, by far, was our earliest departure, at 3:30 am! 😳
Rainbow Mountain, or Vinicunca in Quechua, is the fastest-growing tourist attraction in Peru, and it’s only been visible since 2013. Before that, the mountain was snow-covered. Thanks to climate change, the colors in these mountains are visible. Unfortunately, climate change made all the colors in these mountains visible.
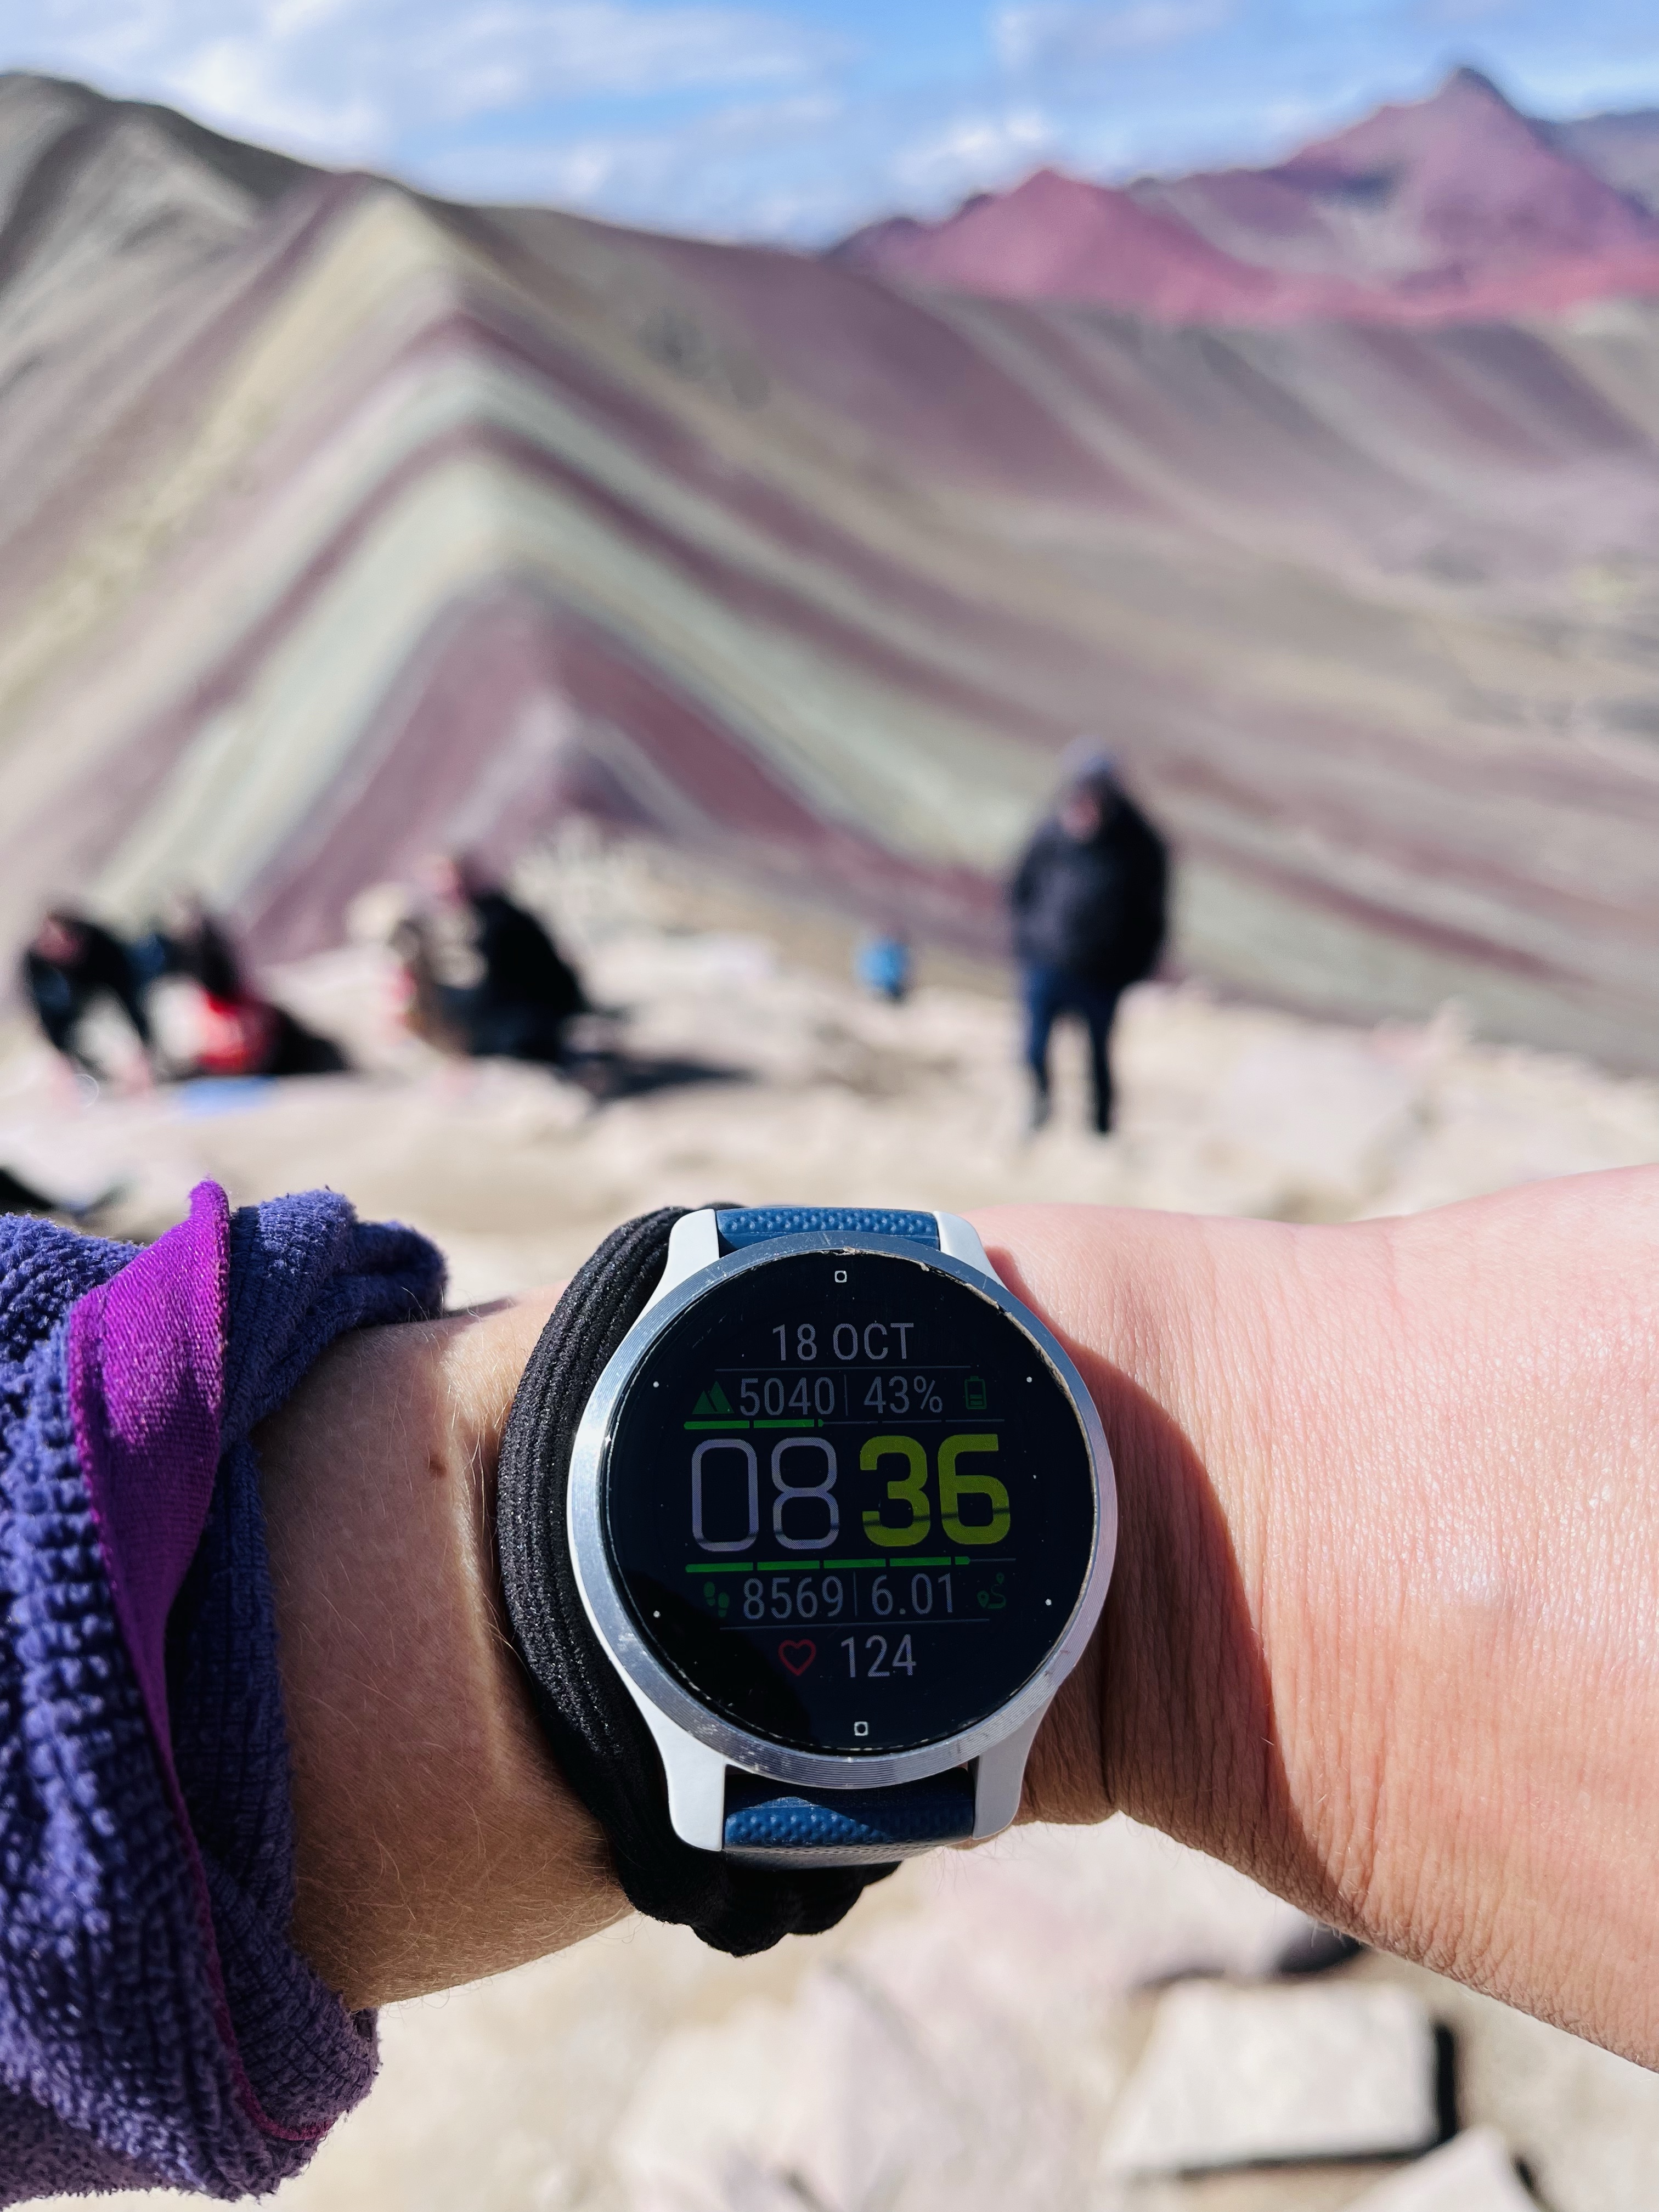
After our 3:30 am pick-up and a stop for breakfast, we arrived at the base of the trail. The walk to the top is only ~4 km (~2.5 miles). But there’s a catch. The trail starts at ~4600 m (~15,000 ft) and ends just above 5000 m (~16,400 ft)! For some context, Mt. Everest base camp sits at ~5365 m (~17,600 ft). This was definitely the highest altitude we’ve ever been!
Early morning arrivals means we are some of the first there.
The walk is split into three parts: “Inca flat” (aka small hills), medium hills, and STEEP at the very end. You can walk the entire way or take a horse 80% of the way. Unfortunately, in the final and steepest section, you have to walk regardless!
The nice part about our early arrival was that we were in the first groups to arrive. Most of our group decided to take a horse. Shane and I walked it and had the trail to ourselves for most of the walk!
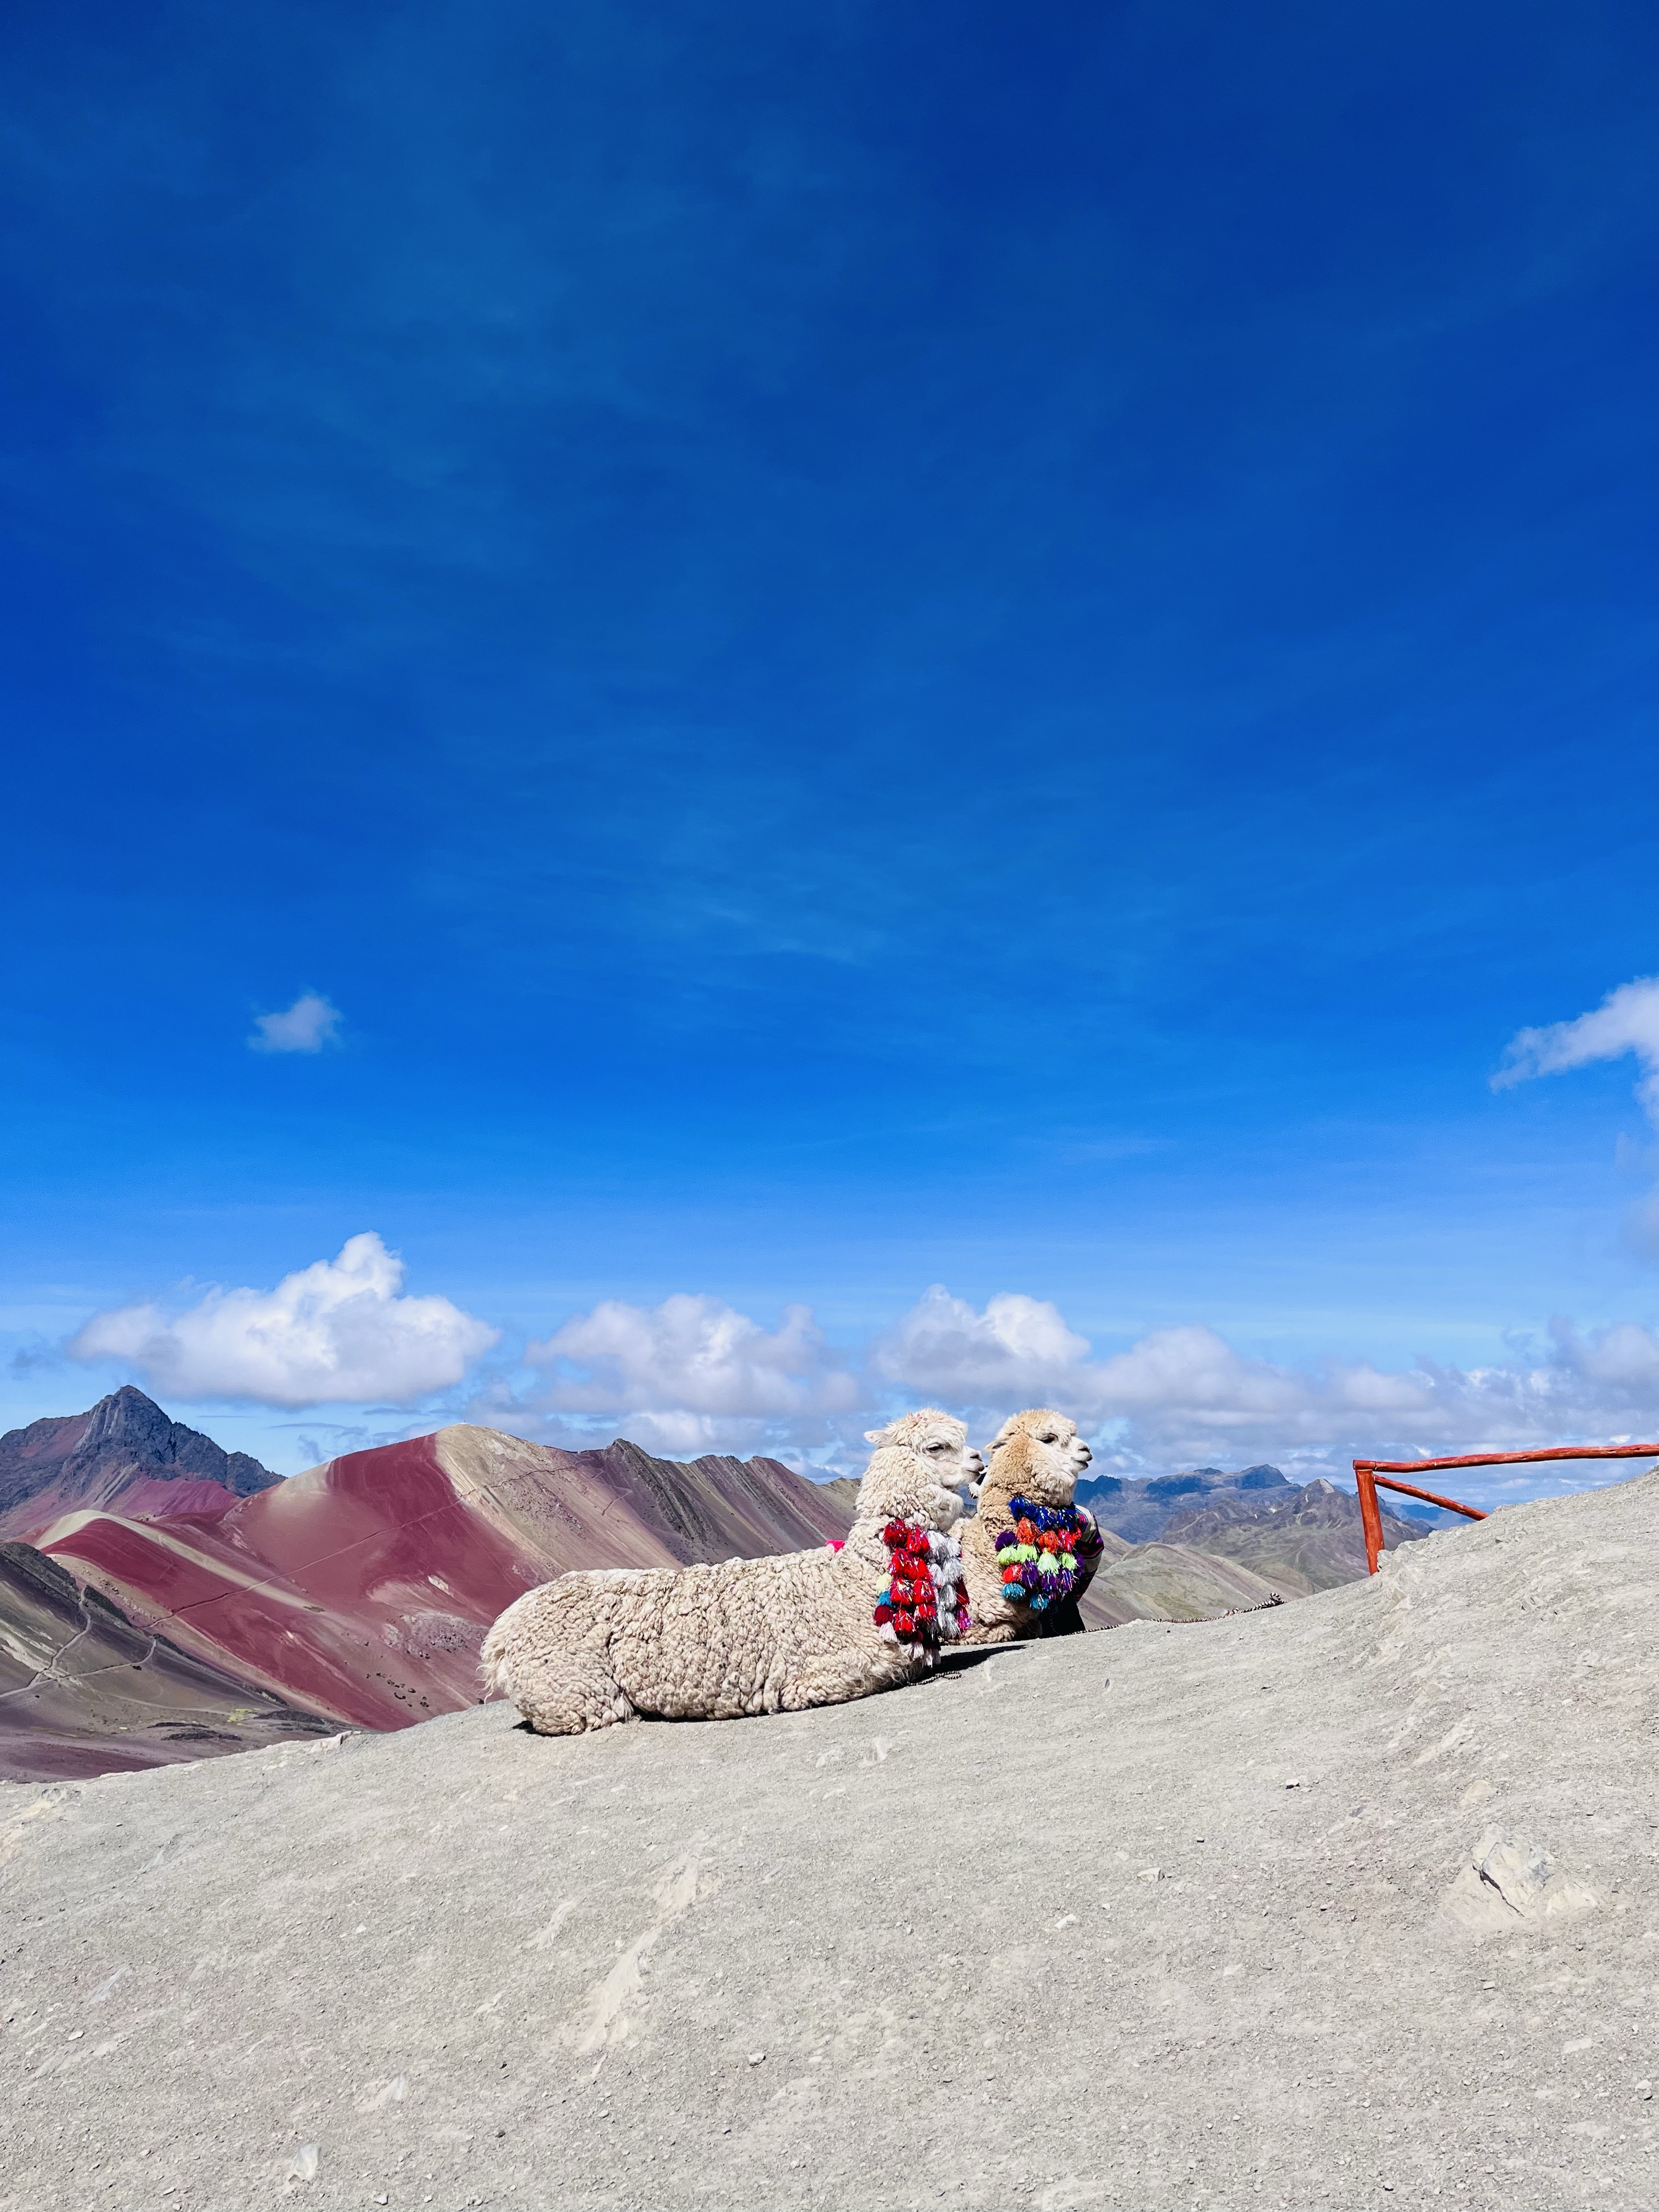
These guys (and gals) walked (and sometimes ran) their horses up and down the mountain several times a day. Quite impressive.
We did, however, have a cute companion in the beginning.
We named her Dina, short for Andina (Andes, in Spanish)
Overall, for us at least, the walk wasn’t that bad. The steep part at the end was indeed very steep, but we both found that if you just walked a slow and steady pace (relative to ourselves), it was much better than quick bursts of walking. Getting your heart rate up too high was when you felt the effects of the altitude the most!
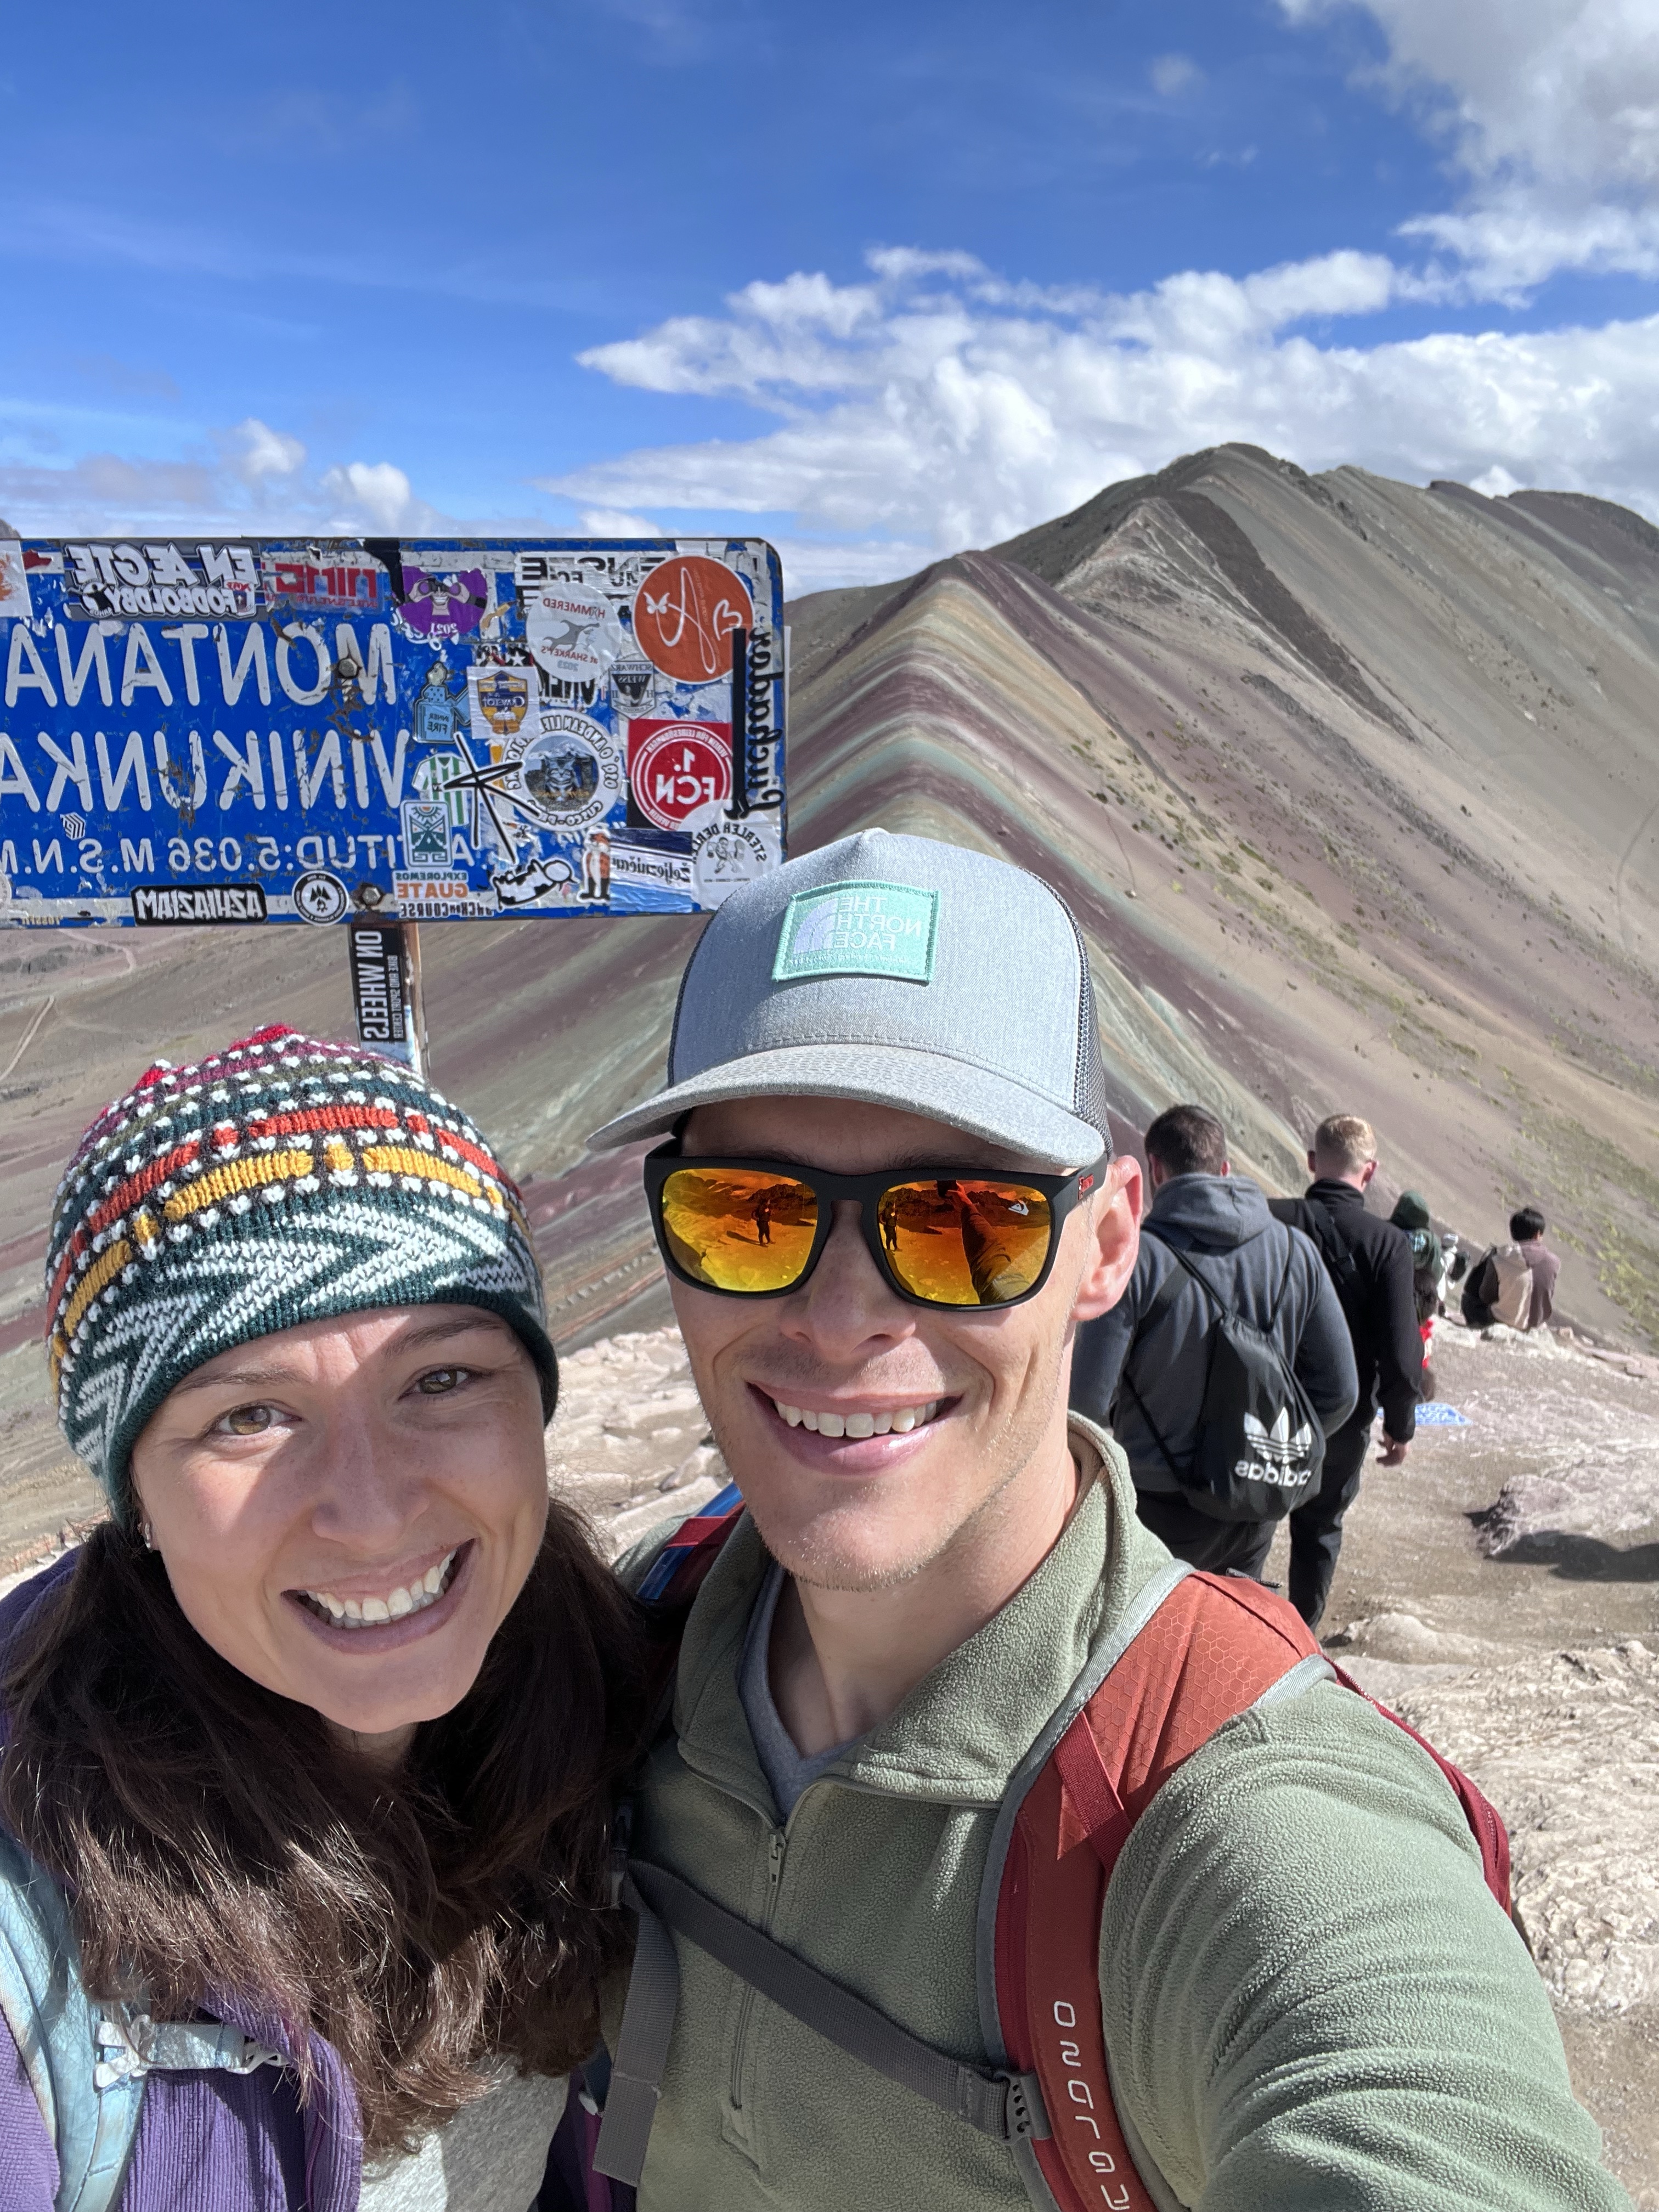
All you have to do is put one foot in front of the other. The view is worth it!
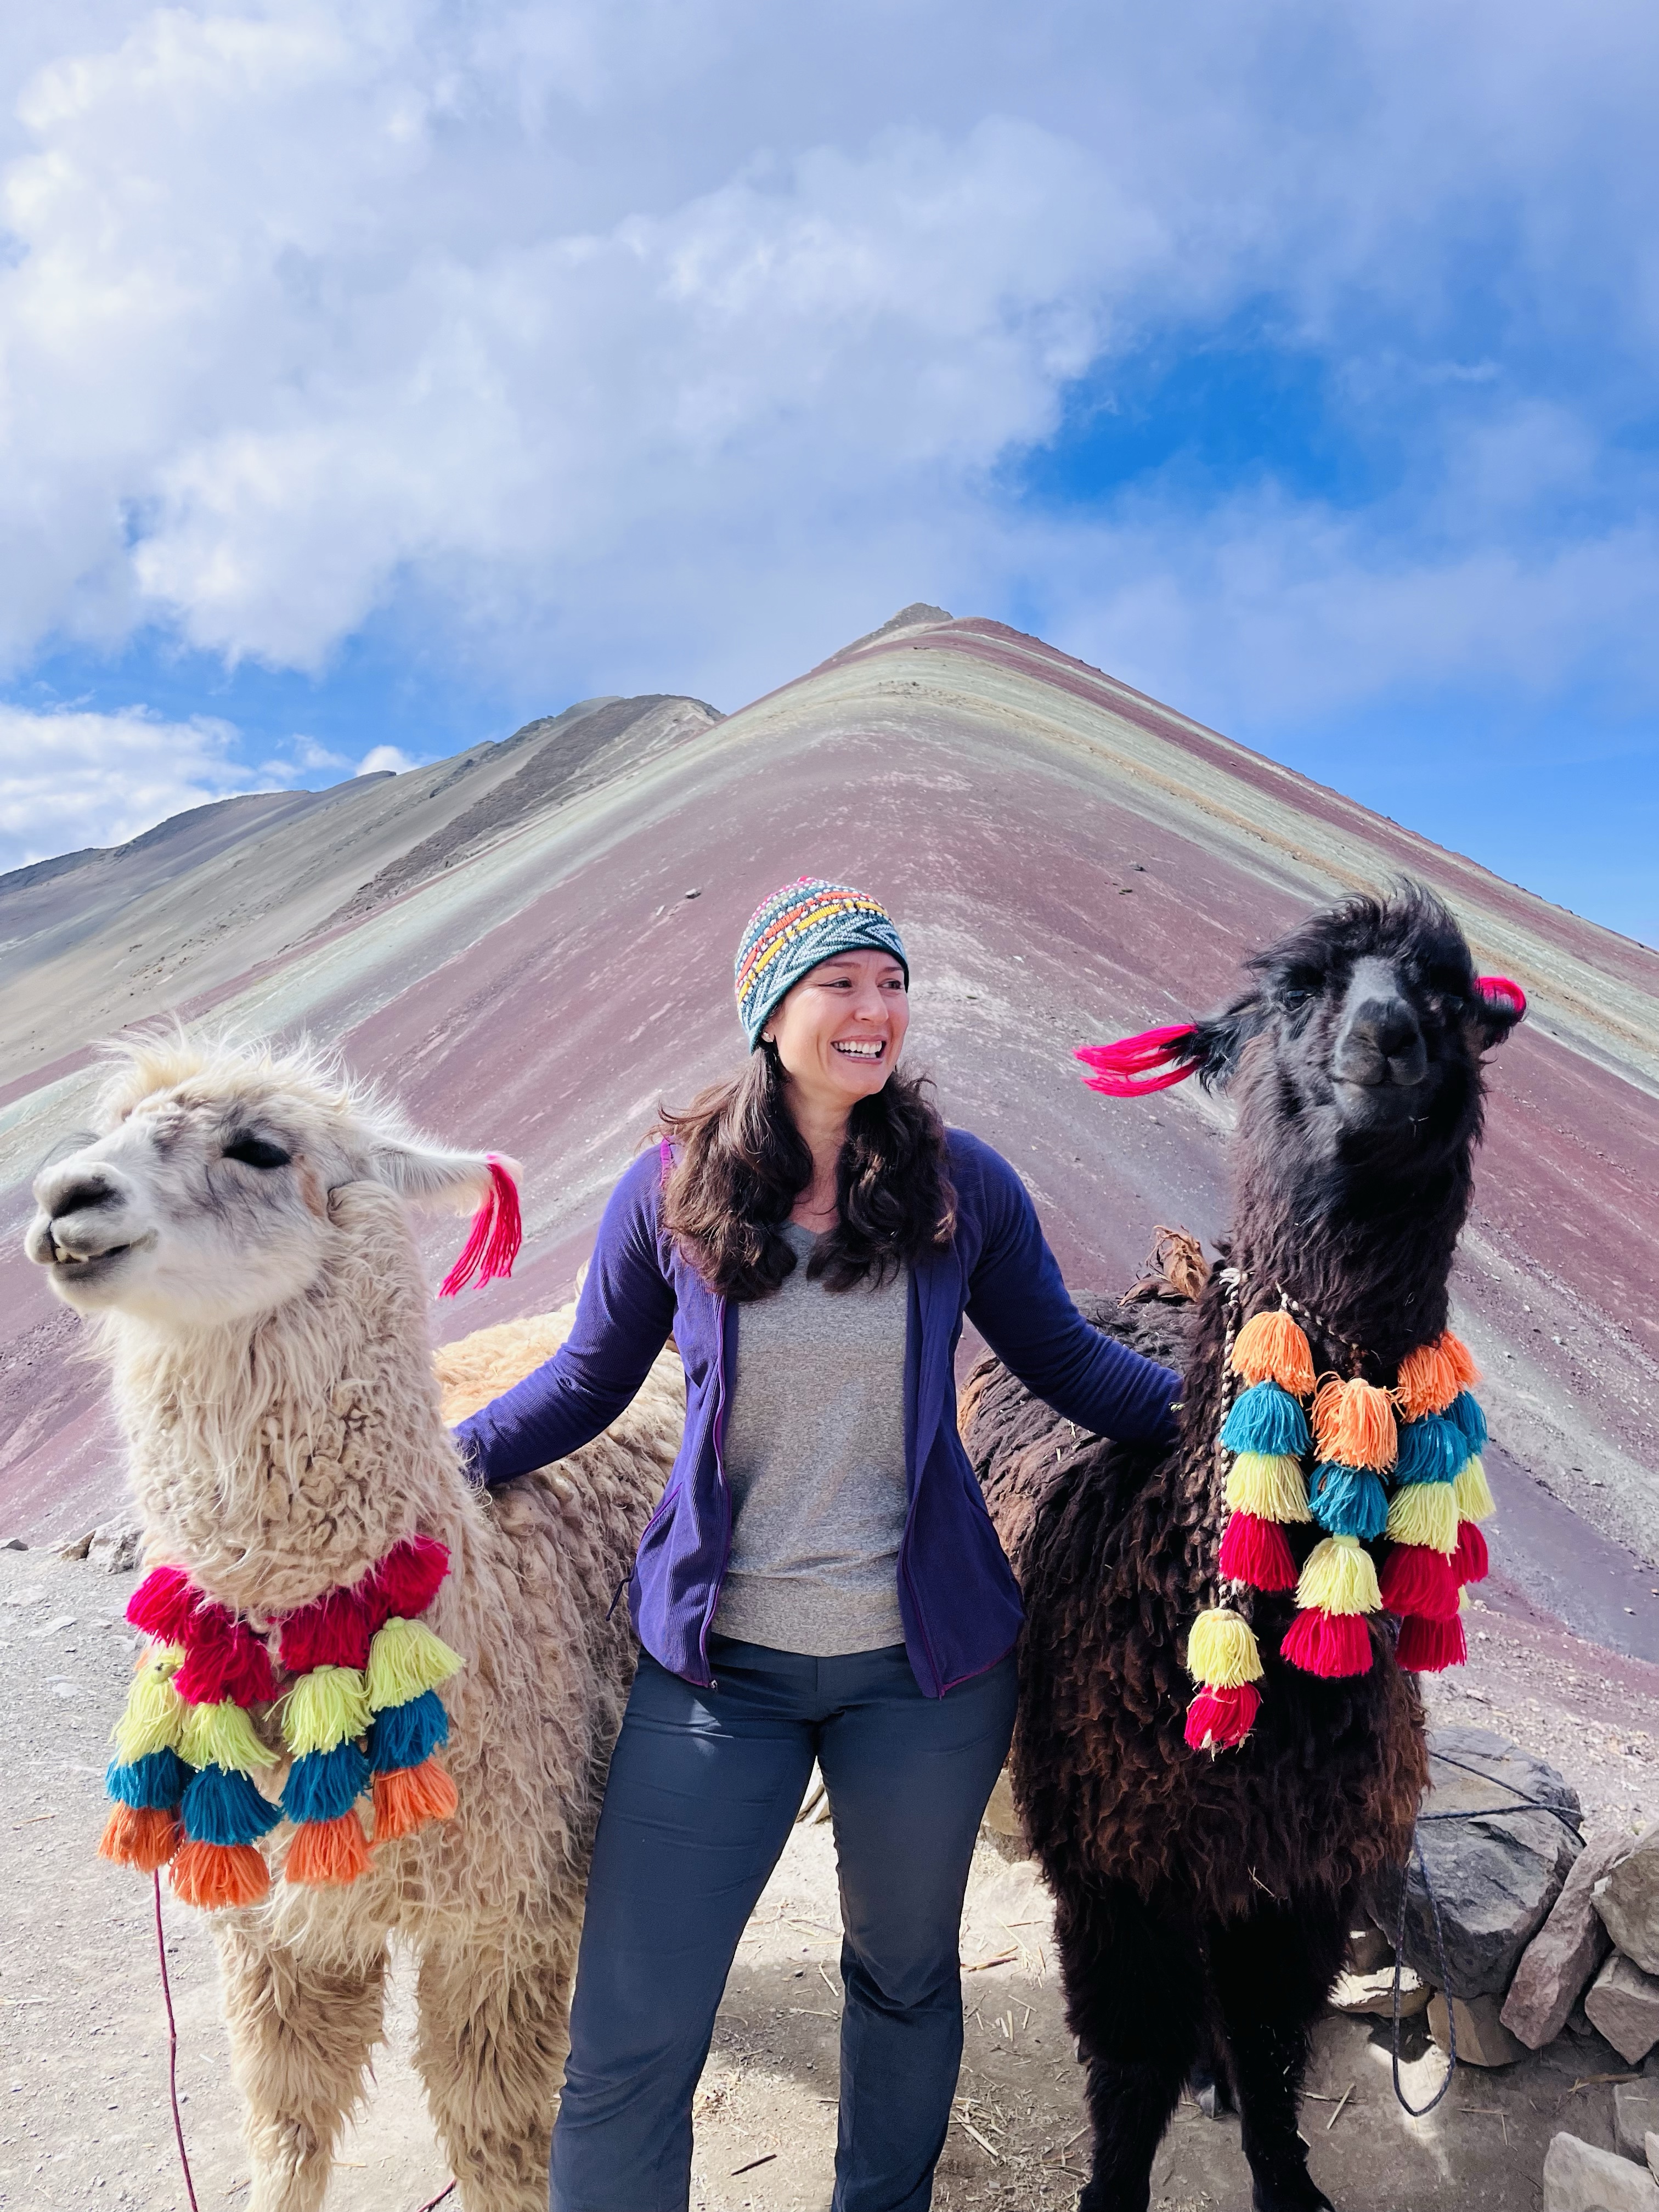
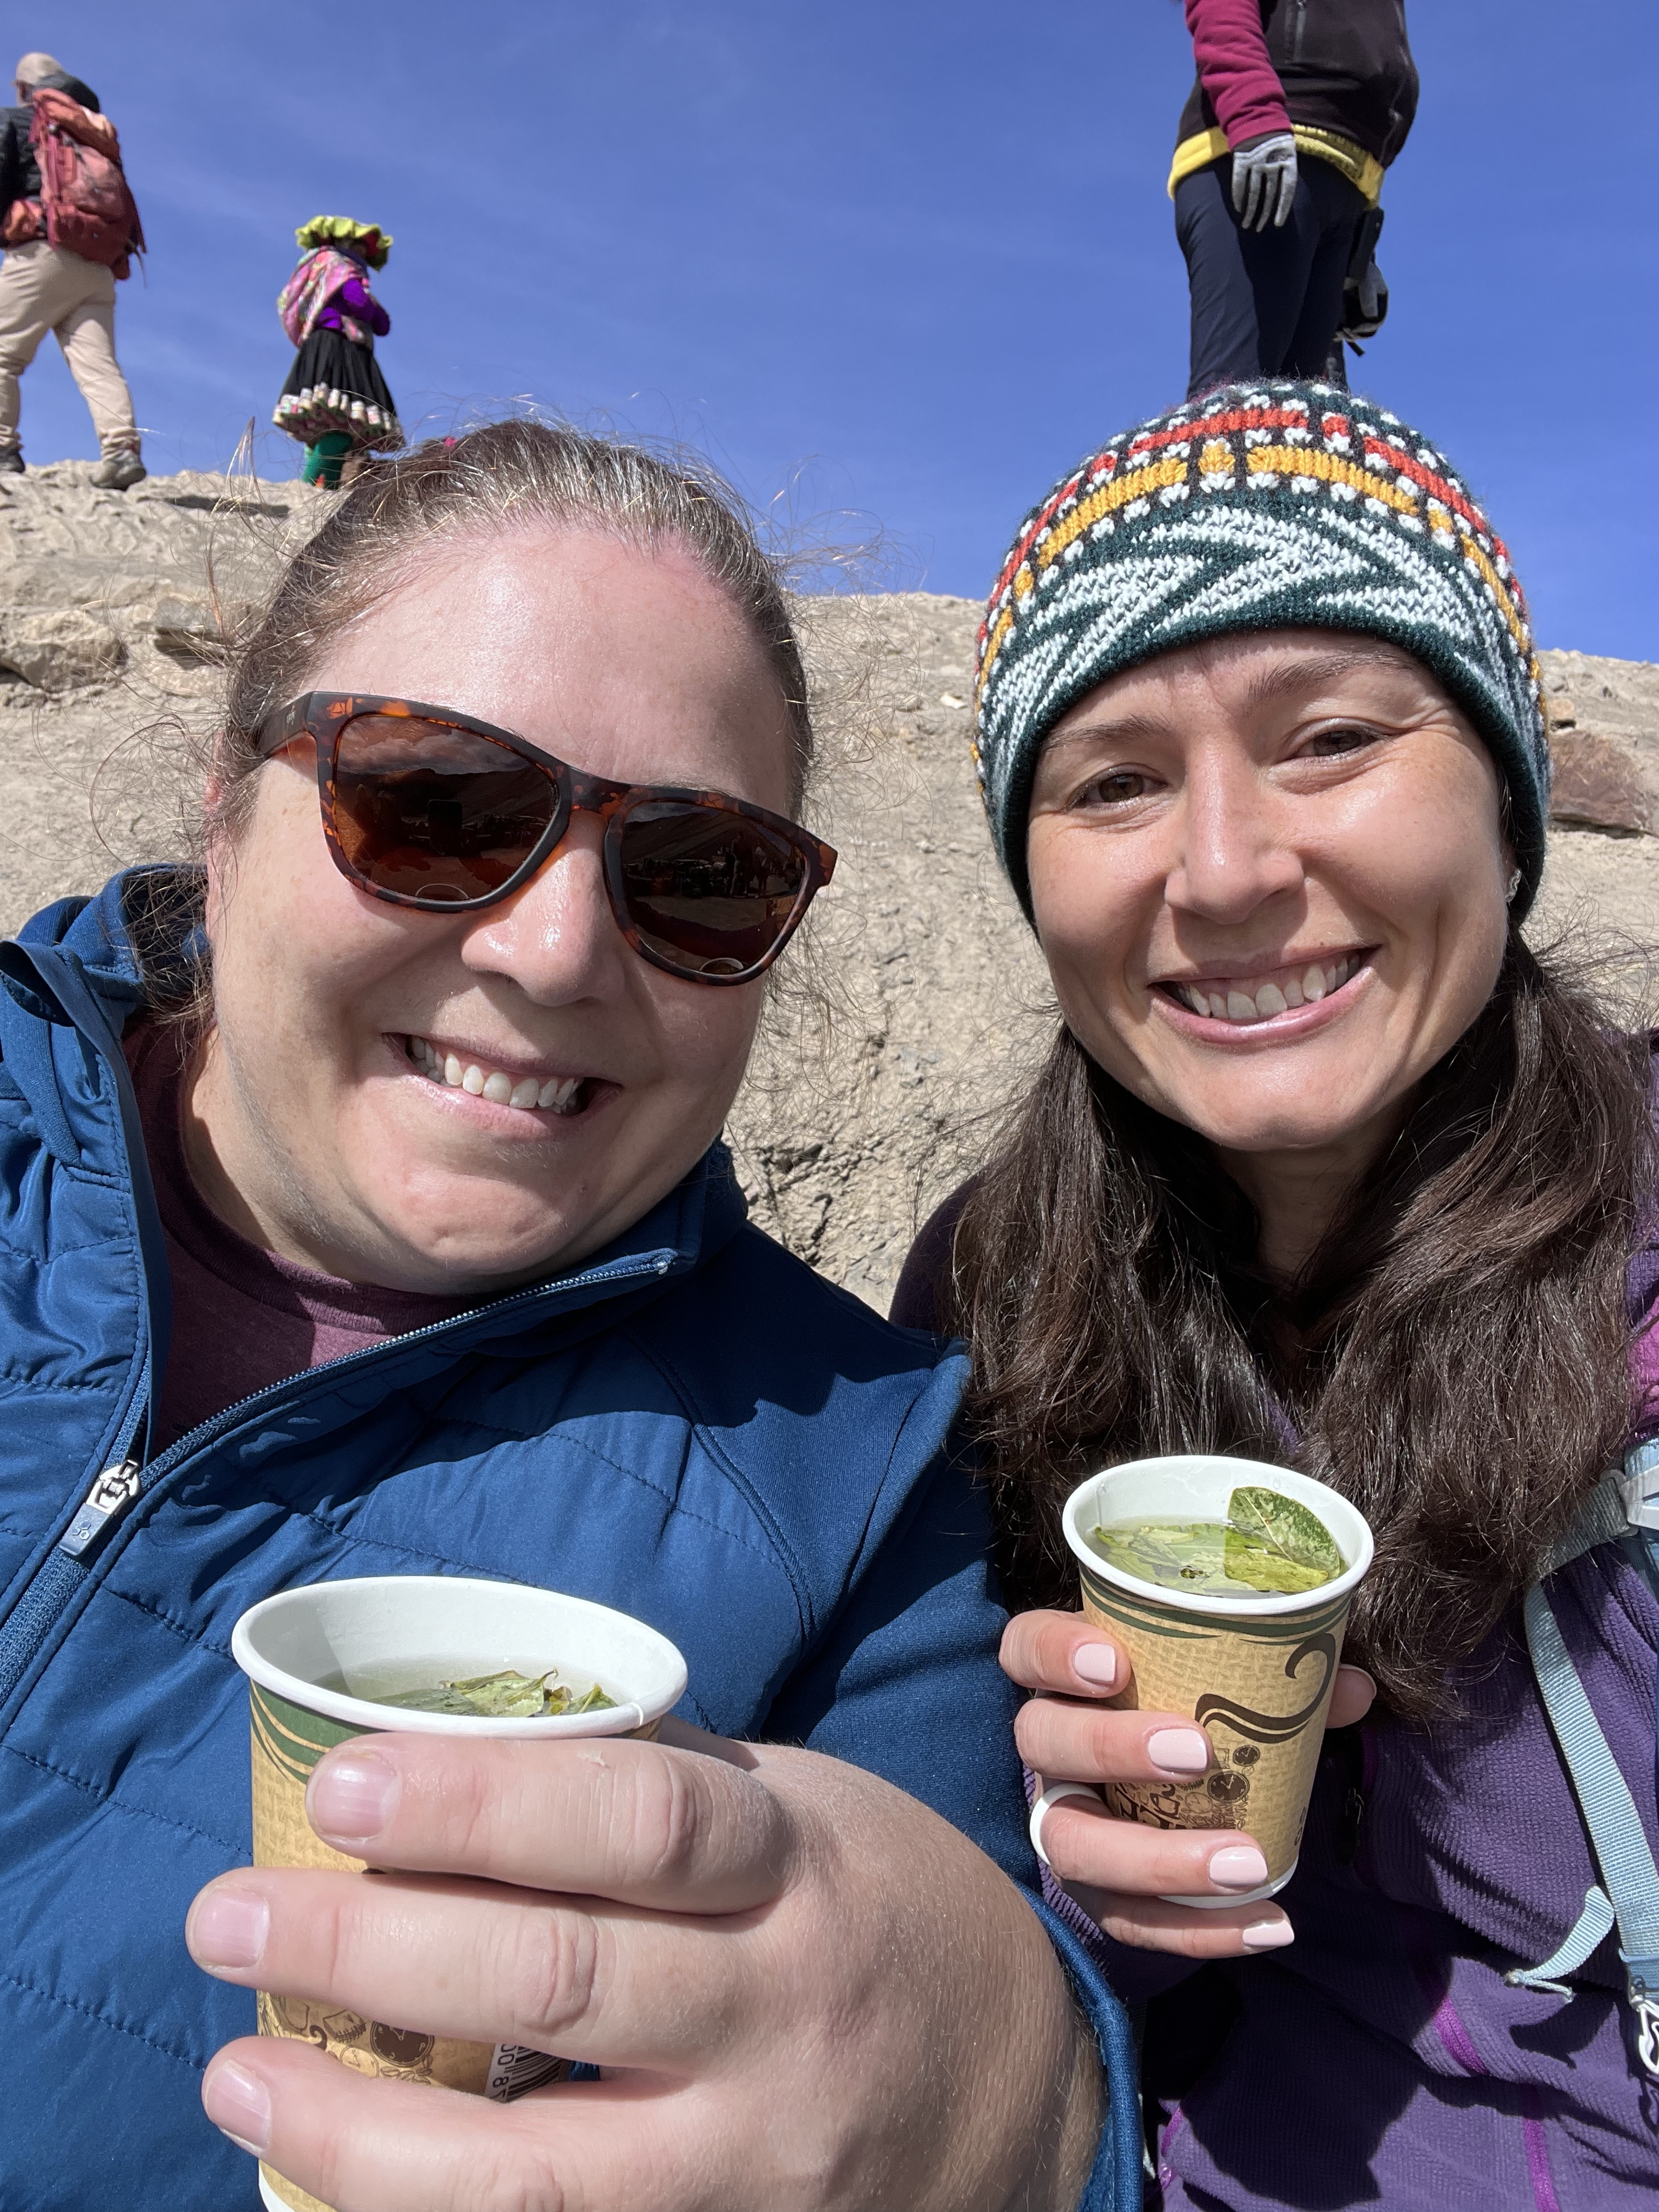
Living my best life with my two new best friends.
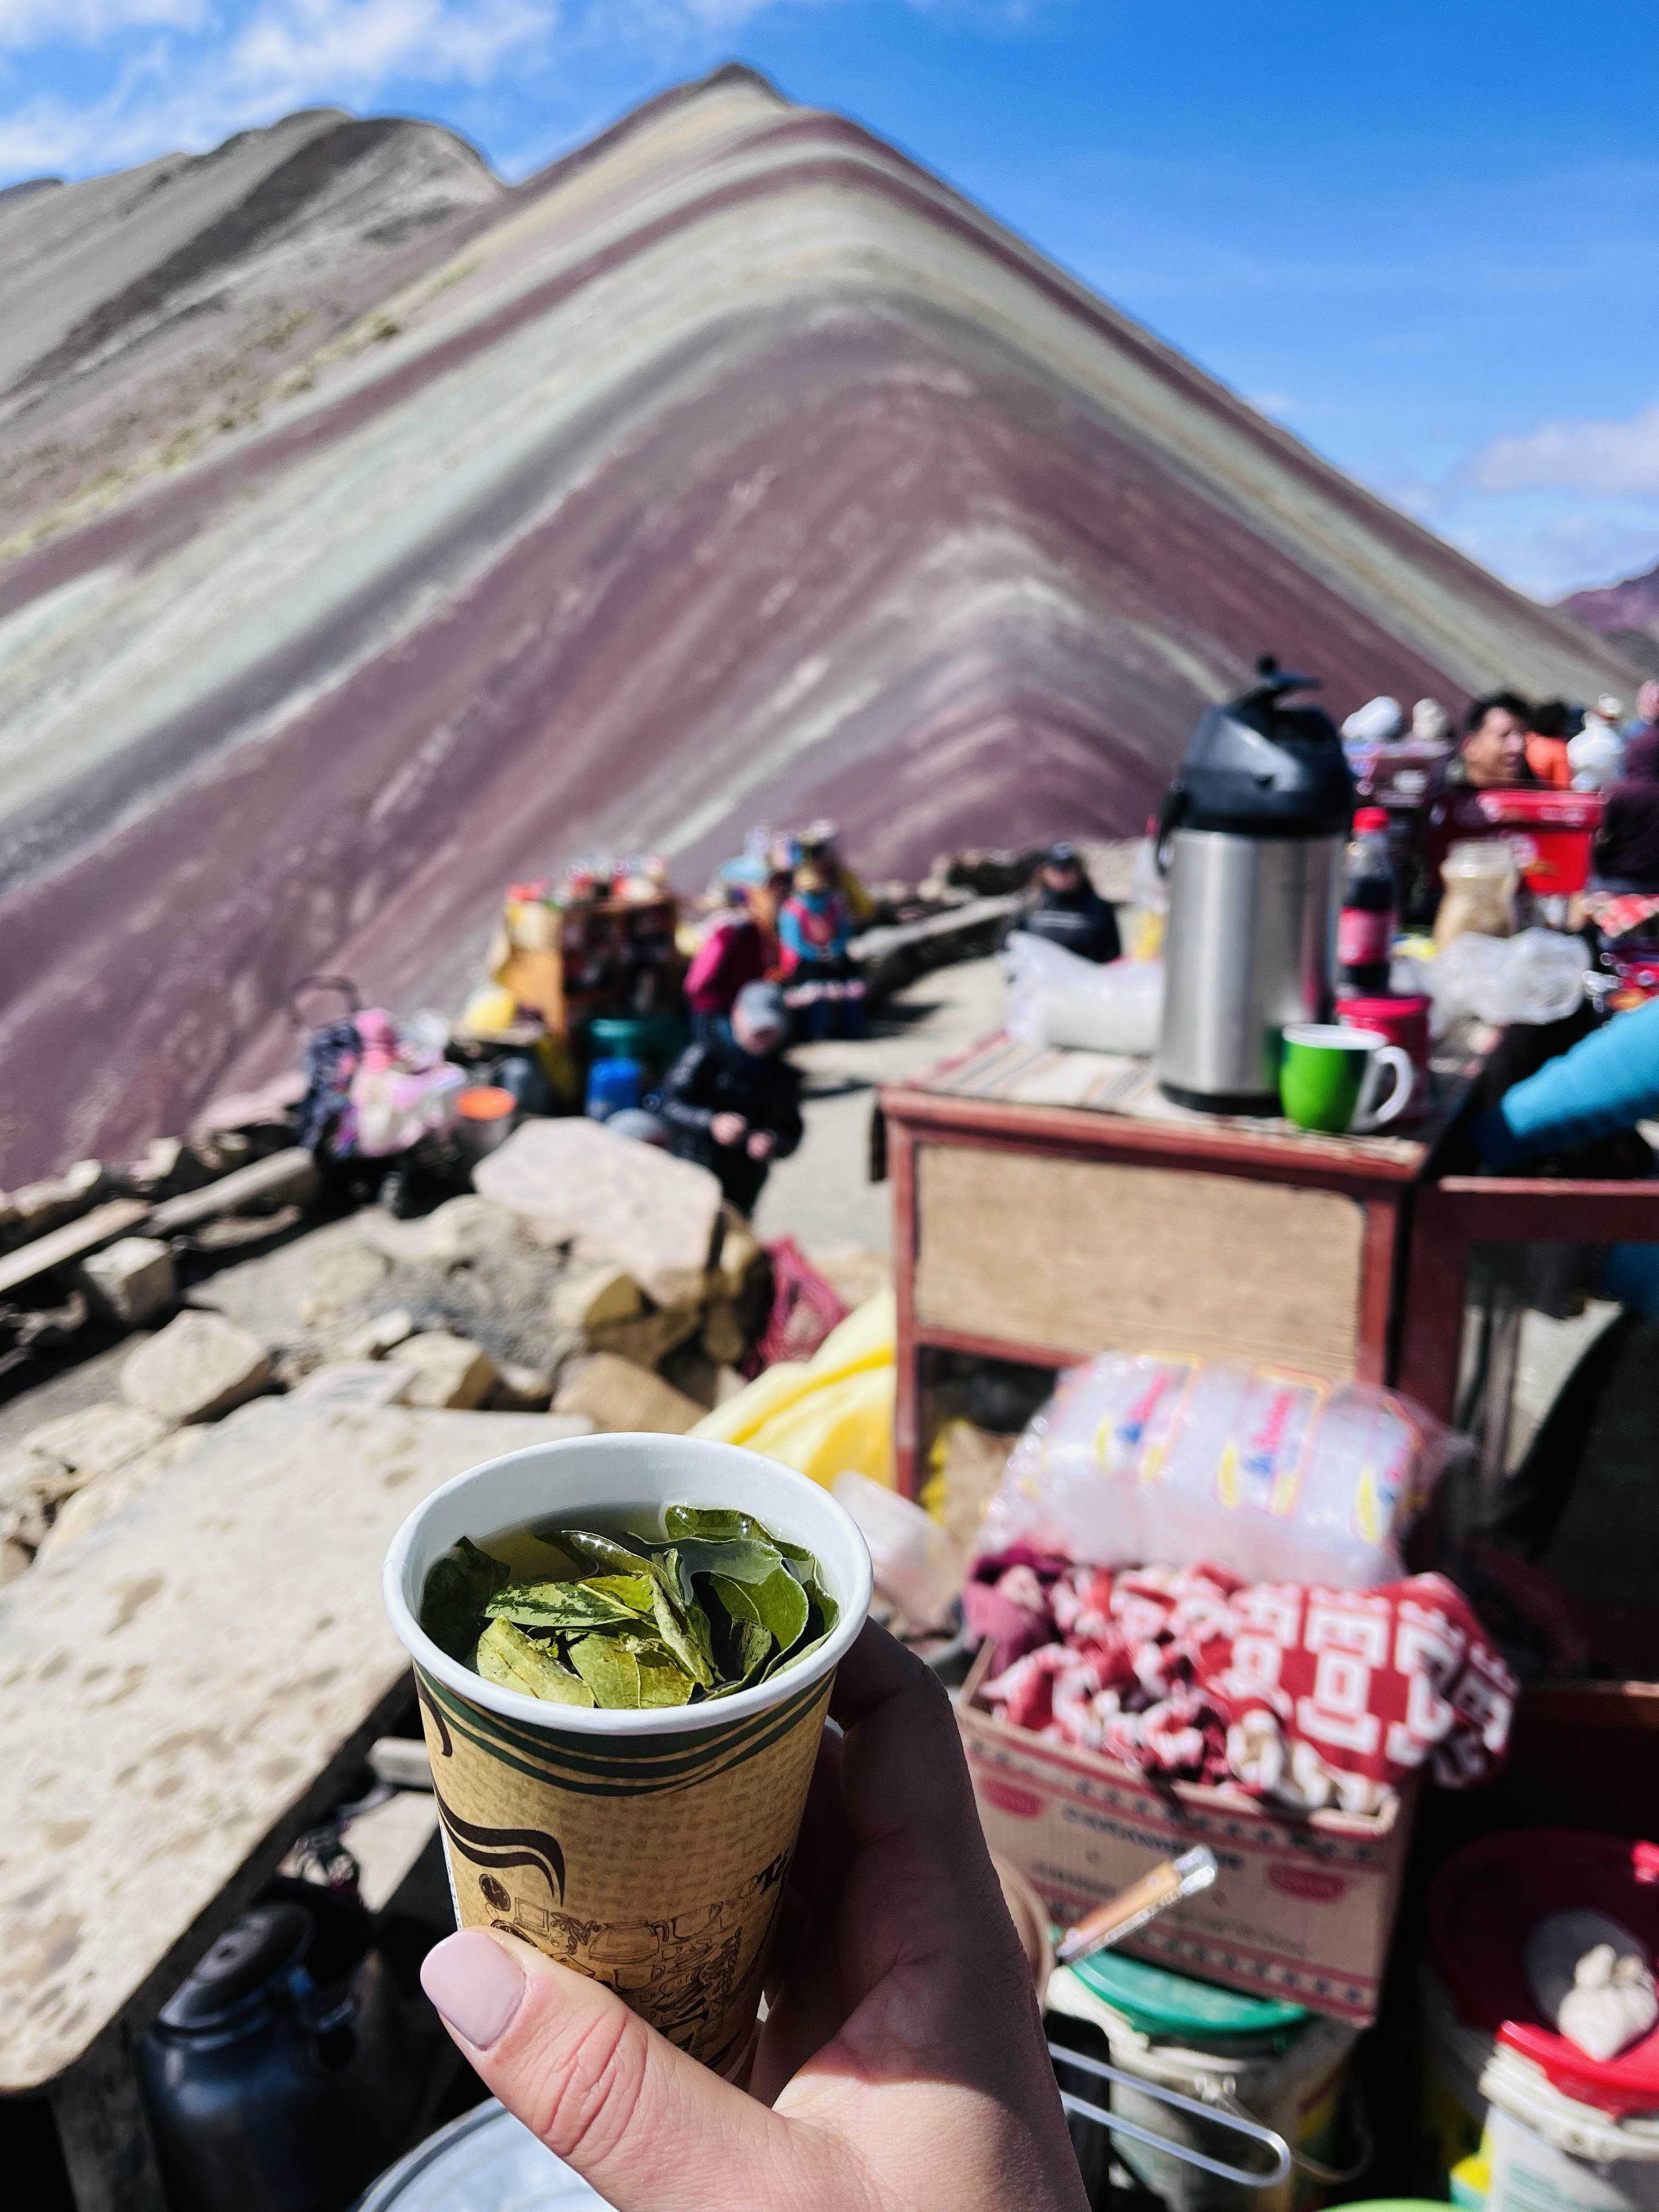
Be sure to grab a fresh coca tea once you get to the top for the altitude sickness, ya know. 🙃
Now, if you’re feeling feisty, and I recommend finding that energy, you can keep going up to the true peak at just over 5,000 m. It’s definitely another steep slog up, but you’re only there once, right? So just do it. Plus, this is the best spot for the full-valley view.
After everyone had time for photos and a short rest, we were given the option to walk straight back to the van or visit the Red Valley on the way back, which was a ~15 min detour and absolutely worth it. The colors in this valley were surreal! Plus, the worst of the uphill was over. There’s a slight uphill to get here, but not much. Then, it’s all downhill to get back to the vans.
Entering the red valley.At the mirador.The walk back to the vans with a glacier in the background.
Honestly, after this, we were ready to return to the vans! It didn’t feel so cold at first, but between the wind in the Red Valley and the altitude, we were tired and cold! Plus, by this point, I had constant pins and needles from the elbows down, presumably from the altitude! It was wild, actually, and not something I expected. When I threw my arms out for the picture above, it physically hurt to have my arms extended! Altitude is crazy.
To visit, we used Rainbow Mountain Travels, which I highly recommend. The price is $50 per person, which may be a bit more expensive than other tours, but it includes breakfast and lunch, which is a nice touch given that you leave at 3:30 am and get back to Cusco around 3:30 pm. Also, the group was small (12 people), and they indeed get you to the mountain first. By the time we left for the Red Valley, this was the line for “the” photo spot…
This may be a controversial statement, but I might have enjoyed this day trip more than Machu Picchu! Don’t get me wrong, Machu Picchu is incredible, but I’m a sucker for natural wonders and a good view. Nonetheless, I highly recommend it!
Unfortunately, that was all the time we had in Peru. There’s definitely so much we didn’t see. I guess we will just have to go back! 😜
This will be short since we are a mere 10 days away from moving back to Germany (🤯). And, let’s face it, there is so much information on the logistics of getting to Machu Picchu that I don’t need to go into the details.
So, this post is all about the pictures!
I will say, however, that I debated arranging this trip DIY-style. Which, sure, is possible, but I’m glad we didn’t do that. Instead, we booked the 1-day tour with Cusco Peru and paid $328 per person to have them arrange everything. And everything includes a lot: return transportation from Cusco (comprising a bus to a train to another bus… I had no idea!), entrance to Machu Picchu, and a private tour guide. Oh, and that price also included the upgraded train with 360-degrees views and snacks!
The topography changes from Ollantaytambo to Agua Calientes are worth the big-window upgrade!
Yes, I’m confident that I could have booked all these things independently, but why? And, if you know me, then you know I had an Excel sheet with a thorough cost analysis of the two options. Honestly, the tour was only ~$50 more expensive per person, which, for the convenience, was worth it. AND my DIY version didn’t include a private guide. So, it’s certainly an expensive day trip, but it’s worth the money. Especially when you walk around the corner for this view!
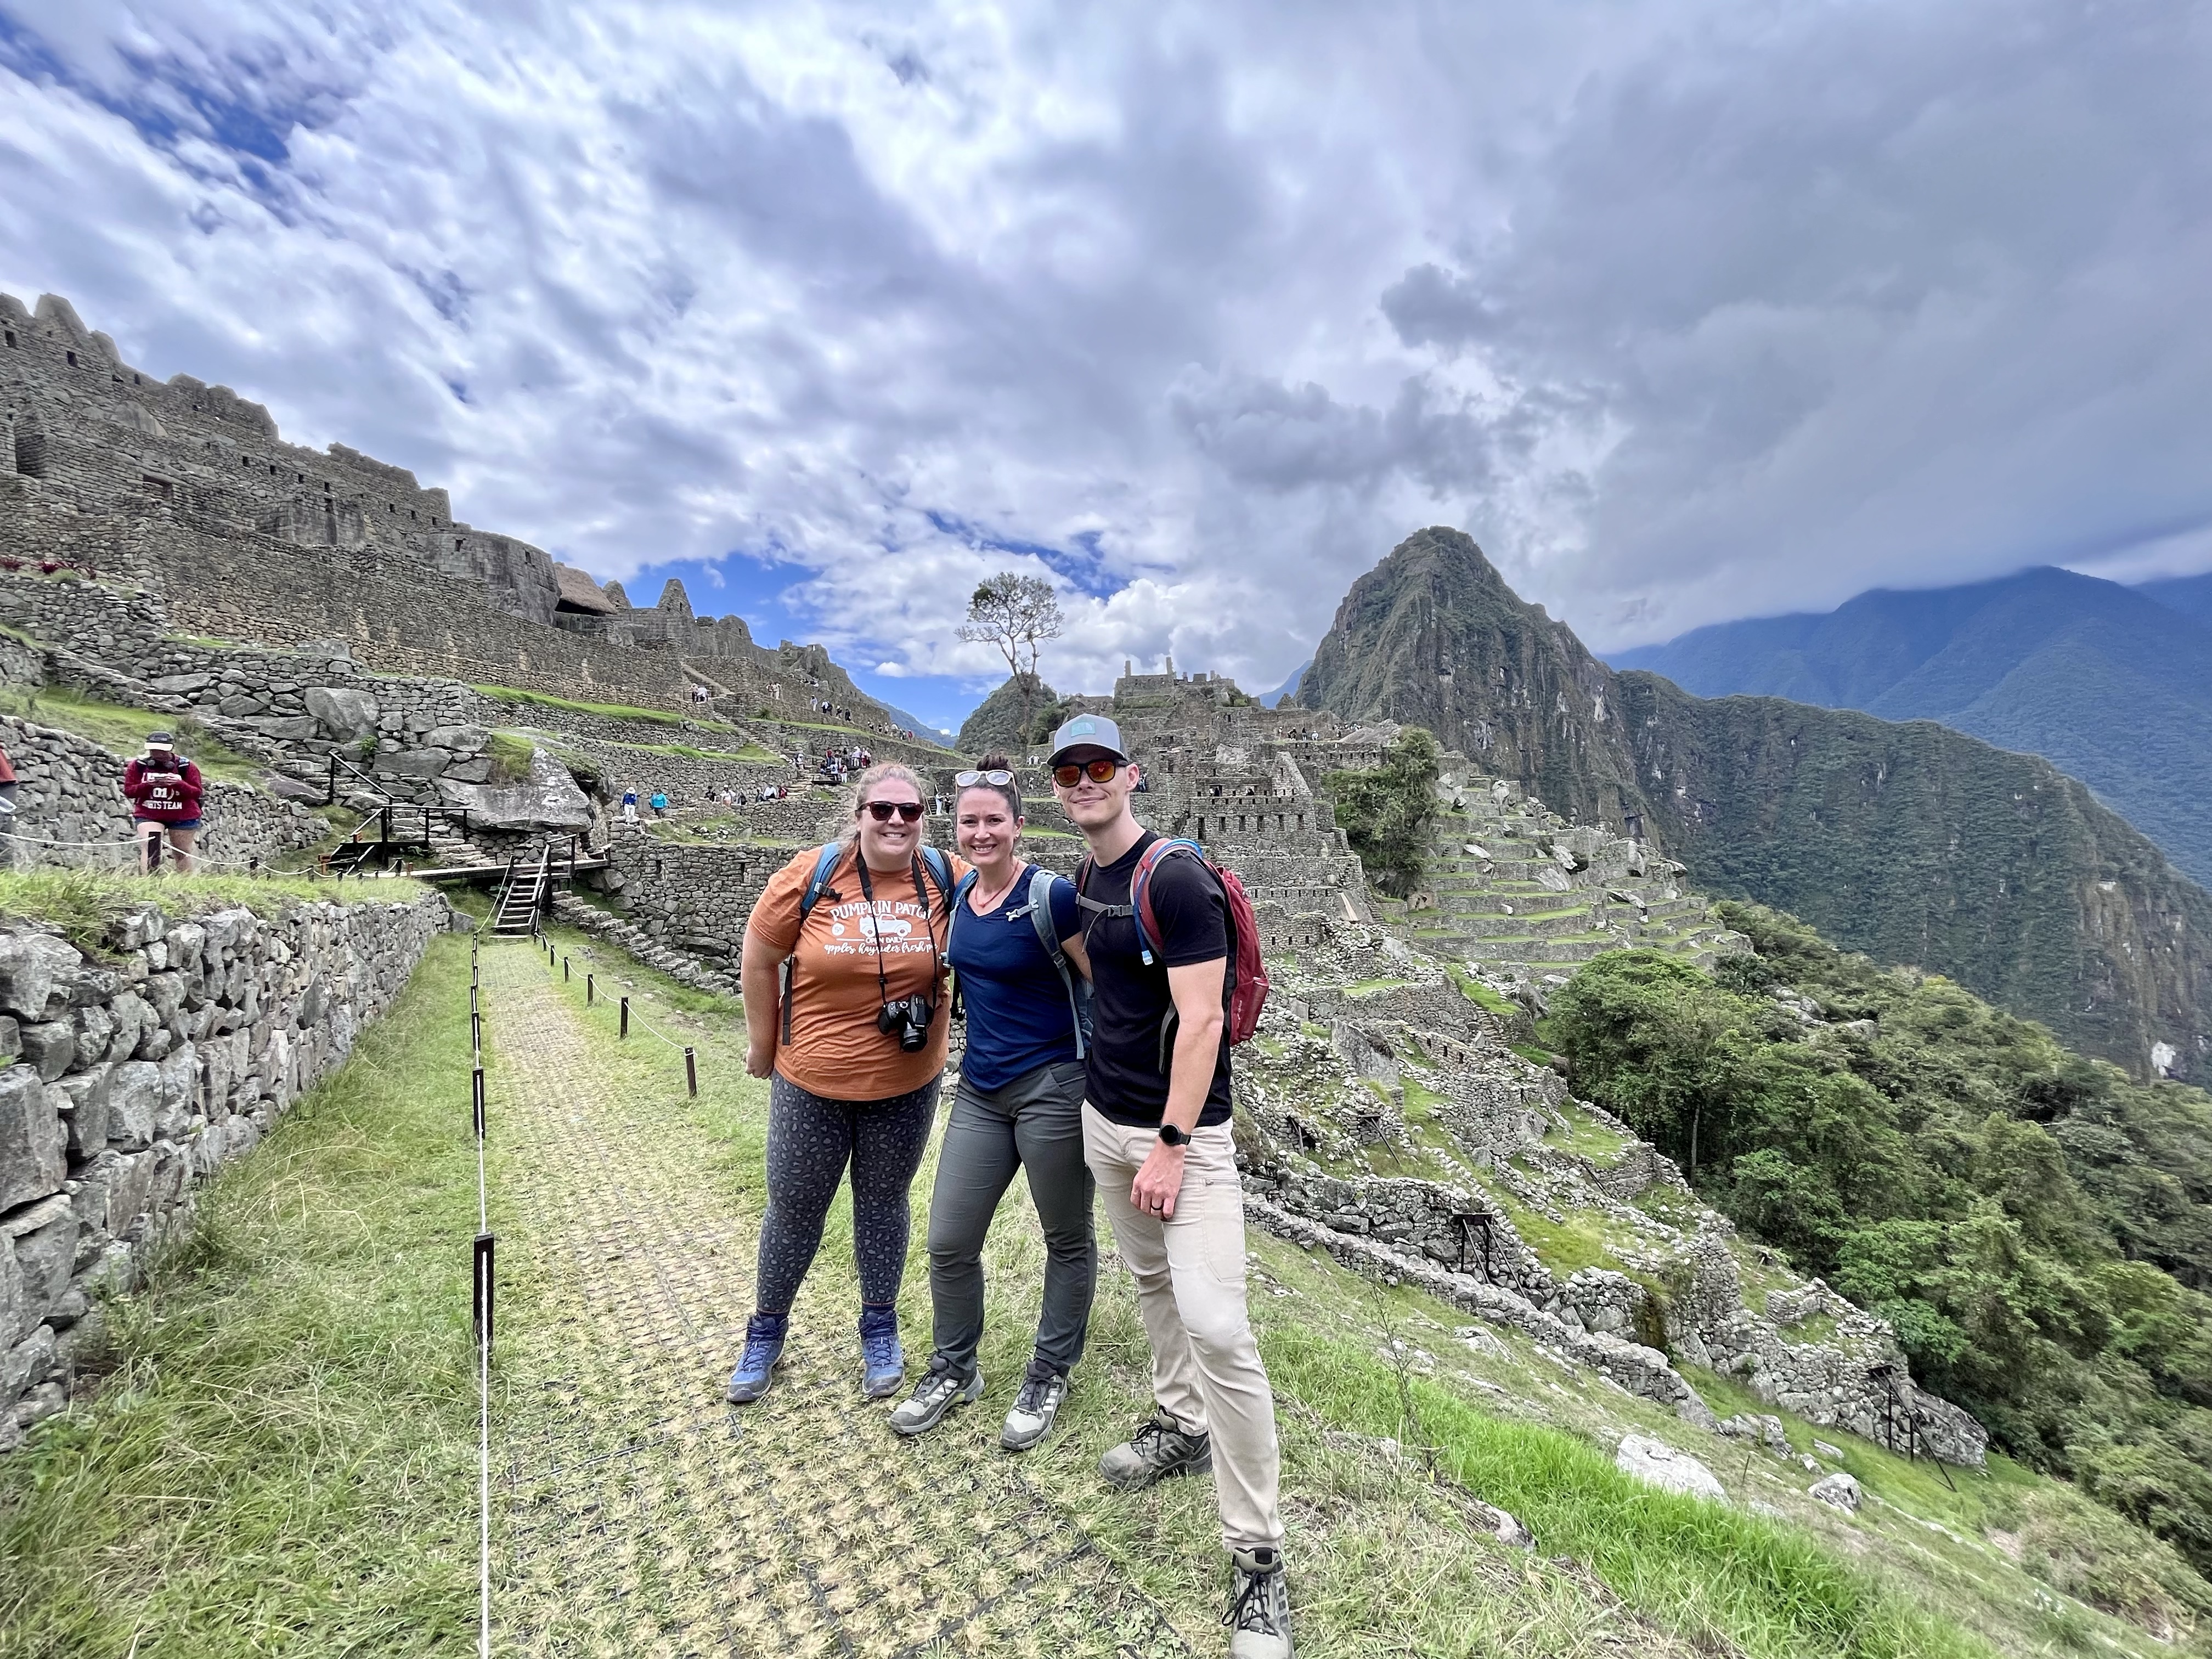
THE view!
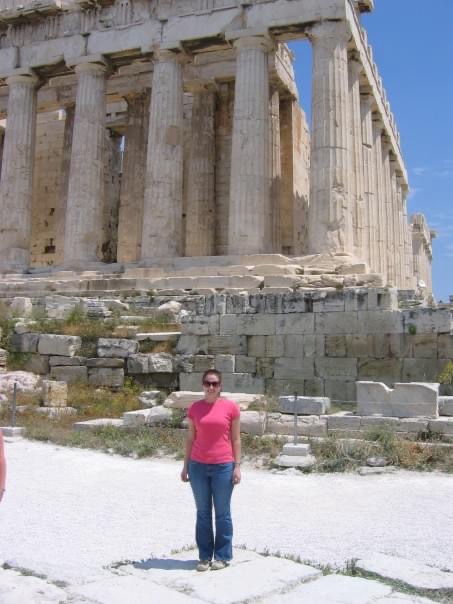
It reminded me of the moment when I first saw the Acropolis in Greece in 2006. Our guide stopped the group and told us to get ready because we were about to turn the corner and see one of the most iconic ruins. Sure enough, he hyped up that moment enough that I still vividly remember it.
Blurry 20-year-old me in front of the Acropolis in Athens, Greece, circa 2006.
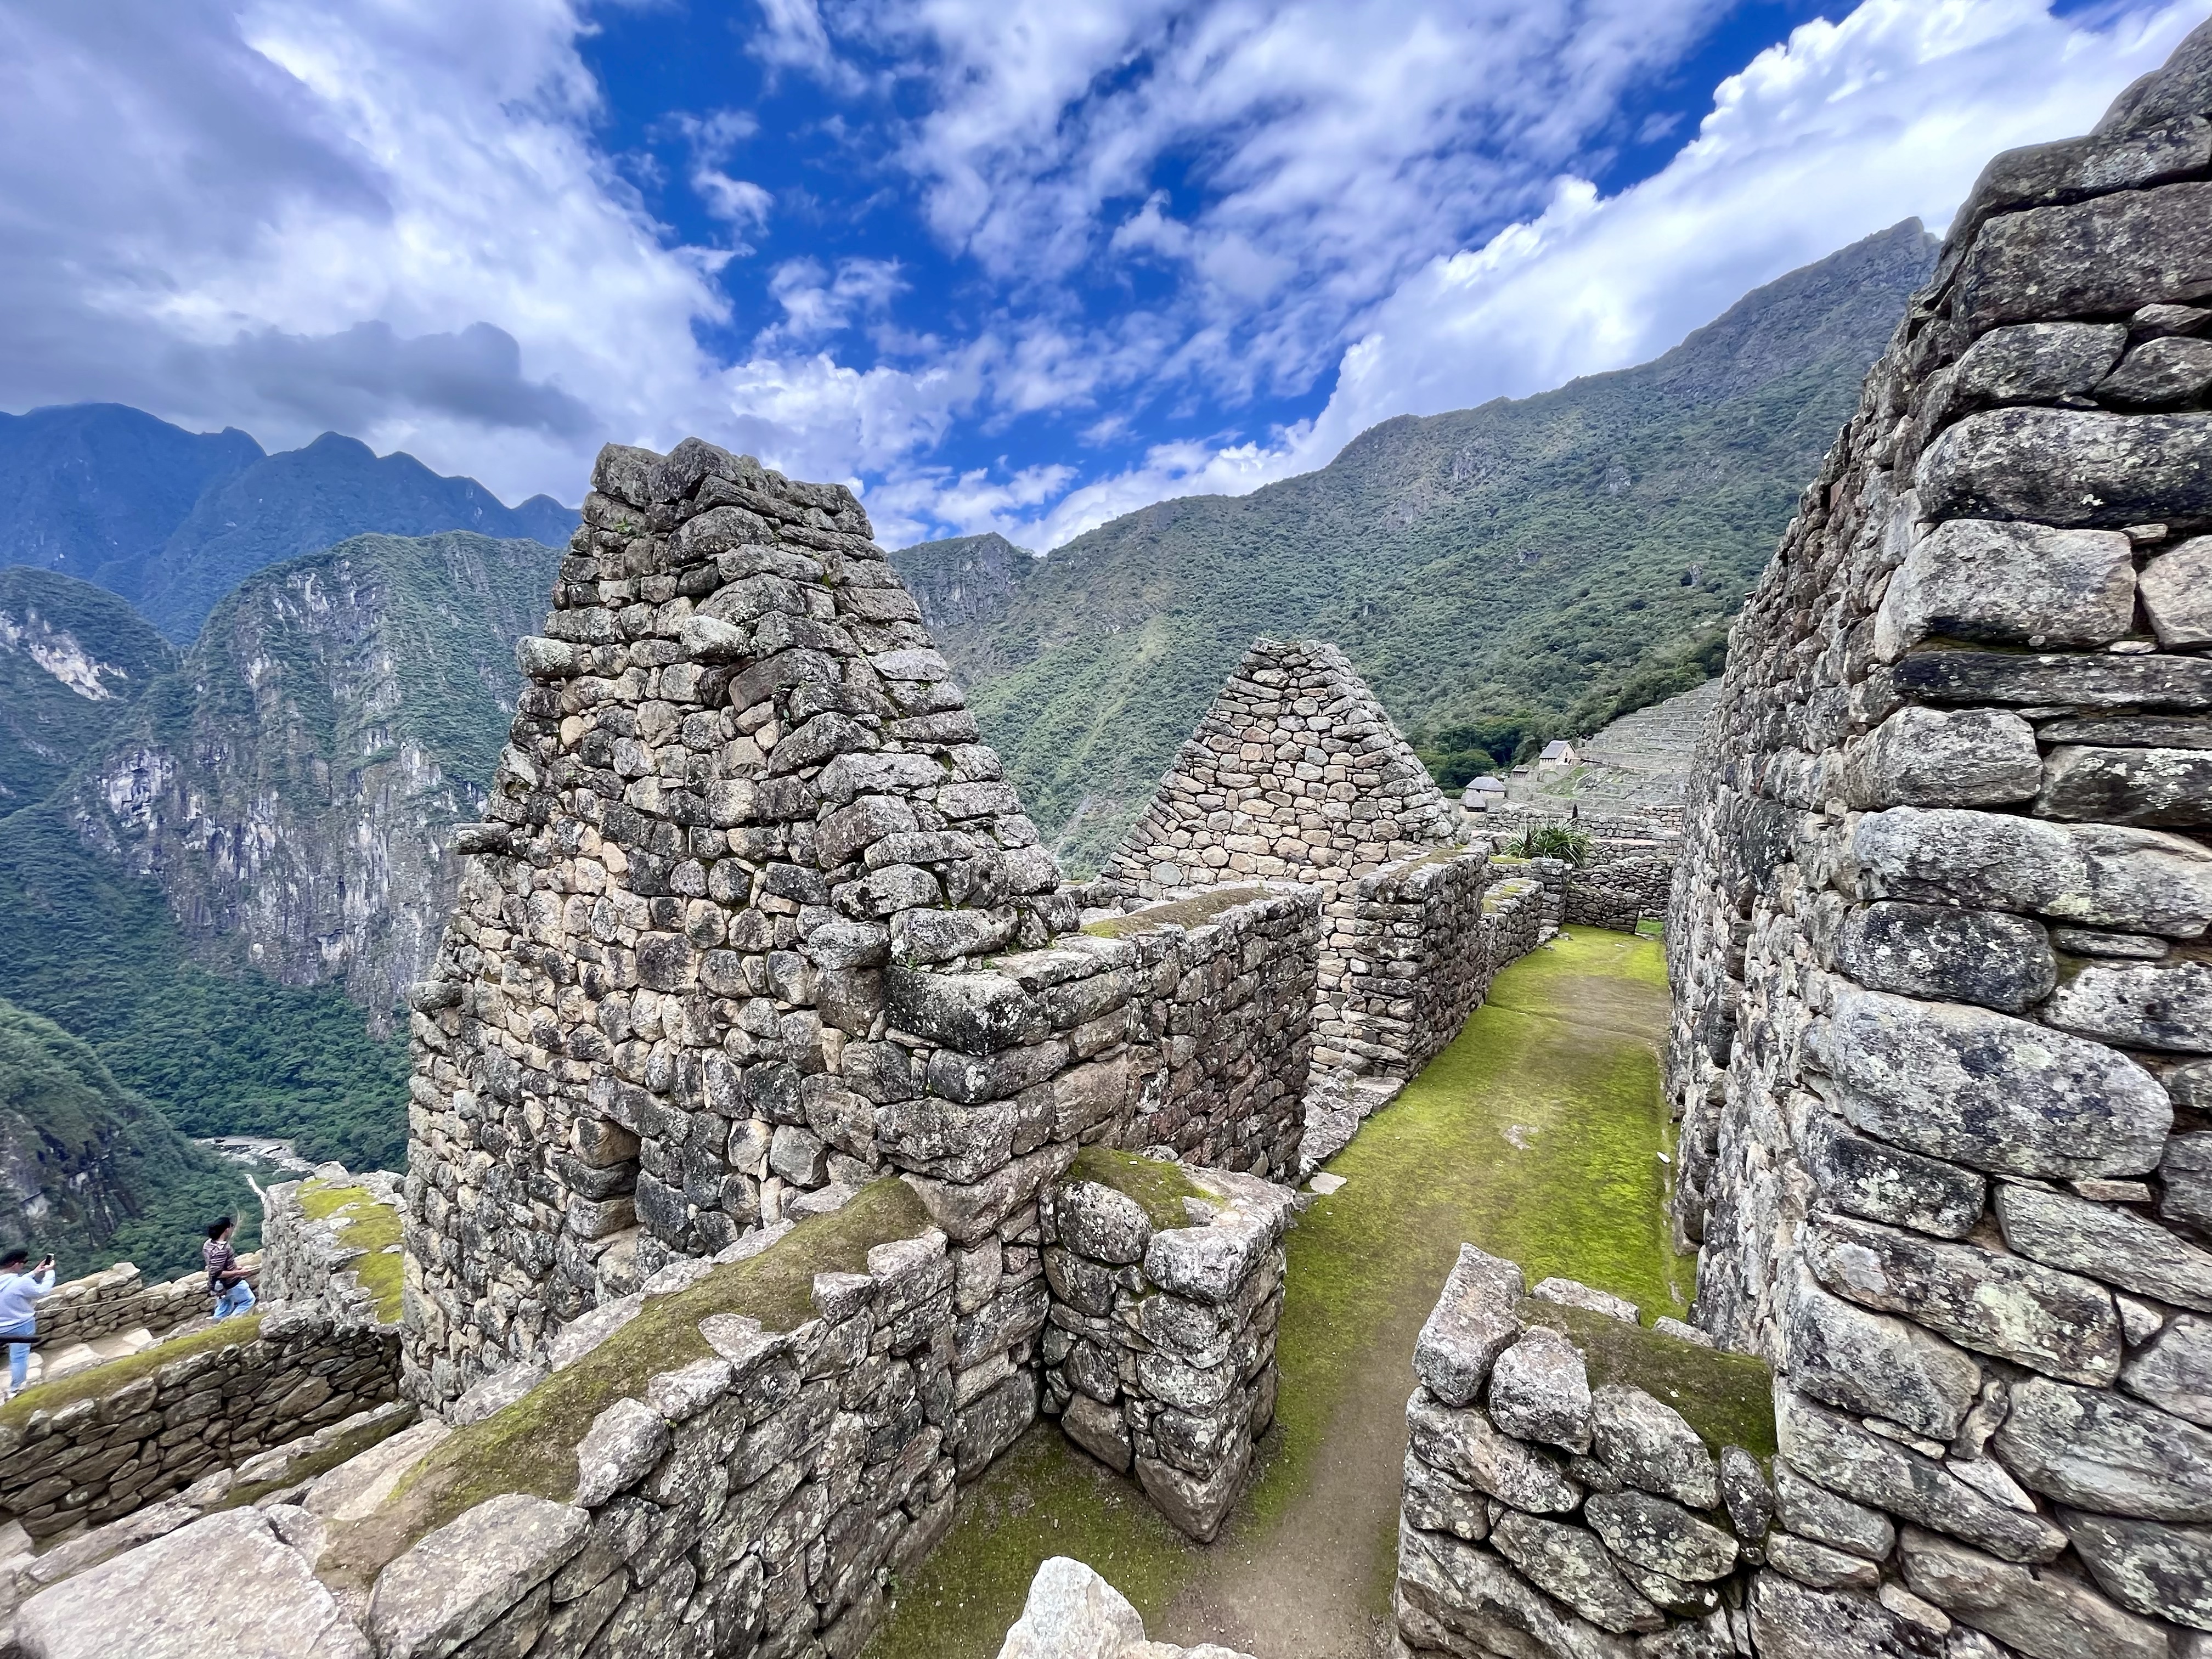
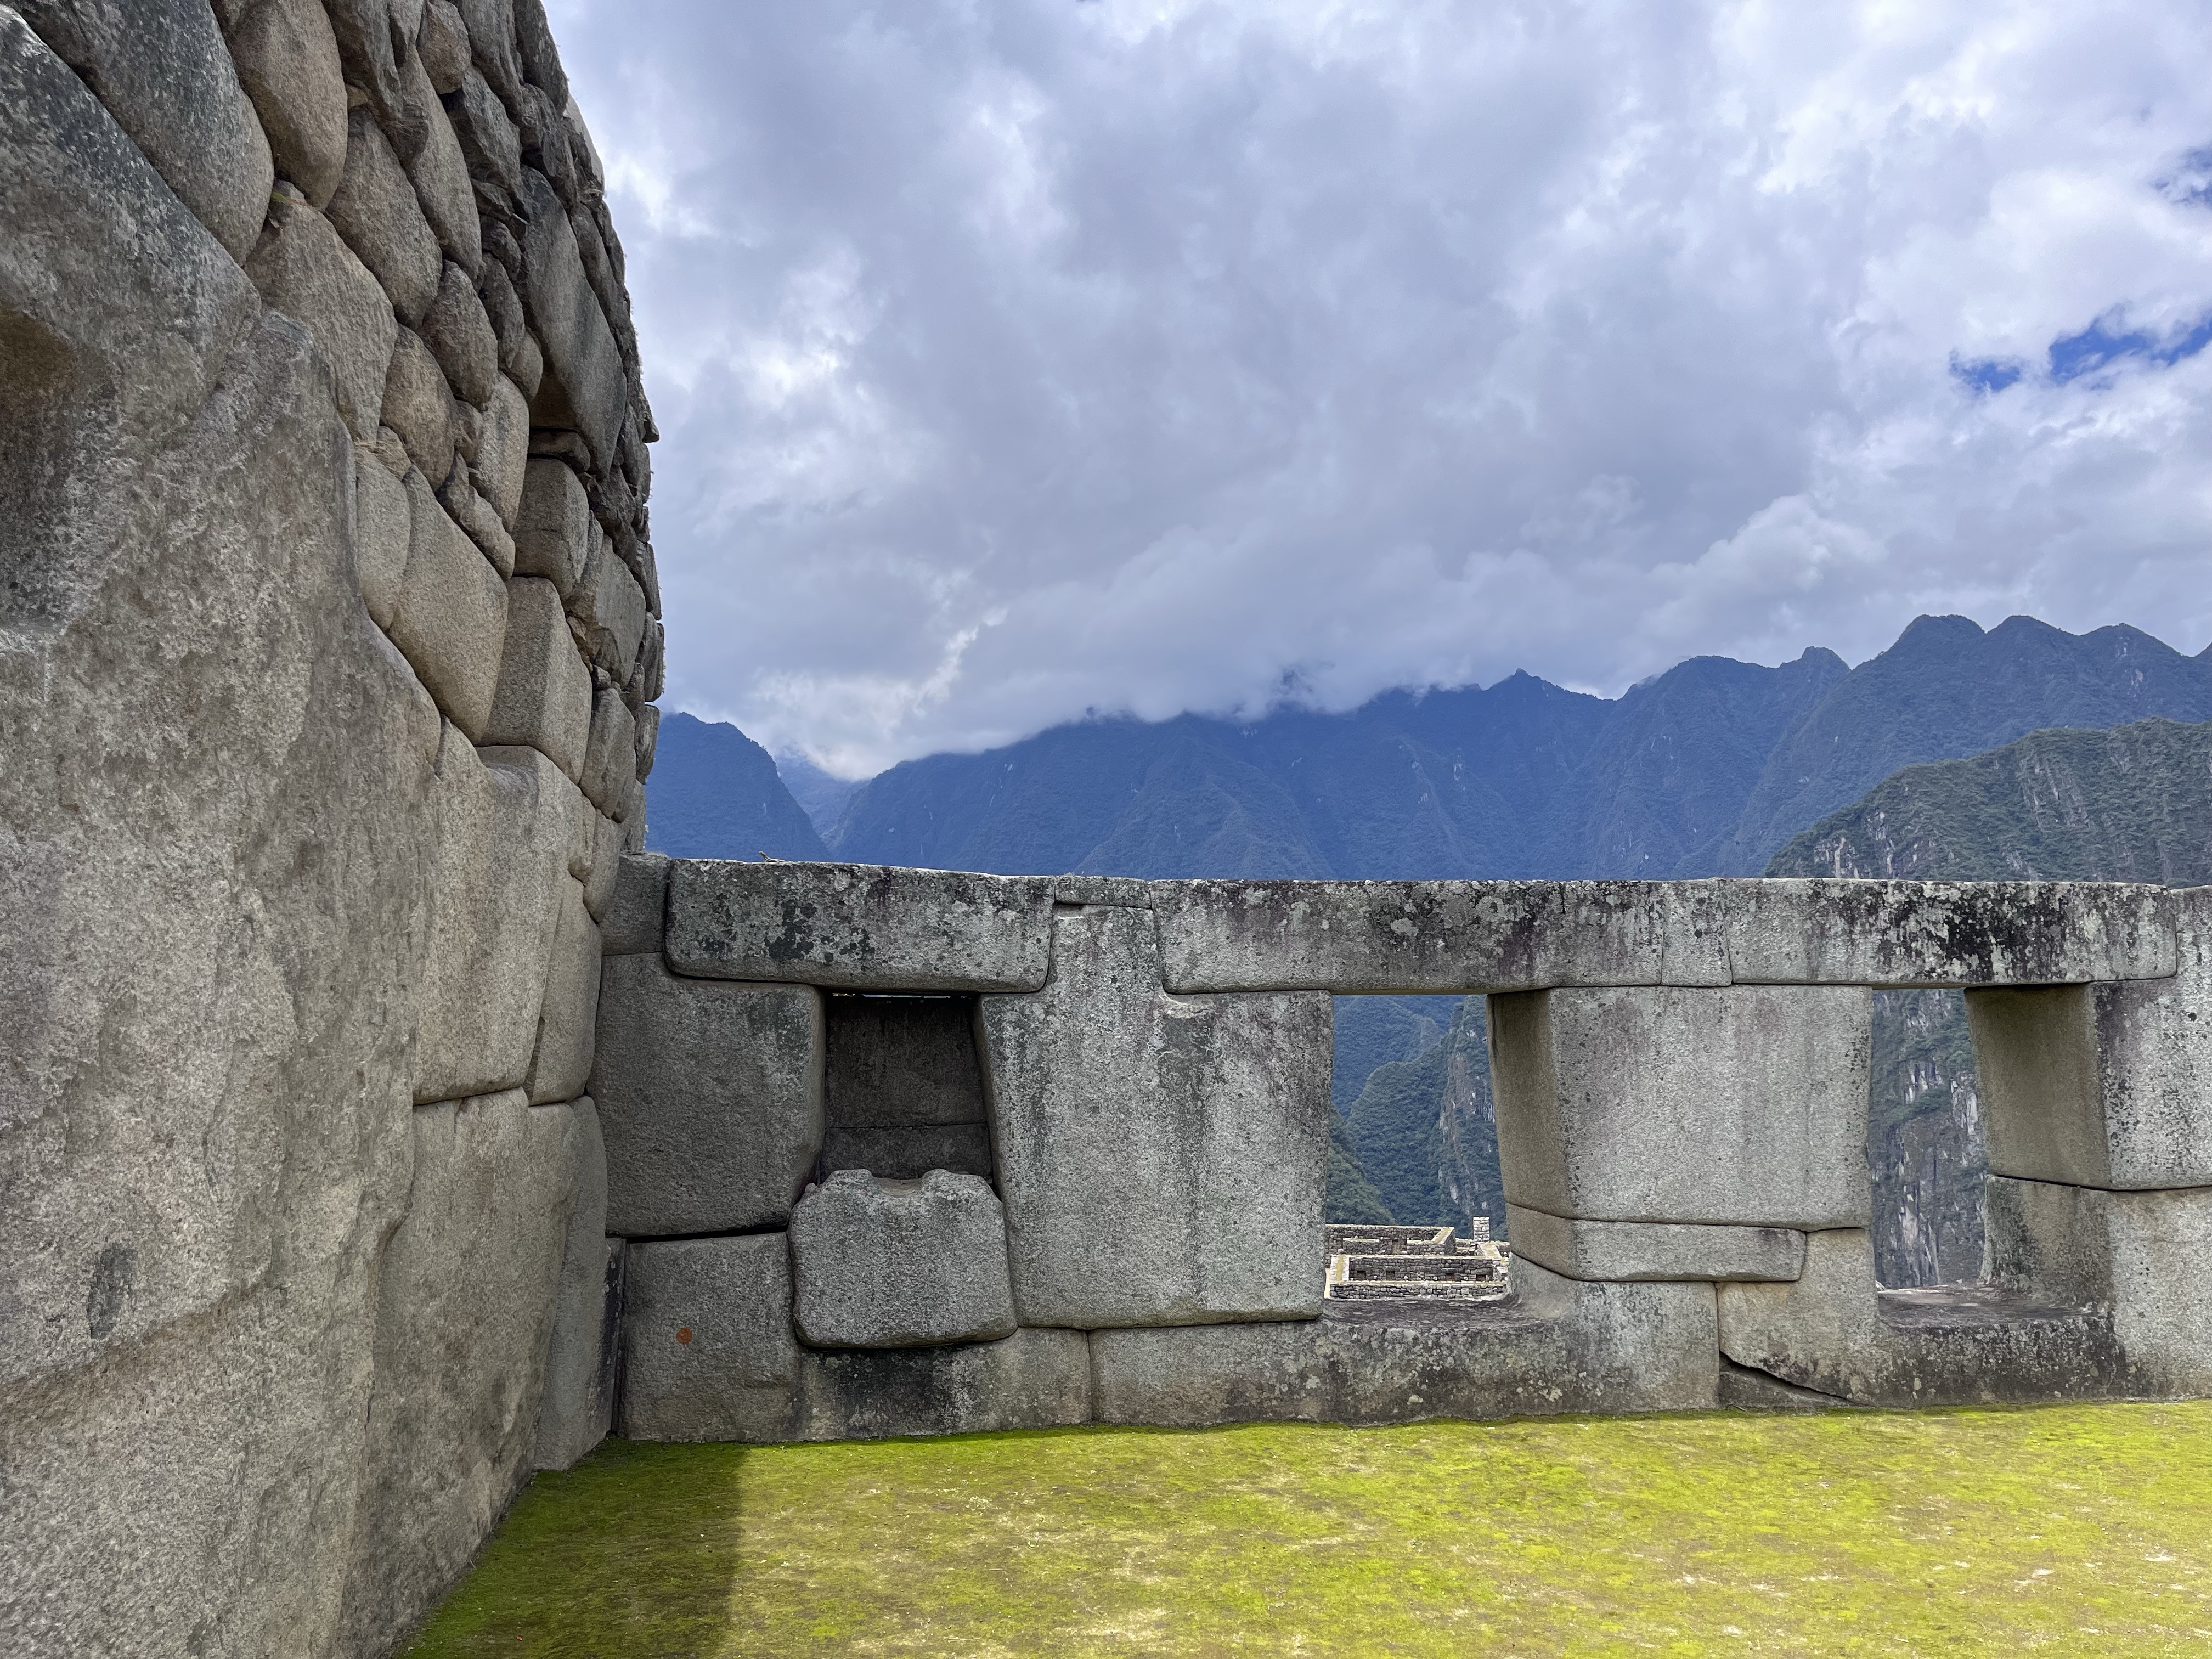
There are four circuits through Machu Picchu. Our tour included Circuit 2, the most common route for the one-day tour. This circuit covers the entire area, which is way bigger than I thought! You can tell from that iconic angle of Machu Picchu that it’s big, but photos really don’t do the size justice. Another thing that was a bit surprising was the mountain in the background, called Huayna Picchu, is a separate area. It’s accessible from Machu Picchu City, but further away than it seems in the pictures.
And yes, I called it Machu Picchu City, which is what our guide called it. No one actually knows the true name of the ruins, but the mountain directly behind, in the opposite direction of Huayna Picchu, is called Machu Picchu mountain. Hence, the ruins are called Machu Picchu City.
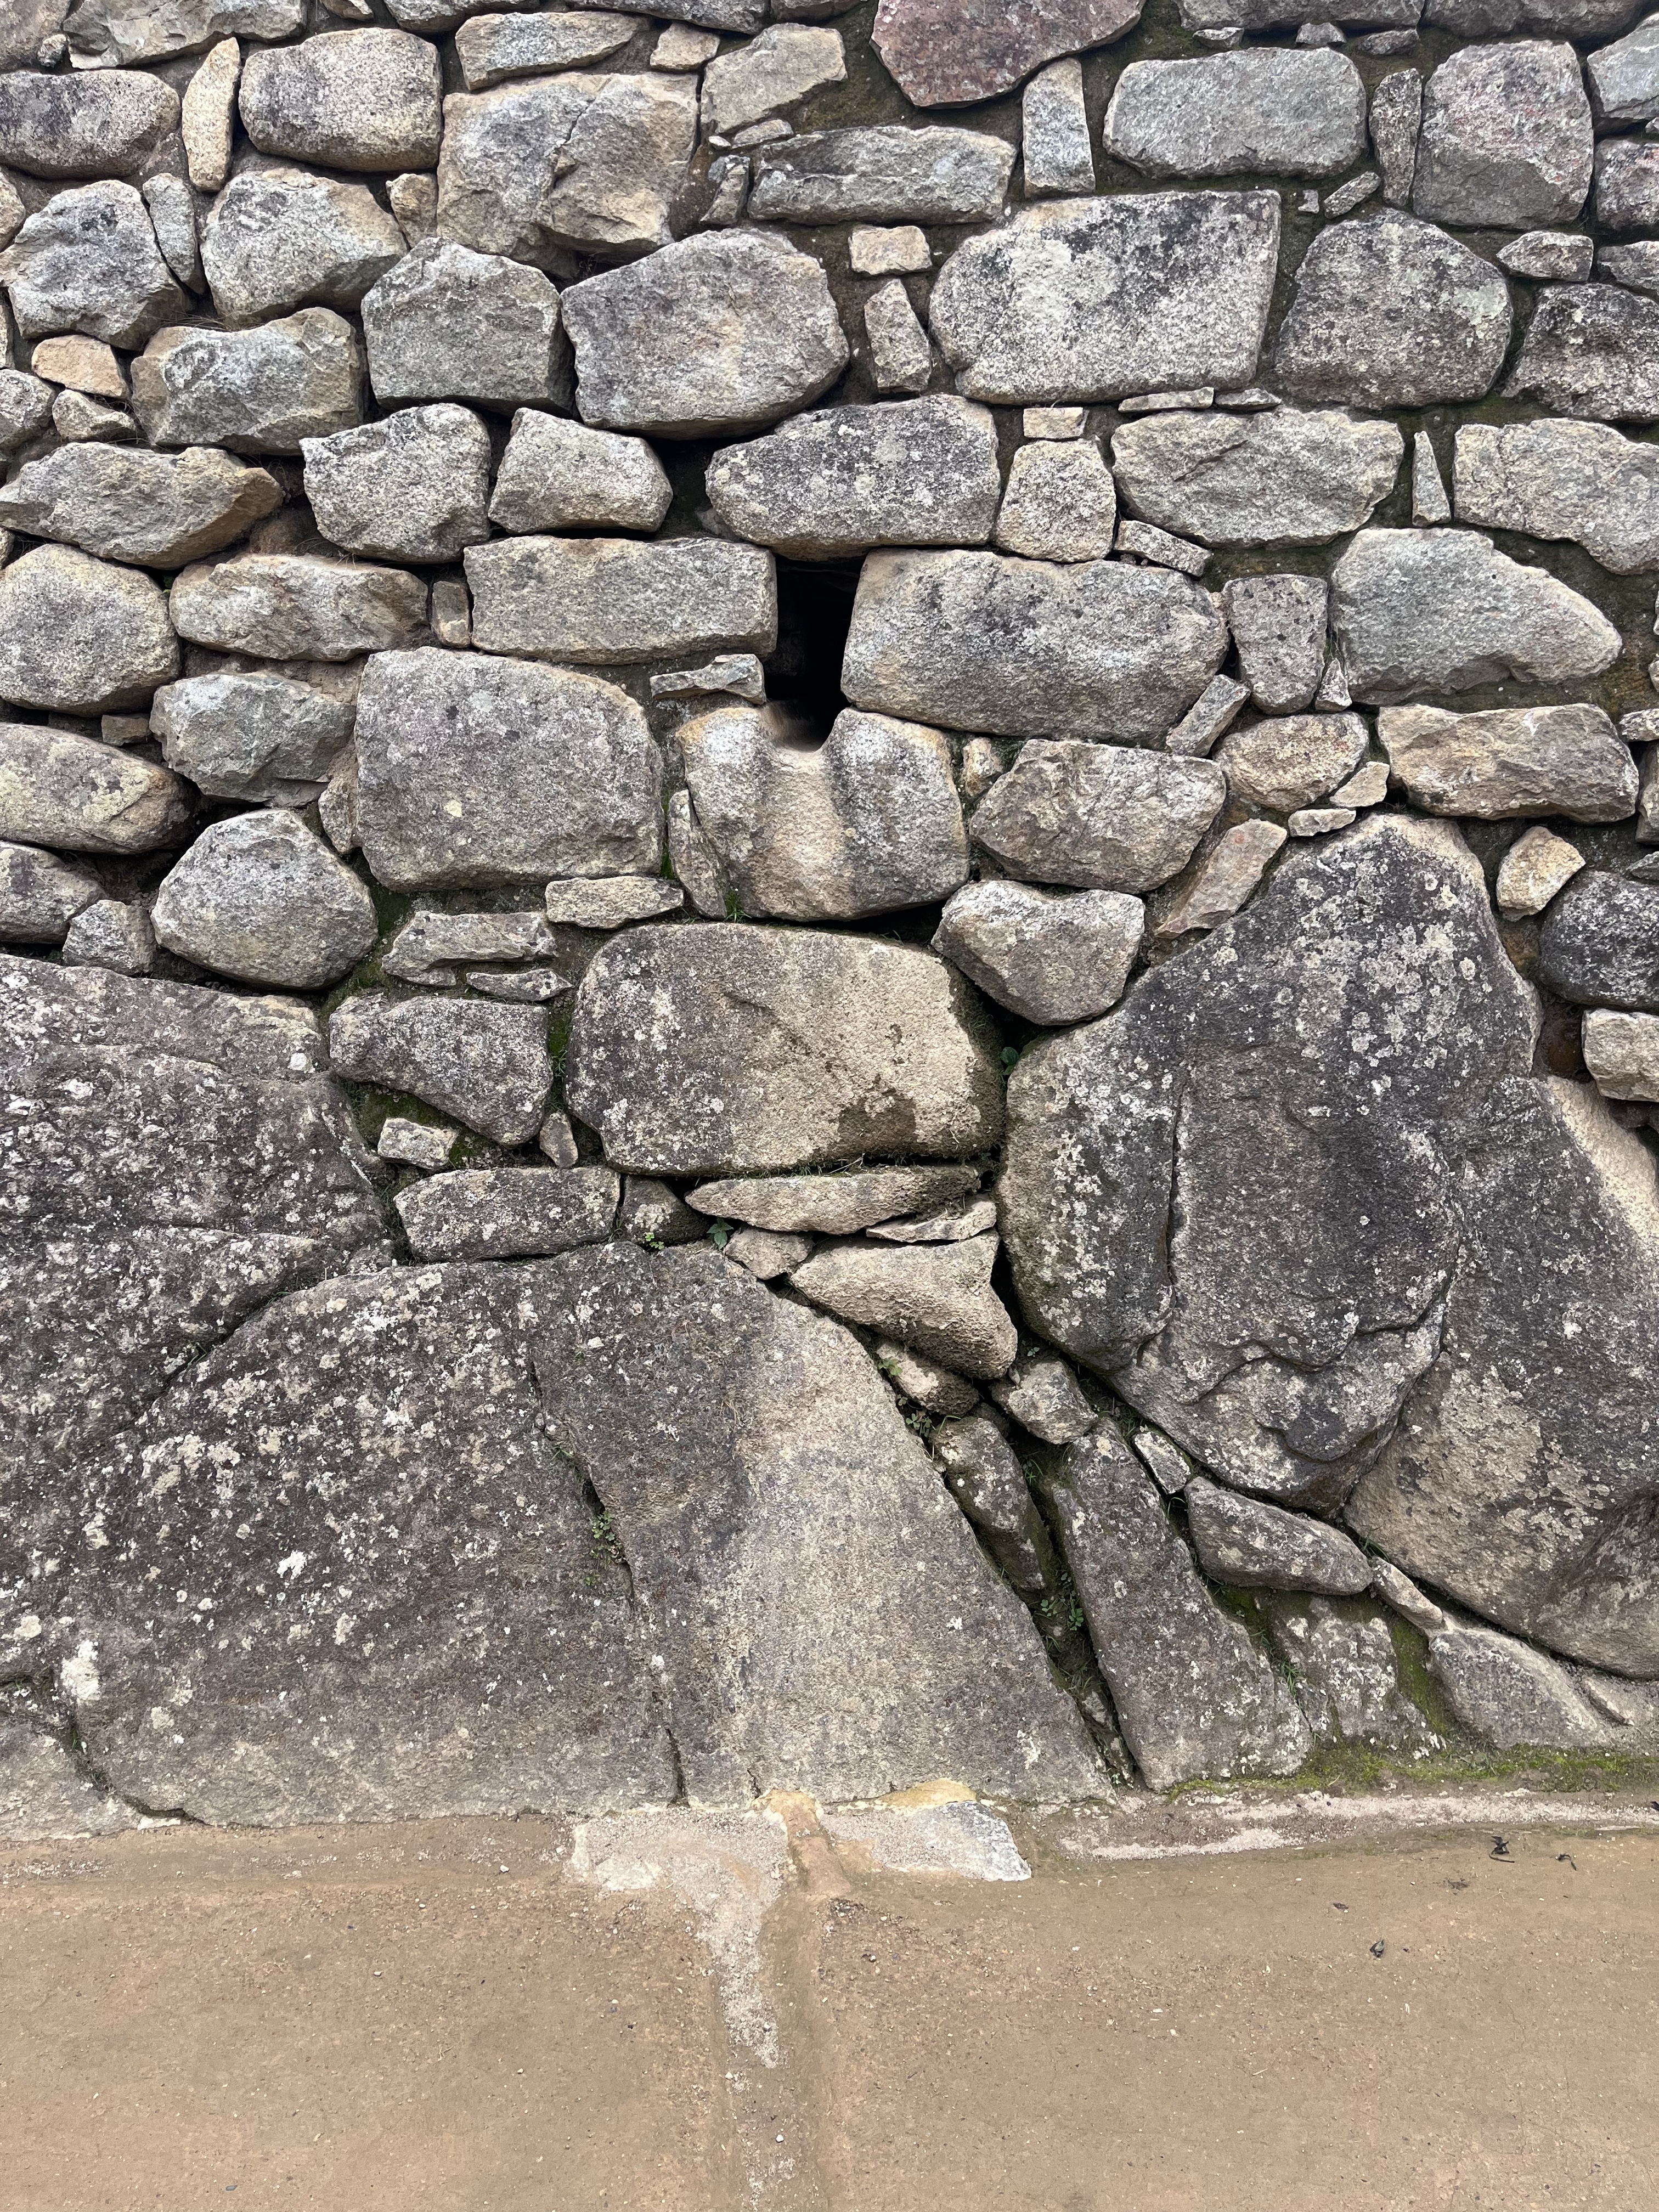
Imperfectly shaped stones were used for every-day buildings.These would have been houses for those living here.Huayna Picchu behind the school for boys (yes, there was also a school for girls!).Perfectly shaped and fitted stones were used for temples or important sites.Water drainage system! It ran throughout the entire city.
Don’t worry though, all circuits include the overlook so you can get THE shot!
Machu Picchu is definitely a bucket list item, and it would have been really disappointing to be this close, relatively speaking, for two years and not visit. Shane compared the experience to visiting the pyramids in Egypt! So, I’m happy that the butterflies allowed us to squeeze this in!
Now that we’re back, Shane and I are both reading the book Turn Right at Machu Picchu. If you like non-fiction, it covers both Hiram Bingham III’s journey to discover Machu Picchu and a modern-day hiker’s quest to follow in his footsteps. But it’s full of good information about the region, the culture, and Machu Picchu that would have been fun to know before going. So, I highly recommend reading this before you go!
I mentioned in my last post that we had three full days in Cusco, one for ATV rides, one for Machu Picchu, and one for Rainbow Mountain, which literally blew my mind. So, until then…
According to our guide, Incan weddings took place in front of this stone. Hence the pose.
I like to think that, within reason, anything you can do, I can do. Maybe not better, but I’ll surely give it a go! Well, friends. Not this time.
Driving an ATV is not for me, and you know what? I’m ok with it.
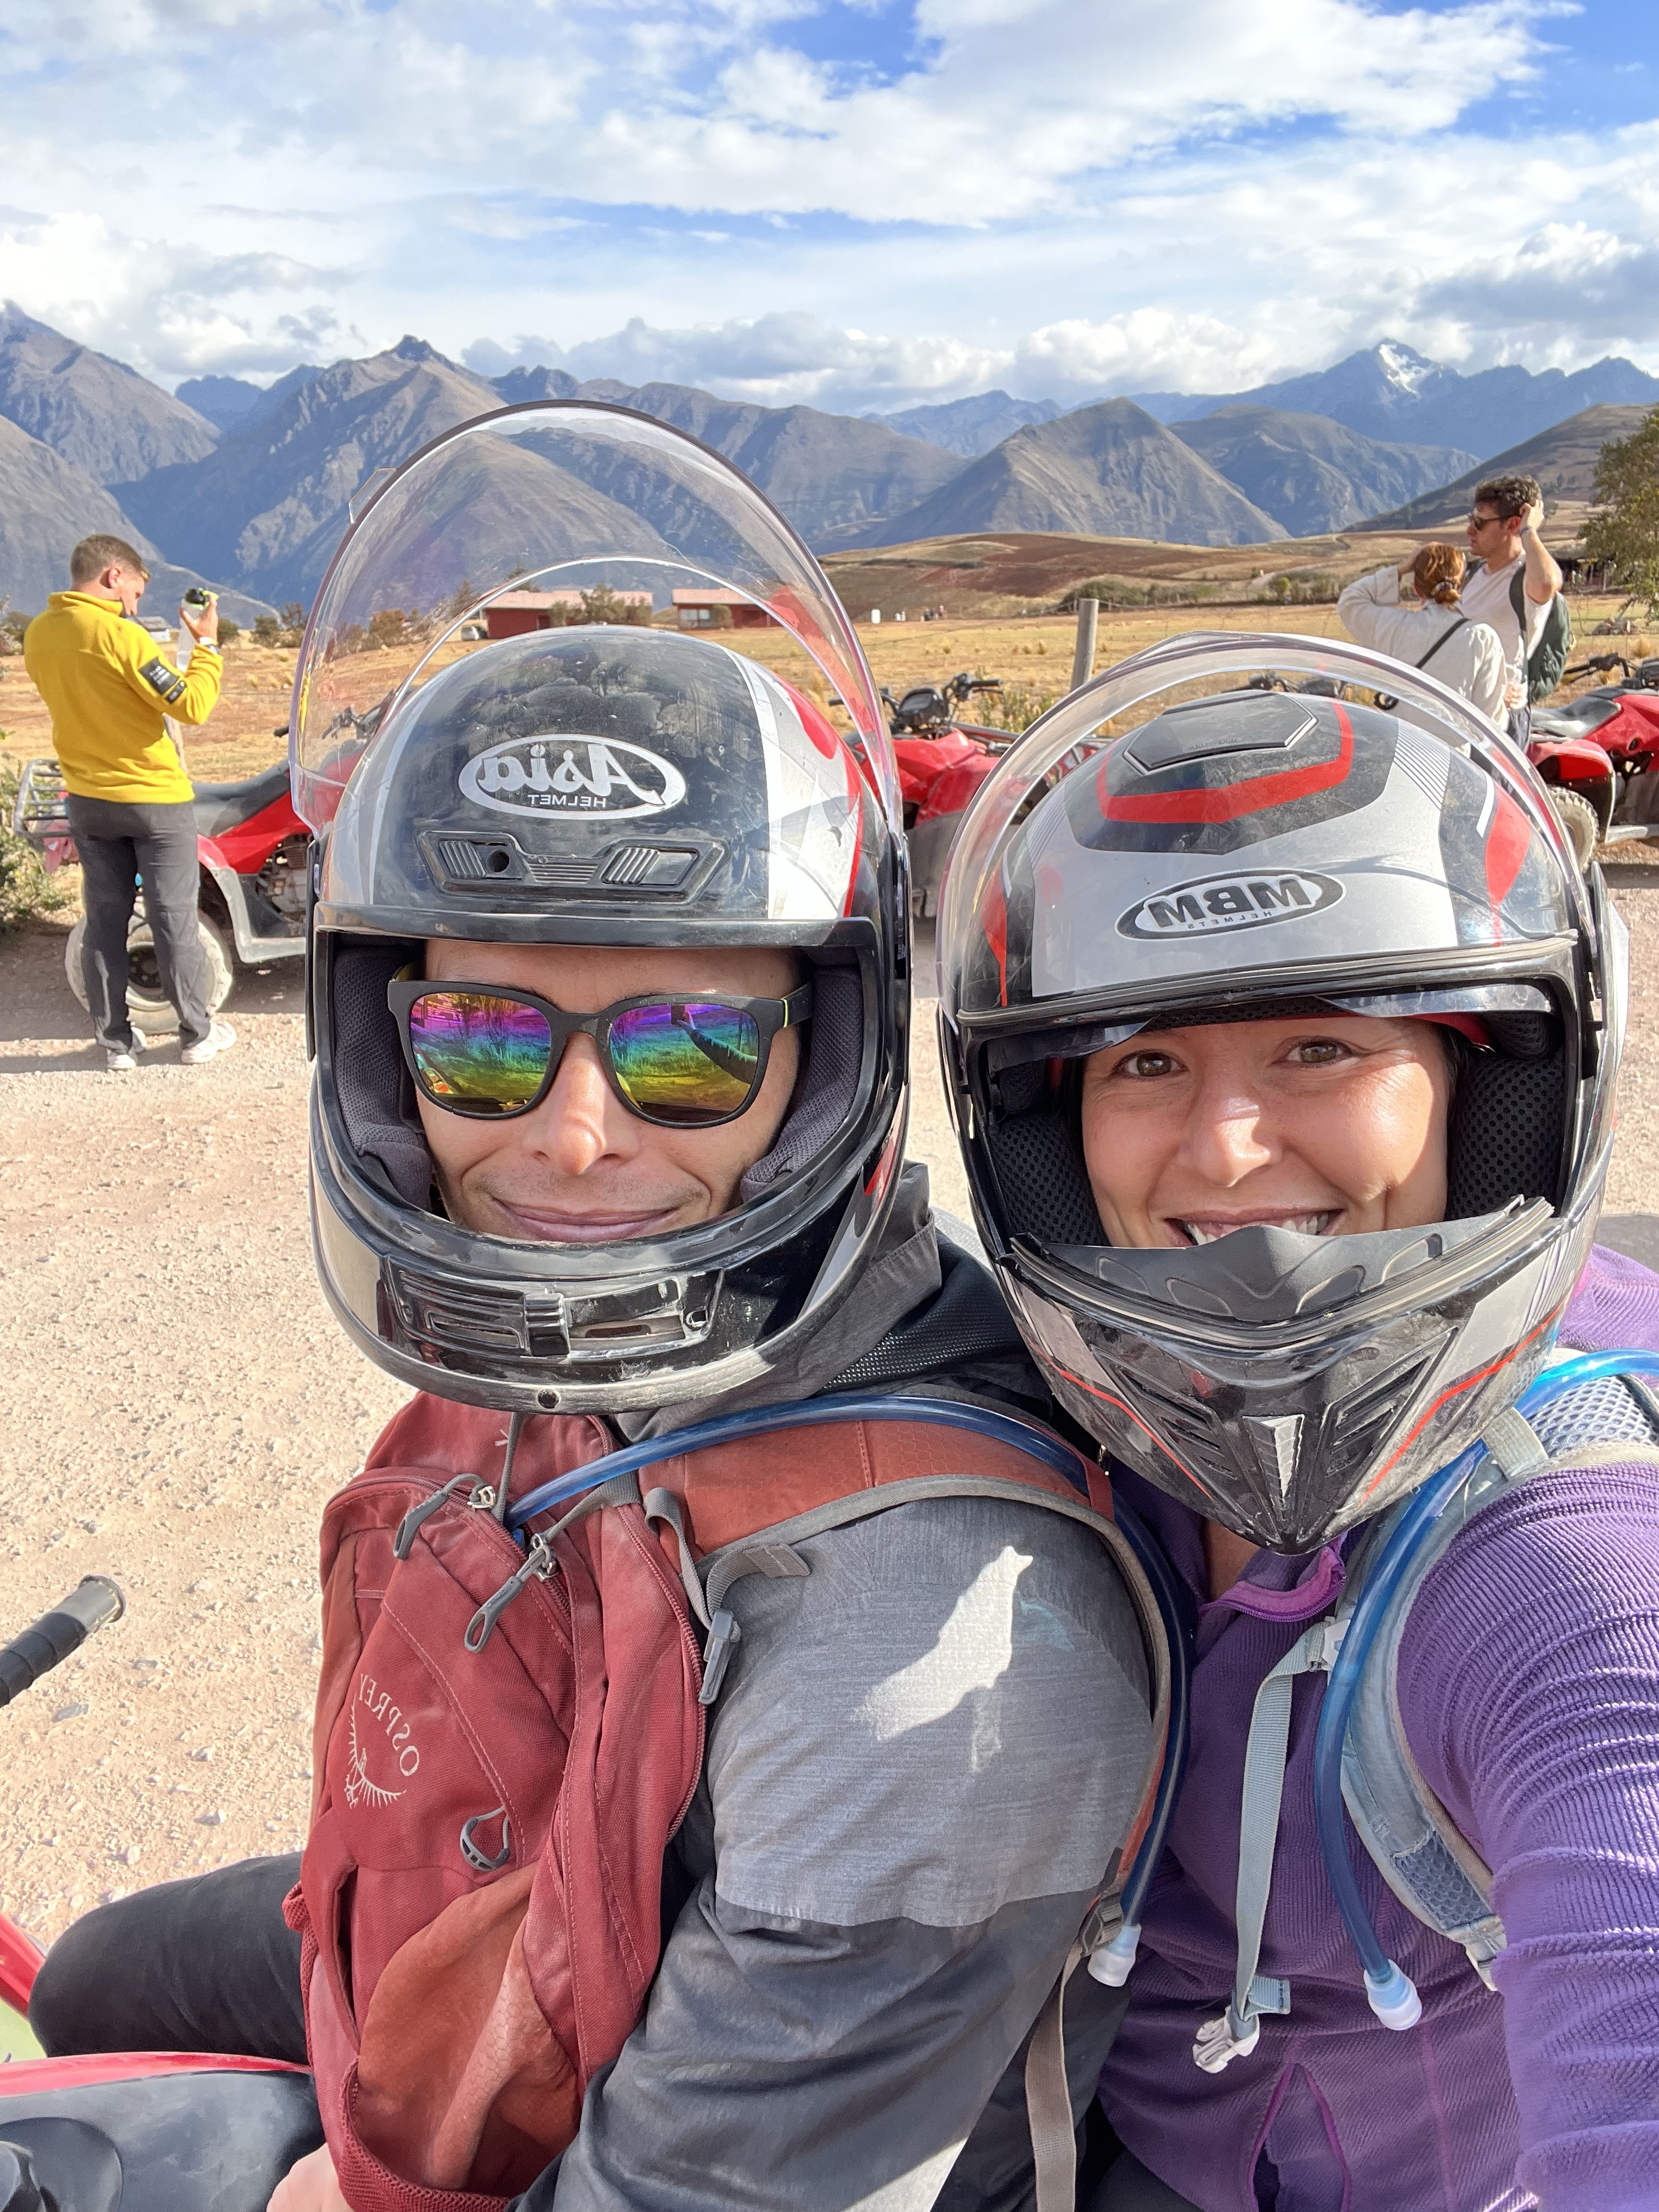
Perfectly happy to be on the back!
I’ve gone a bit rogue with my blog-time continuum. My last post was about our final Ecuadorian adventure, a three day hike to the crater lake at Quilotoa! But, before that, we spent three full days in Cusco, Peru, with our friend Kaitlin. So, I’m backtracking a bit!
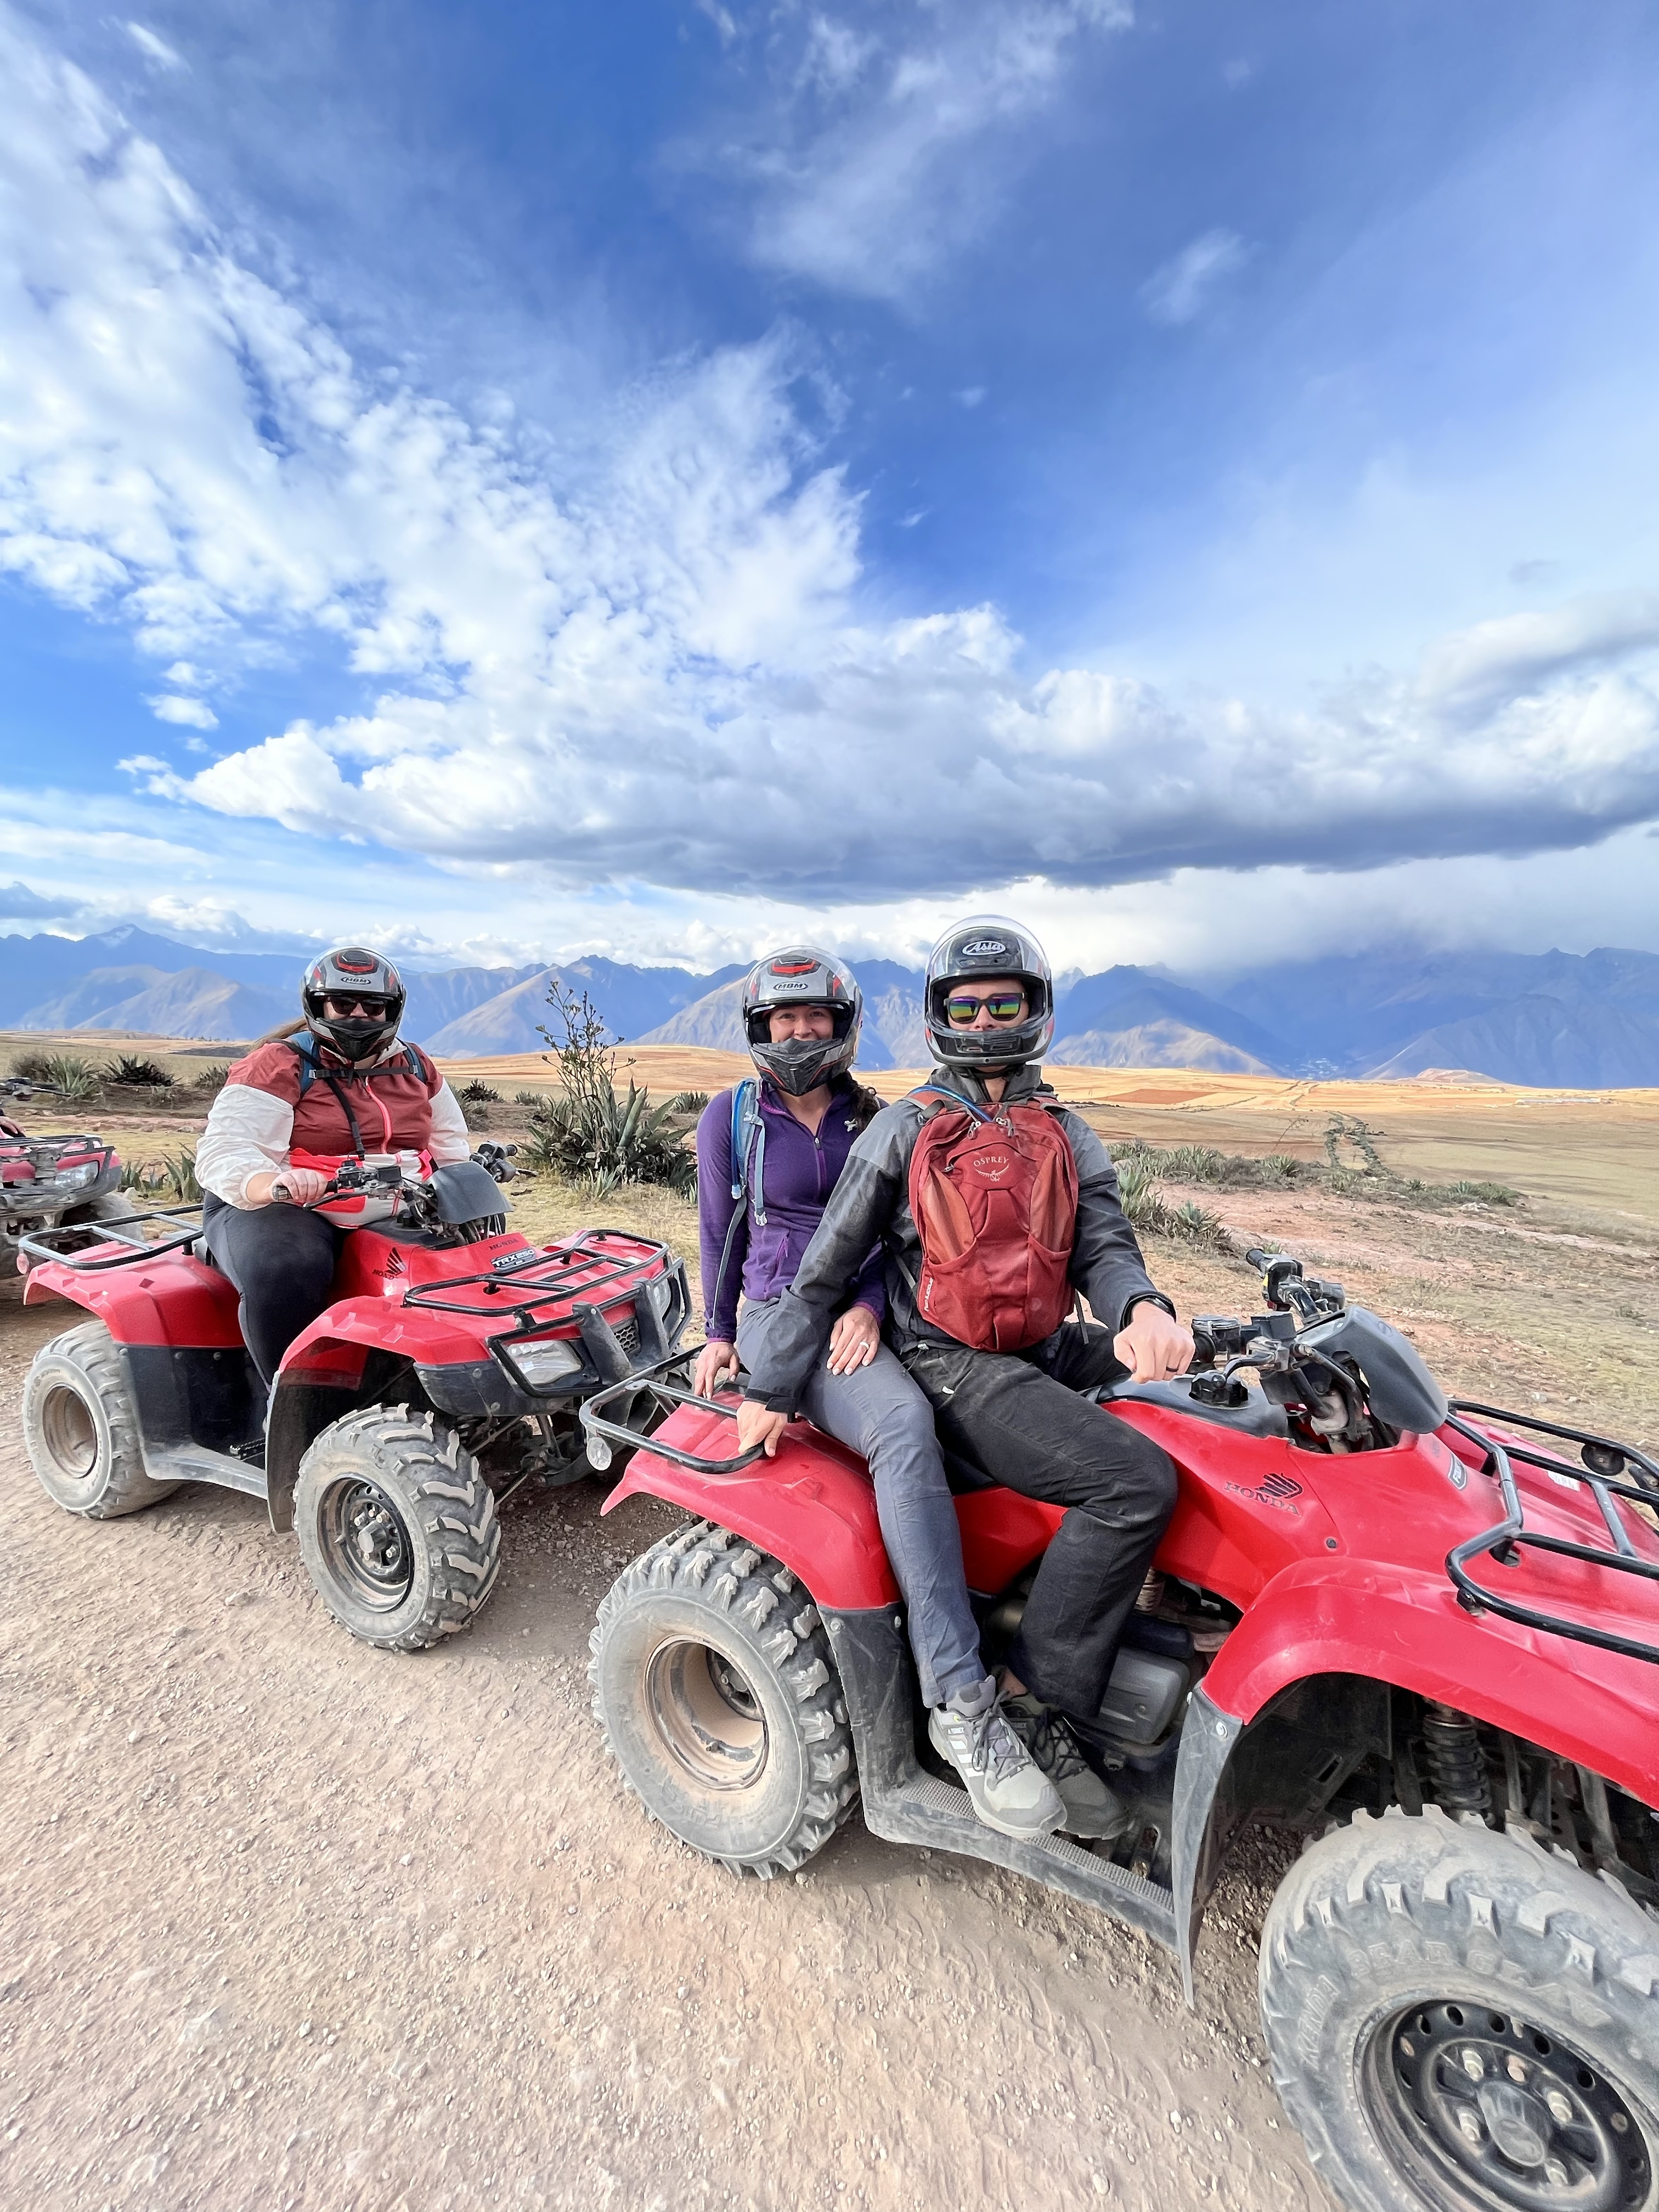
The ultimate goal of the Peru trip was a visit to Machu Picchu, but we decided to have an acclimatization day beforehand. Cusco sits at an altitude of ~3,400 m / ~11,150 ft. Machu Picchu is a bit lower than that, but regardless, it takes some getting used to! So, when we decided to do a half-day tour on day one, Kaitlin suggested an ATV tour.
When she originally proposed the idea, she asked if I wanted my own or to ride with Shane. “Uh, my own, of course!” was my answer. That was my first mistake.
My second mistake was not immediately changing my mind once I was sitting on the ATV and couldn’t figure out how to turn the damn thing on. Then we got a lecture about how there is no insurance on these ATVs. If you break it, you buy it (or pay to fix it, I should say). THEN, we were given specific instructions on how to hand signal down the line of tour-goers and how we needed to stay close enough (but not too close!) to the person in front so that everyone could see the hand signals!
As I’m writing this, it sounds simple.
For me, it was not simple. And I was nervous!
Then, I killed the motor trying to go, which made me more nervous!
Then, I wasn’t going fast enough, so I tried to speed up.
Then, a dog popped out of nowhere!
Then, a TUK-TUK popped out of nowhere! (Really, this one was a mystery since tuk-tuks aren’t really a thing here).
THEN, I had to give a hand signal! While still moving forward! 🤯
So, I ended up going a bit off-roading, nearly flipping the ATV (at least in my mind).
After that, I pulled off to the side. The guide had turned around by this point since I was considerably far away from the next person in line. “Is everything ok?”
“I’ll ride with my husband now.” I was done. 😆
Shane and Kaitlin were totally fine, albeit a bit worried about me flipping the ATV in a literal span of two minutes. Ha. But, once I was riding on the back, I had a great time! The views were incredible!
ATV success!
The tour included two stops in the Sacred Valley of the Incas: Moray and the Maras salt mines.
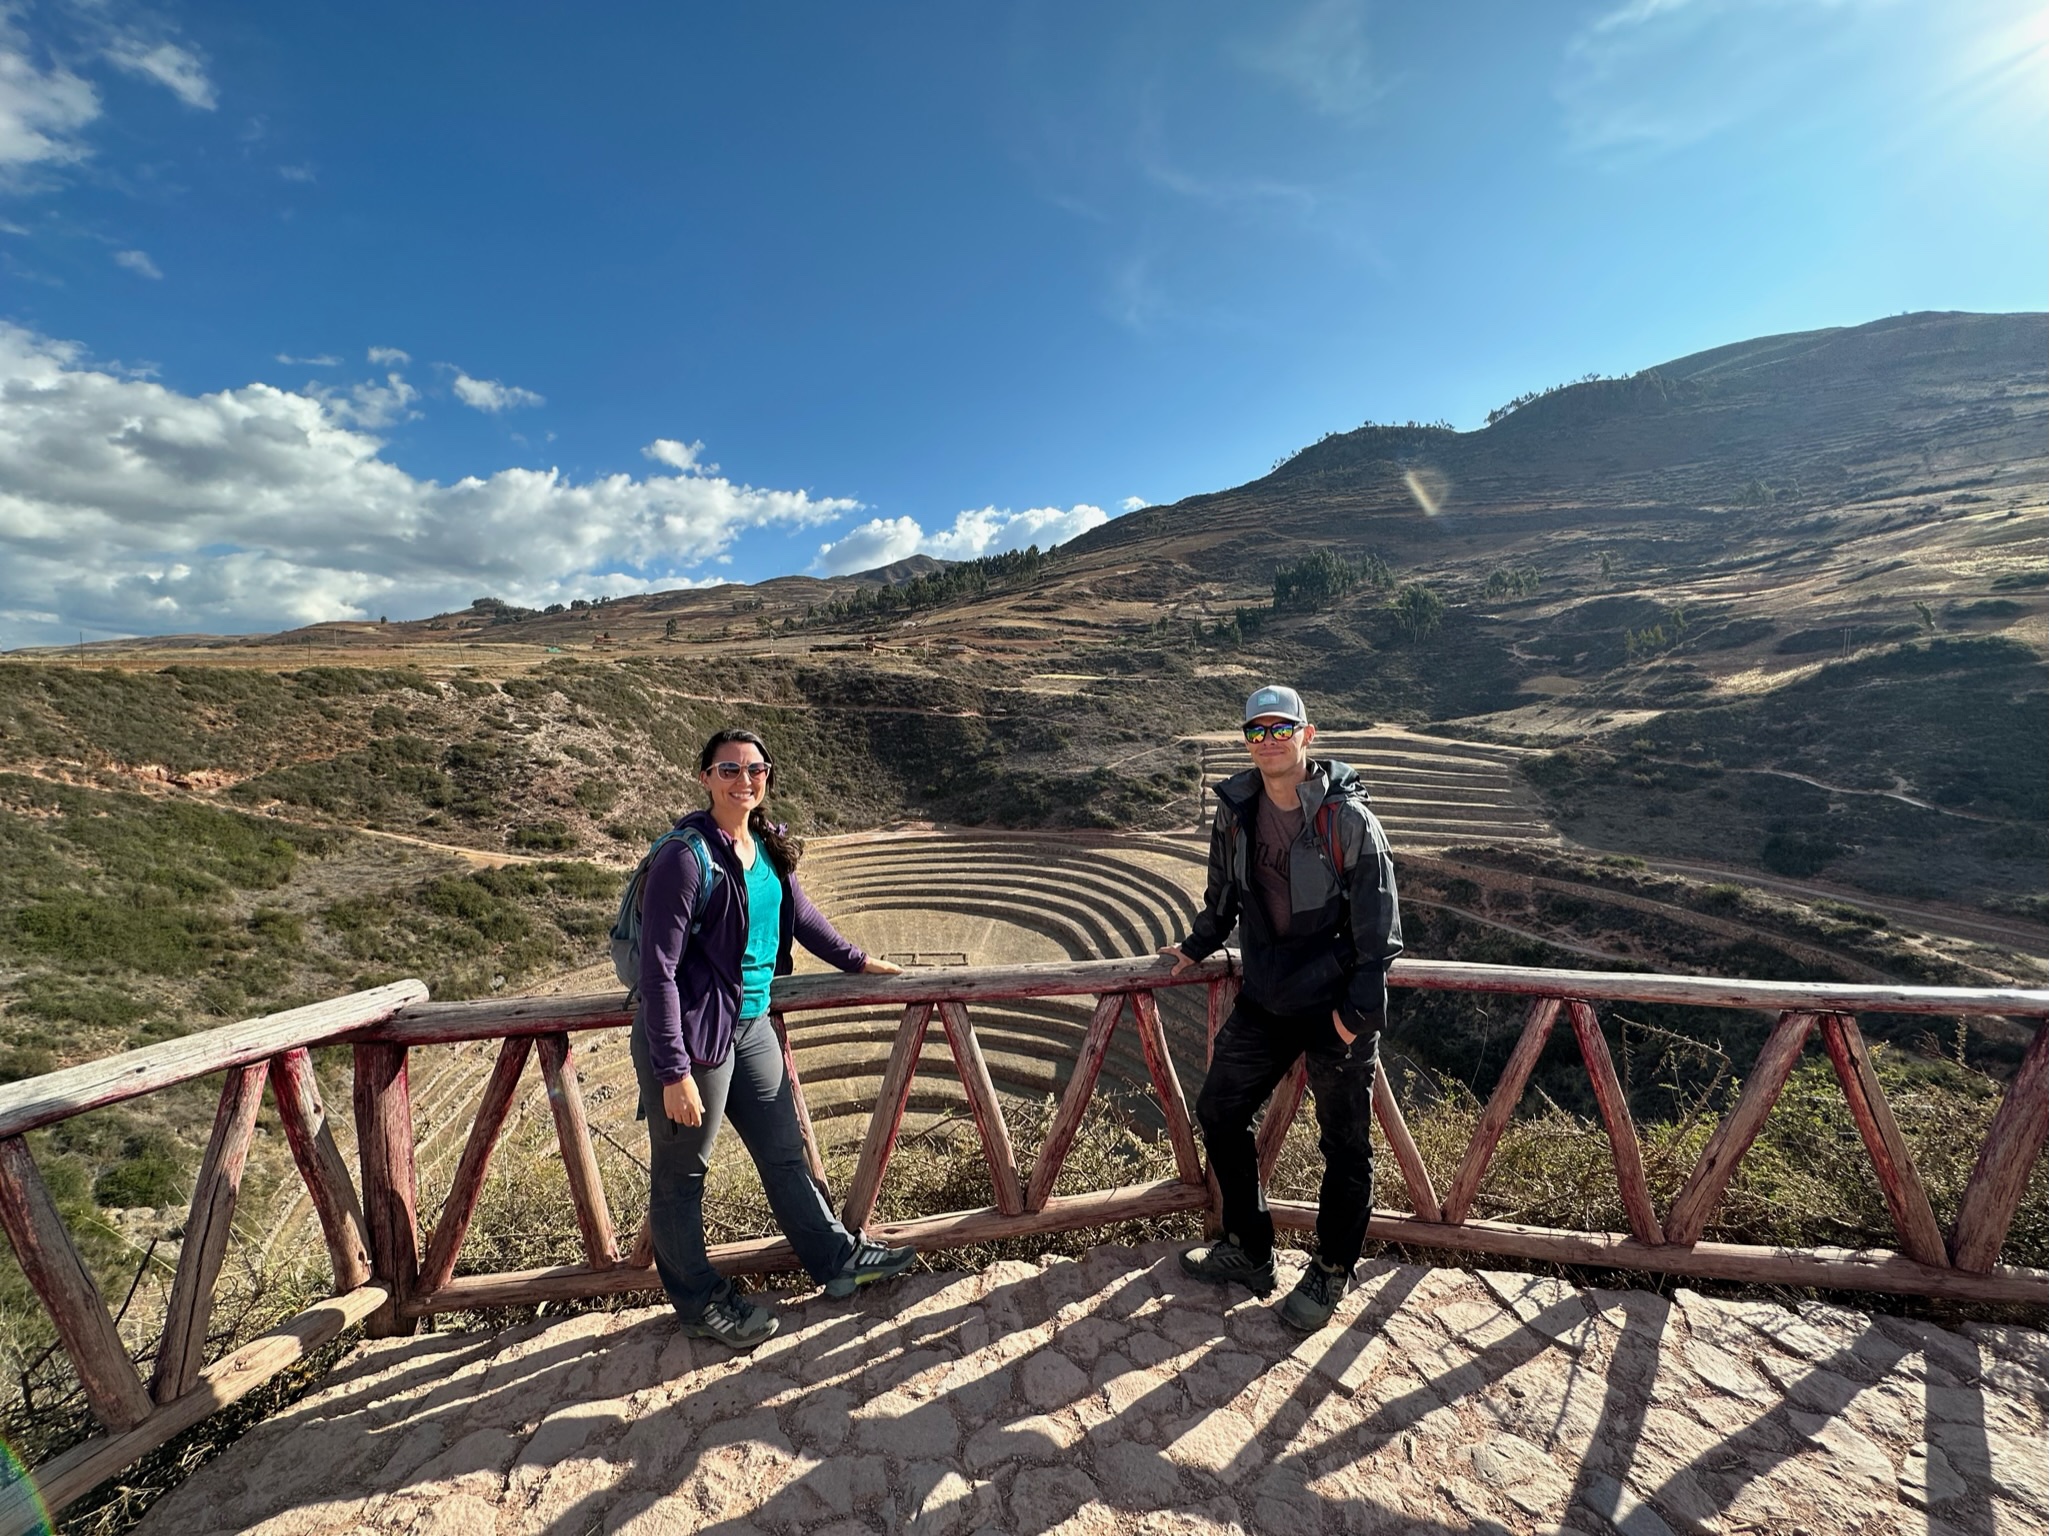
First up was Moray, an Incan agricultural laboratory/archeological site.
Moray, Peru
As you can see, this site is a series of platforms in a natural hole. On average, the platforms are ~1.8 m / 6 ft tall, and our guide told us that each platform represented a microclimate since the temperature and amount of sunlight, for example, varies among the platforms. Hence, it became (so they suspect) an agricultural laboratory!
Up next, the salt mines!
We couldn’t visit the salt mines via ATV; the route is a bit too dangerous for that, given it’s a winding road into a valley. So, we returned the ATVs and hopped on a bus for this part.
The salt mines are indeed a functioning business. Locals own the various salt flats, mine the salt by hand, and carry it out on their own! The salt comes from a saltwater stream from the mountain behind the mines, but the true source of the water is unknown. And according to our guide, it has purposefully not been look for for fear of disrupting it or providing other areas with the source location and, therefore, access to it. They produce three main types of salt here: white, pink, and brown. The white is your standard table salt, the pink is the famous one, and the brown isn’t for consumption (it’s mostly for agriculture or spa/bath treatments). The different salts vary based on the amount of nutrients and are harvested from different layers in the salt pool.
People working their salt pool.
We left with some smoked pink salt, which was incredible and very potent! You could smell the smokey flavor through the plastic bags!
The Sacred Valley is huge, and this was only a taste of the things to see in this area. But we were primarily here for one thing: Machu Picchu! More on that next. 🙂
It’s hard to believe, but by the time you’re reading this, we will officially have less than a month left in Ecuador! Two+ years here have simultaneously flown by and gone slowly, but that’s for another post.
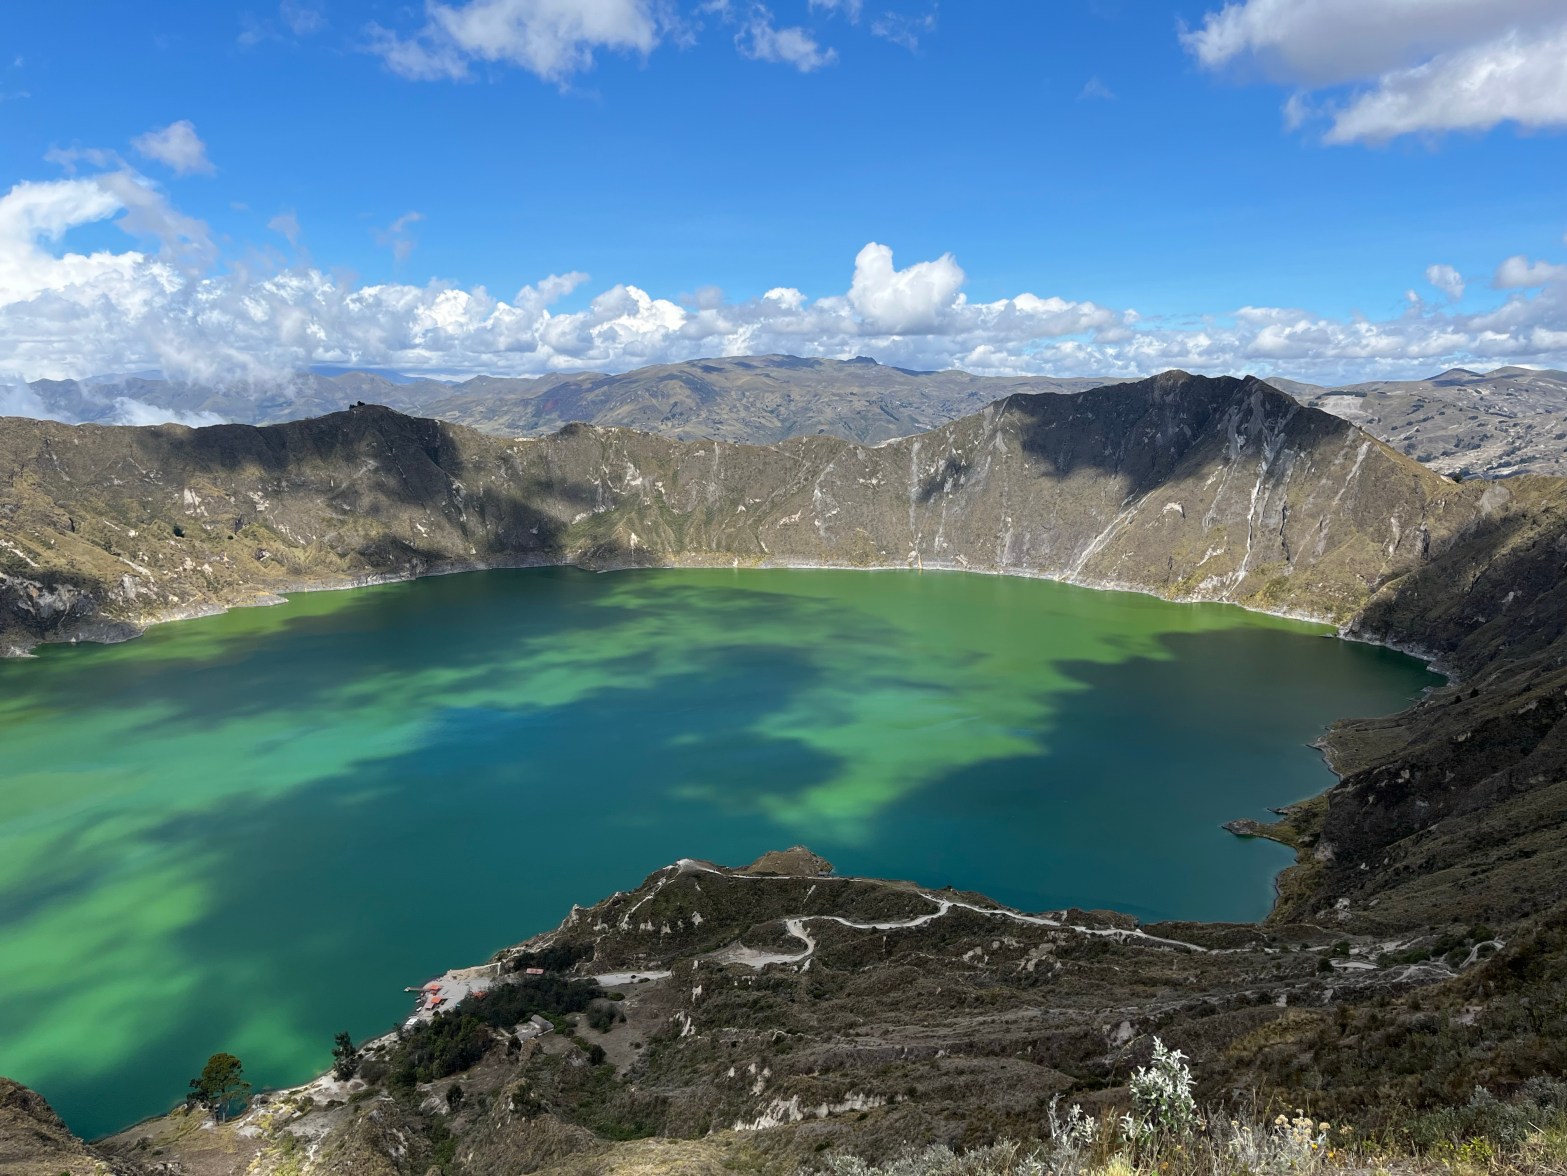
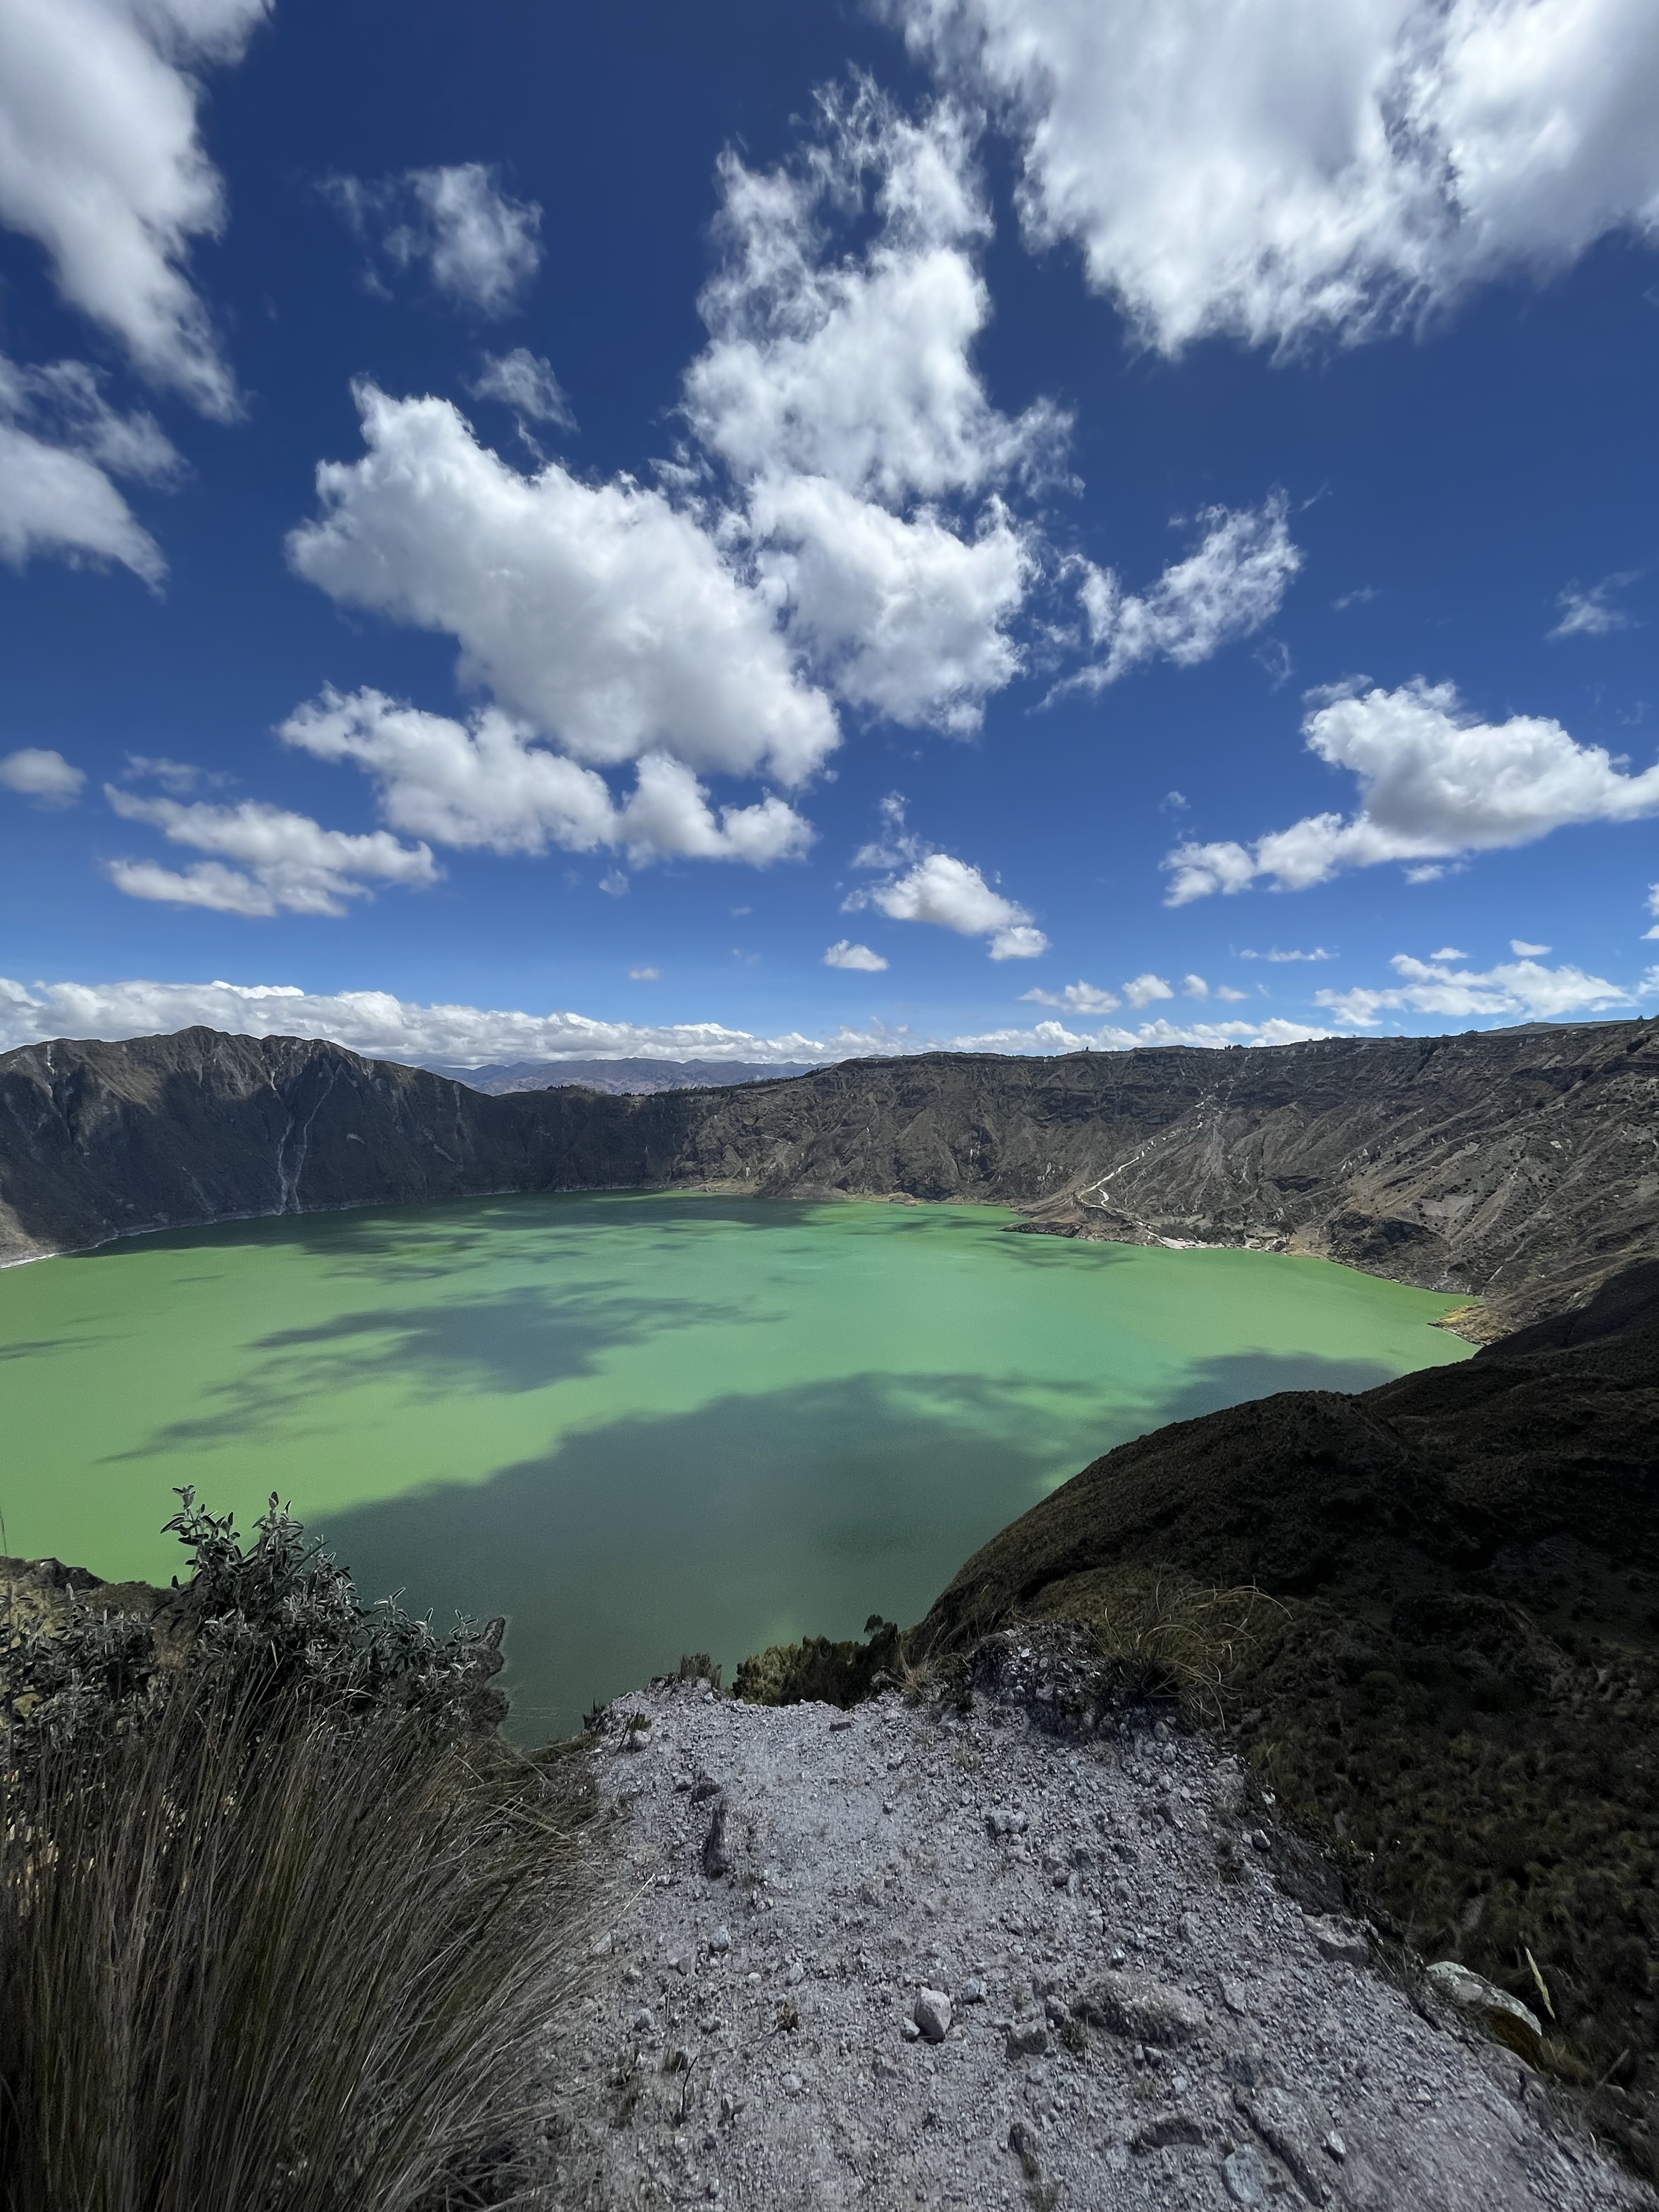
I’ve been to Quilotoa before when my friend Mary Beth visited, but it was only a day trip. Since then, hiking the Quilotoa Loop has been on my Ecuador bucket list. In fact, we were supposed to go for our anniversary back in September, but the butterflies dictate the schedule. So, here we are, two months late but doing it nonetheless!
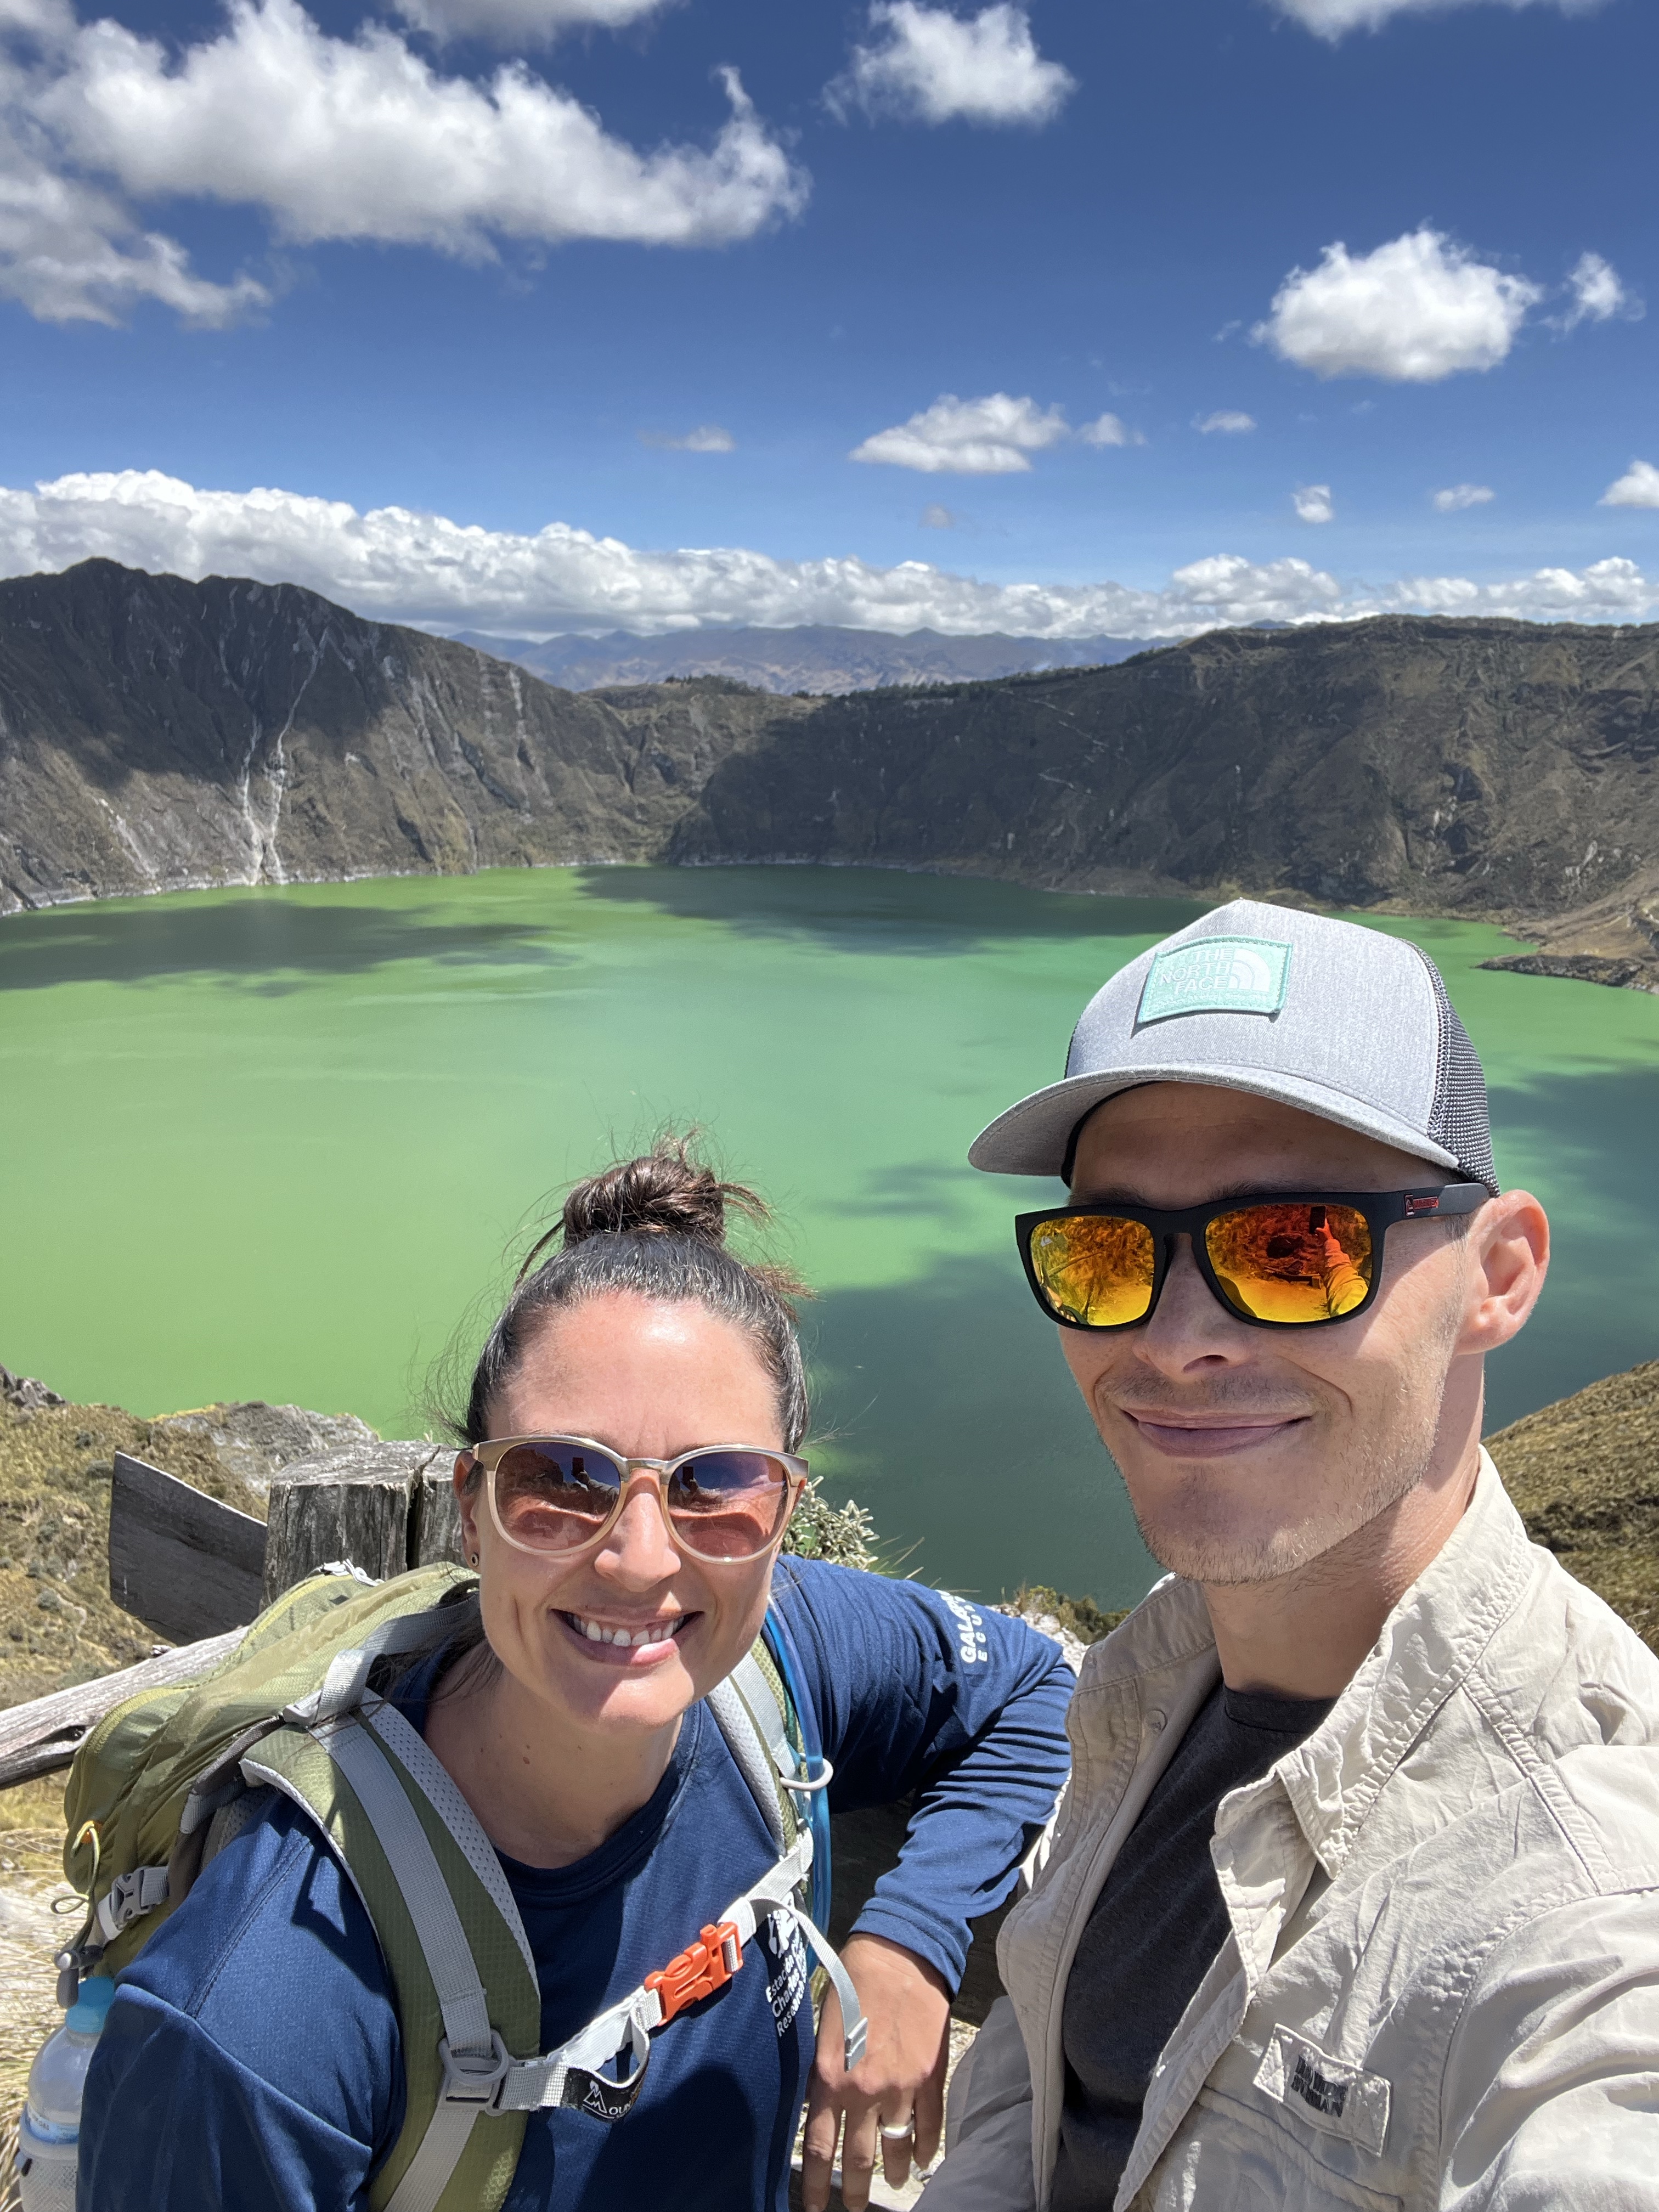
Quilotoa lake.
The name Quilotoa Loop is a bit misleading because the hiking route is not a loop at all. The “loop” starts and ends in the city of Latacunga, with a 2-hour bus ride on both sides of the hiking portion.
We used this detailed description by Chasing Advntr, so I won’t go into too much trail detail. However, a few points:
Download offline maps and check them frequently. You WILL get lost. Two hostels have marked the trail in yellow/red and blue (less frequent), and signs exist along the route to point you in the right direction. Yet, the trail wasn’t marked at some key intersections. The hostels also offer trail maps/descriptions, but they are sometimes confusing. So, offline maps are key for getting back onto the correct trail. We used maps.me (use walking directions from hostel to hostel), but AllTrails also has a version of the hike.
Bring snacks! The hostels offer a box lunch ($3 per person), which comes with water, a sandwich, chips, and fruit. But you’re hiking at elevation, which made me more hungry. So, I recommend extra snacks.
Bring sunscreen and long sleeves. The sun is strong, but the wind is cold. We brought light long sleeves for at night (which does get chilly) and as sun protection. In my experience, you burn much faster here, so be prepared! We also brought raincoats, but luckily, we didn’t need them (in November).
You can take your time. The longest hike is the last day, ranging between 5-6 hours. Walking slowly (out of necessity, ha), we finished in 5.5 hours, at ~14:30, including three longer breaks for snacks/lunch. So, you can take your time on the trail. Once you’re at the hostel, there’s not much to do given the size of the villages. So, enjoy the hike!
It’s an inexpensive trip. The bus from Quito to Latacunga and the rides on either end of the hike are $2.50 per person, and the hostels are ~$40 for two, including dinner and breakfast. The rest of your expenses are box lunches ($3 pp), extra snacks, and your Latacunga hotel cost. We spent ~$200 total for this 5-day (2 travel days, 3 hiking days) adventure.
Various signs on the route.
On to the good stuff, the pictures!
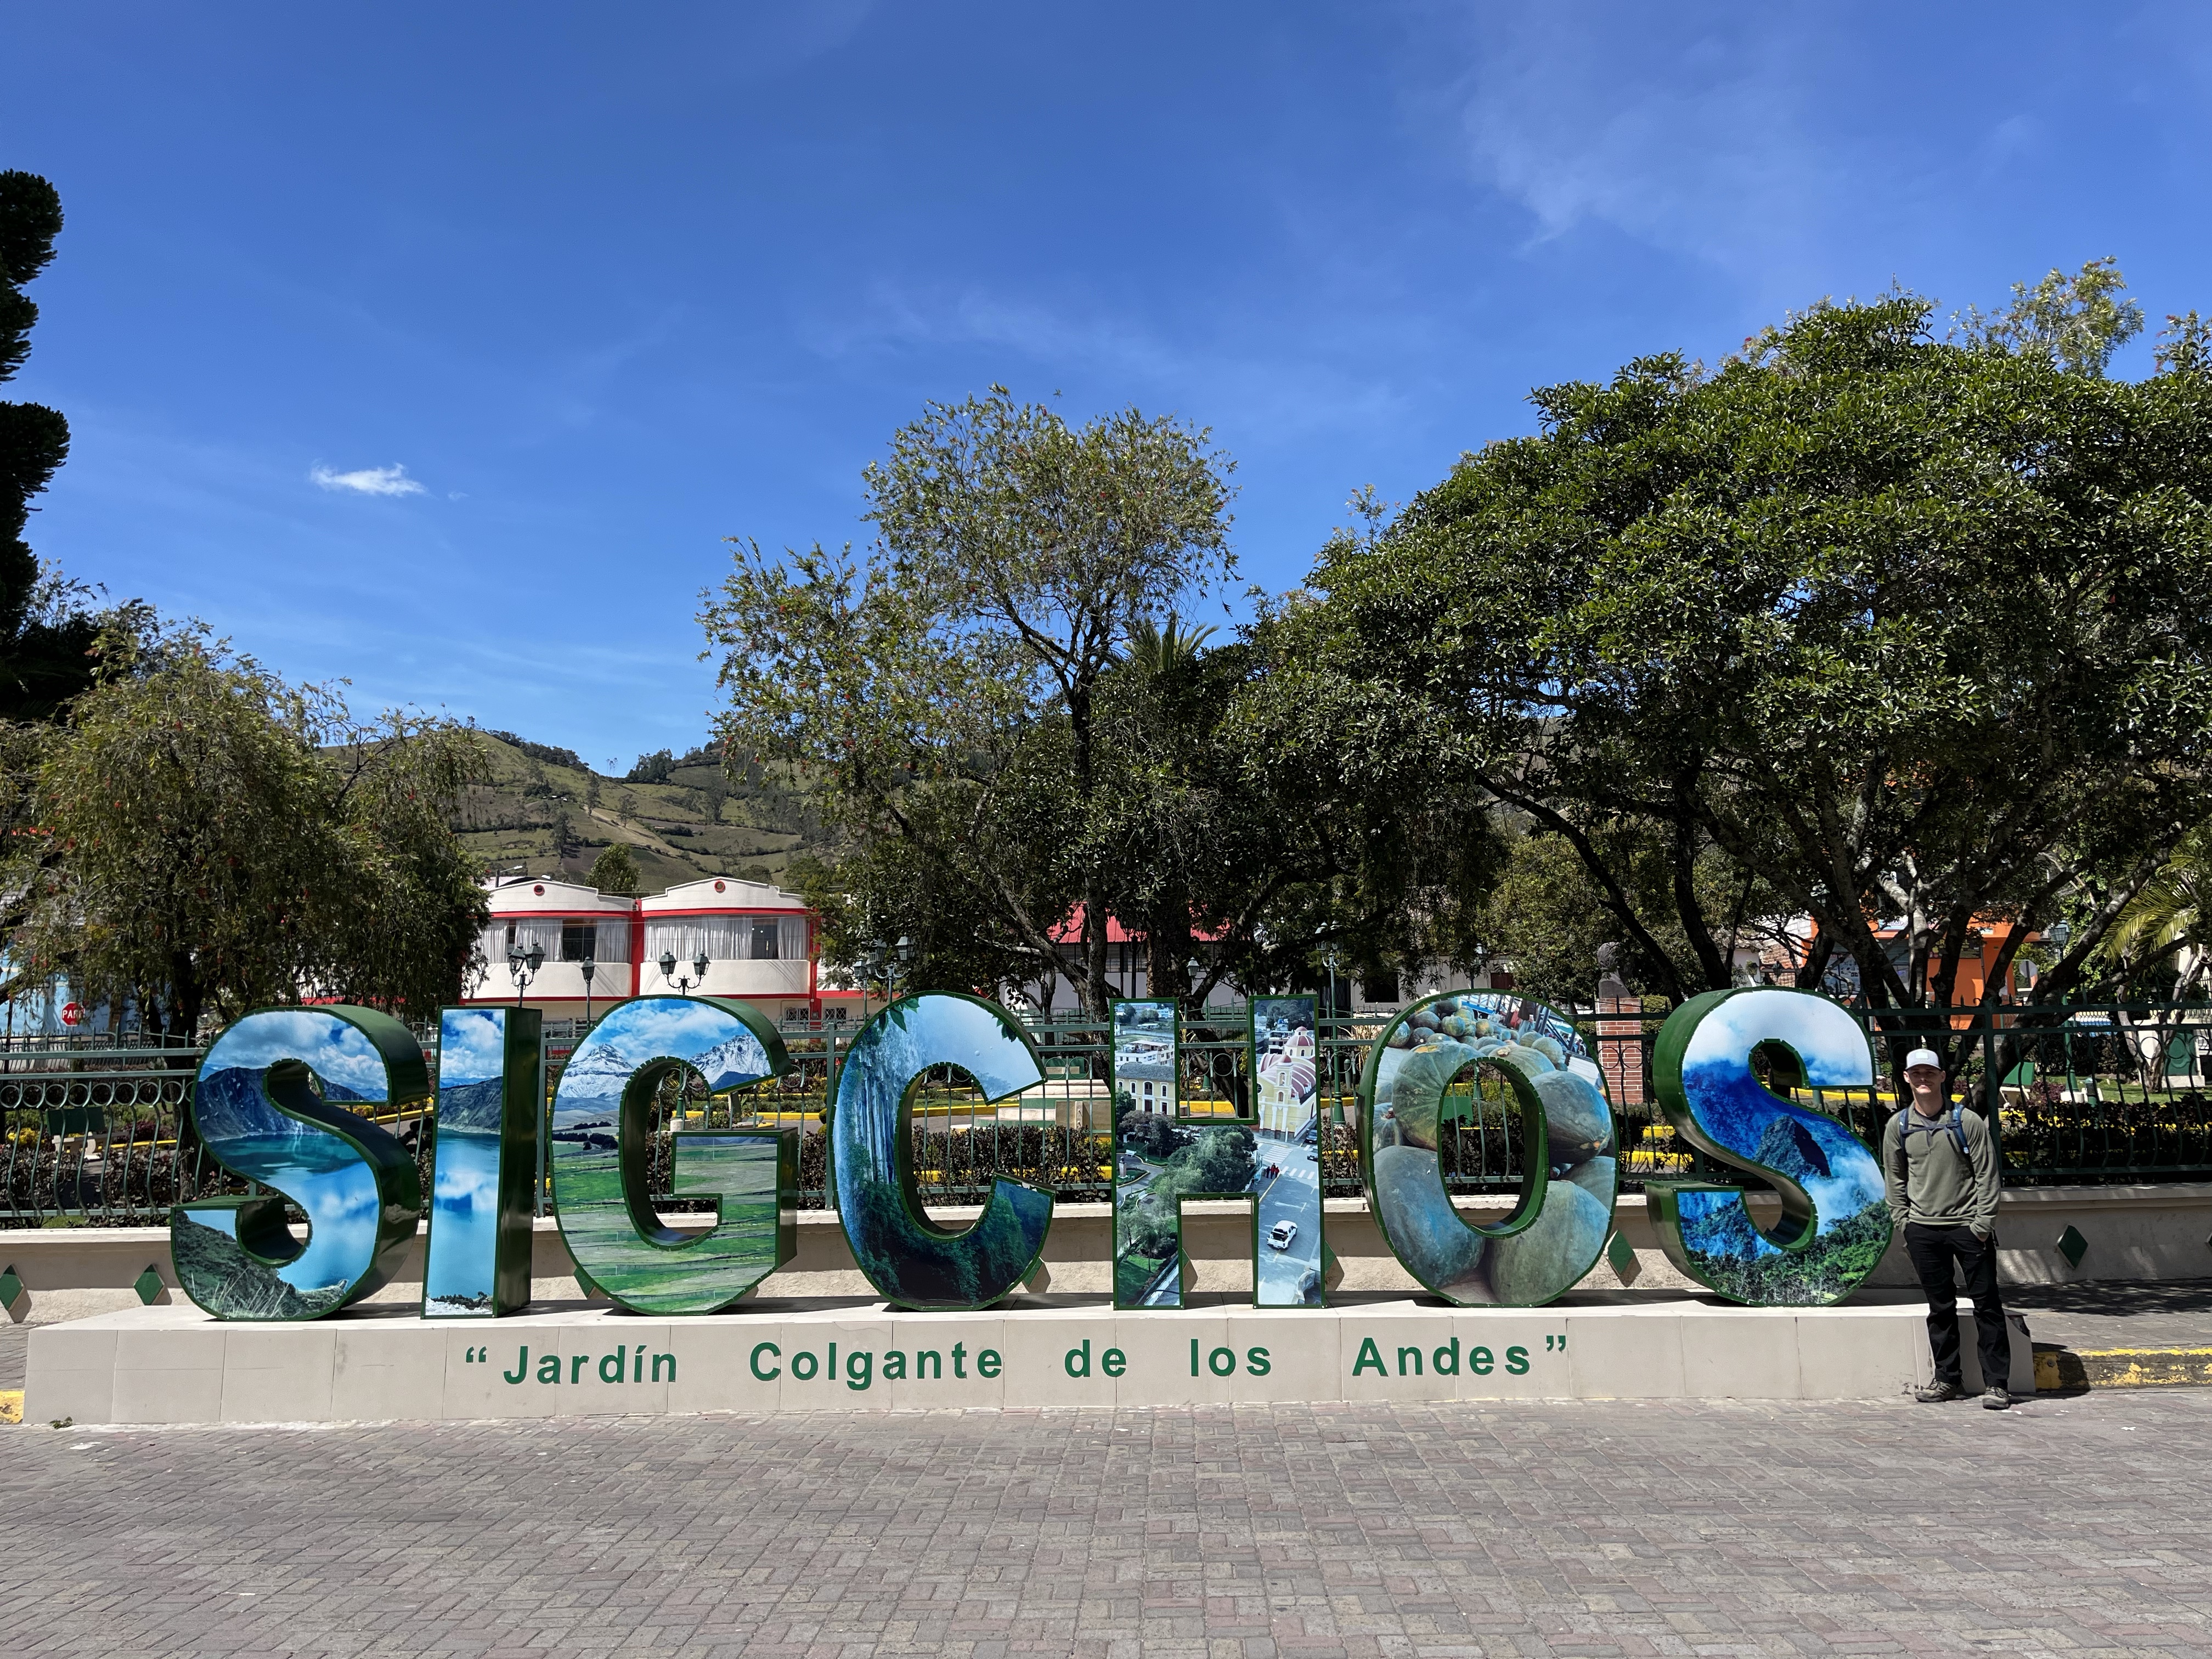
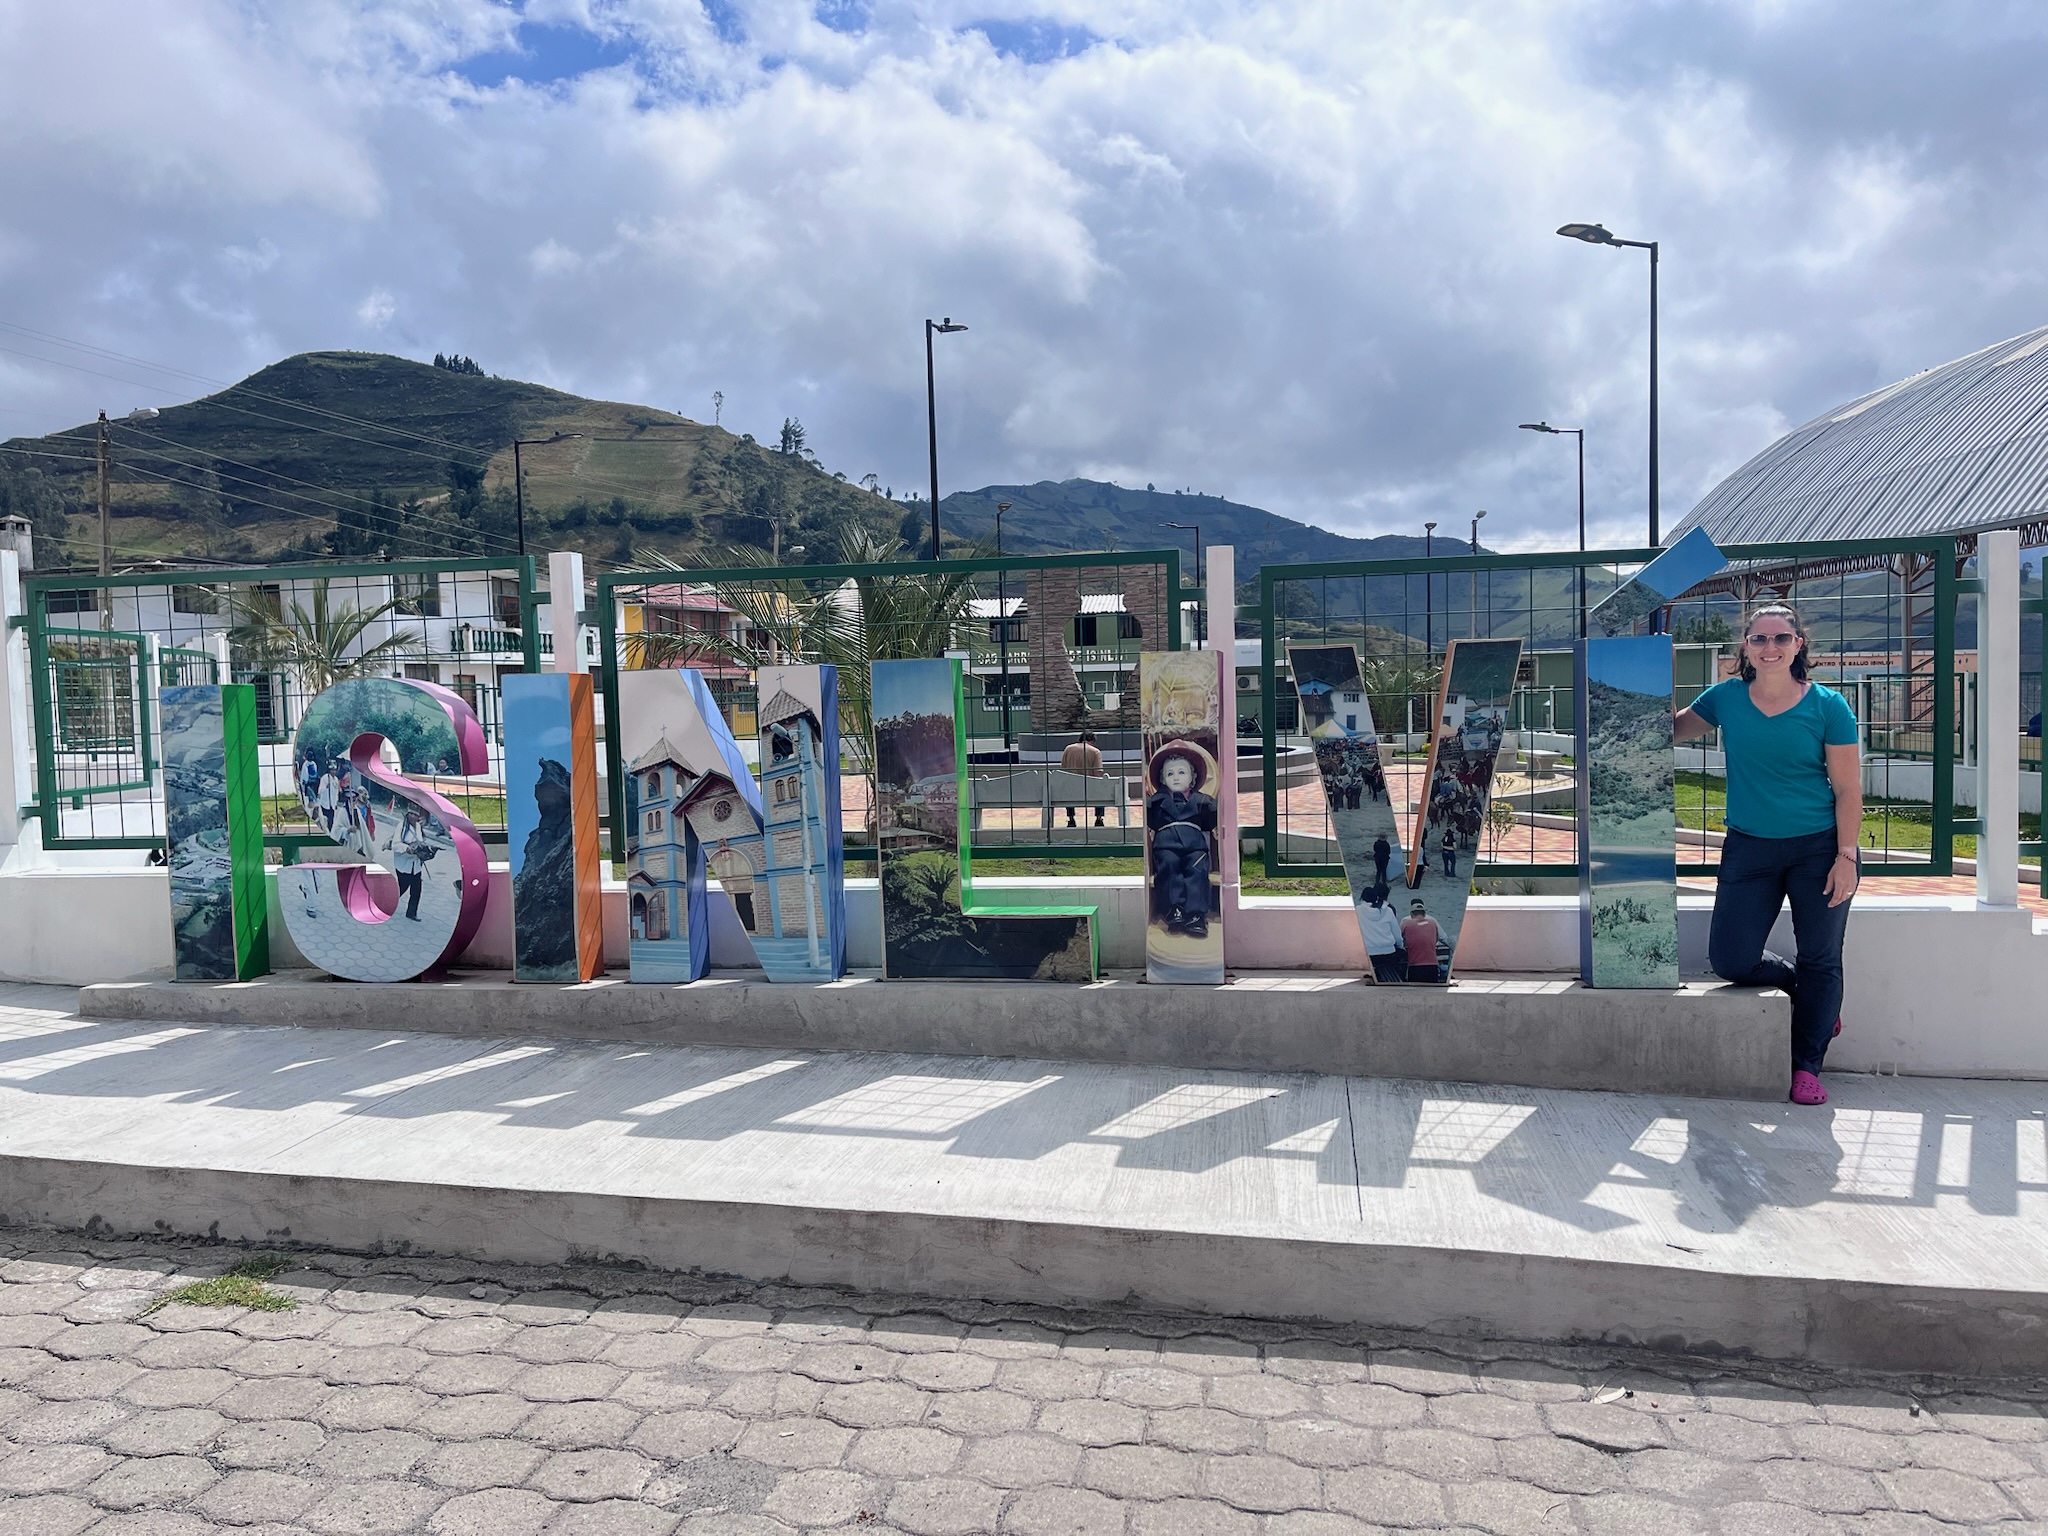
Day 1: Sigchos to Isinliví
Sigchos, Ecuador
The bus from Latacunga to Sigchos leaves from the Terminal Terrestre at 5, 6, and 8 am, then nearly every hour on the hour from 10 am. We chose the 8 am bus to make sure we had plenty of time, but we ran into people who took the 10 and 11 am buses, and they also arrived with plenty of daylight left. So, it’s personal preference!
And, FYI. You can buy your tickets ahead of time at the counter or just hop on the bus and pay in cash on the way. This applies to all buses in Ecuador. Just be sure to have semi-exact change (for example, they likely won’t be able to break a $20 for $5 bus fare).
Finding the start of the trail is easy; it has been marked on maps.me, and is well-signed (head towards the Starlight Inn).
The start of the trail!Descending into the valley.
As I mentioned before, we were following the map and the written directions from Chaising Adventr, and here is where we first messed up. The directions were:
“As you follow the road downhill you will get to a bridge across the river – the best hiking trail from here turns right just before the bridge and follows the river on the west side of the river.”
Two things. First, we weren’t paying attention. We got to the bridge and just kept on walking, not stopping to check the maps. Second, the trail is not marked at this intersection, or if it is, we didn’t see the marker. Consequently, we walked the road to Isinliví and missed the trail, which was fine–we got where we needed to go, but we missed an entire section!
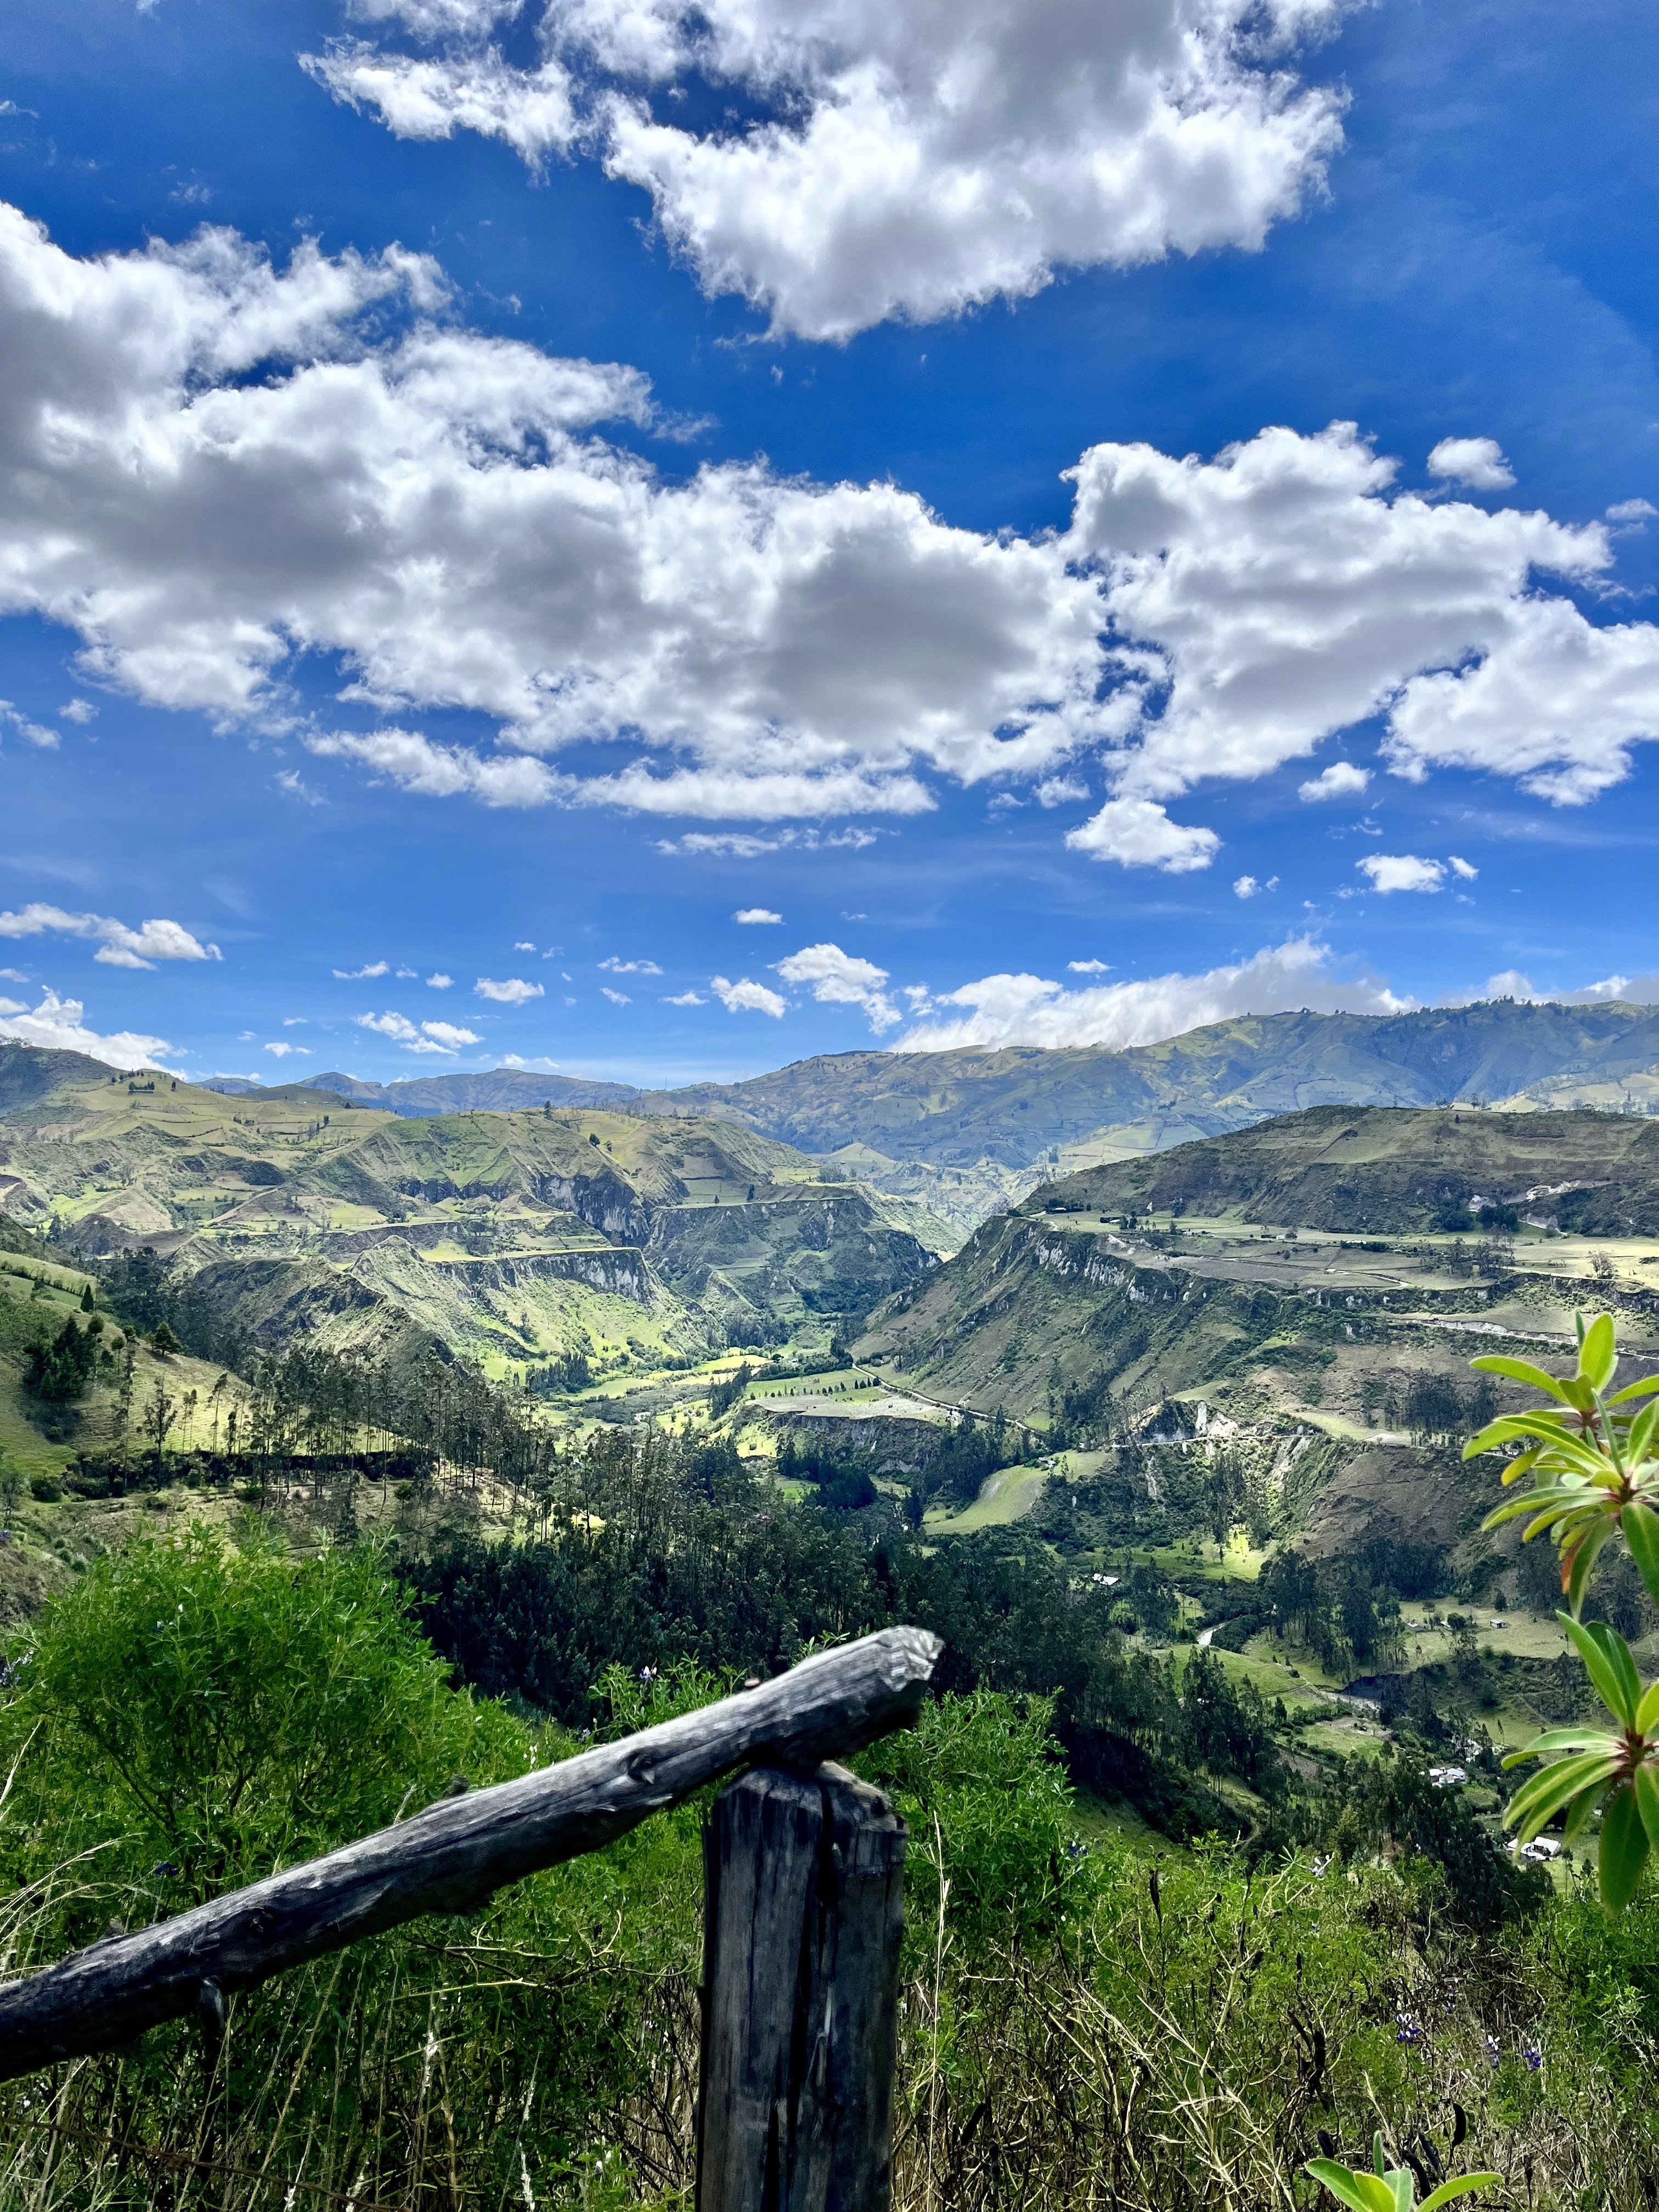
The views from the road weren’t terrible.
Second, we noticed an error.
“At the top of the hill you will reach a road. Turn left for a short distance and then follow the trail to the right to Isinlivi. The walk on the road is about 1.5 km.“
You should turn right at the top of the hill and follow the road for a short distance. The trail to the right to Isinliví is marked. However, we also missed this trail since we didn’t realize we should follow the red/yellow blazes at this point. 🤦♀️
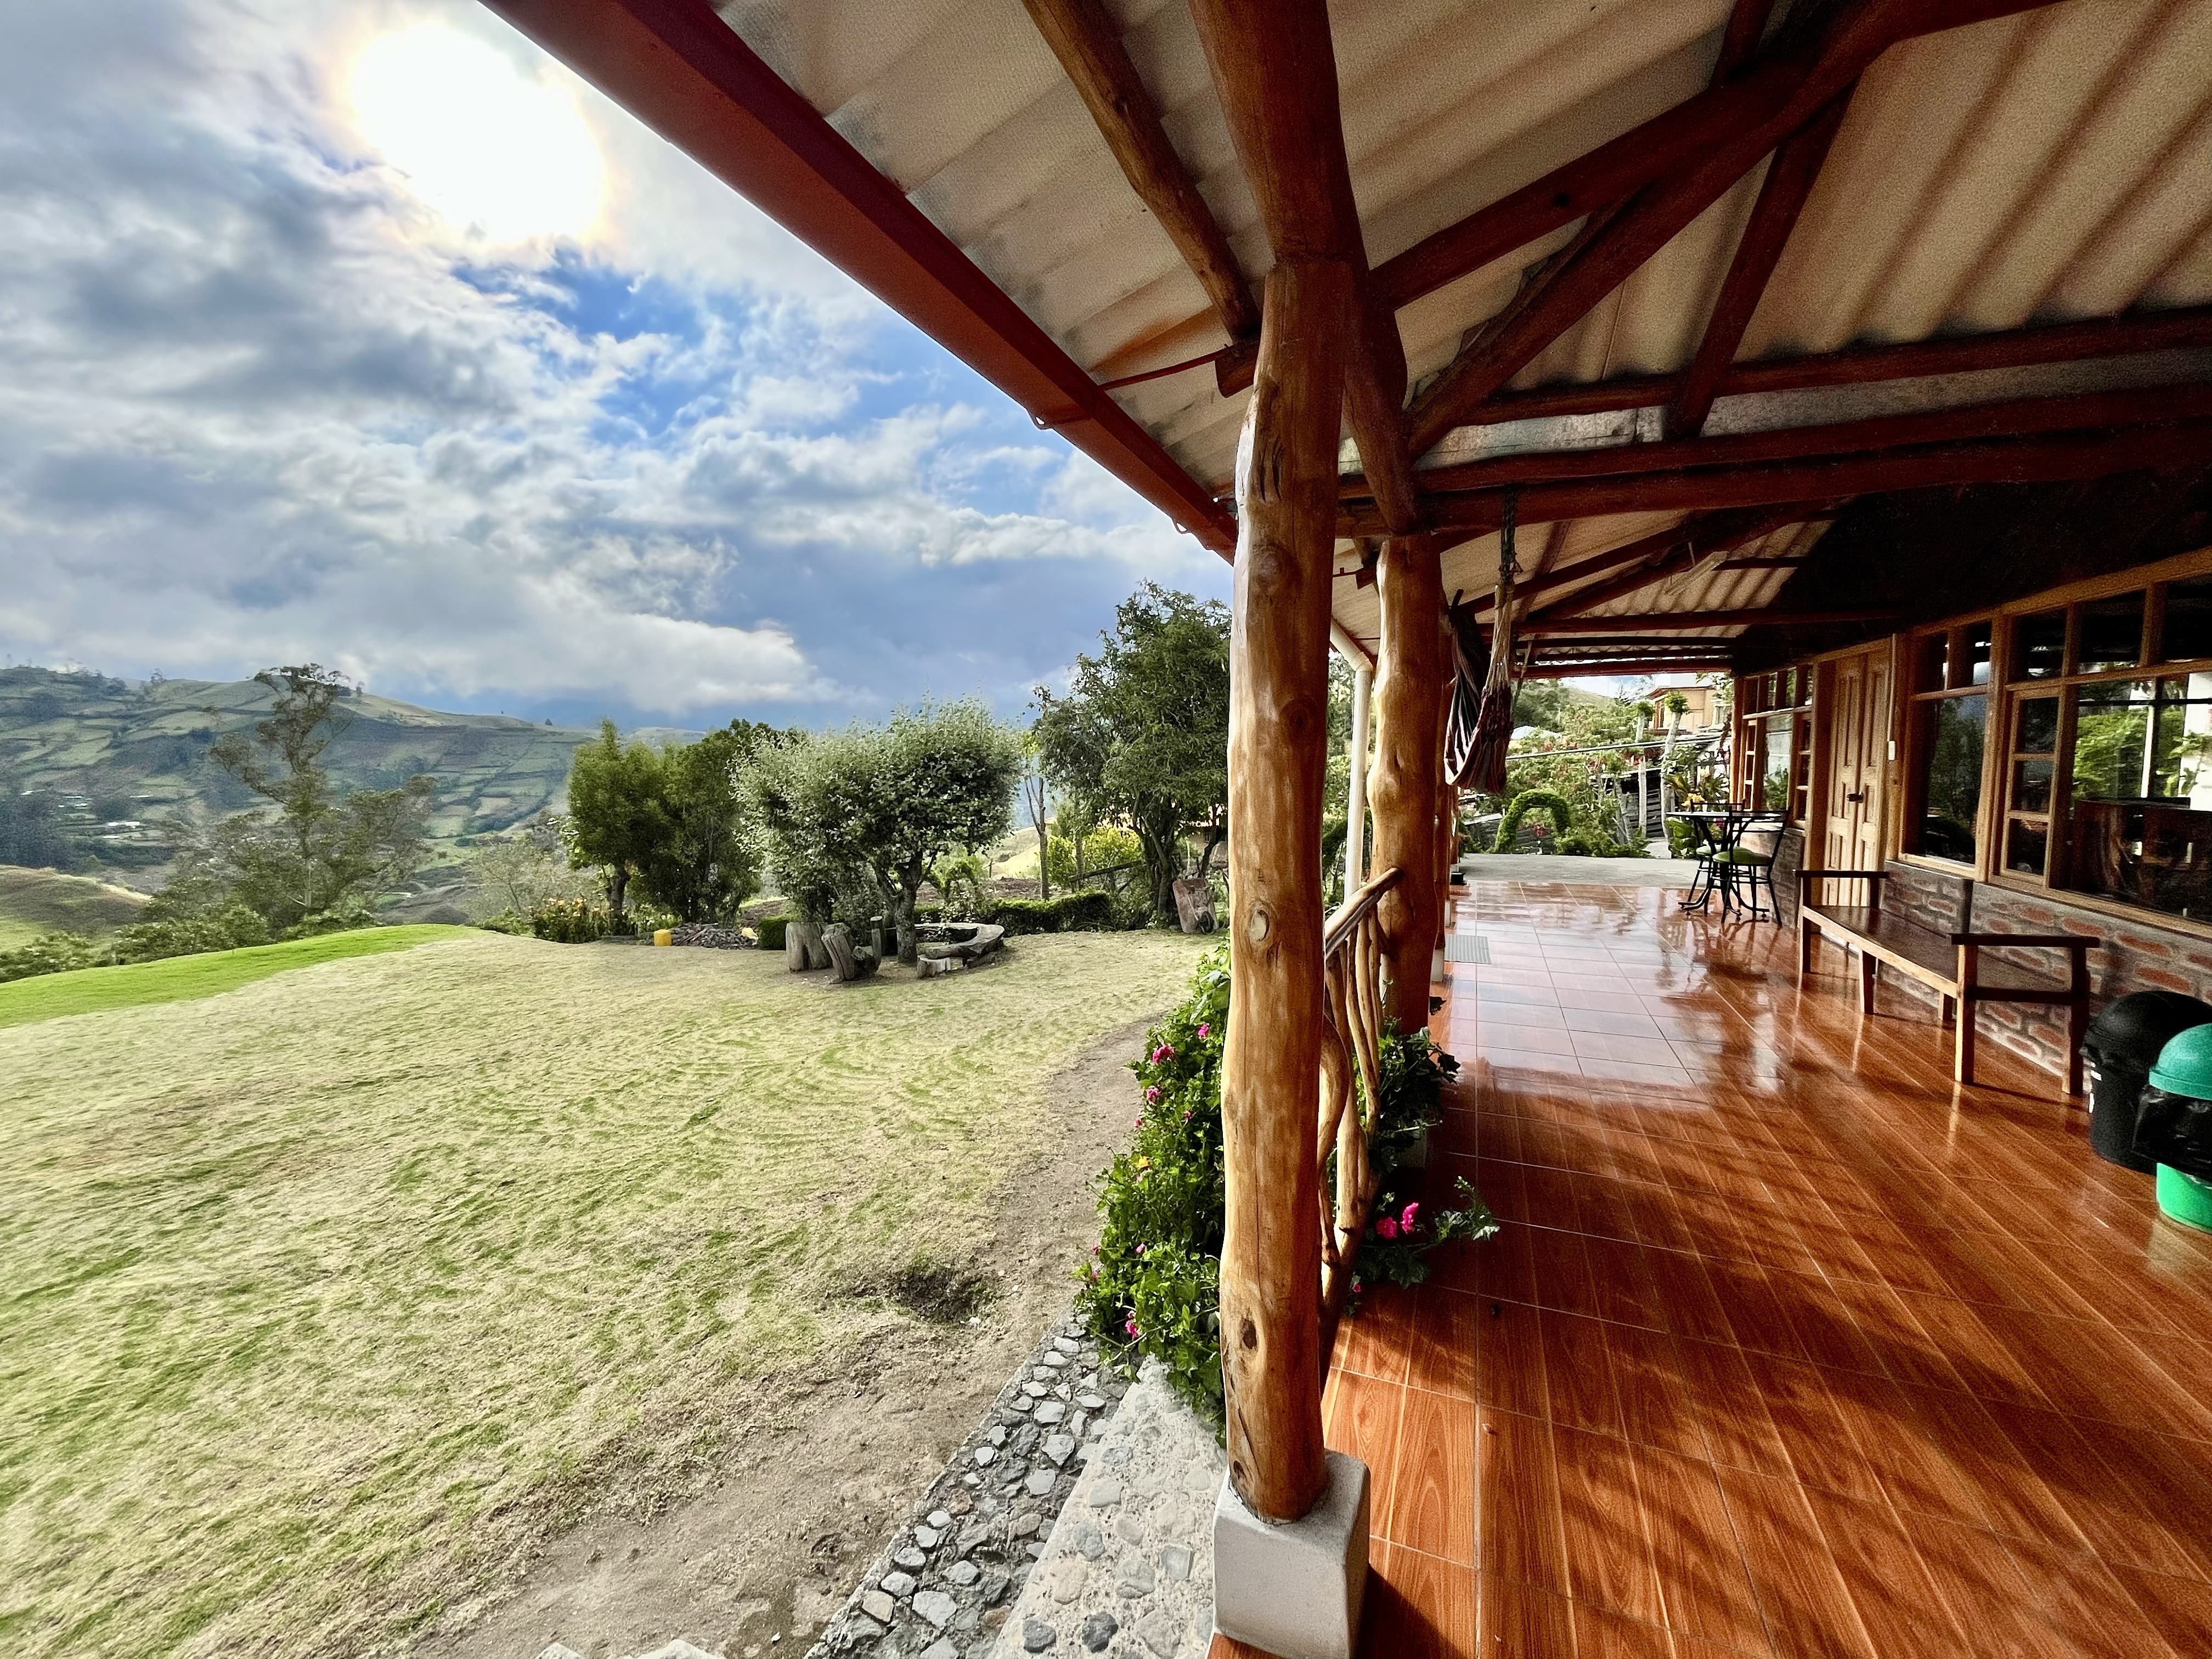
Nonetheless, we made it! There are exactly two hostal options in the sleepiest town I think I’ve ever seen: Hostal Taita Cristobal and Llullu Llama Mountain Lodge. We stayed at Hostal Taita Cristobal, which has very photogenic on-site llamas if that affects your decision.
Hostal Taita Cristobal
Day 1 Summary:
Distance: ~11 km / 7 miles
Time: 4 hours (suggested time: 3–5 hours)
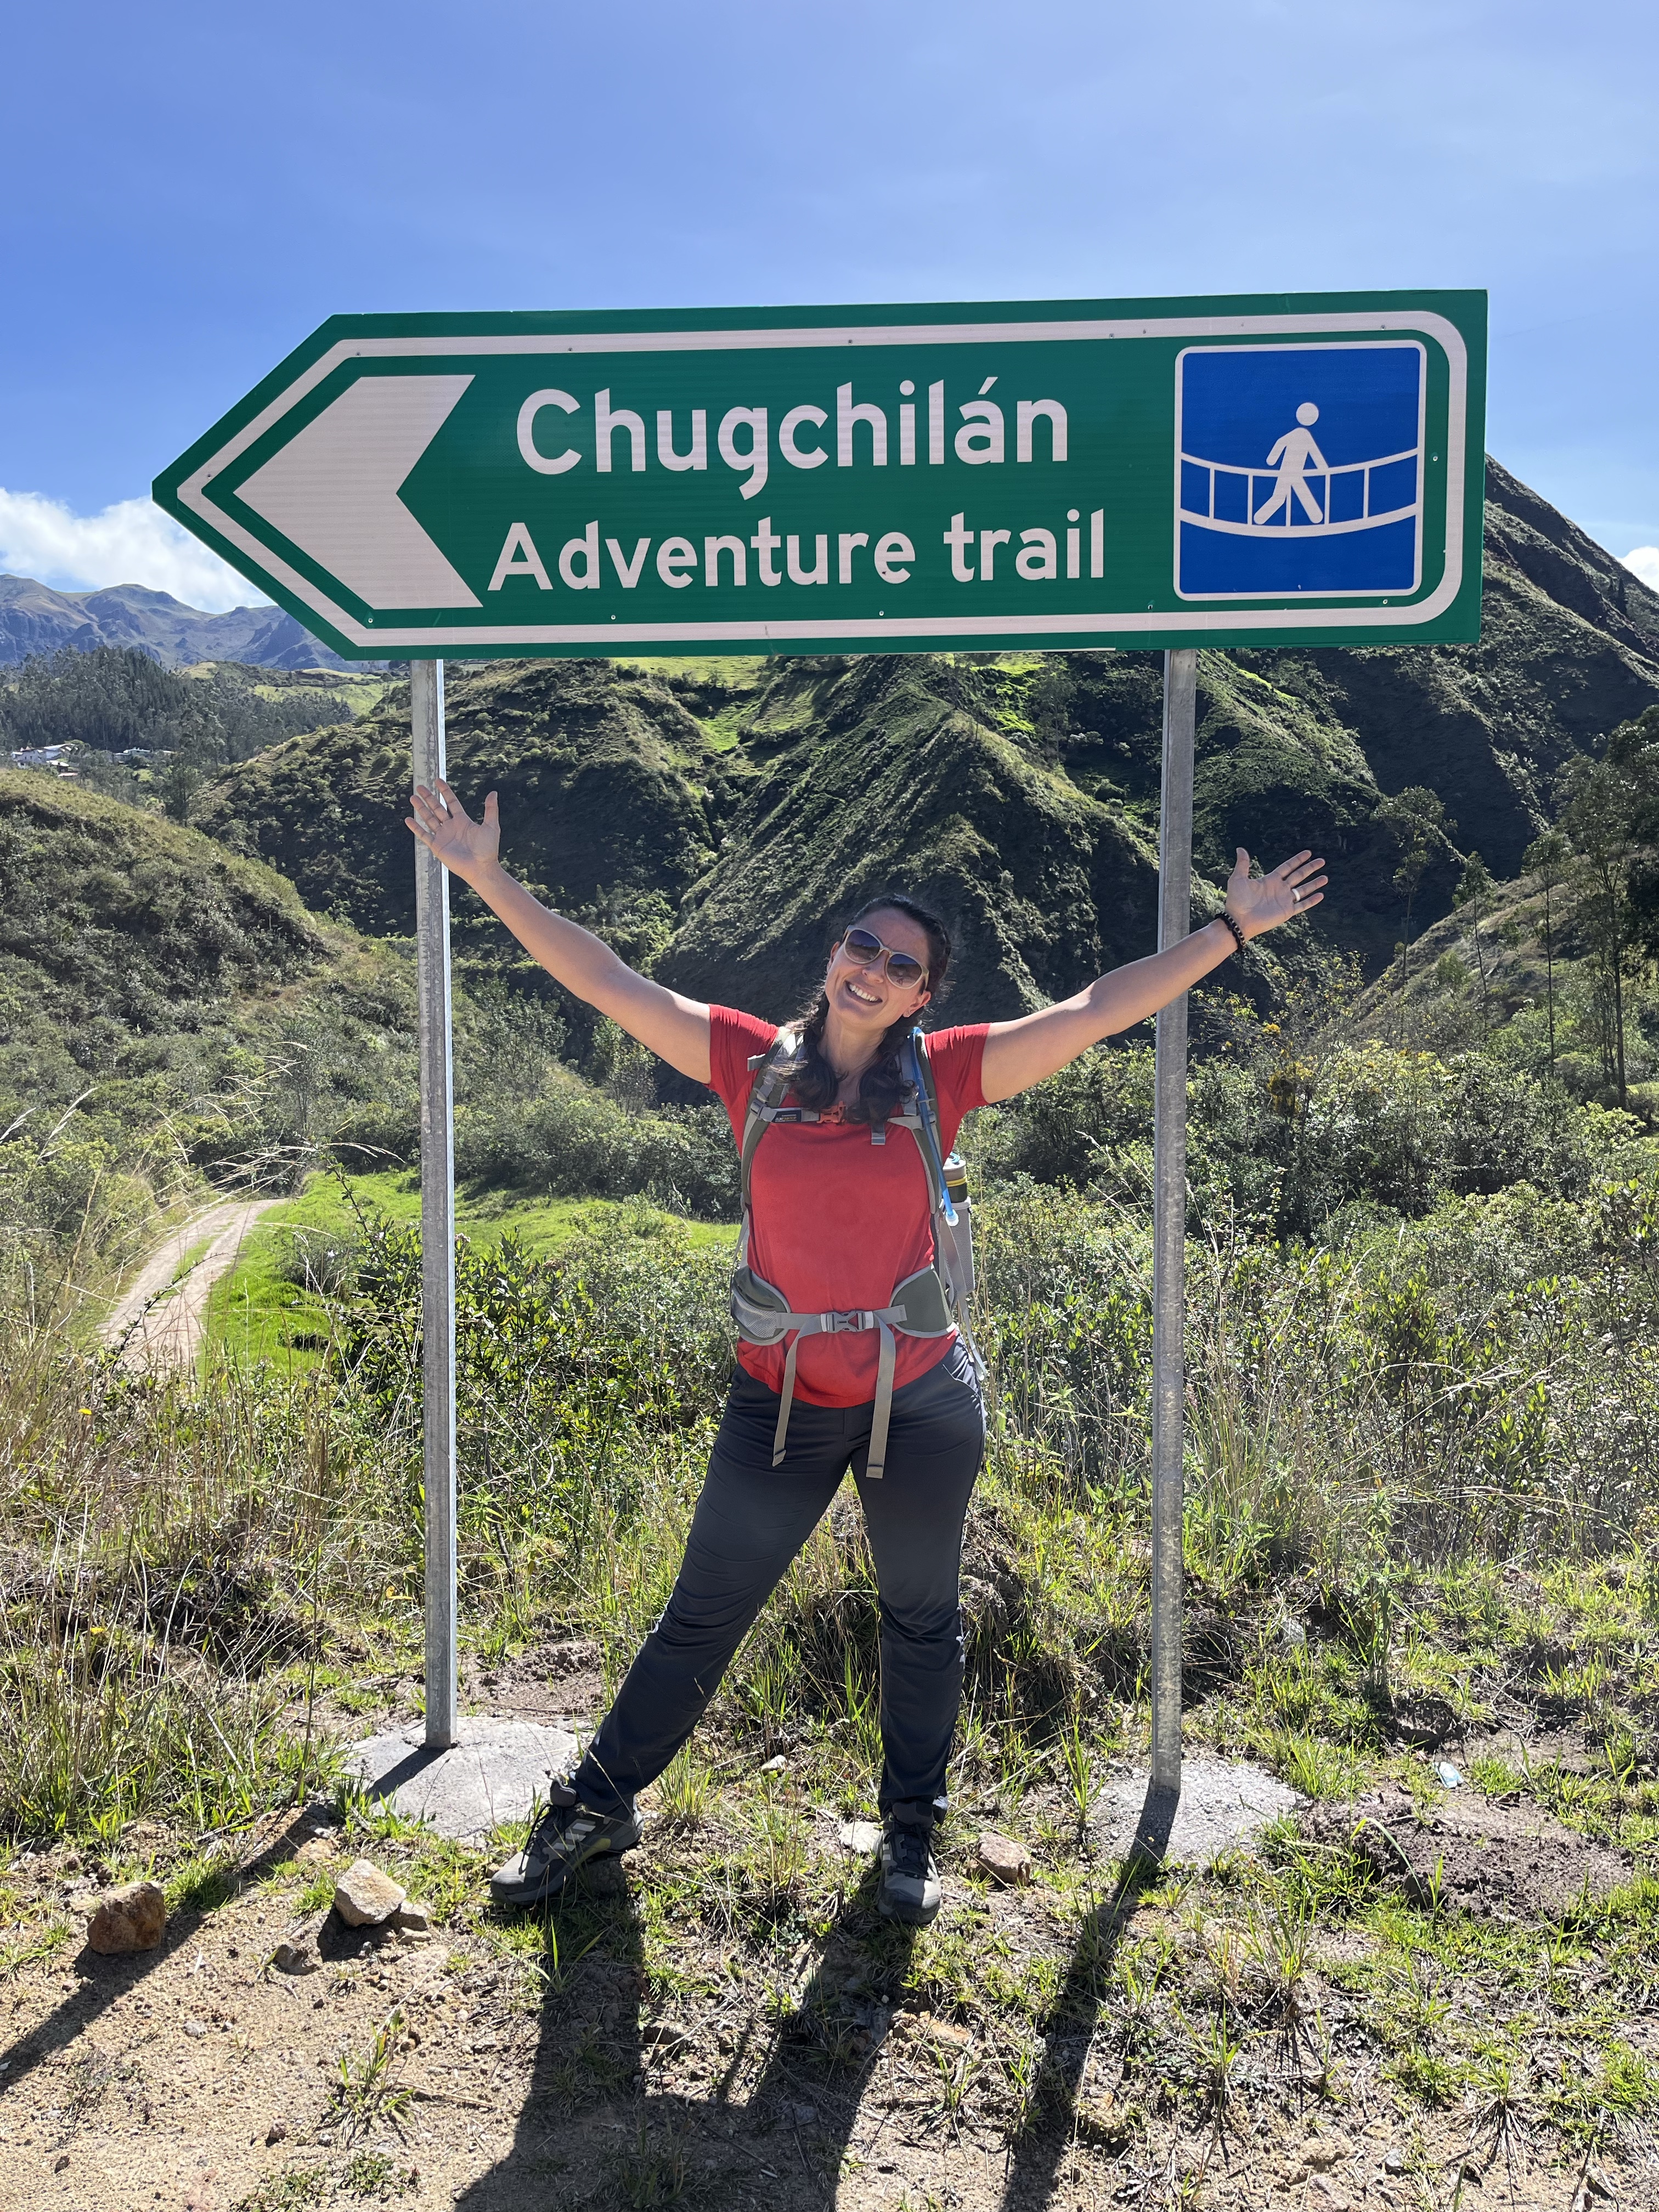
Day 2: Isinliví to Chugchilán
Isinliví, Ecuador
We left Isinliví after breakfast, ~9 am. Again, the start of the trail is easy to find since it’s directly behind the hotel! The day starts with a deceivingly easy walk into the valley, where you have two options: the “safe” route or the “adventure” route. Naturally, we chose the adventure route.
Ready for adventure!
Remember how I said you would get lost? Well, we did it again. We came to an intersection with one way blocked by a fence and the other open. What would you do? We took the open path and scrambled to the top of this particular cliff, only to realize we should have read the written directions again, which clearly stated to take the trail down to the river. 🤦♀️ Well, jokes on them (whoever them is) because we had a lovely snack break with a sweeping view (and then backtracked to the correct trail).
The view from our detour.The route we should have taken, behind the fence.
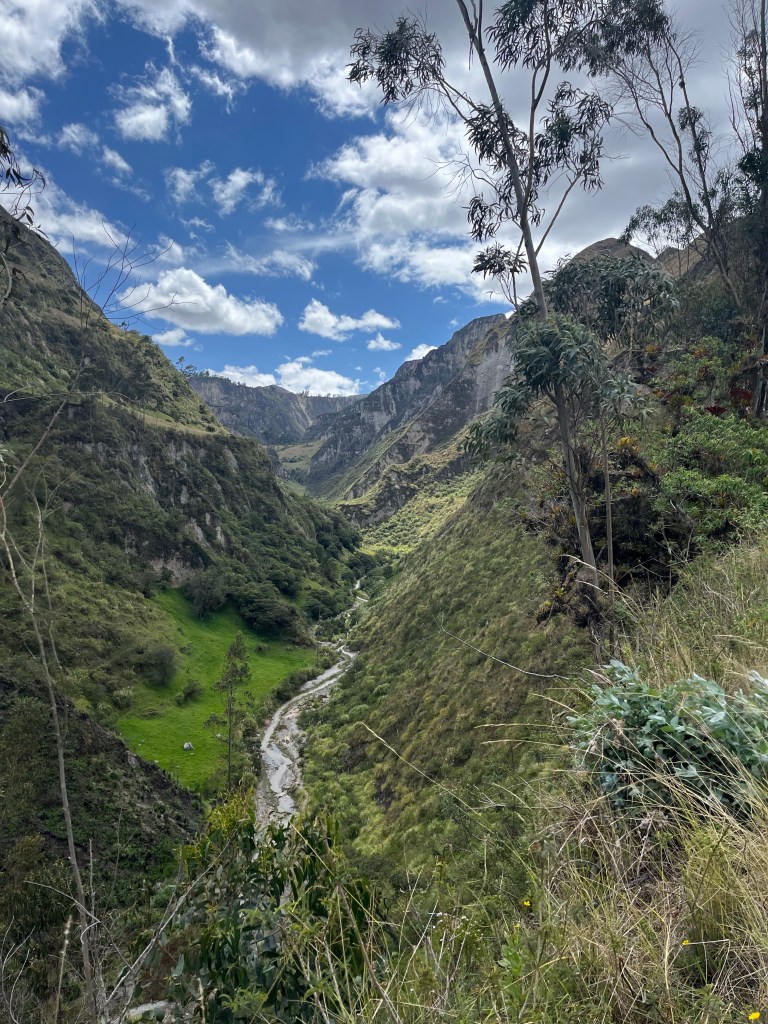
The safe and adventure trails meet about halfway but split again after that. We chose to stick with the adventure trail, which continues on the other side of the village of Itualo (the safe trail continues before entering the village) and takes you into the Toachi Canyon. This hike was definitely more challenging and adventurous in that some areas were exposed, and there were some drop-offs, but the views were worth it!
Of note, we also got lost here, again, owing to an unmarked intersection. Once you reach the top of the hill (trust me, you’ll know which hill), you can turn left and continue up or go straight and start descending. At this point, Shane checked the map, which indicated we should take the trail up to the left instead of straight and down. So, we started walking, and the GPS indicated that we were on the trail, until suddenly we weren’t… by a lot.
The plus side is there are tons of trails to choose from since the locals frequently walk the area. So, we pointed ourselves toward the official path and ended up back on the correct trail without much effort or time lost. However, this final part of the trail was one of the hardest sections of the entire day since it was essentially a straight shot up out of the canyon. You’ve been warned!
We stayed at the Hostal Cloud Forest, but there are several other options in Chugchilán. For example, Hostal el Vaquero looked nice from the outside and seemed to have a better mountain view than Hostel Cloud Forest.
Day 2 Summary:
Distance: ~14 km / 8.5 miles
Time: 5 hours (suggested times: 4–6 hours)
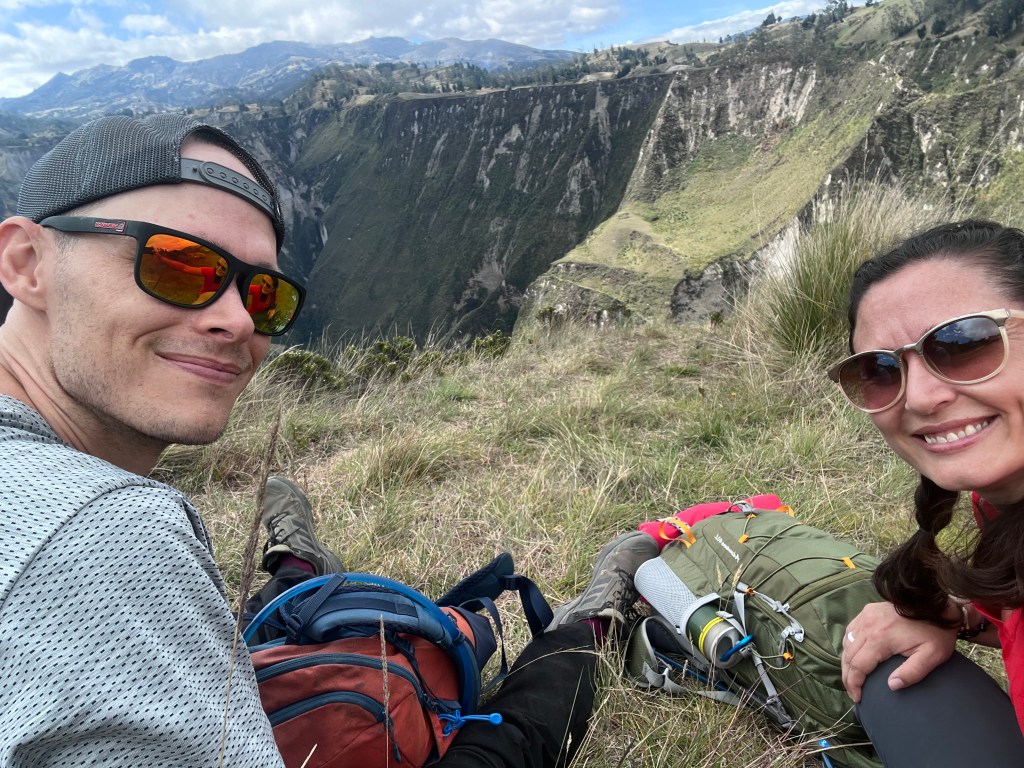
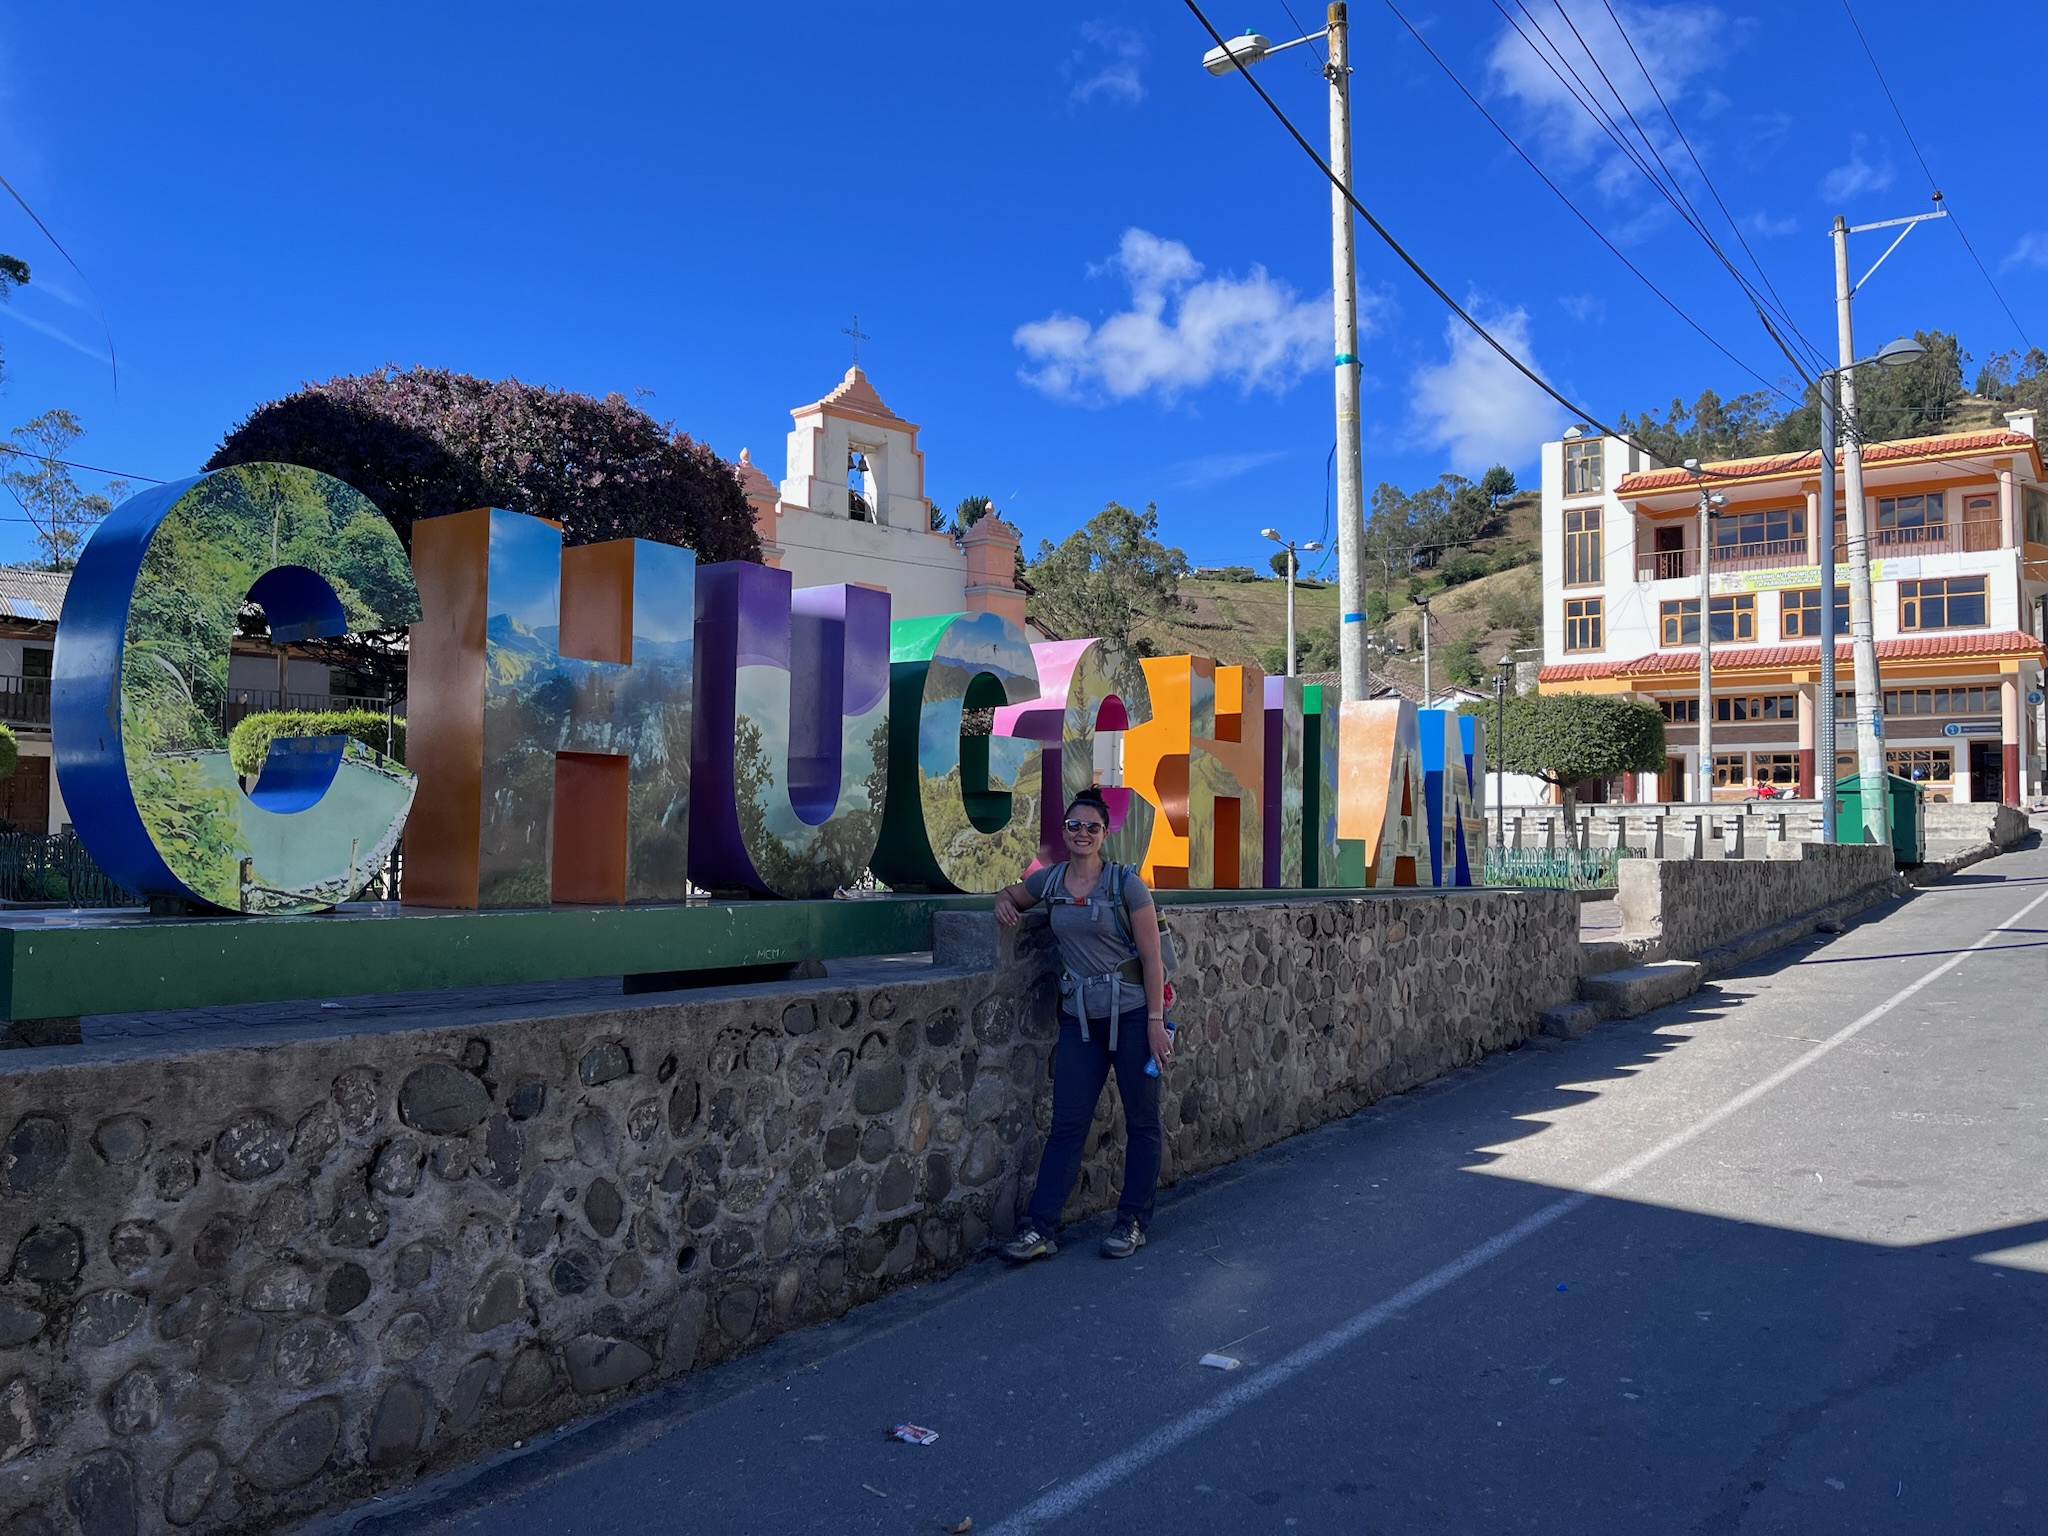
Day 3: Chugchilán to Quilotoa
Chugchilán, Ecuador
We started our final day of the hike ~9 am, after breakfast. And, again, there is a deceivingly easy downhill trek into the valley to start the day. Just know, what goes down must come back up… to nearly 4,000 m / 13,100 feet.
Props to us because we didn’t lose the trail on the last day! Don’t get me wrong, we almost did a handful of times, but we checked the map in time. Like the other days, if you happen to veer from the path, it’s easy to get back on track.
The view from the crater’s rim back towards Chugchilán.
Shane and I disagree on this, but I think the last day was the most challenging (he thinks day 2 was). The plus side to day 3 is you’re rewarded with a view of Quilotoa! But don’t get too excited; you have about an hour and a half of walking once you hit the crater’s rim trail. The hike ends at the viewing platform in Quilotoa Village.
We made it!
When you’re ready to head back to Latacunga, turn left out of the viewing platform and walk down the road past an entrance checkpoint. You’ll see a sign on the left side of the road with bus times to Latacunga. Just flag down the first one that comes!
Day 3 Summary:
Distance: ~14 km / 8.5 miles
Time: 5.5 hours (suggested time: 5–6 hours)
Shane has done multi-day hikes in the past, but this was my first multi-day trip, and I really enjoyed it! I found that the hostels were a nice compromise and made the trip much simpler since you don’t need to worry about packing sleeping gear and food. Shane also admitted that 37-year-old him was much happier with a hot shower and meals prepared for him at the end of the day versus ~22-year-old him, packing all his camping gear and food. 😆
On one hand, the altitude makes this hike challenging, and the uphill parts can really suck. On the other hand, you’ve got three beautiful days in the Andes of Ecuador, and there are enough downhill and flat parts to make you forget the uphill pain (lol). Moreover, the locals we met on the route were so friendly, and the trail wasn’t crowded. In fact, we didn’t see anyone else on the route until the final day, and we were far enough behind them that we didn’t cross paths. So, I’d highly recommend this trip to anyone who is moderately fit.
Or, in other words, the “Shit I’d Wished I’d Known” post.
Don’t get me wrong, our trip to the Galapagos was fantastic! However, there are definitely some things that, had I known beforehand, we might have done differently. Also, “the Galapagos is so expensive!” is a common phrase but slightly misleading.
So, if you’re thinking of DIY-ing a trip to the Galapagos, I hope this helps! If not, feel free to stop reading… or not, whatever you prefer.
The Budget Breakdown
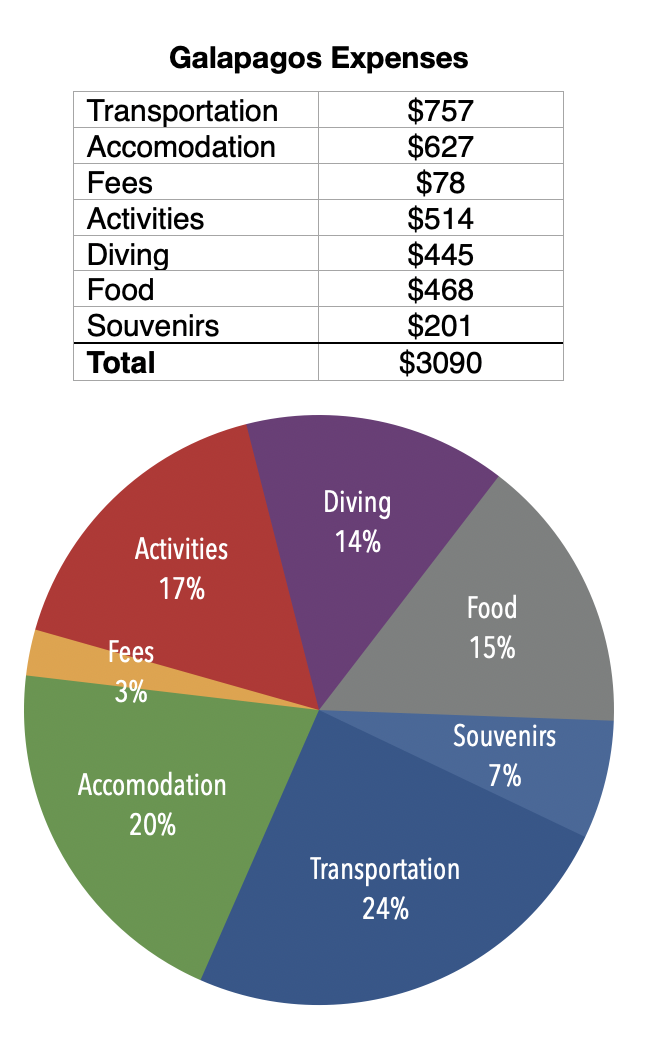
This is a full disclosure post because, when I started planning this trip, I arbitrarily set a $3,500 budget, but I had no idea if that was sufficient. Turns out, it was (with some caveats, more on that later). As you can see, we spent ~$3,100 for two people for 10 days, including flights and other transportation, including our rides to and from Tena.
Now, on to the specifics!
Transportation
Flights
Flights are absolutely the most expensive part of the trip, making the transportation category the most variable. We spent ~$450 total on the round-trip domestic flights from Quito to Baltra Island (the main airport; there is also a smaller airport on San Cristobal Island). However, this is also a bit misleading because we were able to book cheaper rates since we are Ecuadorian residents. On the other hand, we opted for the direct flight (versus the indirect flight through Guayaquil), which was a bit more expensive. Regardless, you cannot book flights to the Galapagos without a stop in Quito.
San Cristobal from above.
Baltra Island Airport transportation
Relatedly, the journey from the airport to Santa Cruz isn’t hard, but it isn’t simple. After you arrive and go through immigration (where you pay the national park fee), you’ll have to pay $5 per person to take the bus to the port, then pay $1 per person to take a water taxi across the channel to get to Santa Cruz Island. And yes, it’s required. There is no other option.
The ticket counter for the bus from the airport is outside, directly across from the bus.
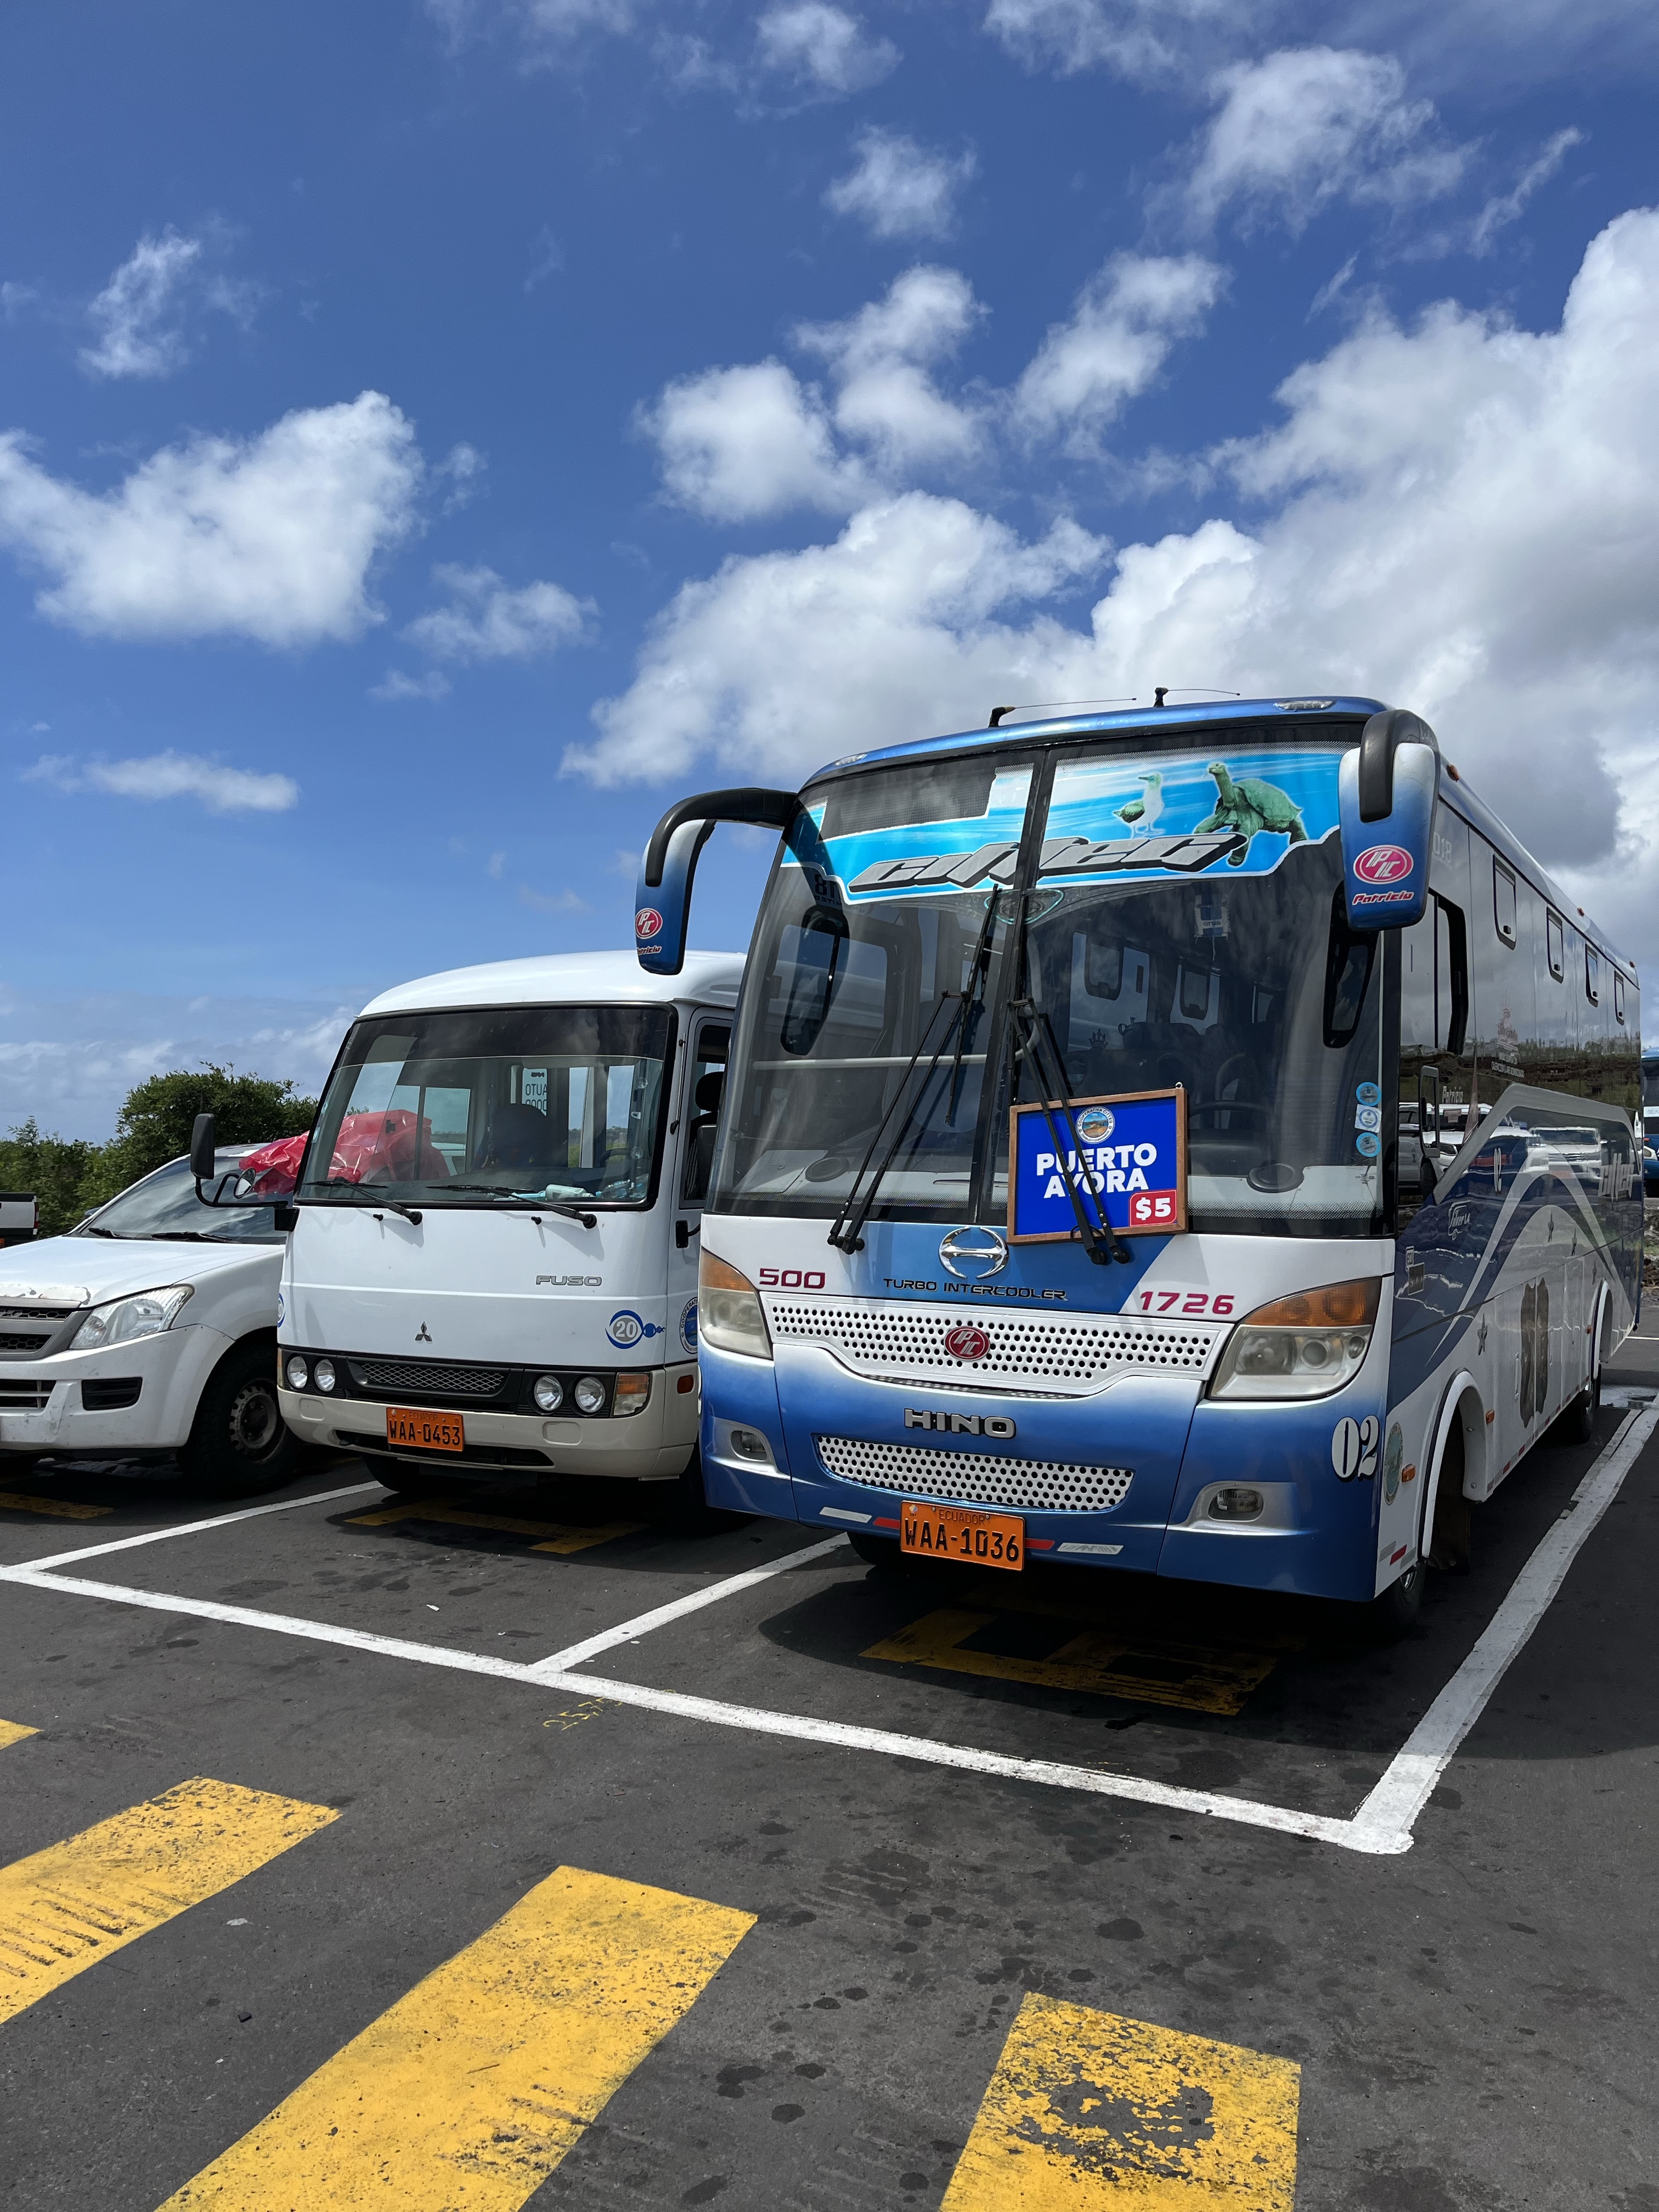
On the other side, you’ll have options: either a $5 per person bus ride or a $25 taxi ride. Both take approximately the same amount of time, the difference being the taxi is a port-to-door service. We opted for the $5 bus (a more economical choice for only two people), but if you’re a larger group, then the taxi is just as cheap.
It was very easy to find the buses to Puerto Ayora.
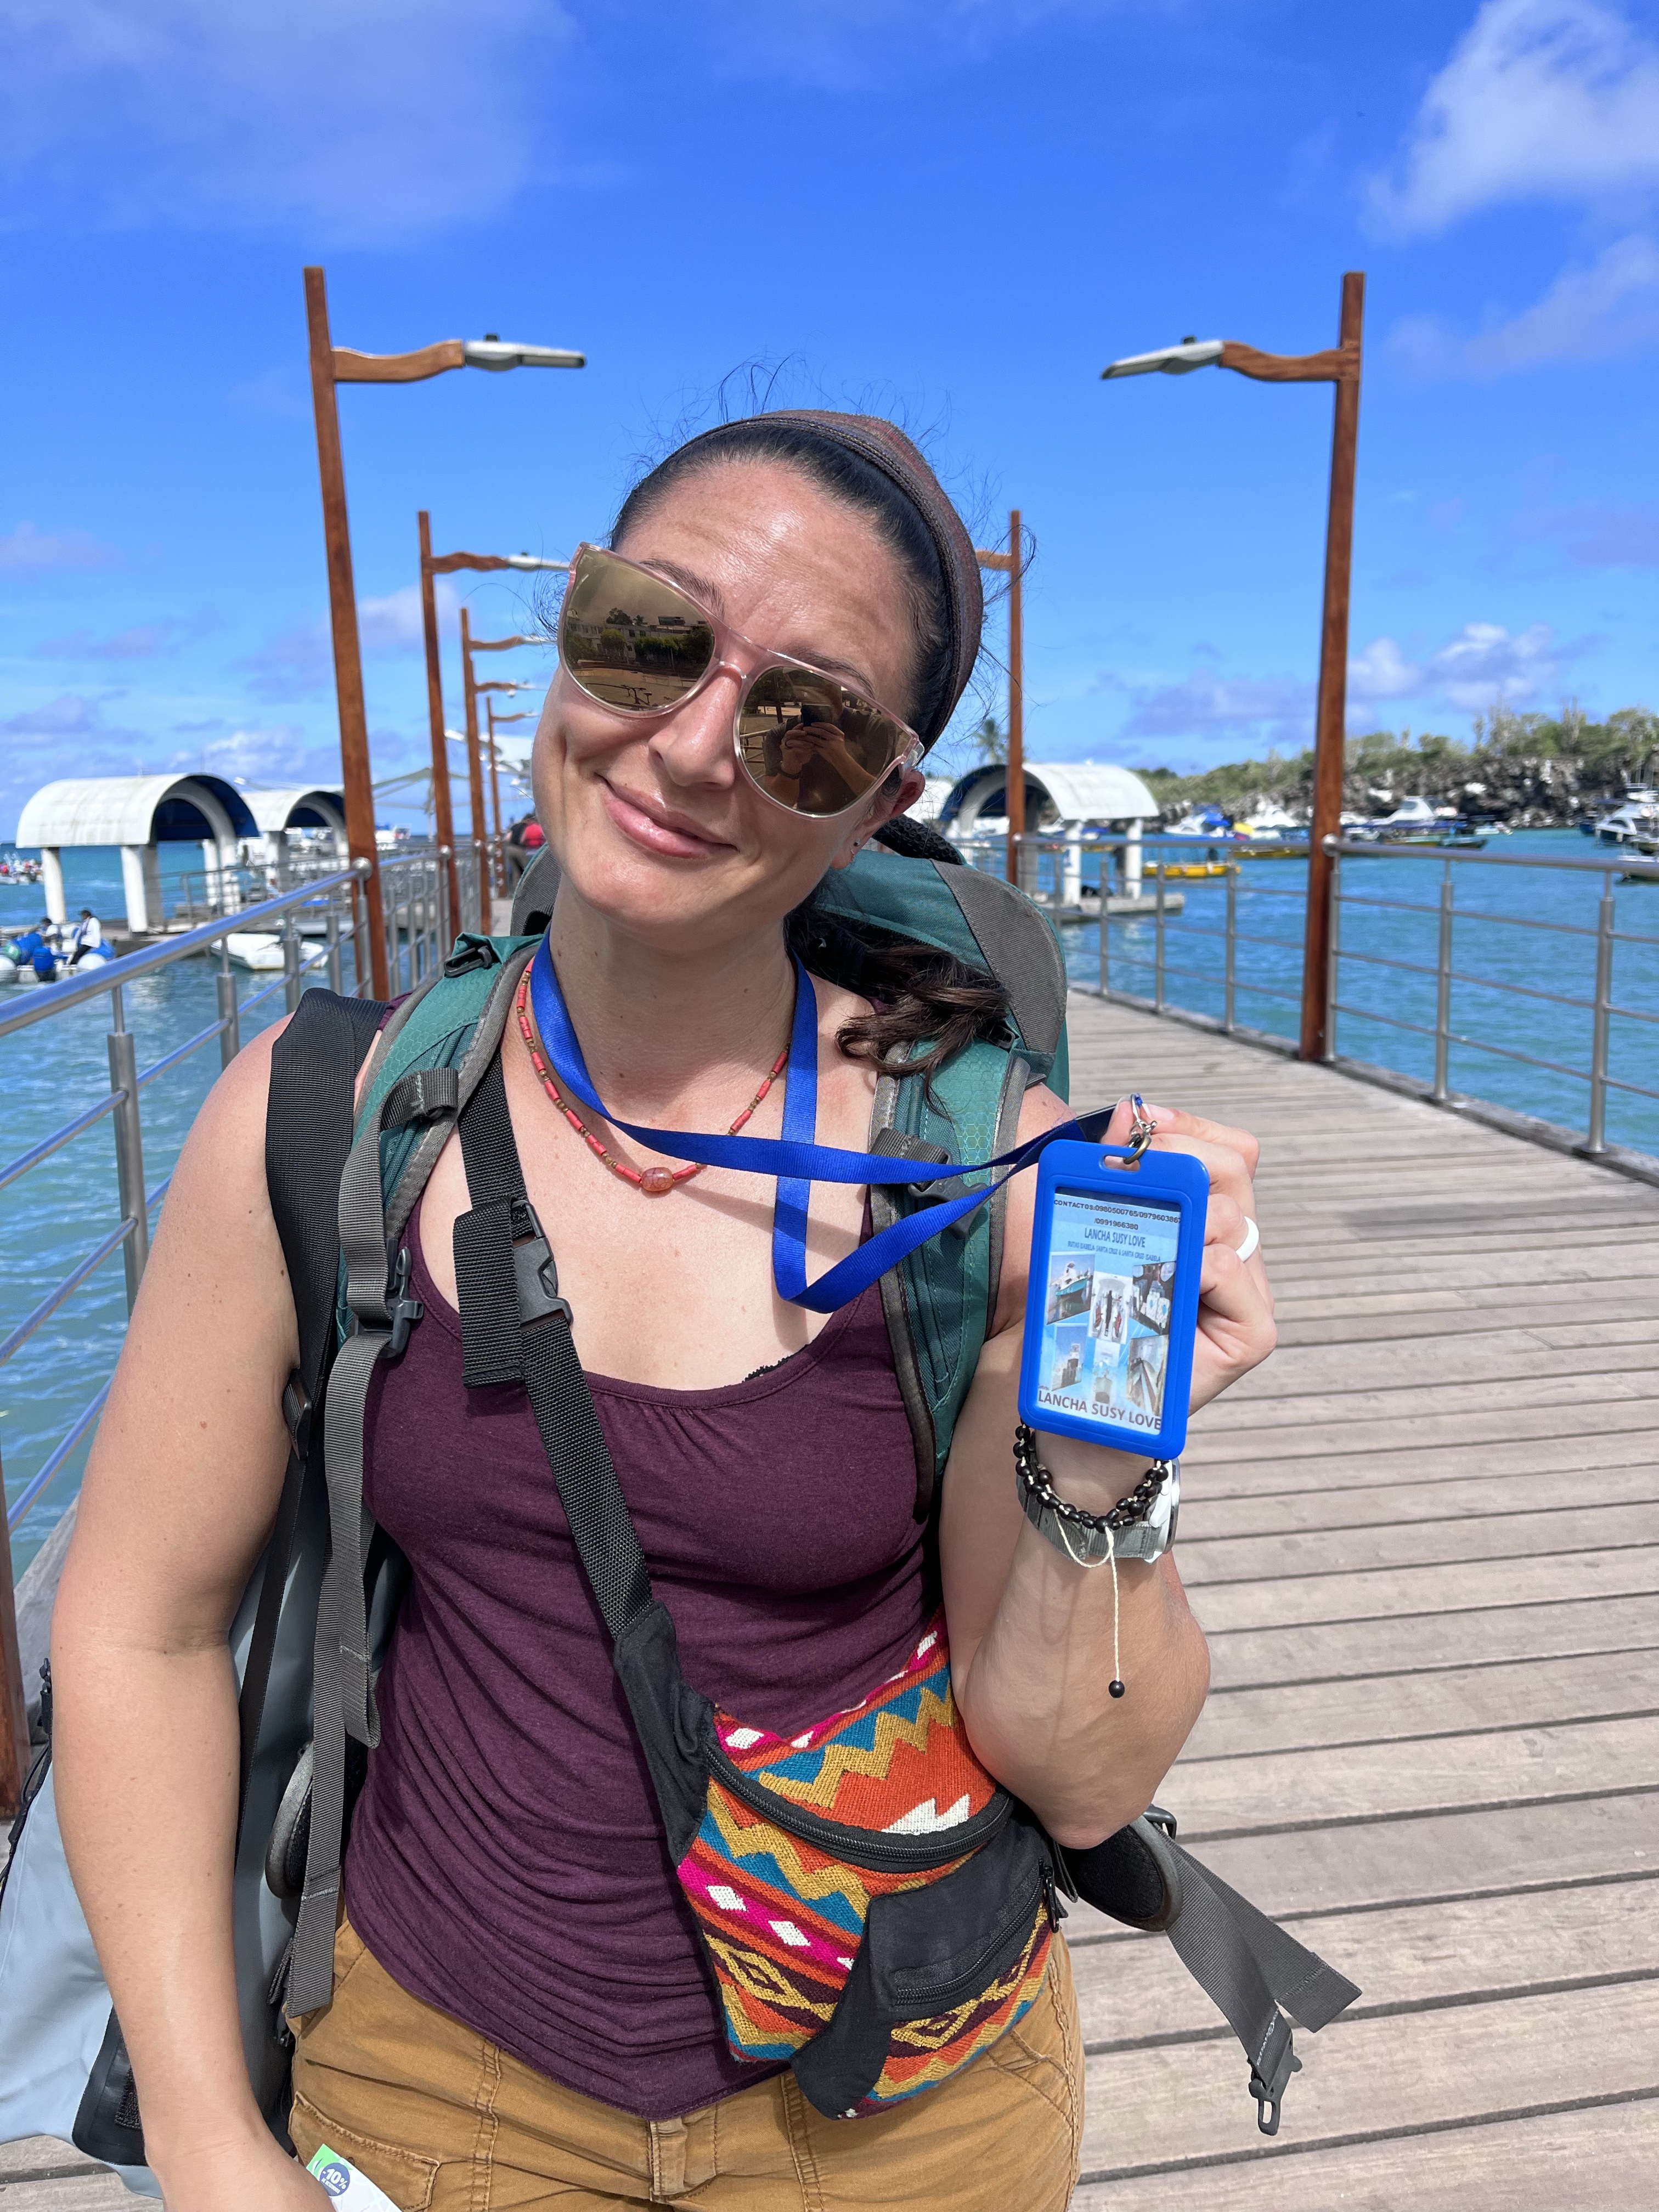
Ferrys
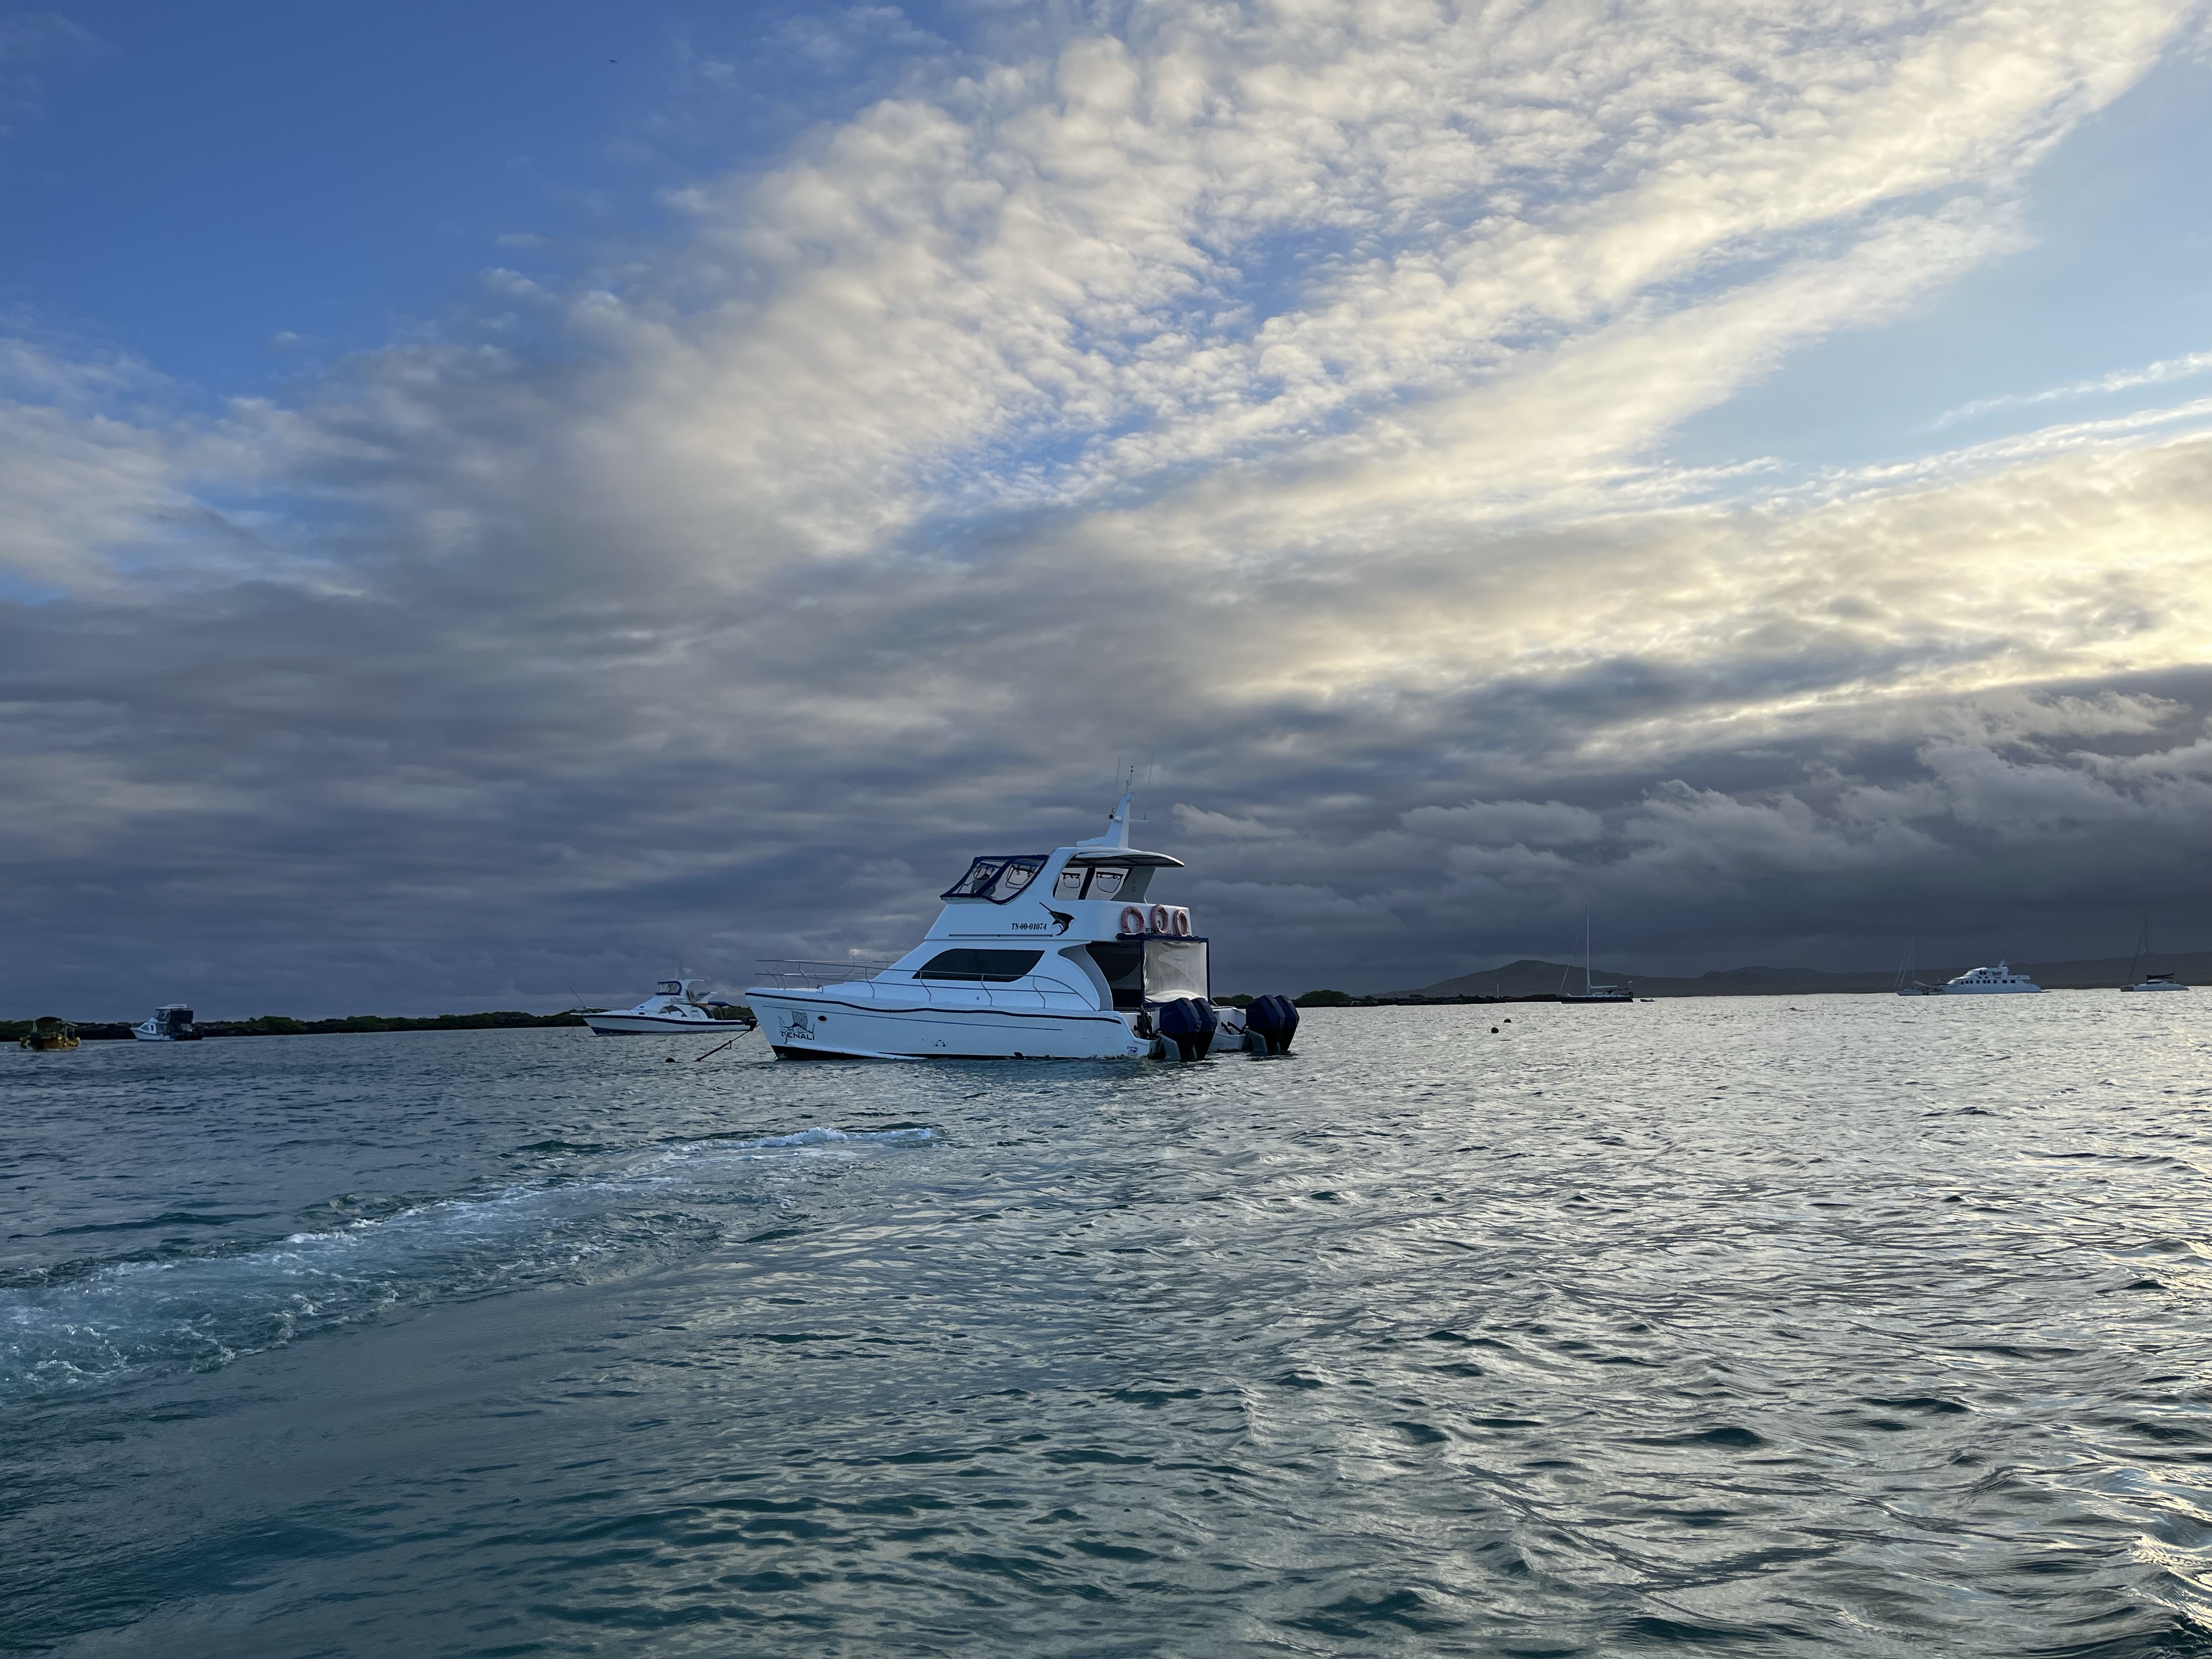
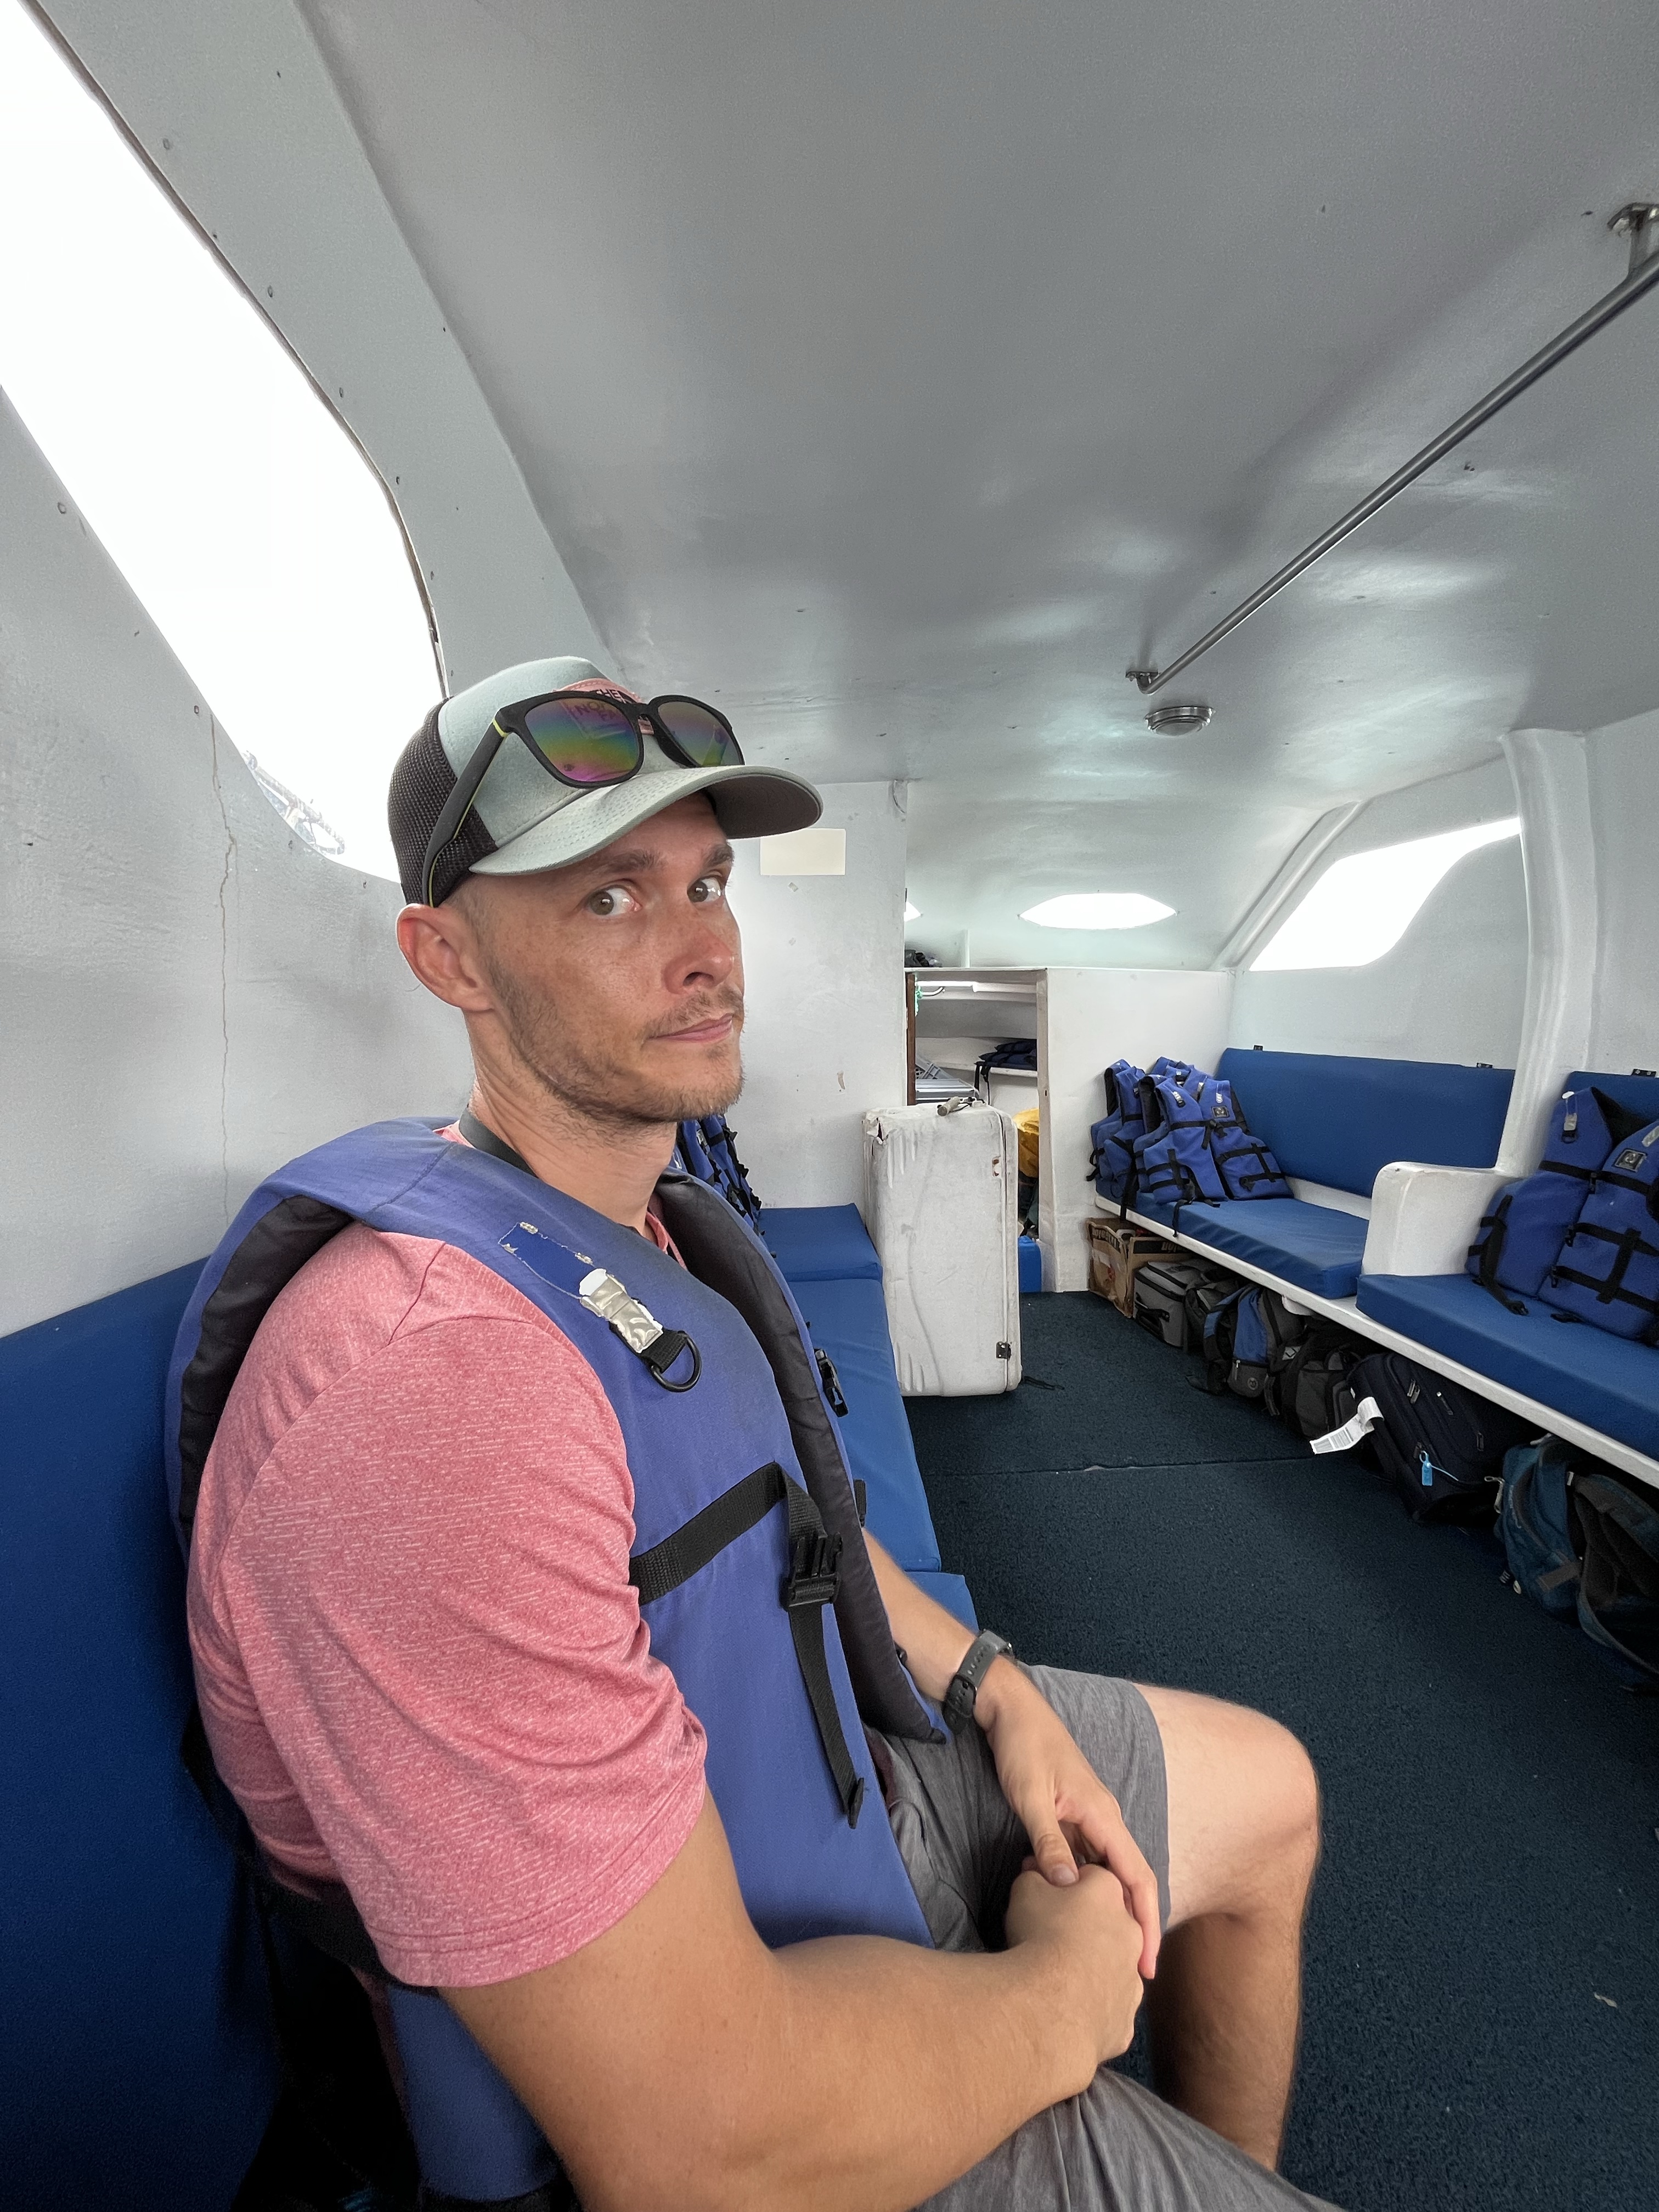
To get between islands, you have to take a ~2-hour “ferry” ride. And yes, I say “ferry” in quotes because these boats were essentially old fishing boats converted into people boats and not at all what we expected. Even the slightest chance of getting seasick? Take Dramamine. You won’t regret it because you’re plowing through the open ocean on a relatively small boat. Let’s just say, the ride isn’t comfortable, and I’m pretty sure people’s spines are littered throughout the water from the unexpected SLAMS! as the boat crashes through the waves. Anyway, I digress.
The price is $35 per person one way and seemed to be pretty standard. Of note, there are no “official” sellers. On Santa Cruz, you can buy tickets by the port–just look for the signs for ferry tickets. On Isablela, the agencies are in the main square. The ferries only leave twice a day (~07:00 and ~15:00), so be sure to buy your tickets ~24 hours in advance (much earlier isn’t really necessary). Finally, everything is cheaper in person (versus online) and paid in cash. However, if you’re in a bind, you can reserve tickets via WhatsApp through this company (which we had to do; more on that later).
A typical ferry.Ready for the ride! 😐
Water taxis
Ah, the water taxis. They are $1 per person, regardless of where you need to go. Likely, you won’t need them often, but, for example, to get to the ferry, you have to take a $1 water taxi ride from the pier to the boat. So, keep your little change!
Oh, and don’t be surprised when all the luggage is piled on the front of the boat. It’s (probably) fine!
Accommodation
The second most expensive part of the trip was accommodation. In reality, it broke down to ~$65 per night, which is a bit pricey compared to the mainland but overall not bad. We also chose to stay in Airbnbs and hotels not directly in the center of town to put more resources towards activities, which was smart for us because the towns are small and walkable. Nothing is far away, and we didn’t spend much time in the rooms. However, where you choose to stay and what amenities you want are all personal preferences. We saw some very nice hotels, depending on what you’re looking for.
We stayed in this Airbnb for most of our time on Santa Cruz Island, and this apartment for our final night before heading to the airport. On Isabela Island, we stayed in these serviced apartments, which happen to be next to an Isabel microbrewery if that interests you. Notably, all had air-conditioning and provided drinking water, which was a nice touch.
View from our Isabela apartment.
Fees
Fees! Yes, you will get hit with mandatory fees, so it’s better to know about them before you arrive. Also, you can only pay them in cash, which is something to prepare for.
Transit control card
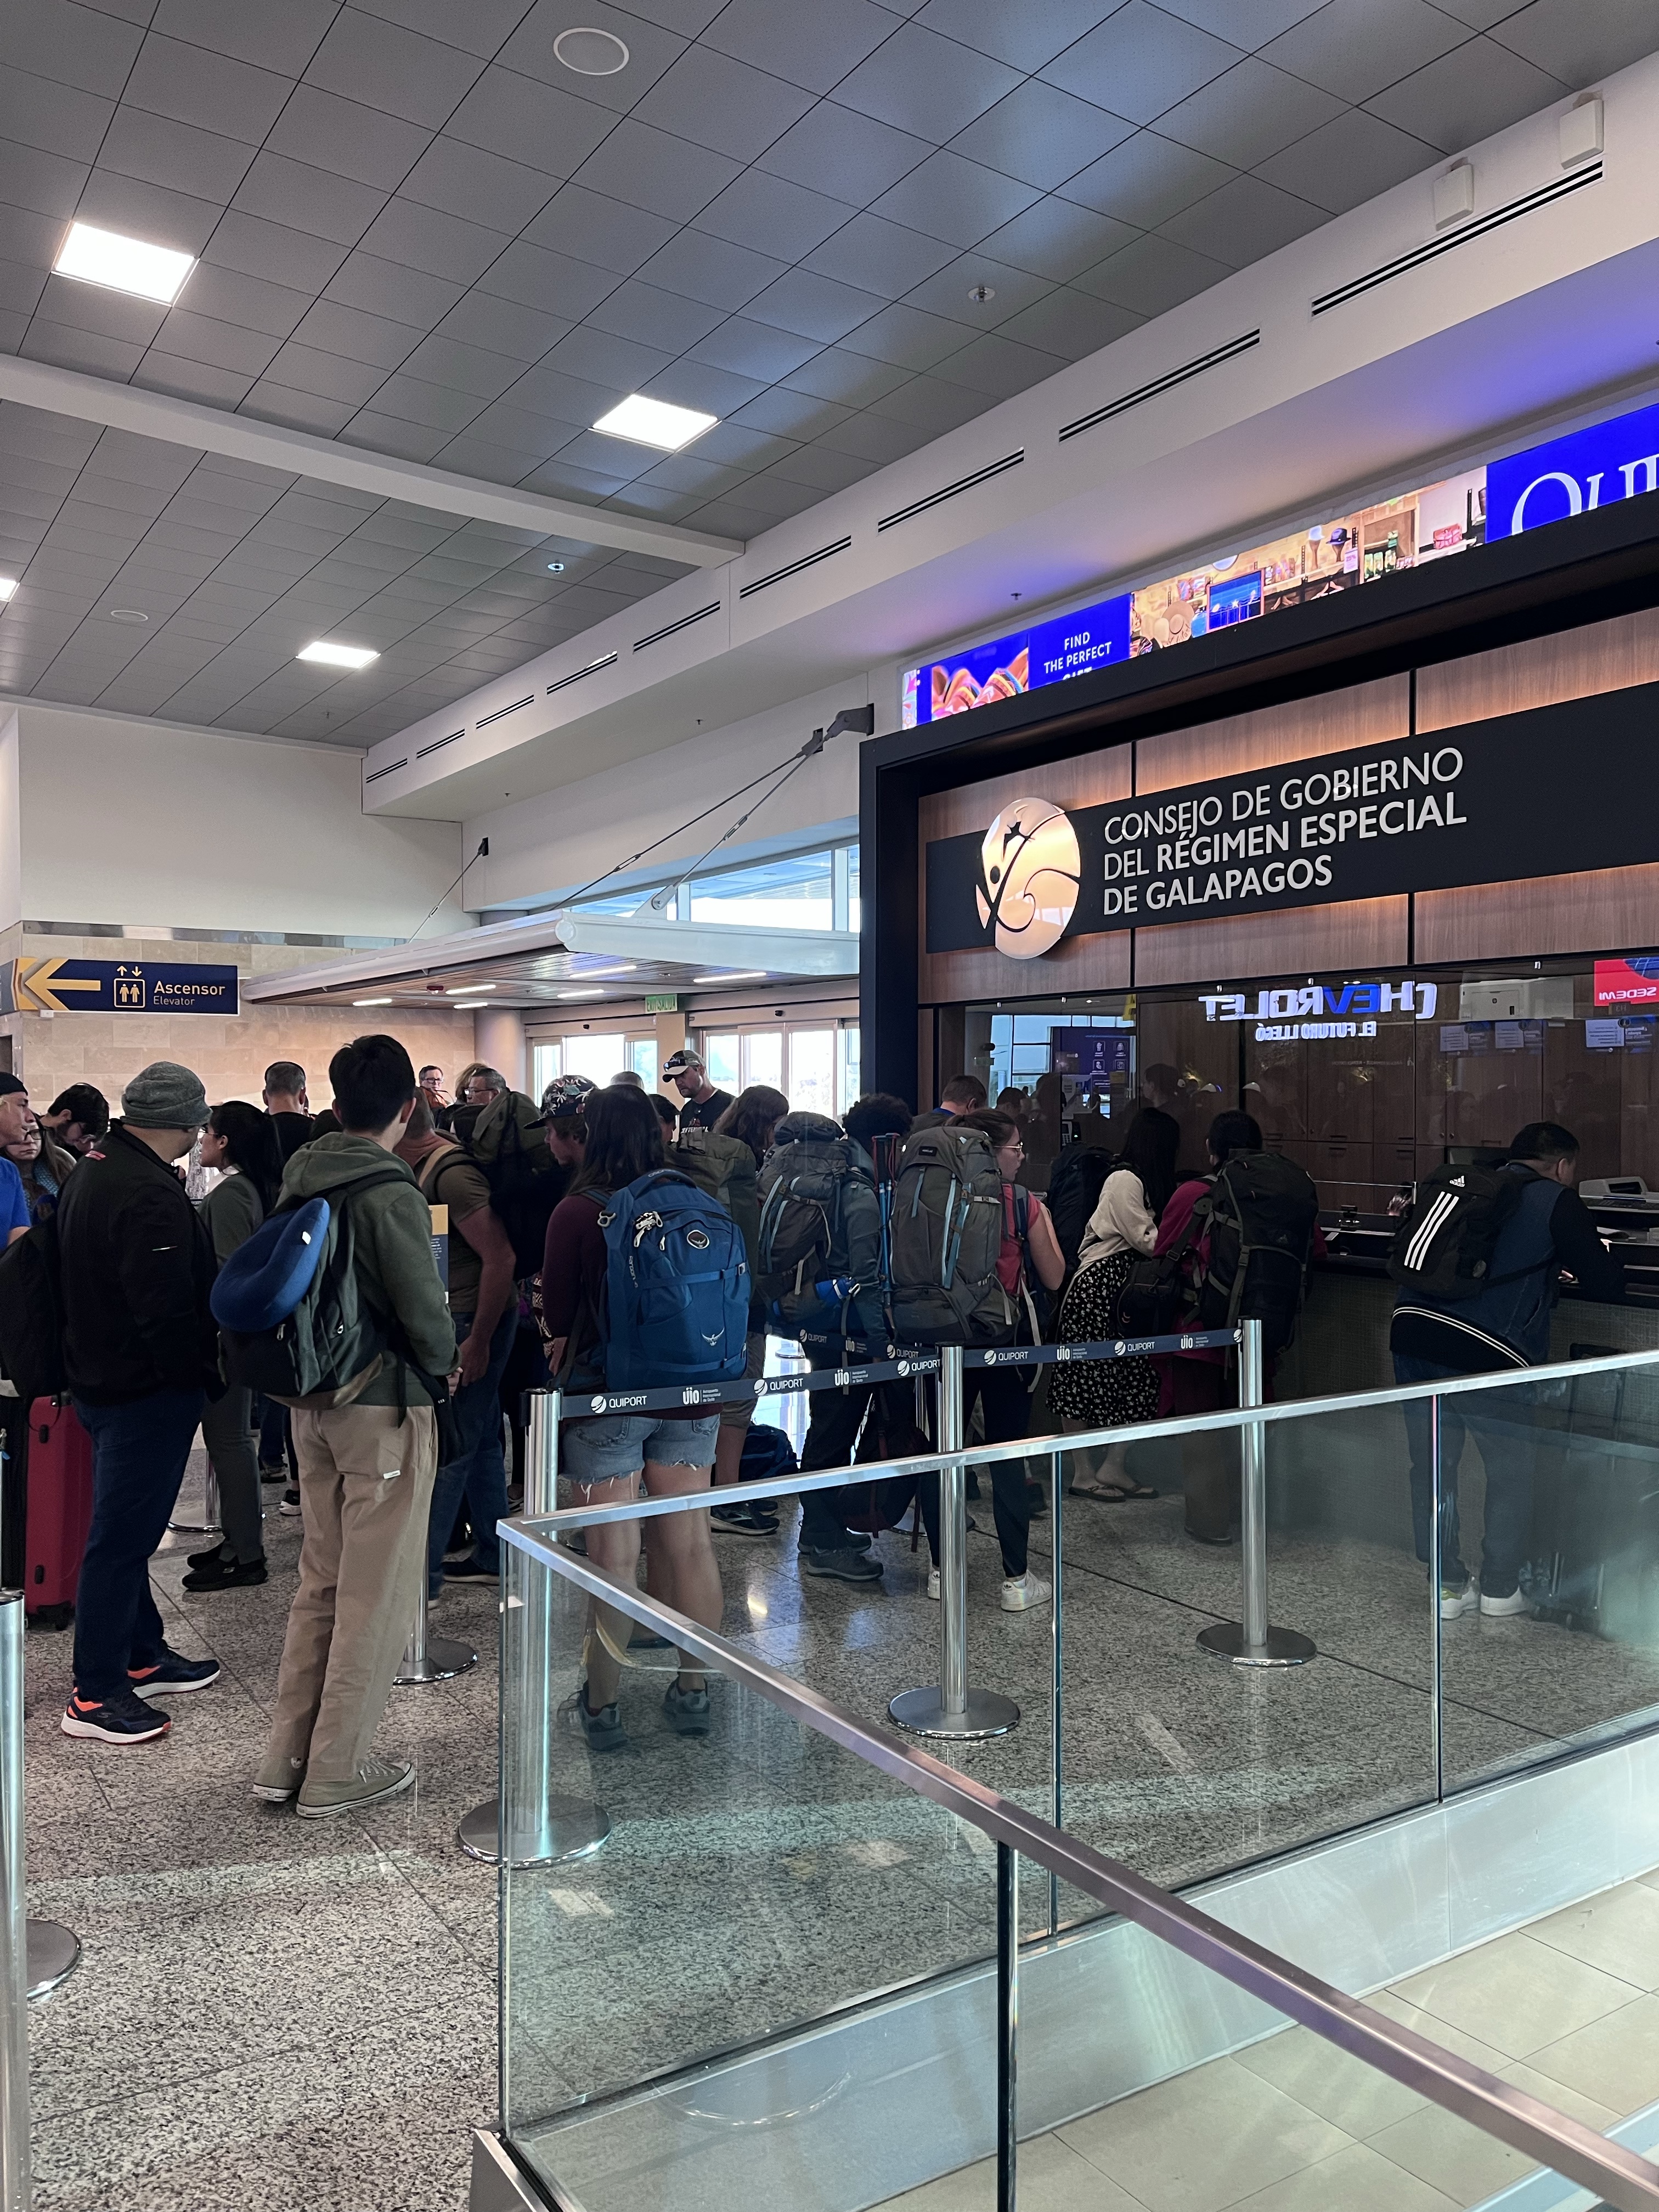
Starting at the Quito airport, you’ll need to pay $20 per person for the transit control card. You’ll also have to have your bag screened before checking it at the counter. So, one person can stand in line for the transit control cards while the other gets the bags screened. Both are located immediately inside the doors on the national departures side. Oh, and be sure to keep up with these cards! They will ask for them when you arrive and again when you leave the islands.
Can you spot me? Waiting in line for the transit cards (only one person per group is allowed!).
Galapagos National Park fee
You’ll pay this fee at the airport in the Galapagos, where you will also present your transit card. It’s $100 per person for non-residents of Ecuador. We were able to pay the resident rate of only $6 per person, which definitely helped the budget! So, be prepared to pay this (in cash!) as soon as you arrive!
Individual island entrance fees
Yep, you’ll have to pay another entrance fee if you switch islands. Presumably, for their individual national park fee, but I couldn’t find any specific information about this. For foreigners, it’s $10 per person to enter Isabela and Santa Cruz (if you’re returning by ferry, not for a daily activity).
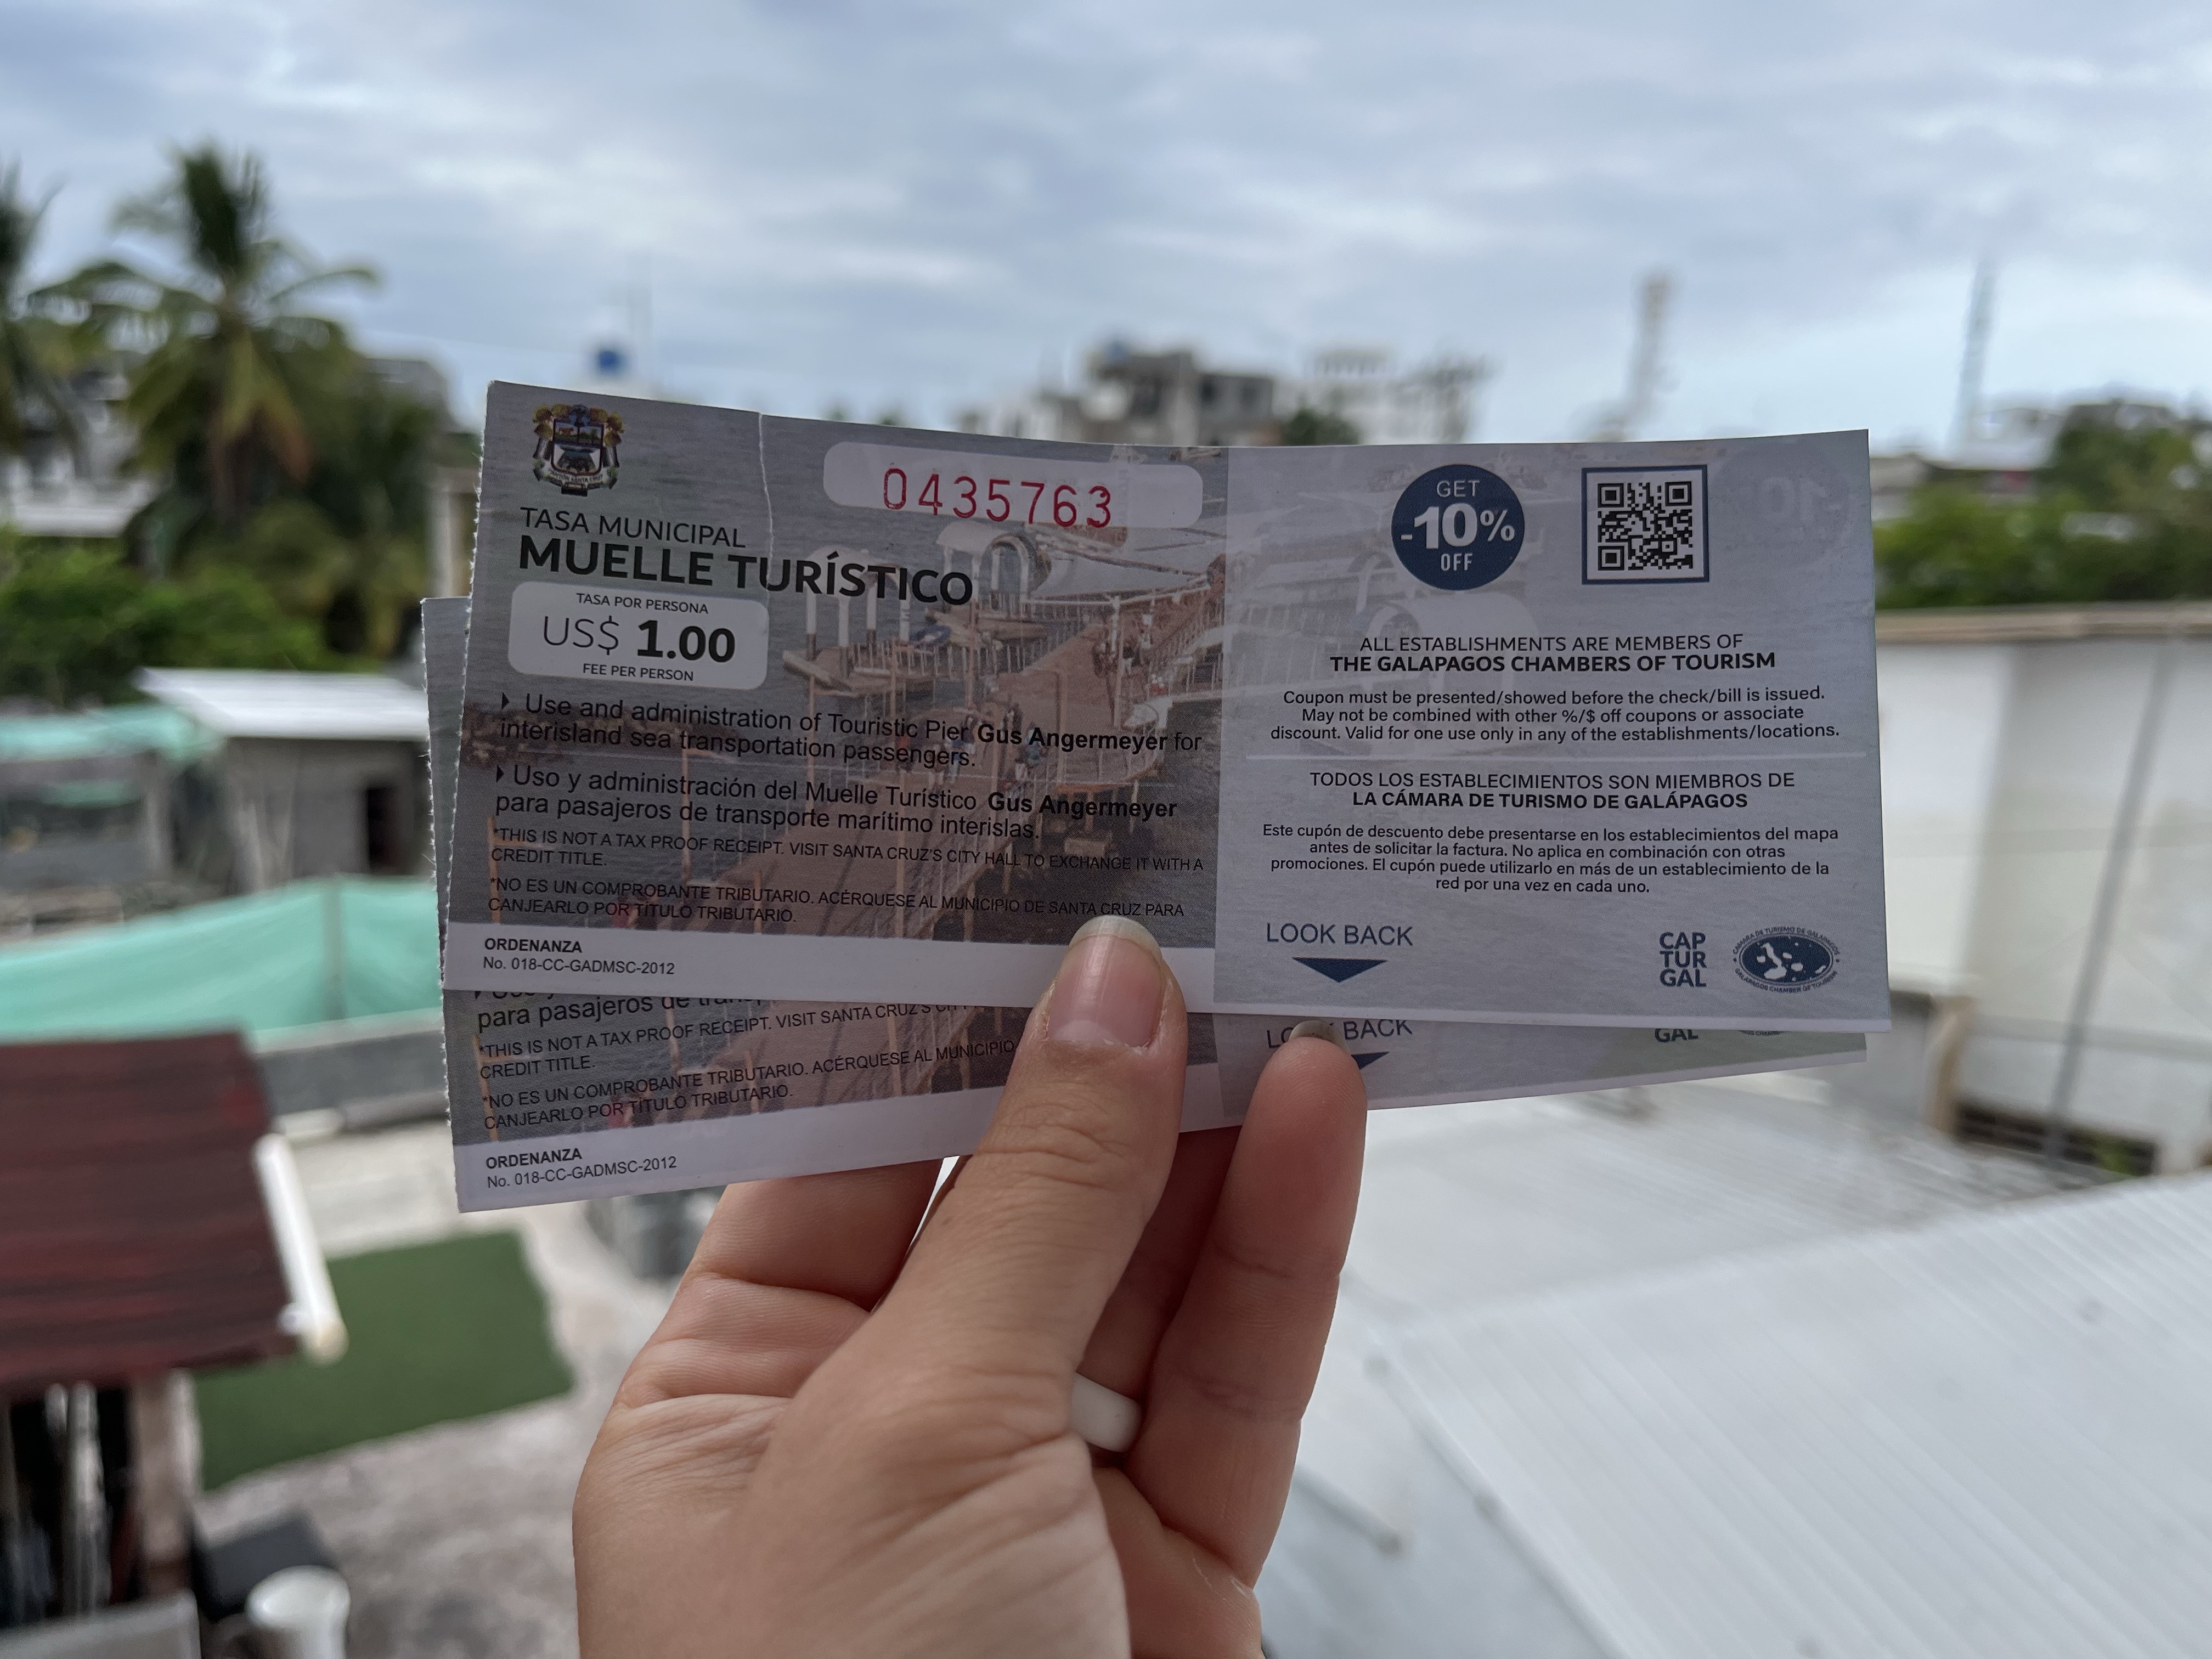
Santa Cruz pier fee
Honestly, you really get nickel-and-dimed (or, more accurately, dollar-ed?) on Santa Cruz. If you’re taking the ferry, in addition to the $1 water taxi per person, be prepared to pay another $1 per person to get on the pier.
Pier-approved!
Activities
Now for the fun part… activities!
There are plenty of free or inexpensive activities on the islands. For example, on Santa Cruz Island, Tortuga Bay and a visit to the Darwin Research Station are free. If you want to take the breeding center tour at the research station or visit Las Grietas, then you’ll pay $10 per person for the guided tour, paid for at the respective locations. On Isabela Island, the beach is always free, as is snorkeling at Concha de Perla. We also rented bikes for $20 per person for the day to visit The Wall of Tears and the El Radar viewpoint (both free to visit).
Even though you will see tours offered for just about everything, you absolutely do not need to book a tour with a company for everything.
Activities get expensive when tours with equipment and boats are involved. However, everything is less expensive when booked in person and paid with cash! For instance, online, the Los Túneles snorkeling tour was $140 per person. However, we booked the tour in person the day before and paid $110 per person in cash. So, the tours still aren’t cheap, but a $30 difference per person adds up. The tour prices are generally the same between companies for the same tour; they primarily increase or decrease in price depending on how far you need to travel. You can expect half-day tours in the $110-120 range and full-day tours in the $180-200 range.
Also, don’t let the sticker shock stop you! *cough, looks at myself* Yes, it’s a lot off the top. But, it’s a lot of effort to get to the Galapagos, and when are you ever coming back? So, take at least one tour!
Tortoise Tip
Seeing the giant tortoises is an absolute must-do on the Galapagos, and visiting a reserve, like Rancho Primicias on Santa Cruz, is a great way to see them out living their best tortoise lives. However, it was a $50 cab ride (round trip, the driver waits for you), followed by a $10 per person entrance fee–not the cheapest adventure. However, Isabela Island also has a breeding center ($10 per person), only a short detour from the Wall of Tears route. Moreover, there’s a chance to see tortoises in the wild on the route to the wall. So, if you’re planning to rent a bike, this could be a more economical option!
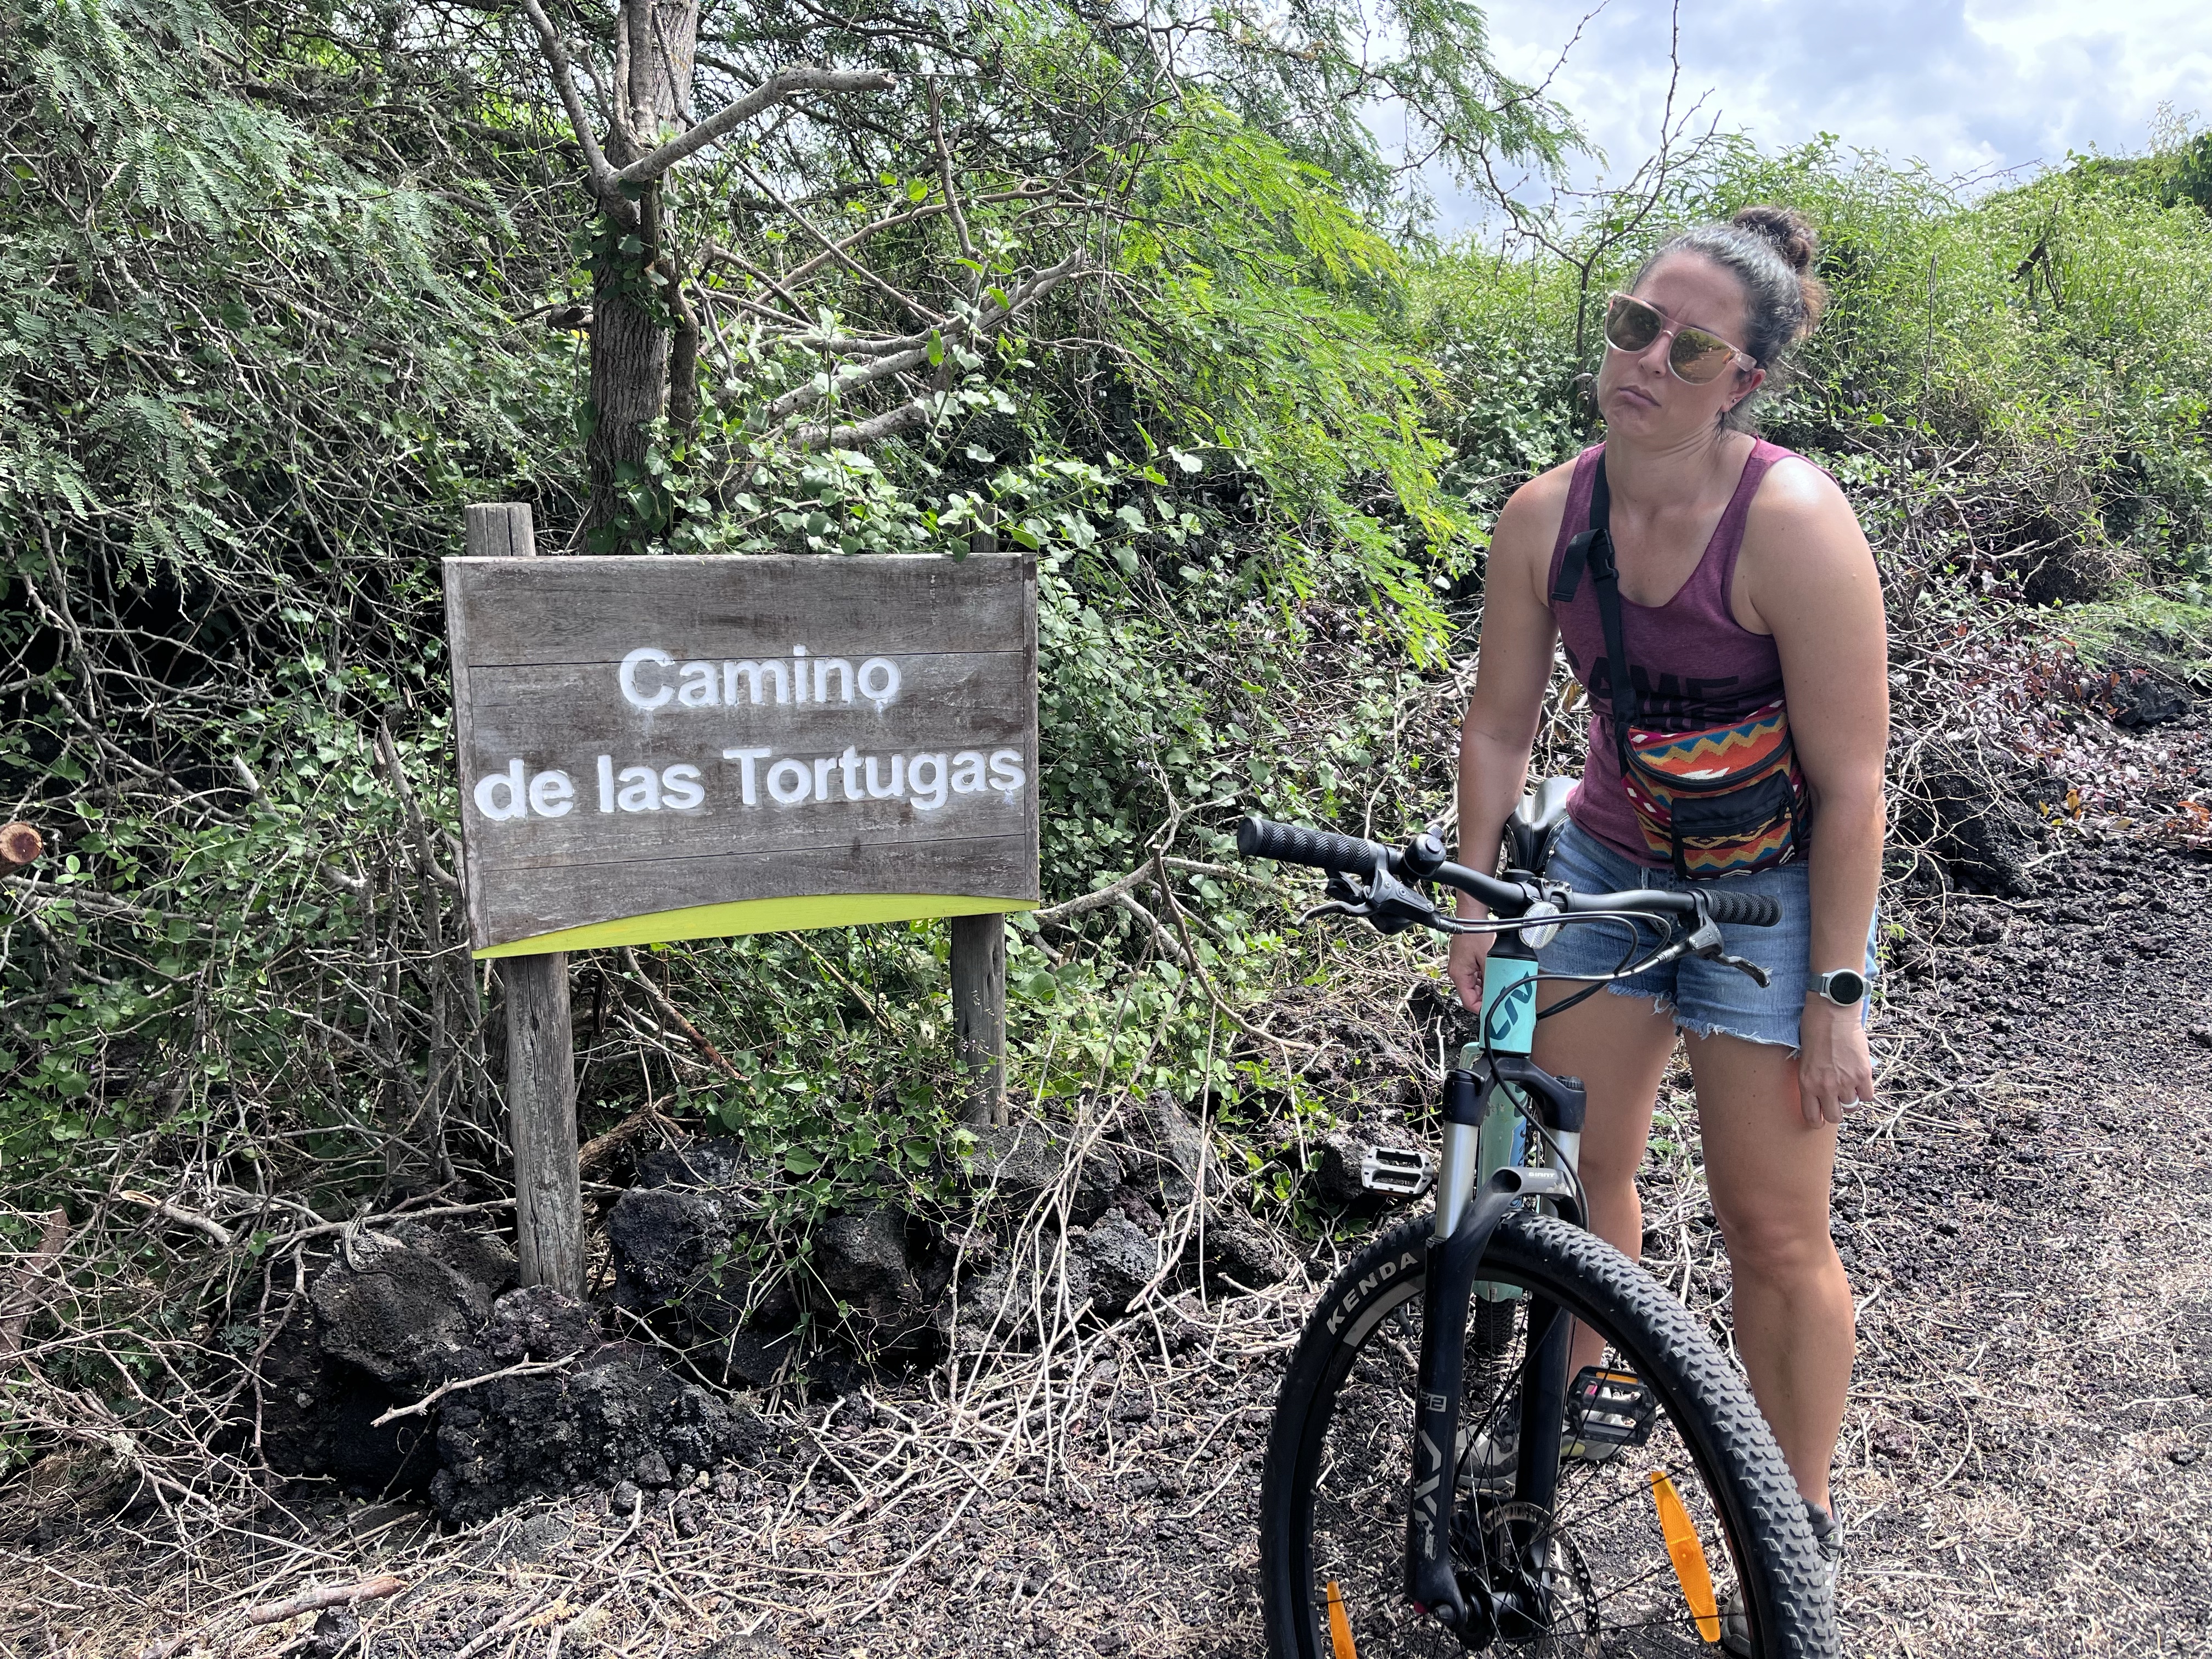
We, unfortunately, did not see any tortugas on the Camino de las Tortugas.
Diving
Yes, I realize that diving is also an activity. However, not everyone is a diver, and at ~$220 per person, this was by far the most expensive activity of our trip. Worth it? Absolutely. I recommend only diving from Santa Cruz, which has PADI certified dive centers. Again, you can walk in and book a day (or two) beforehand for cheaper rates than booking online.
Food
Compared to the mainland, food is more expensive, but when you consider that EVERYTHING must be brought to the island by boat, it makes sense.
Eating in Puerto Ayora (on Santa Cruz Island) is more expensive than in Puerto Villamil (on Isabela Island), especially on Charles Darwin Avenue, the main road. However, you will find some really nice restaurants. For instance, we frequented The Rock quite a bit for their nice beer and good food. But, I highly recommend venturing off the main avenue to find more local options. And, la Calle de los Kiosks (or the Kiosk street) is full of good, affordable options from breakfast ($5 pp) through dinner (~$10 pp).
If the menu is written on a whiteboard, then you’ve likely found a good (local) spot!
On Isabela, look for the menu del día for both lunch (almuerzo) and dinner. For instance, we had a beach-front three-course almuerzo (soup, main dish, dessert) for $10 per person. One street back from the beach, you’ll find typical dinners (soup + main dish of usually meat, beans/lentils, small salad) for $8 per person. For comparison, we pay ~$4 for similar dinners in Tena. So, yes, it’s more expensive relatively speaking, but it’s also not unreasonable.
And, of course, in both places, you’ll find mercados for general grocery shopping. We mostly had coffee and breakfast in our Airbnb.
Overall, we spent just under $25 per person per day on food, and we didn’t worry about always finding the cheapest food options. So, I’d say that’s not so bad.
Of note, I did not include alcohol in our food budget, which is sometimes more expensive than the food itself, especially if you want craft beer. Alcohol consumption is obviously a personal preference, but not drinking is an easy way to save money.
General Tips
Santa Cruz vs. Isabela
Puerto Ayora on Santa Cruz Island is MUCH more touristy than Isabela Island. We didn’t make it to San Cristobal (which I regret), but I would expect the town in San Cristobal to be more like Puerto Villamil on Isabela. So, you should consider what you’re looking for from your trip before deciding how many days on each island. Puerto Ayora has many more food options (and places that accept credit cards), tour companies, microbreweries, and souvenir shops (you get the point) than Isabela.
In hindsight, we would have spent only two full days on Santa Cruz Island and four on Isabela Island, given that we preferred the laid-back beach atmosphere of Puerto Villamil to Puerto Ayora.
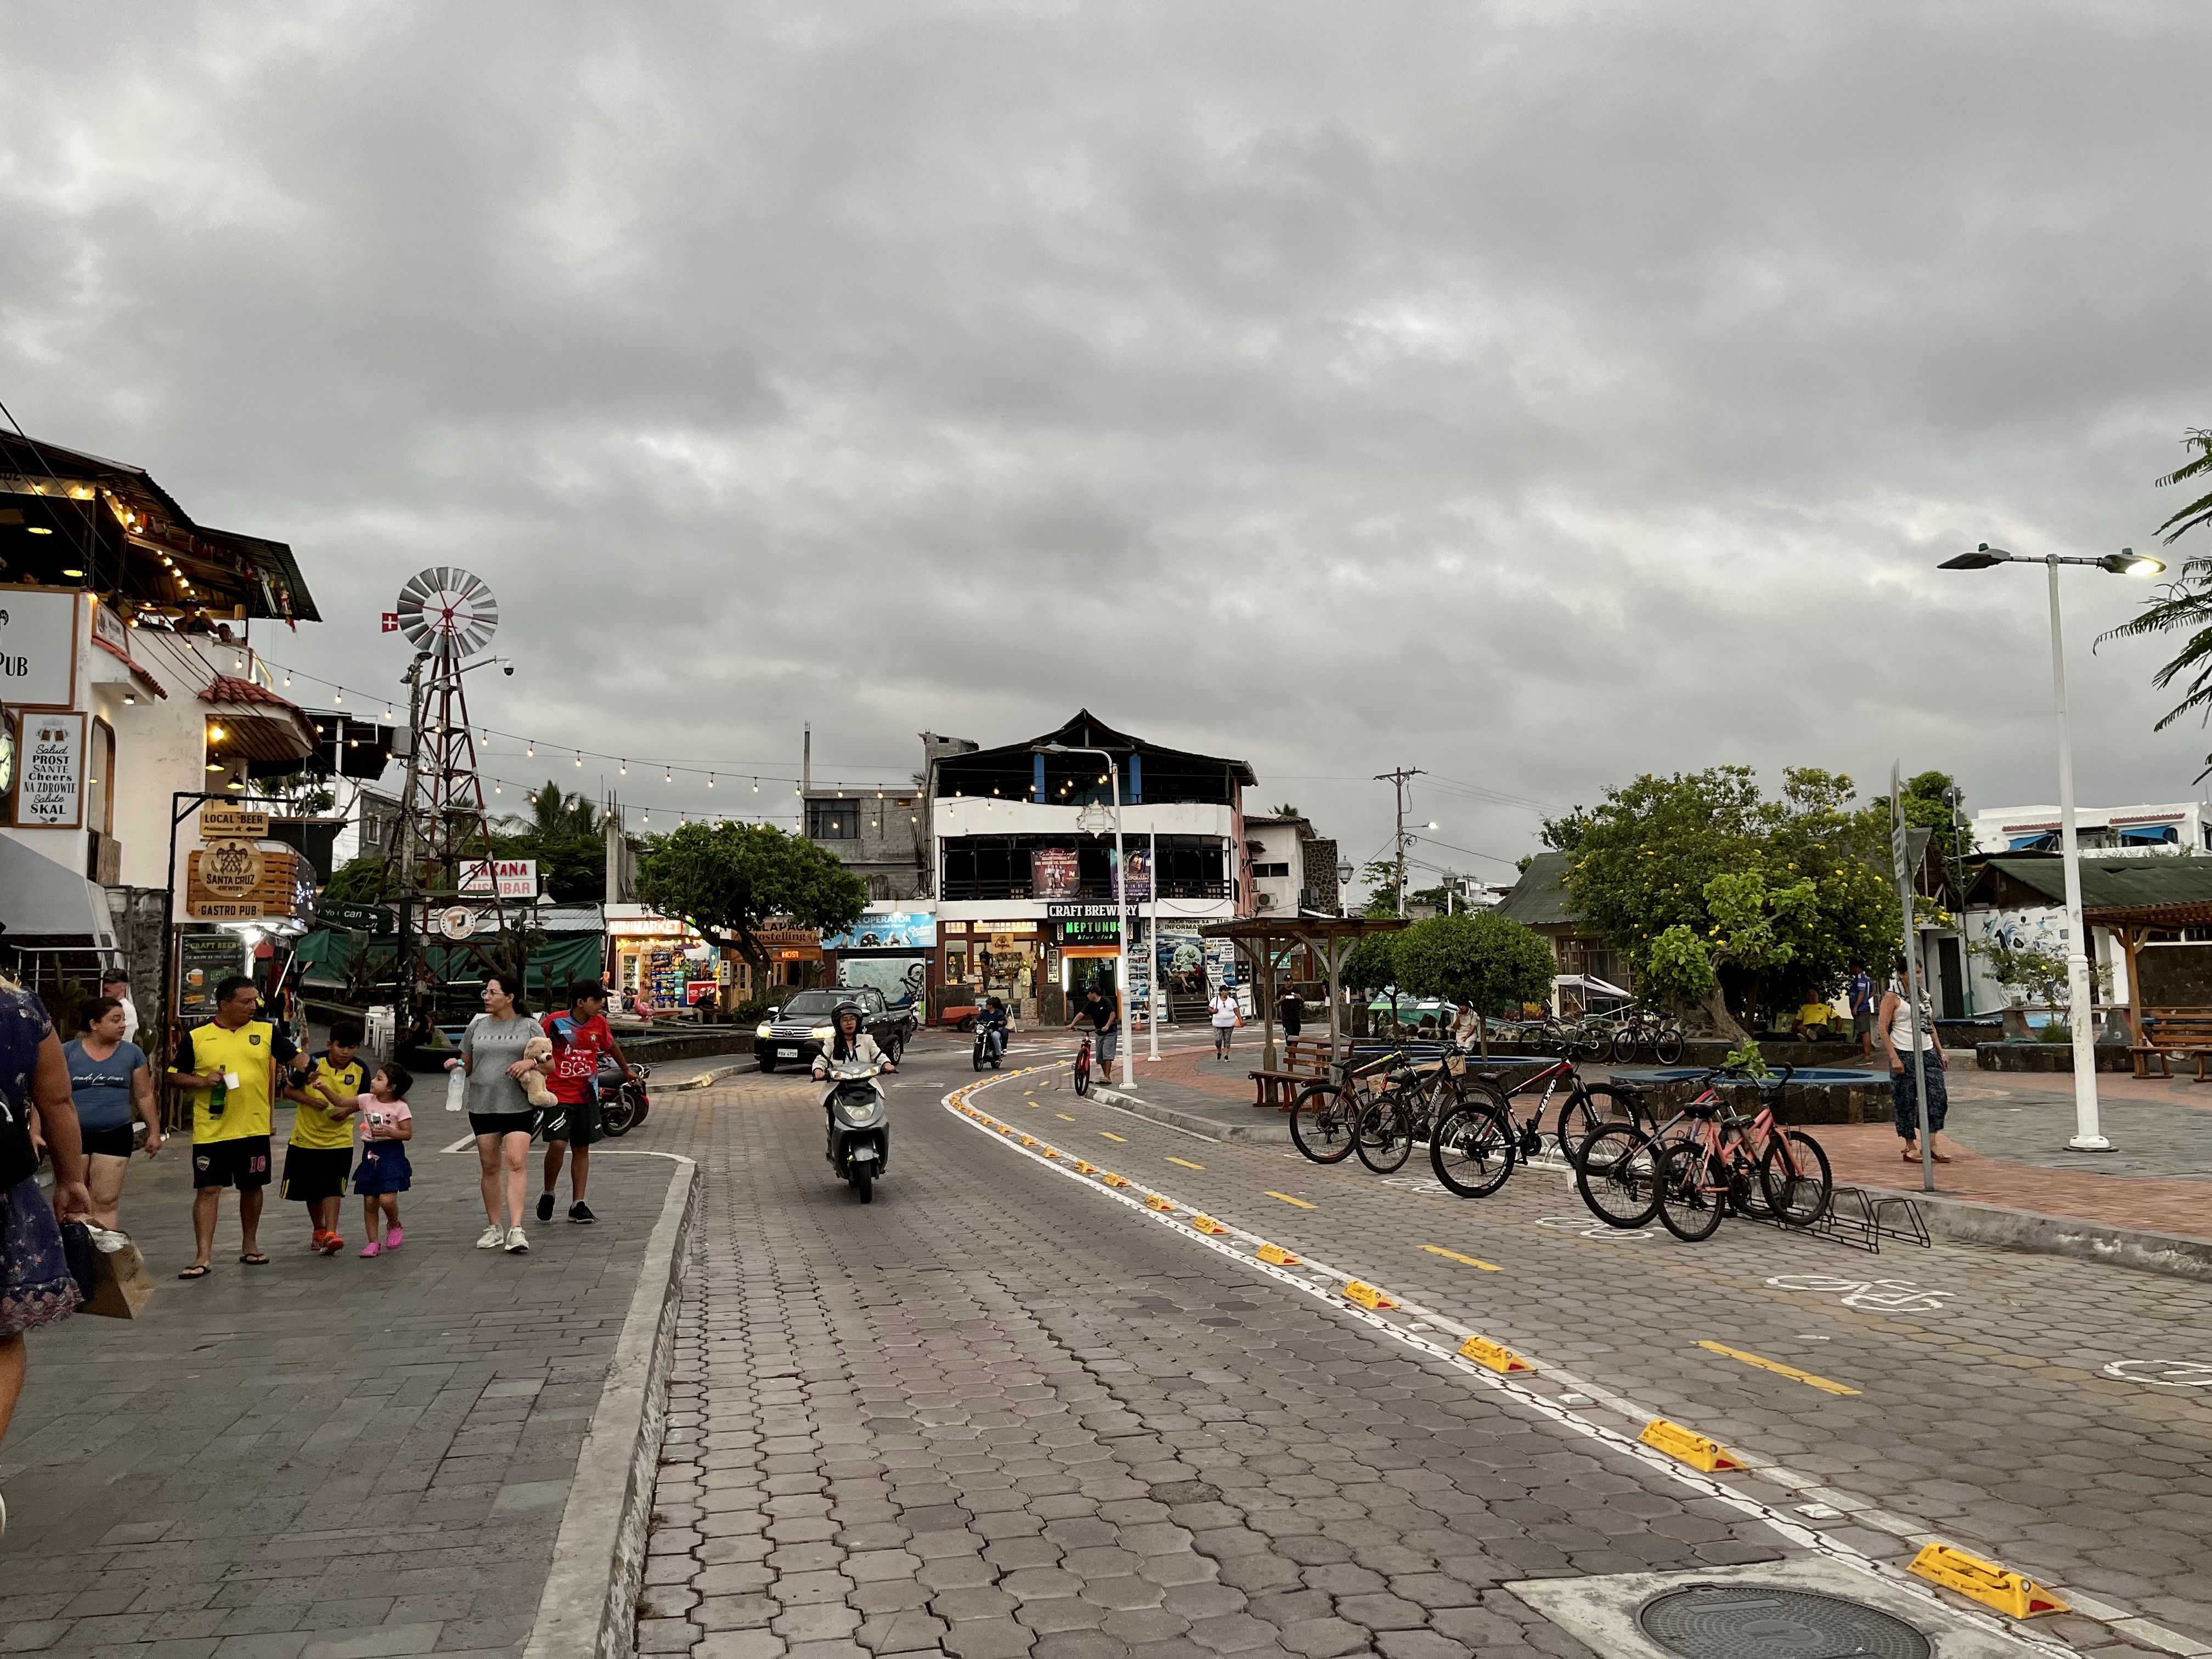
Main road in Puerto Ayora, Santa Cruz.Main road in Puerto Villamil, Isabela.
Cash! Cash! Cash!
You will always benefit by having cash. However, don’t carry too much at one time. The ATM options are plentiful in Puerto Ayora, but Isabela only has one ATM, and sometimes that ATM doesn’t work, which we found out the hard way. Luckily, it started working again by the afternoon, and we had enough cash for our necessities, but the lack of extra cash really cut into our happy hour time! 😜 Honestly, though, it’s why we ended up buying the ferry tickets online because we didn’t want to spend nearly all our remaining cash without knowing for certain we could get more. It was a bit stressful, I don’t recommend it!
Anyway, long story short, especially if you leave Puerto Ayora, expect to pay everything in cash and take more than you need.
BYOS
Bring your own snorkel (and mask)!
You can snorkel at any of the public beaches for free if you have your own gear!
So, thank you for coming to my Ted talk on the Galapagos, and happy planning! 😀
The second half of our Galapagos adventure was spent on Isabela Island, which is larger in size but much smaller in population. For reference, the number of permanent residents on Santa Cruz Island, where we spend the first half of the trip, is ~15,000 versus ~2,000 on Isabela.
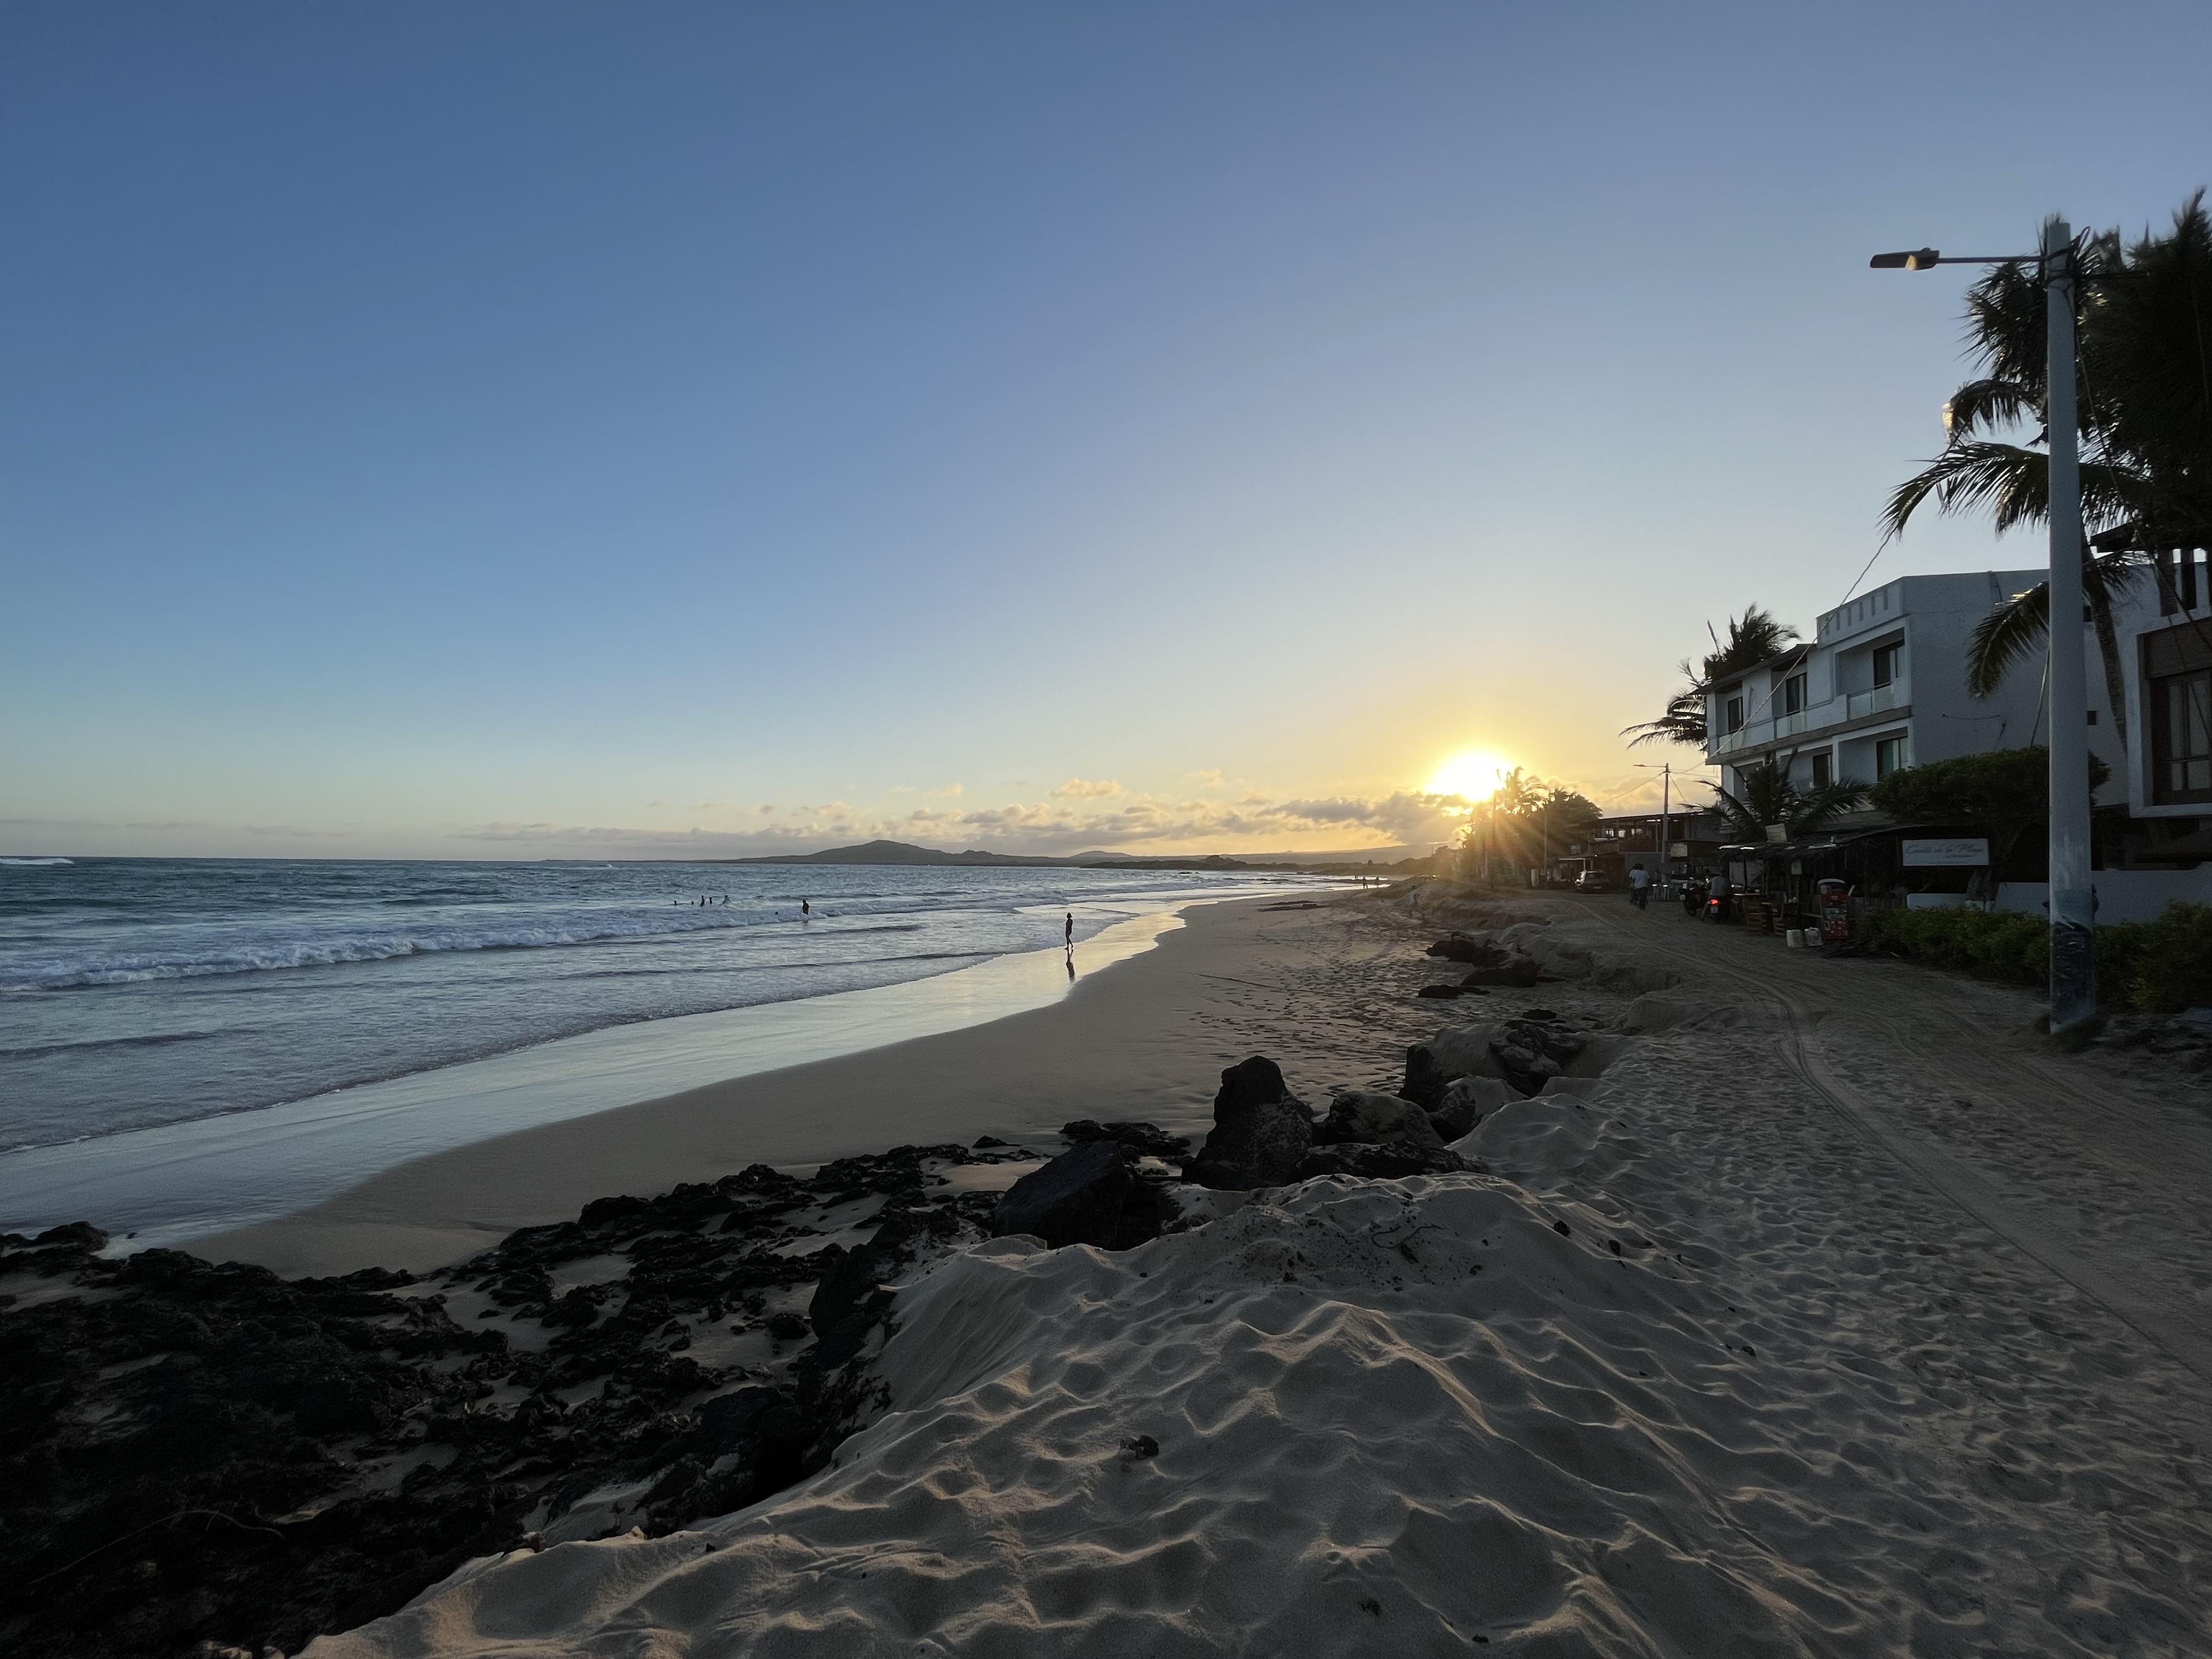
If we had it to do over again, we’d spend more time on Isabela! The feel of this island was much more laid back and less touristy, and you have easy access to the beach!
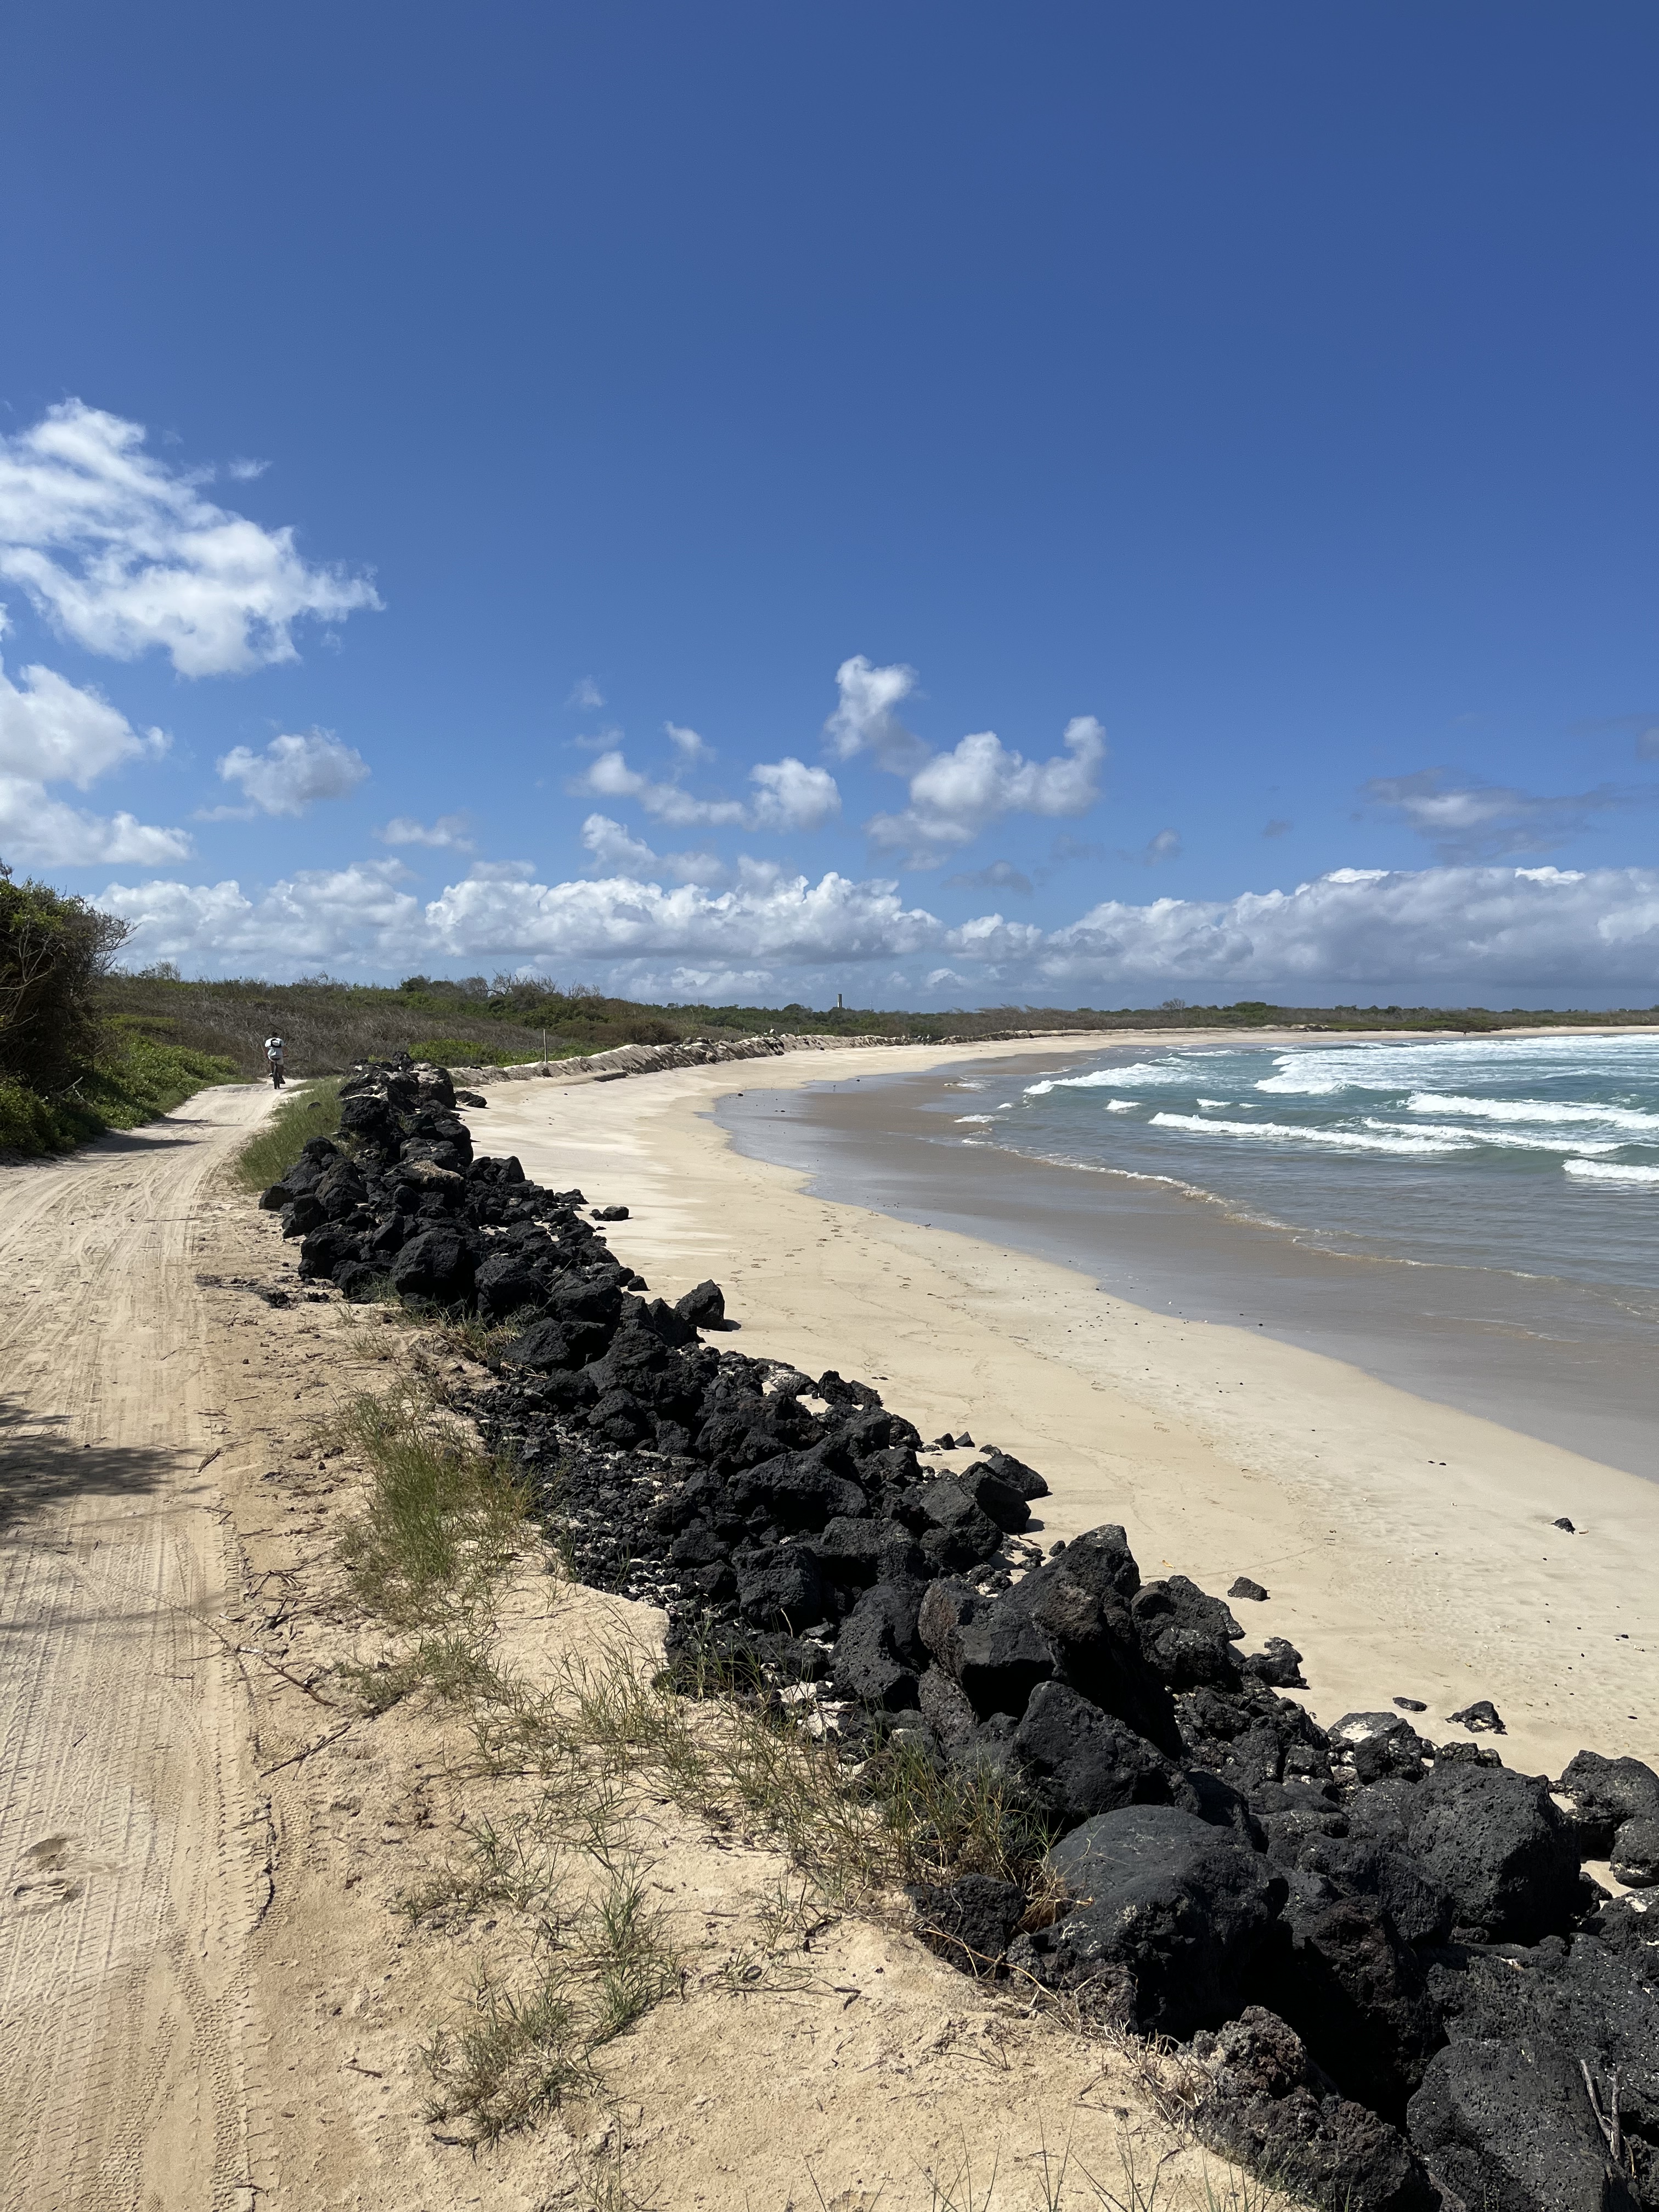
Playa Puerto Villamil
We kicked off our time in Puerto Villamil, the main town on Isabela Island, with one of the coolest tours I’ve ever done!
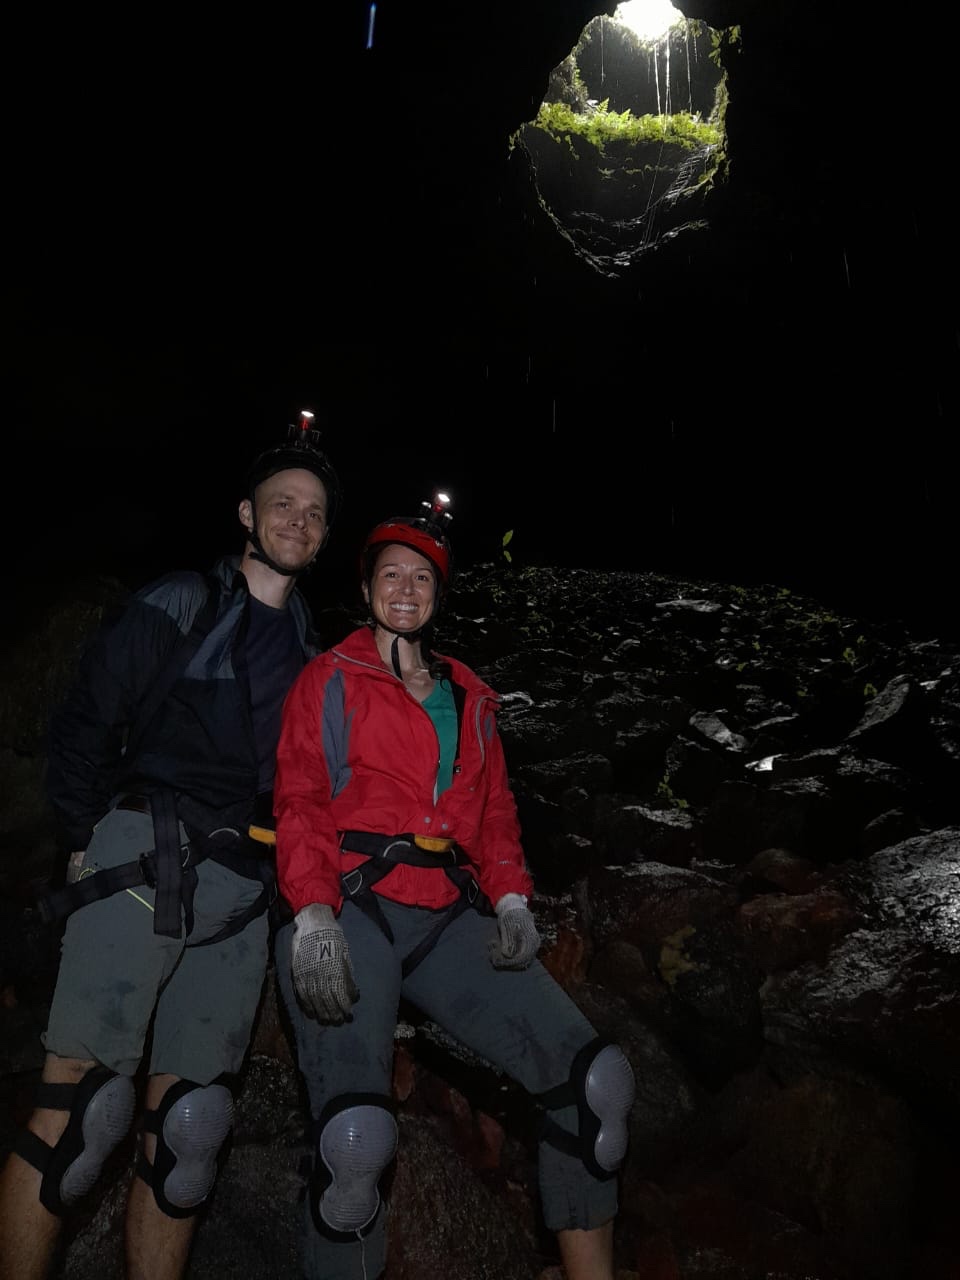
Volcan Trizillos
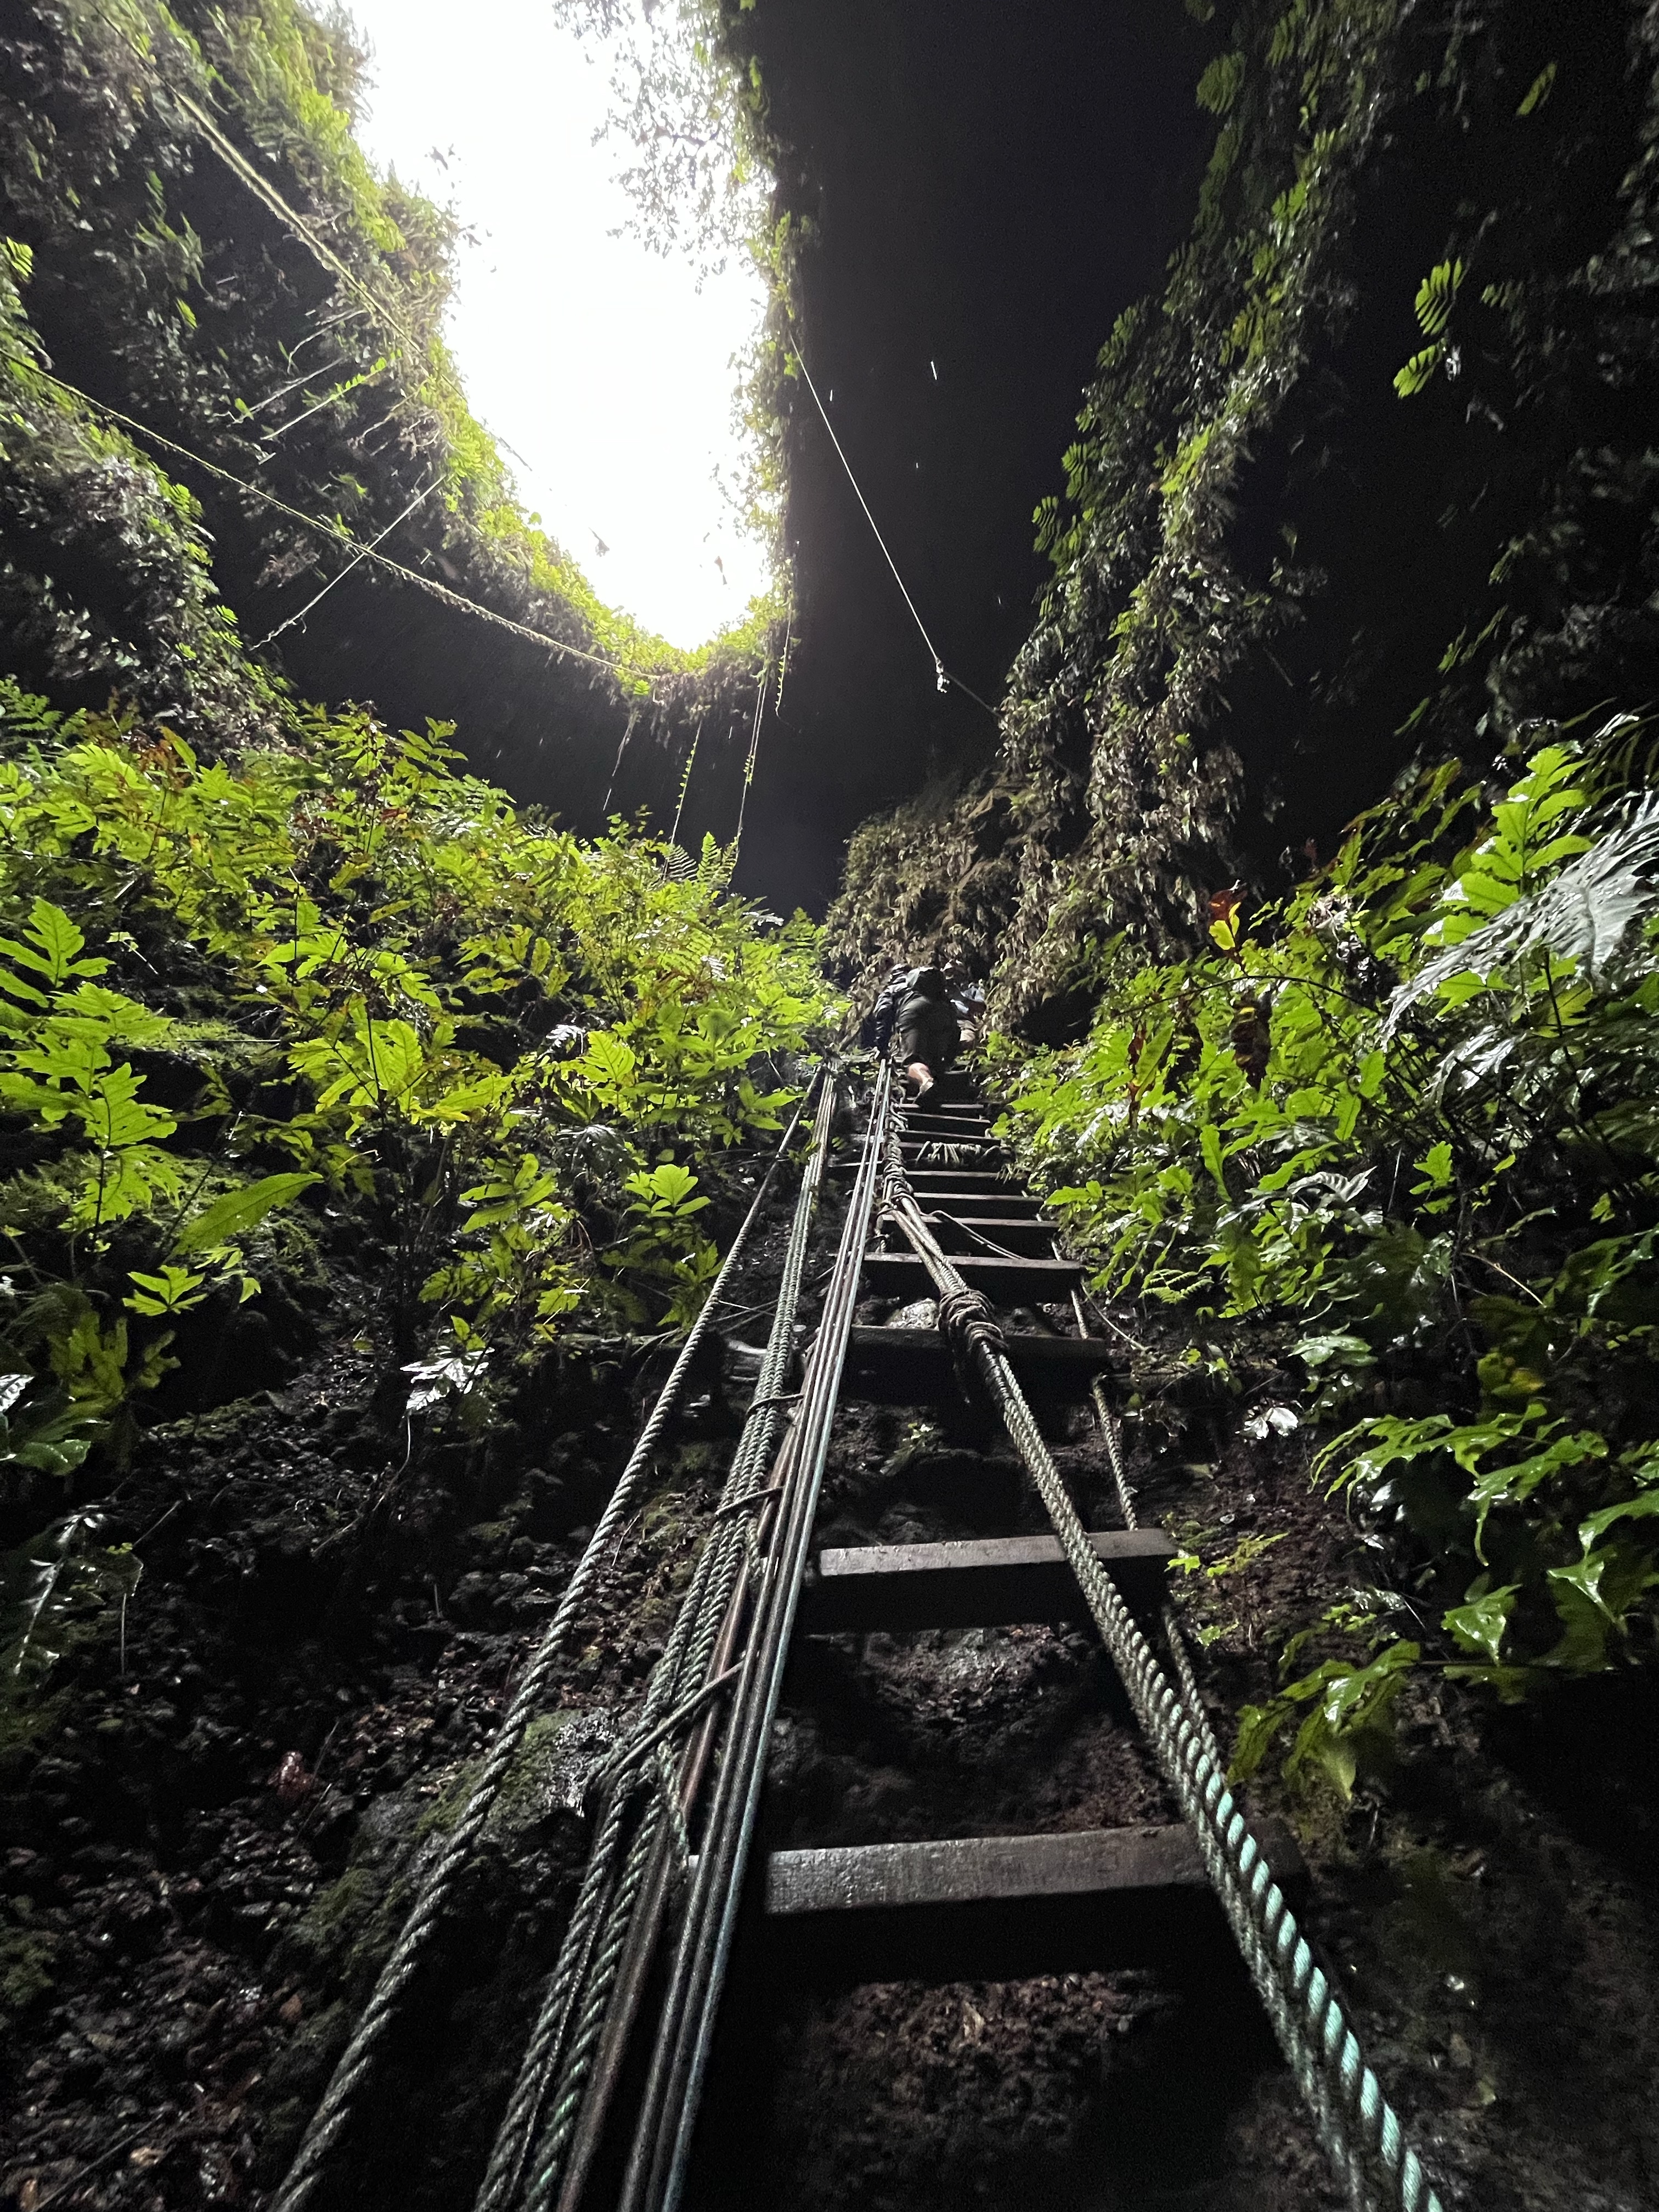
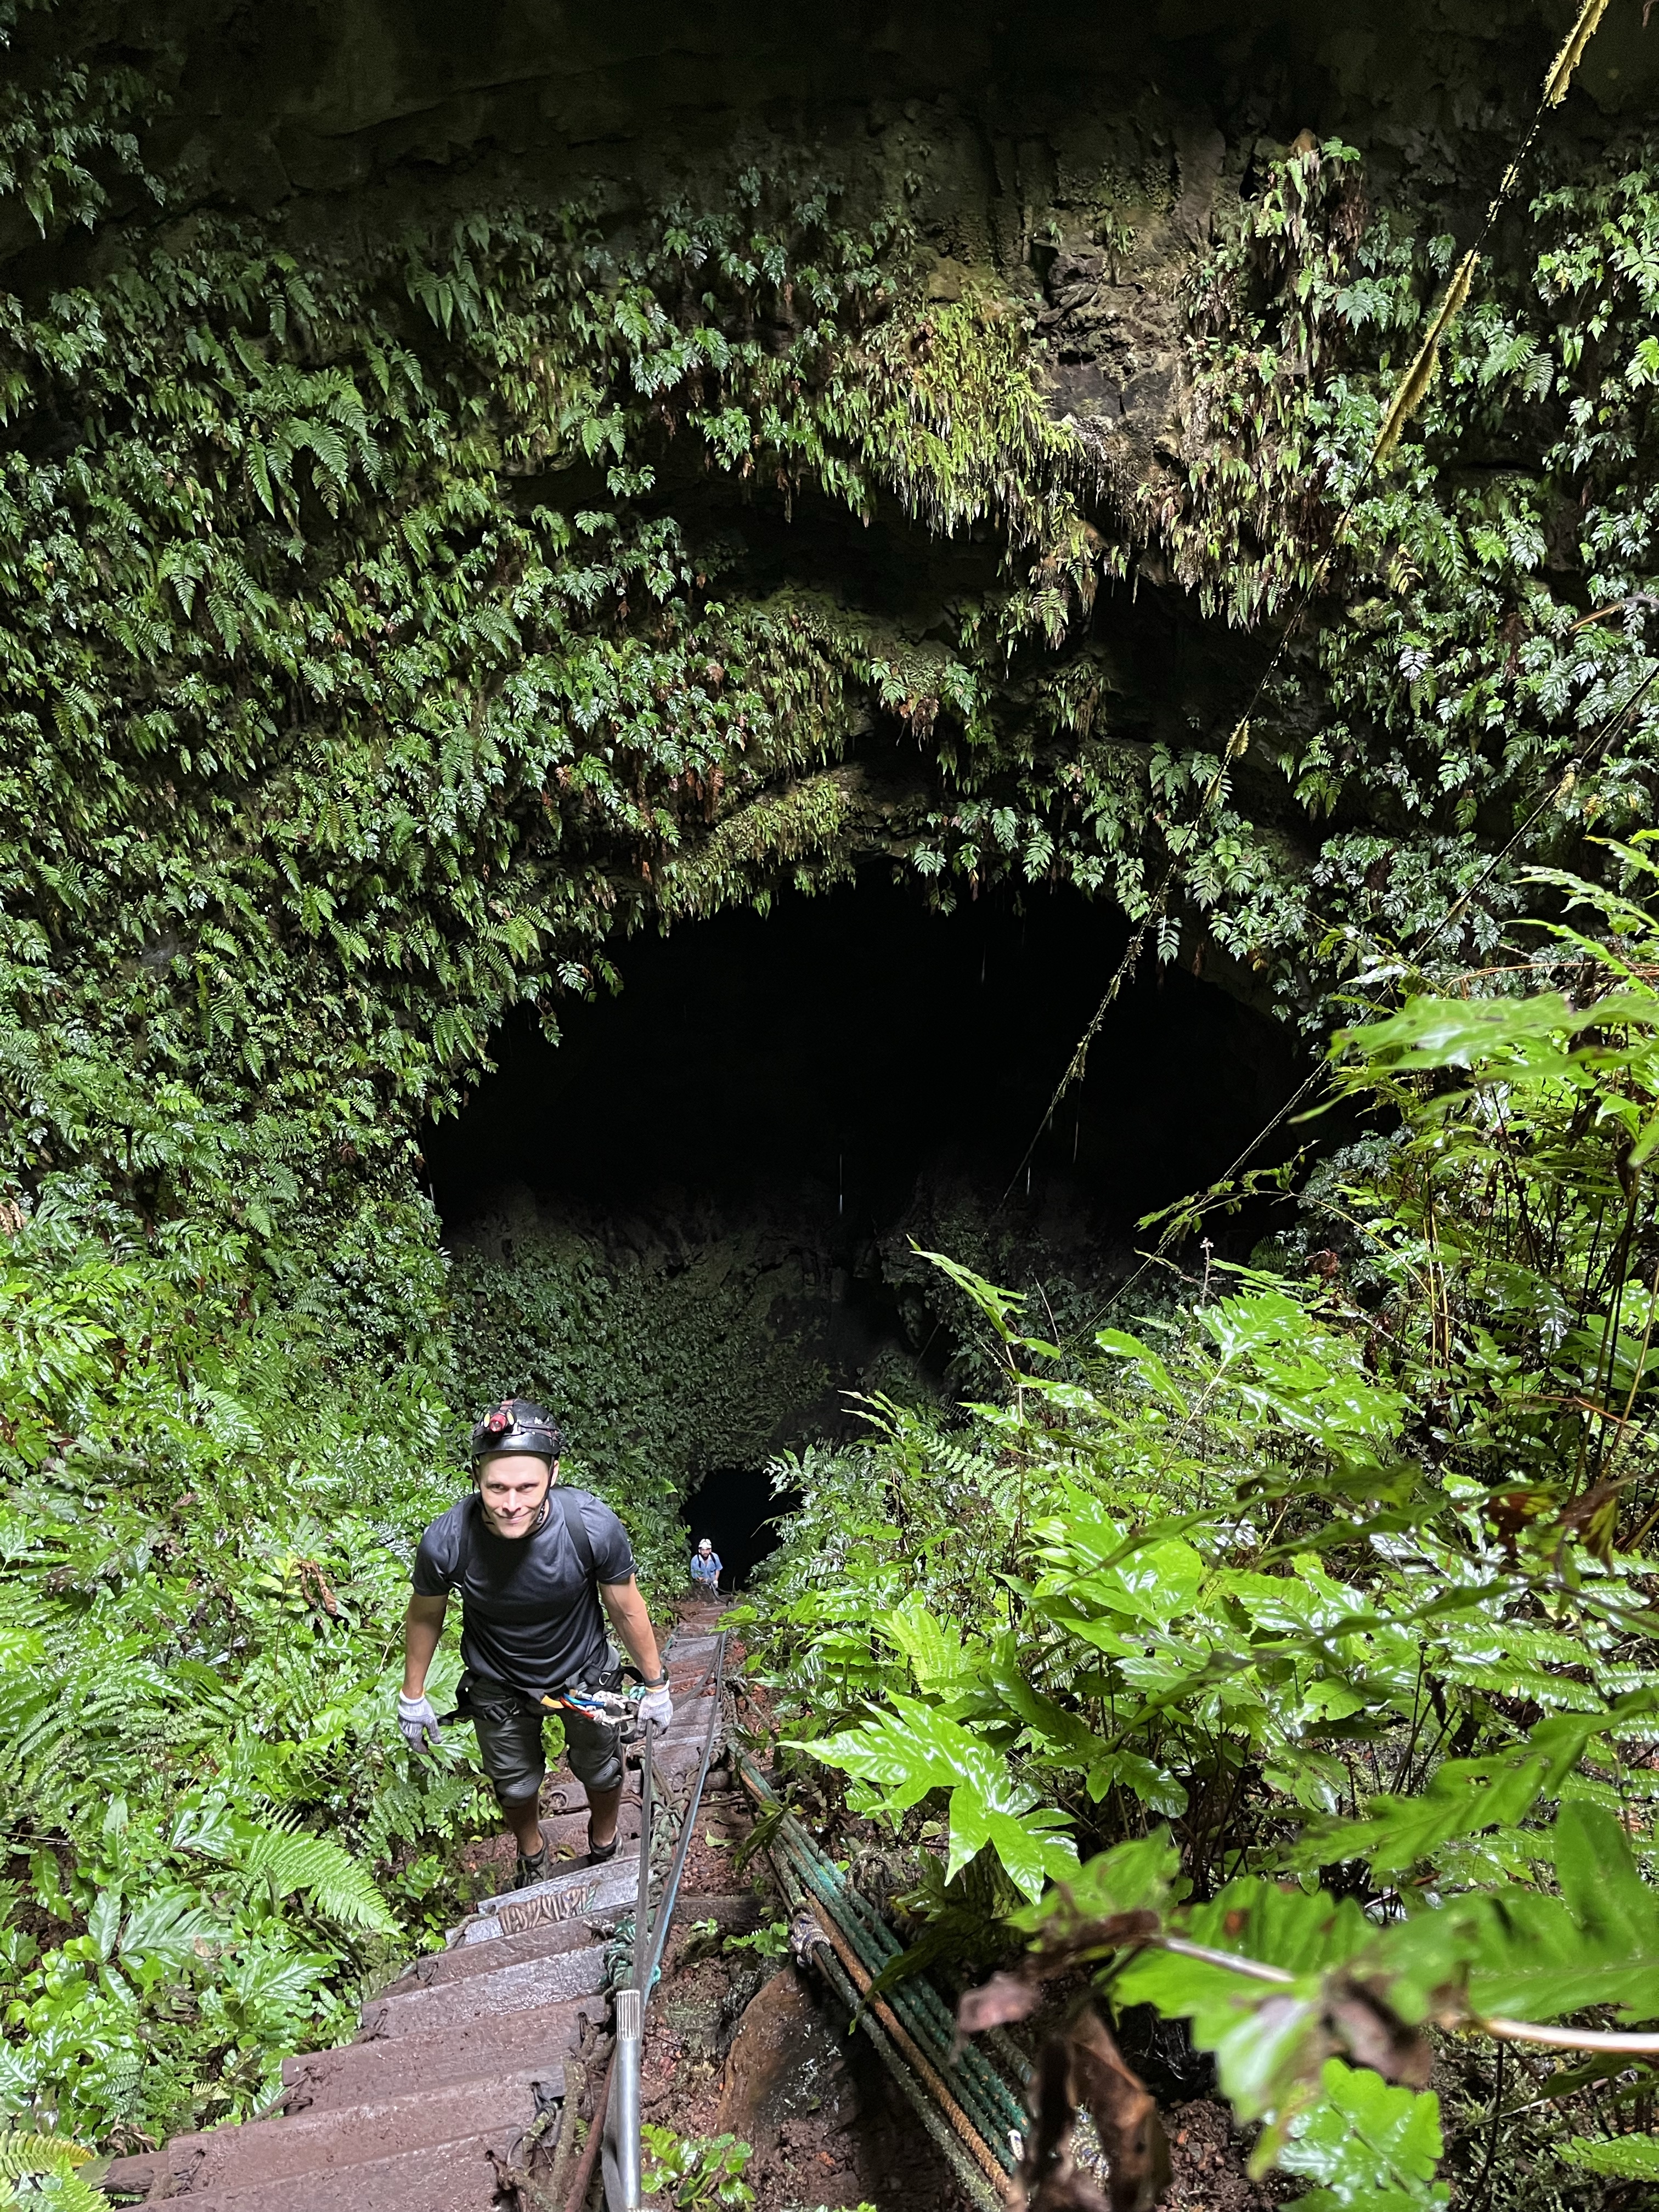
This tour involves repelling 105 meters (~500 feet) into an inactive volcano crater!
Ready to repel!
Yes, it seems a bit sketchy, but it definitely wasn’t. Everything was super secure, and once you got the hang of how the rope lines worked, it was easy. At the bottom (well, at least as far down as we were going to go… it kept going!), our guide pointed out the various remnants of the volcanic eruption, like quartz and lichens.
Notice the vertical ladder leading out of the hole.
Don’t worry, though. There are plenty of water-based activities. We decided not to dive from Isabela. Honestly, the dive shop there wasn’t PADI- or SSI-certified, which was a red flag for us. Instead, we booked a snorkeling tour to Los Túneles, or The Tunnels.
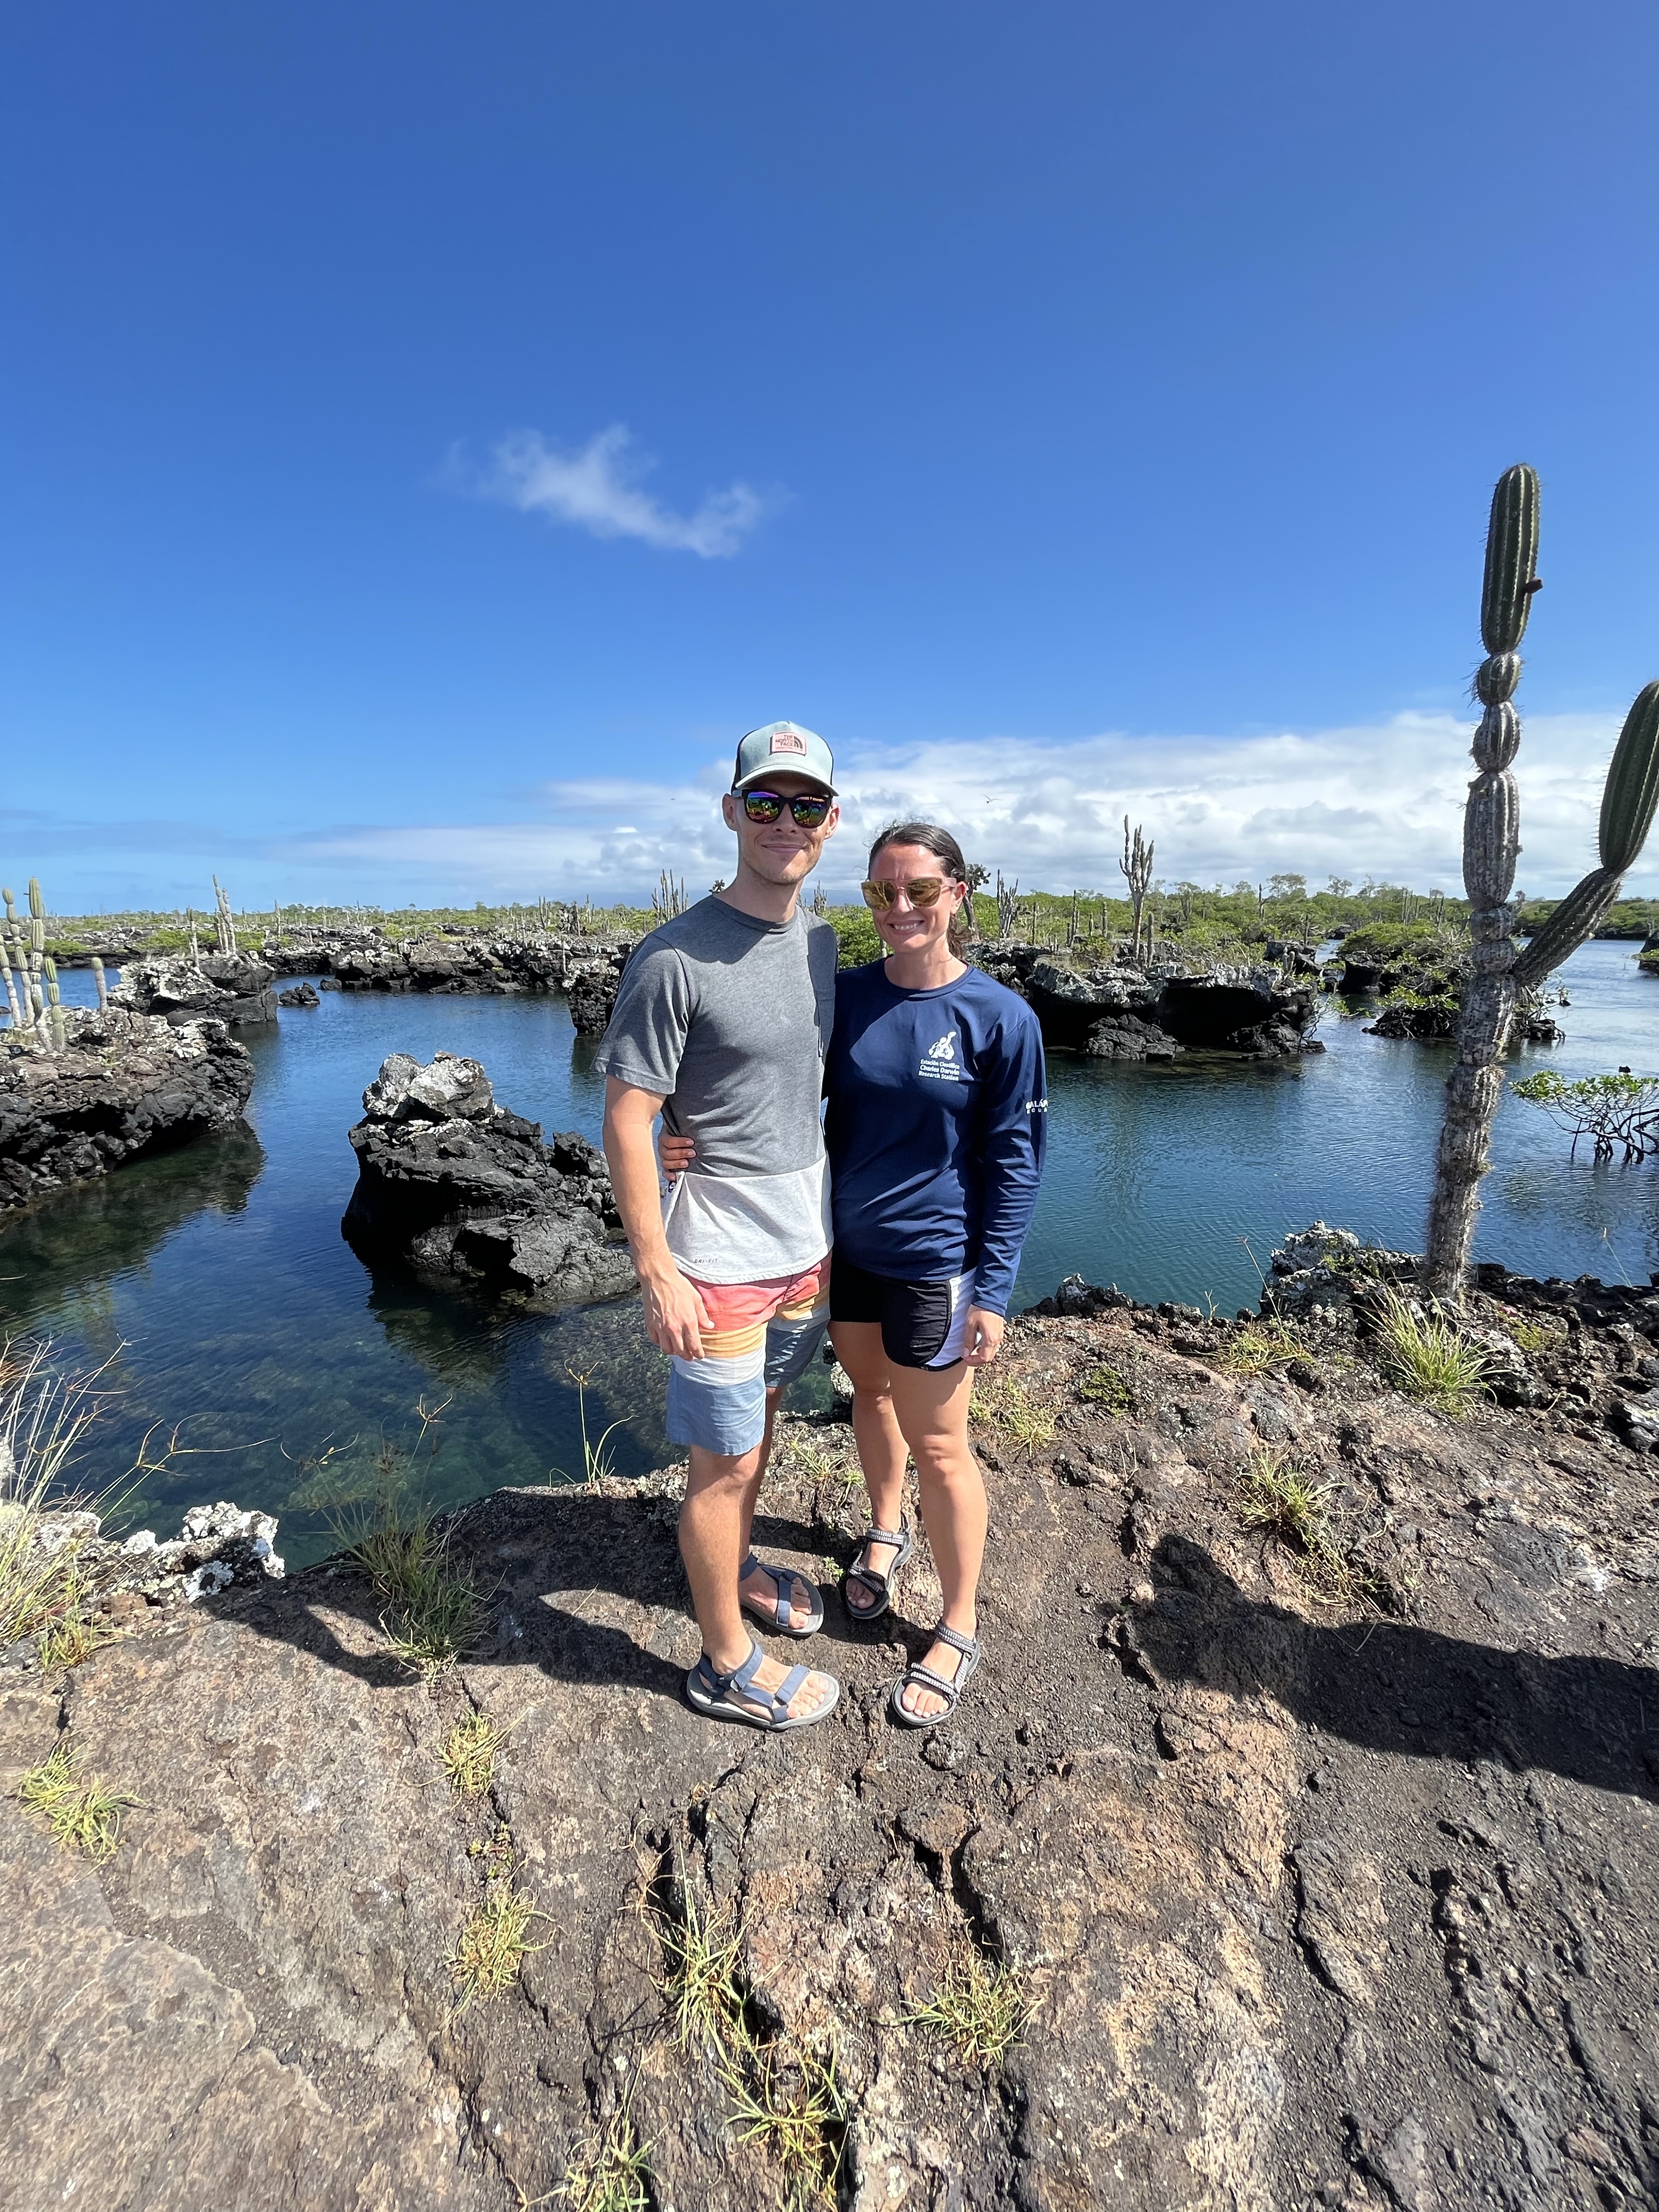
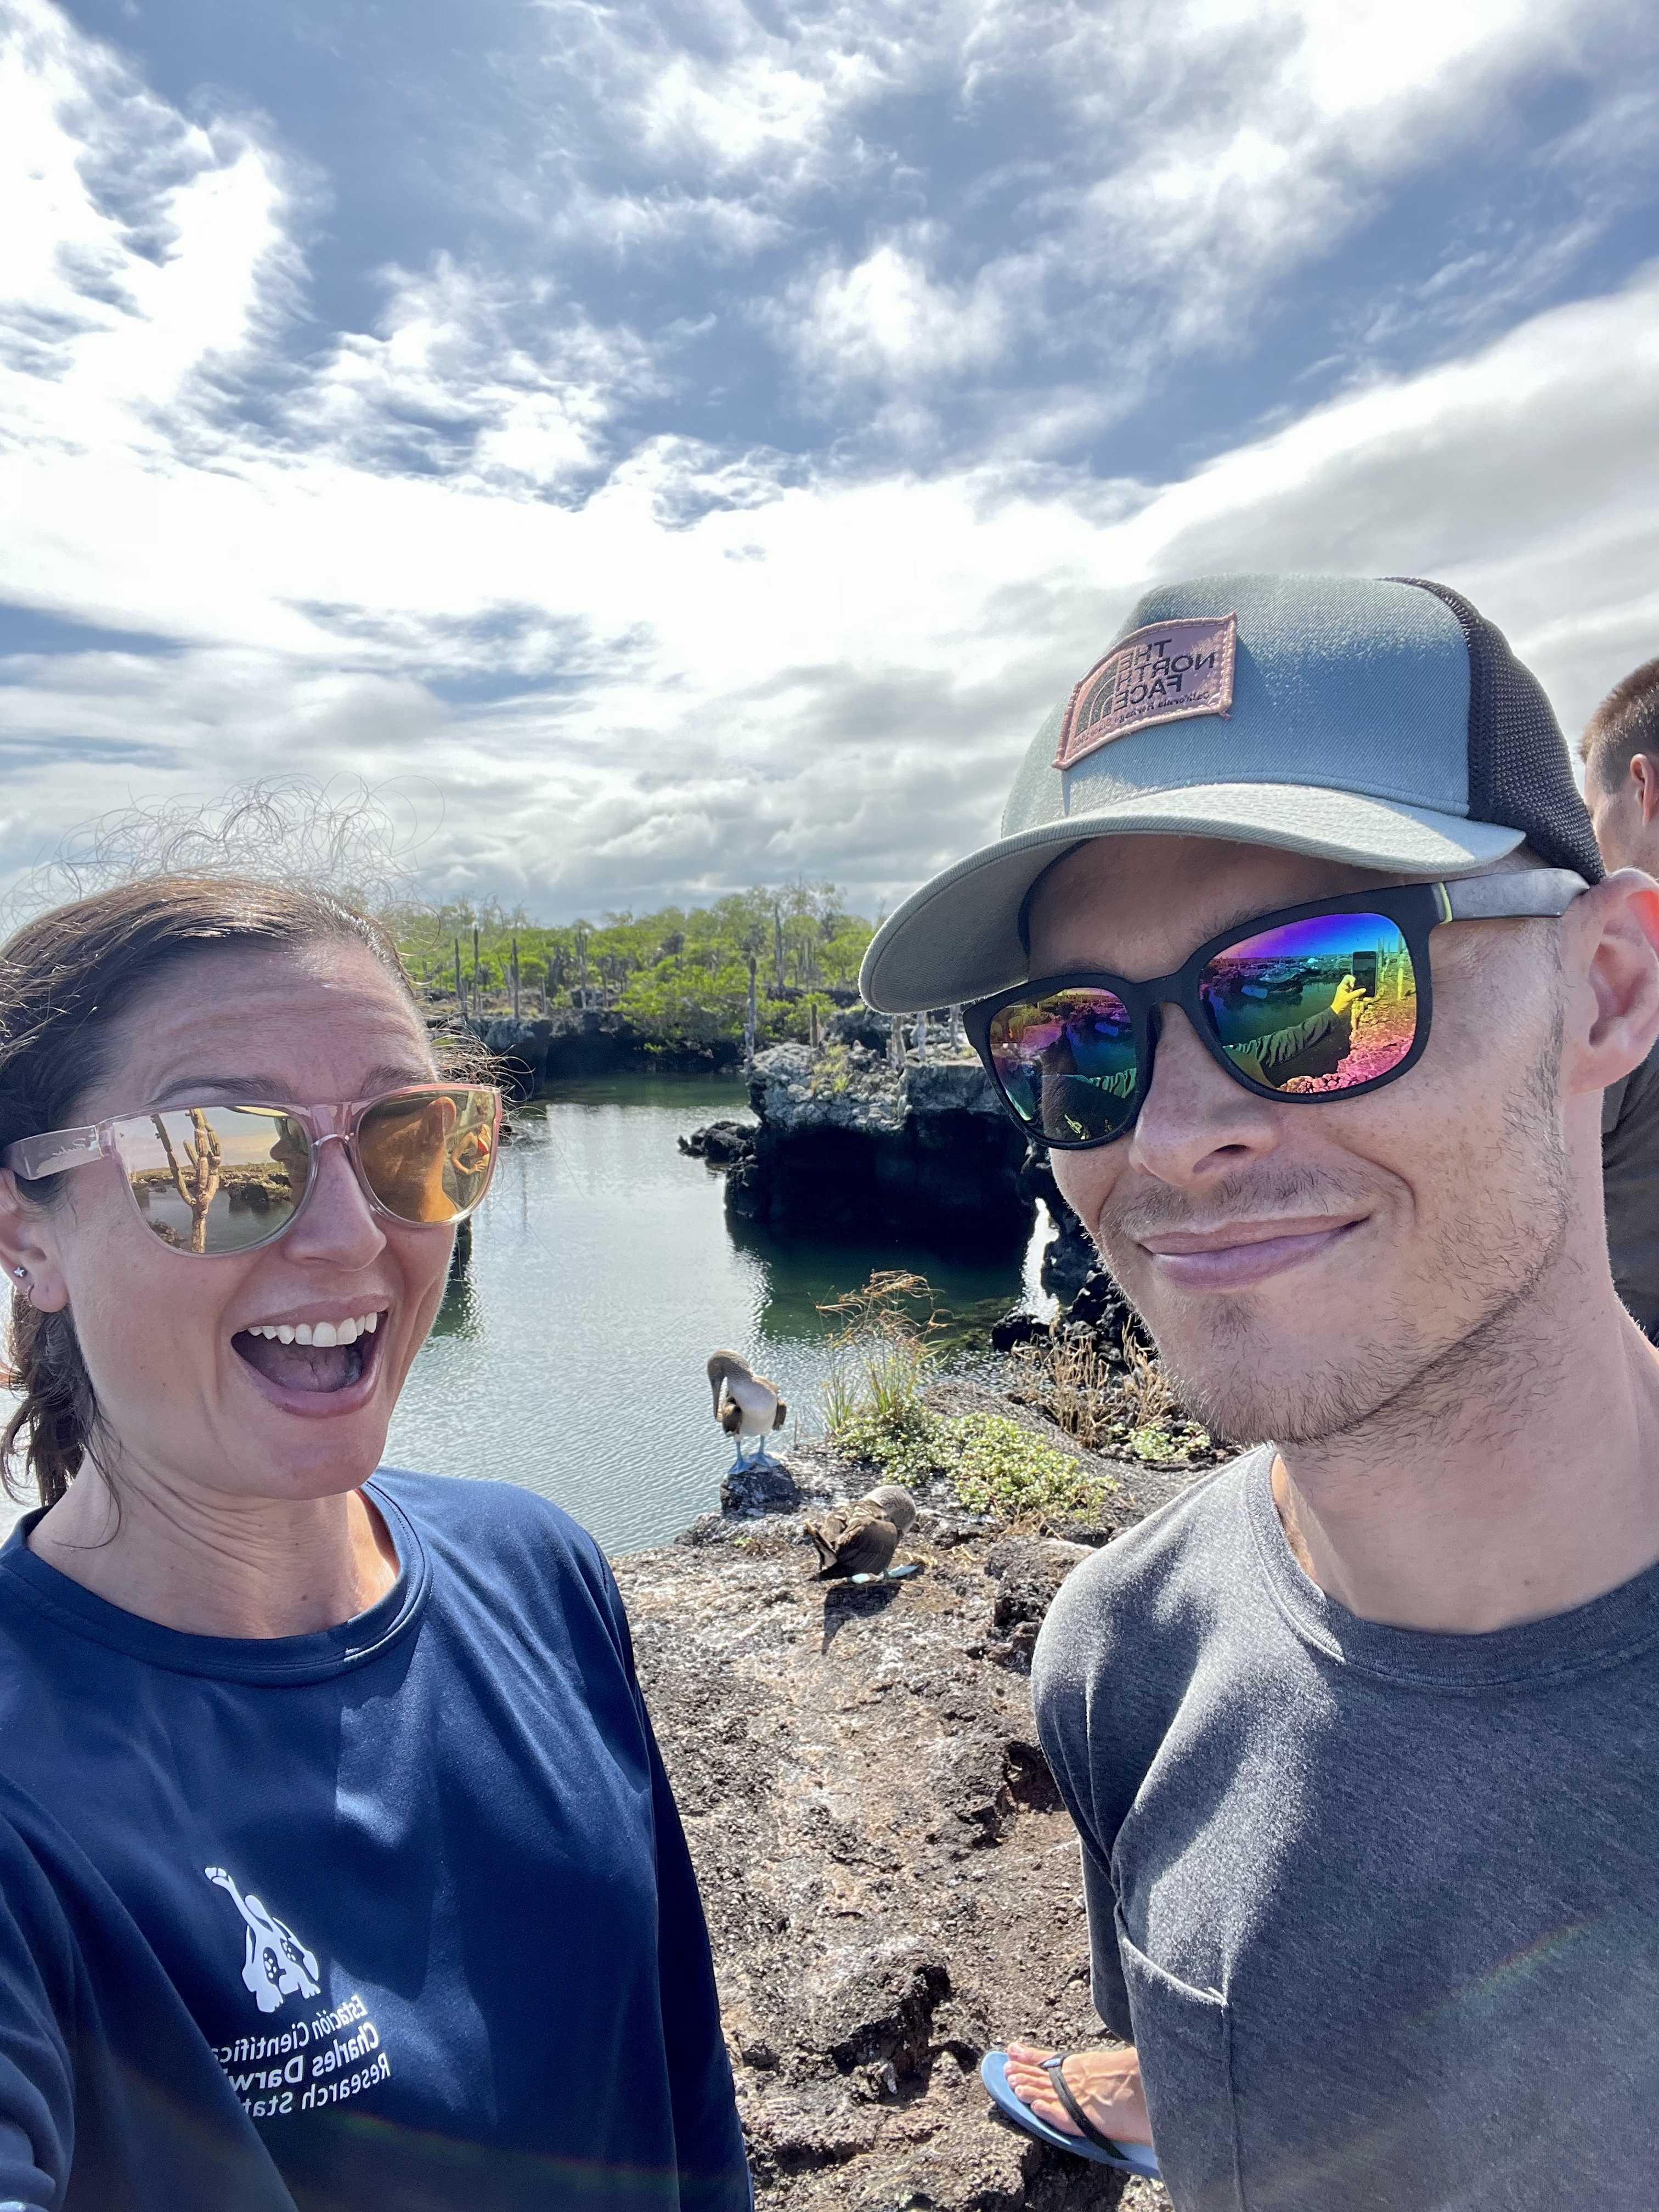
Los Túneles
This tour is really a two-part tour: land and water. You don’t snorkel at “the tunnels” pictured below. First, there’s a land-based walking tour of this unique and aptly named area. This is important to know because several people showed up in only bikinis and flip-flops to walk around in the direct sun on volcanic rock… not ideal.
Anyway, this area had plenty of sea turtles, visible through the crystal clear water, and blue-footed boobies! This is one of those places where photos really don’t do it justice.
Oh, and another thing. If you’re easily seasick, I recommend Dramamine before you go. 🤣 To get into the Los Túneles area, you have to ride the waves, which is tricky because the boat needs to be in just the right position. The captains do this tour every day, so they (hopefully!) know what they are doing. But, on the day of our tour, I swear I thought I was going to watch the other tour boat in front of us capsize. It quite literally (at least in my mind) went completely horizontal! The waves that day were ~5 meters (~16 feet), and apparently, that’s a “calm” day. 😳 To get back out, they put everyone towards the back of the boat, kicked the motor into the highest gear possible, and just plowed through the waves. It was definitely an experience!
Snorkeling happens in two different areas. In both, we saw penguins, sea turtles, baby and big sharks, and tons of fish! The sharks were pretty crazy because the baby ones would swim right next to you, and later, there was a cave with at least 4 or 5 adult white-tipped reef sharks just hanging out in the sand. This tour was $110 per person, but we saw a lot of animals!
The only downside to a group snorkeling tour is the levels of swimmers, and our group certainly had all levels. Luckily, our guide didn’t mind Shane and I lingering a bit behind the group to avoid the chaos.
We also had good snorkeling luck at another spot near Puerto Villamil.
Concha de Perla
We went here twice, once in the afternoon and once in the early morning, about 8:30 am. I highly recommend going early in the morning. Other than one other couple, we had the spot to ourselves, and the sea lions were active in the morning! We swam with two!
To get there, walk back towards the pier for the ferries, then follow the sign and boardwalk through the mangroves to the swimming area.
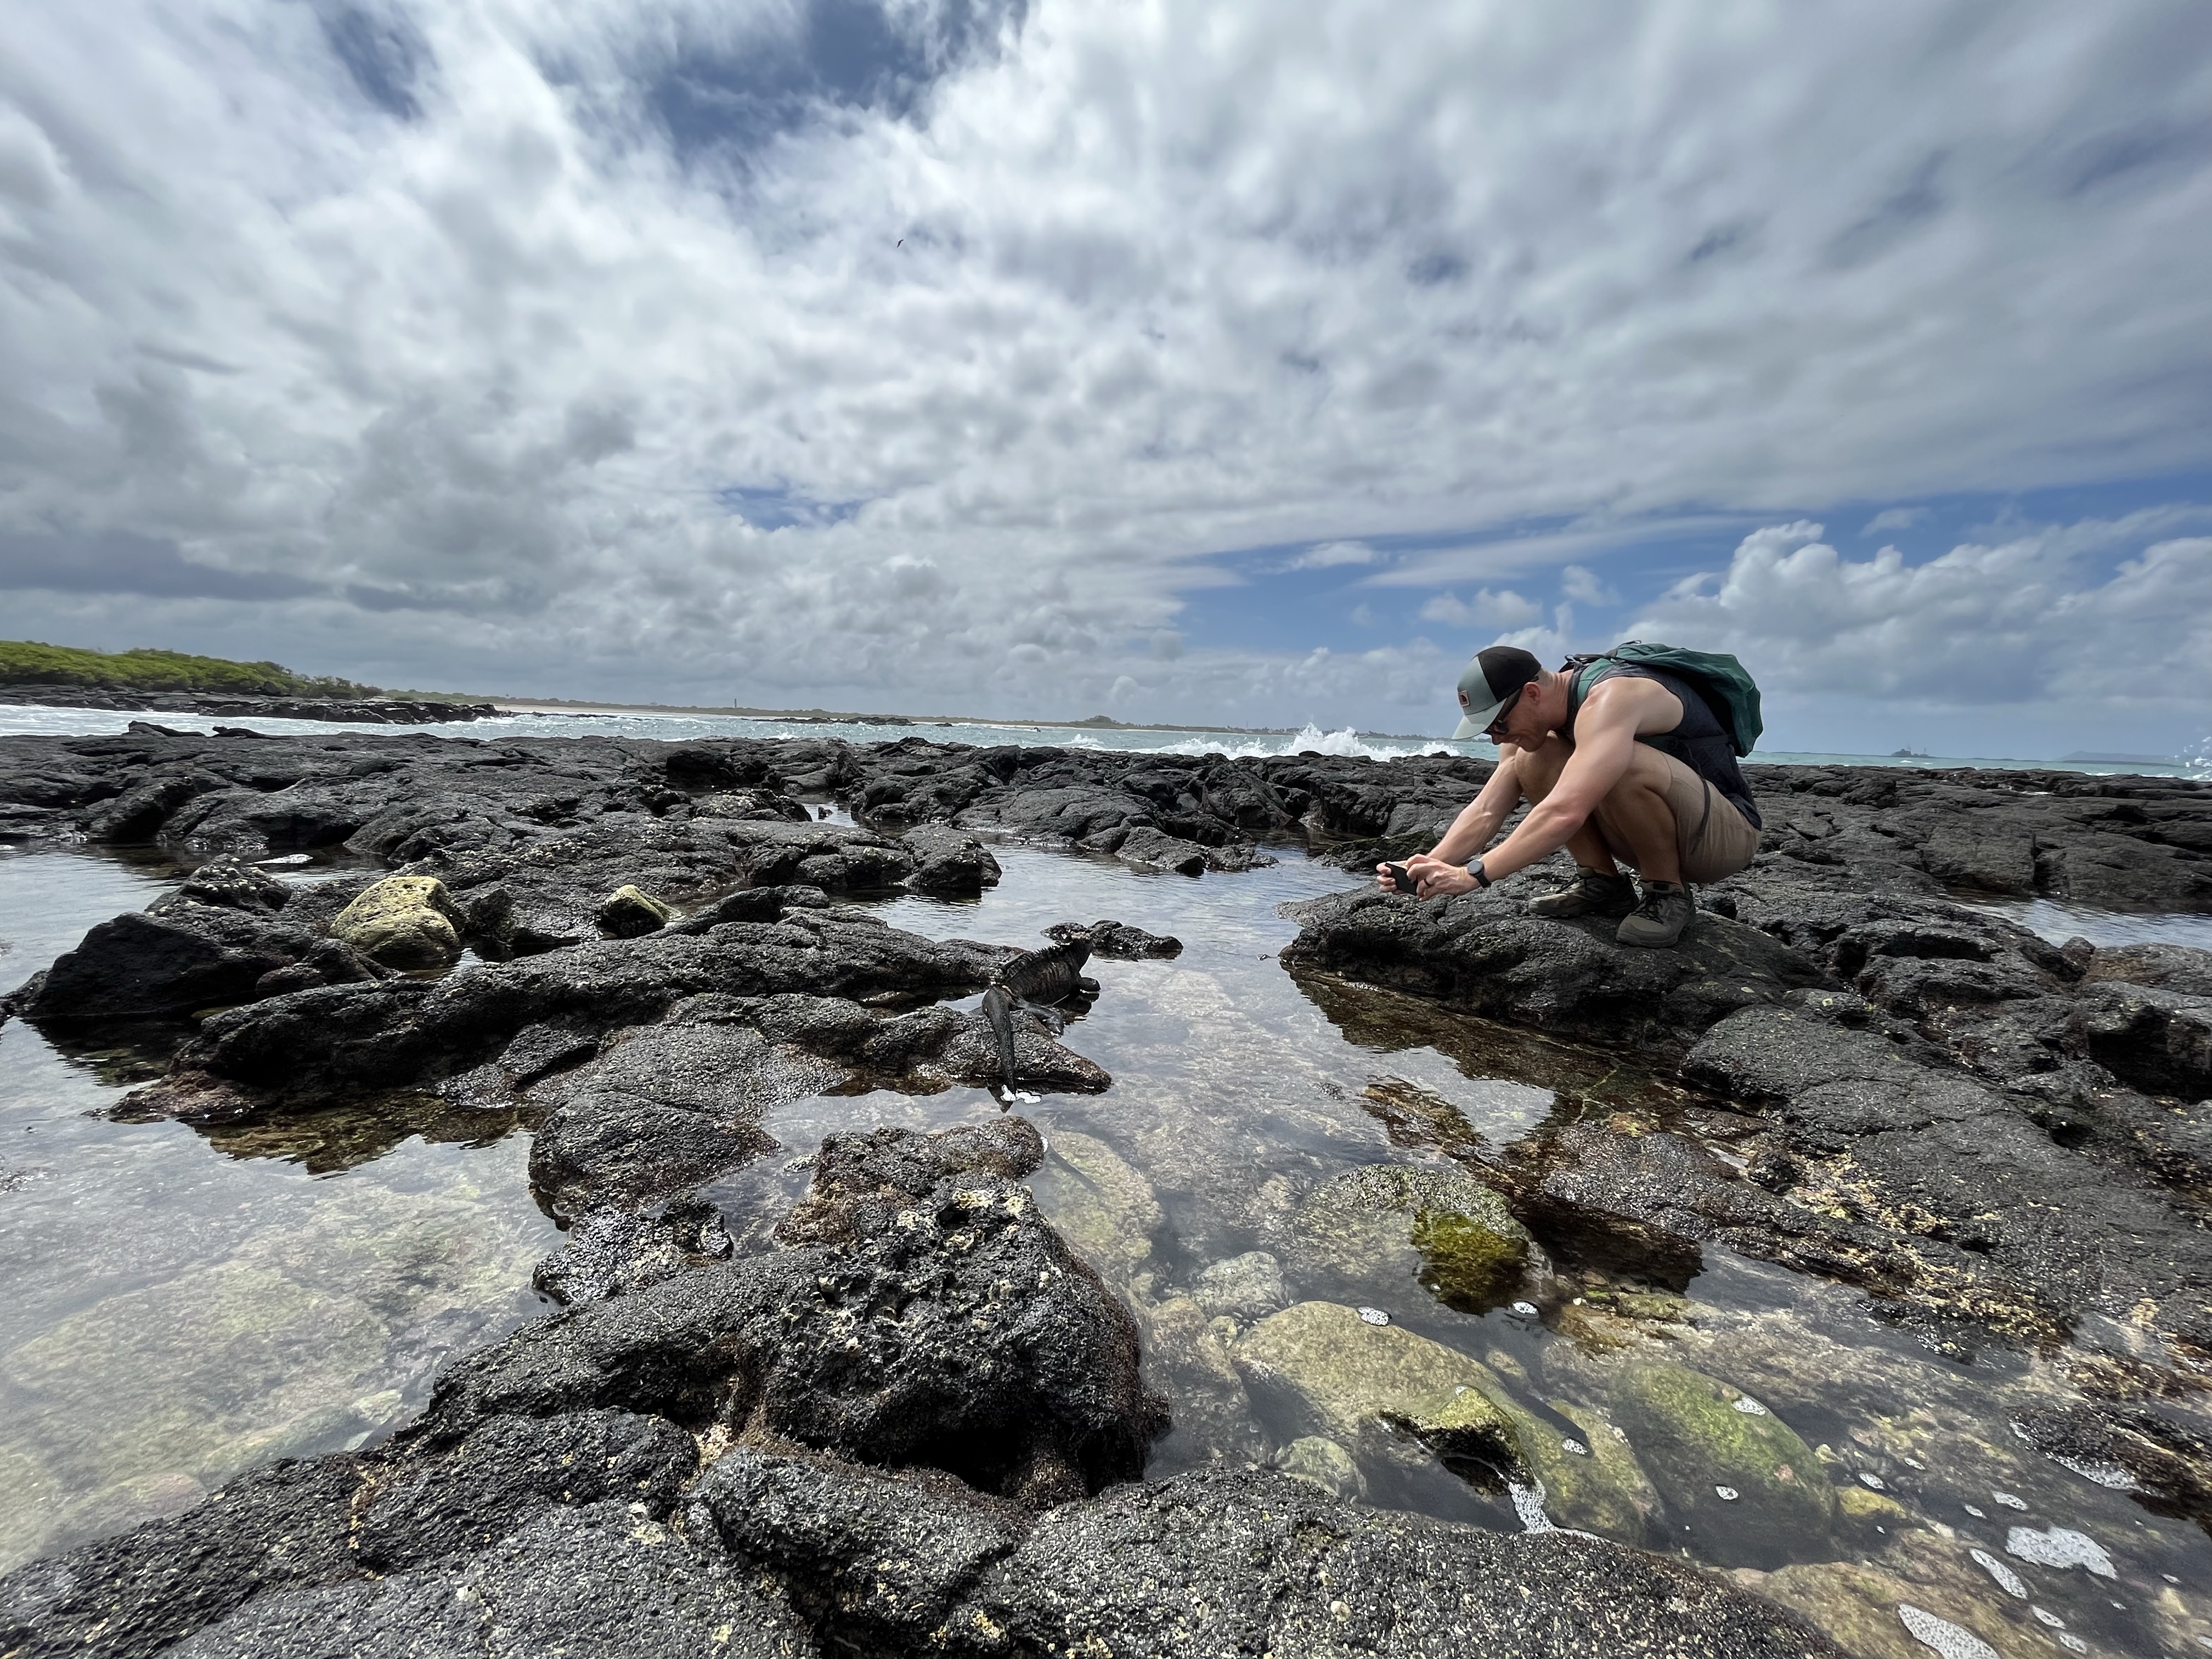
The end of the boardwalk. Notice the sea lion and marine iguana!
Walking there takes about 15 minutes, but you’ll know you’re close when you start seeing sea lions hanging around. 😆 Also, legitimately watch your step. You never know where an iguana will choose to sleep!
Our final adventure was by bike to the Wall of Tears.
El Muro de las Lágrimas
Remember how we lived in The Netherlands for six years and also biked everywhere around Munich? WHEW, BUDDY, we are out of bike shape! It literally got to the point that we looked at each other and said, “Please do not make me put my ass back on this bike.” Everything hurt, and I mean EVERYTHING. 🫣
Biking to the Wall of Tears
Nonetheless, we rented bikes and visited the Wall of Tears, or el Muro de las Lágrimas, about 5 km outside Puerto Villamil. The wall is within a national park, so a taxi can only take you so far. You’ll have to walk or bike the rest of the way. However, we chose to bike because there are several stops along the way, for example, la Playa del Amor, a volcanic rock beach covered with marine iguanas (we were obsessed with them if you hadn’t noticed). You can also stop to spot flamingos and visit the tortoise reserve.
The bike path.Playa del Amor.Flamingos!
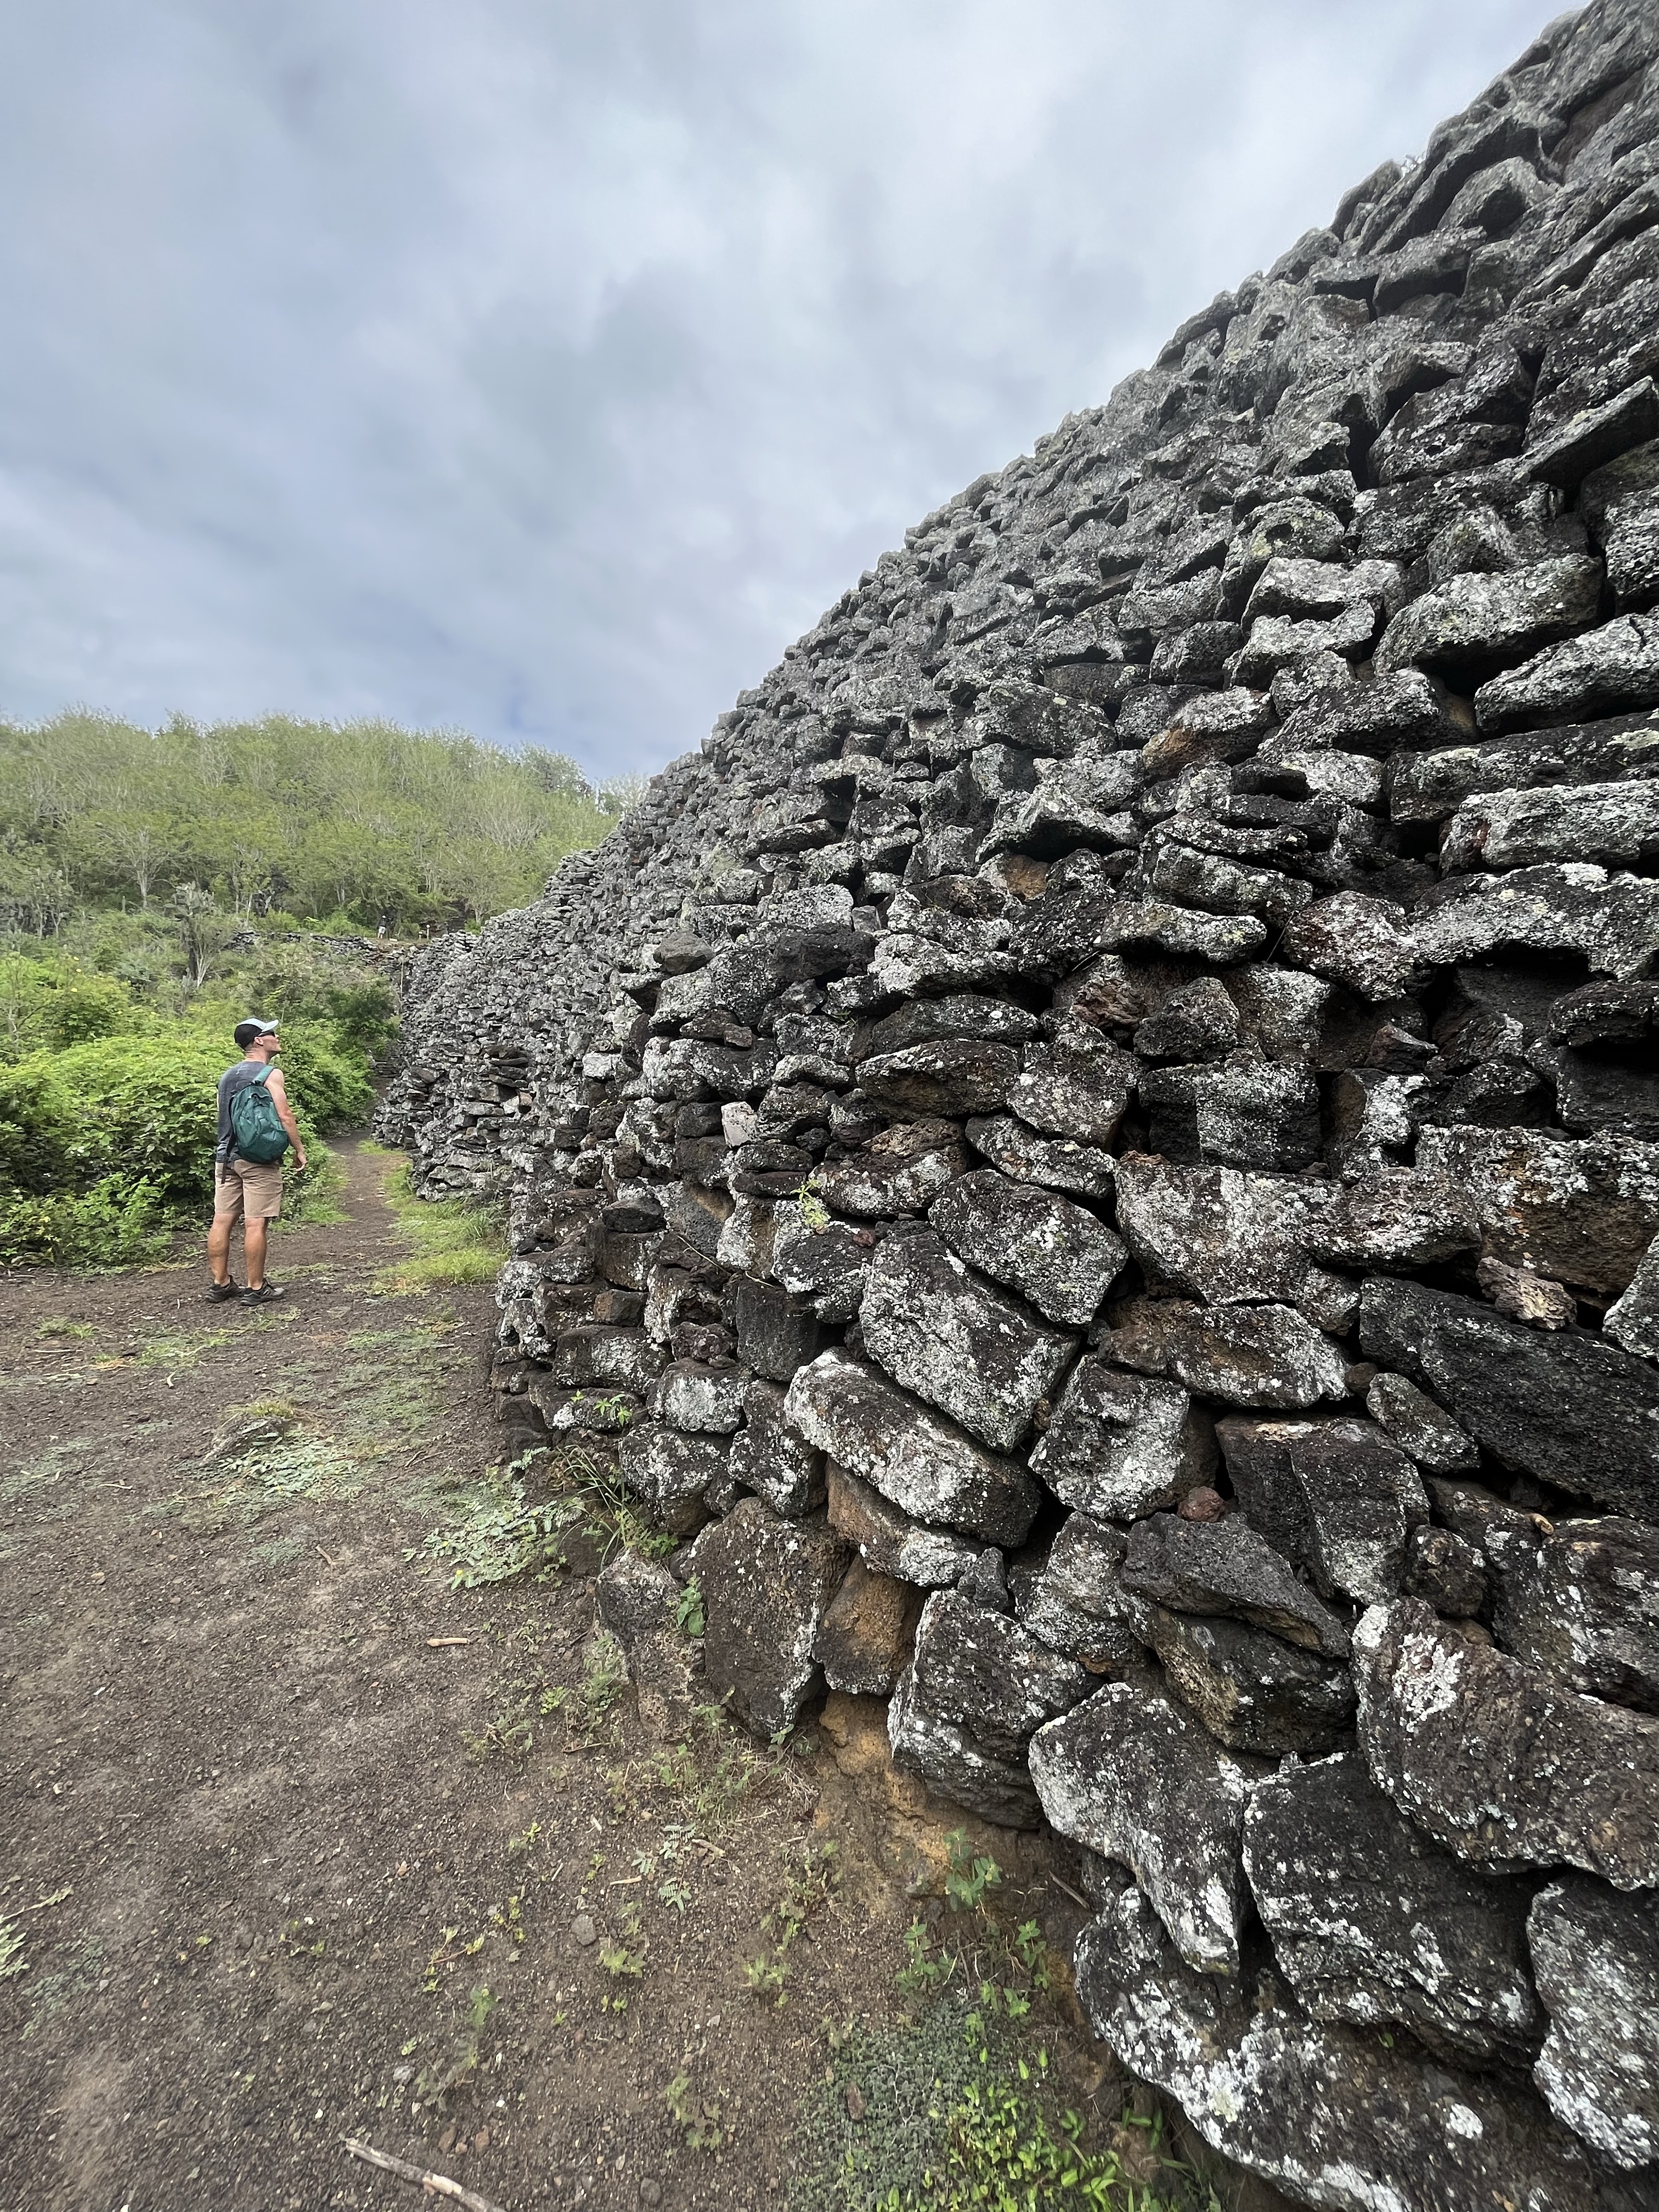
So, why is it called the Wall of Tears? Let’s start with: Did you know the United States had a military presence on Isabela Island during World War II? I surely didn’t. Baltra Island, which now houses the airport, was a secret base during WWII to monitor activities around the Panama Canal. Isabela Island had one of three radar stations.
As WWII ended, Ecuador established a penal colony on Isabela (from 1945 to 1959). The Wall of Tears was built by the prisoners for no other purpose than manual labor.
What a cute guy!The Wall of Tears from above.
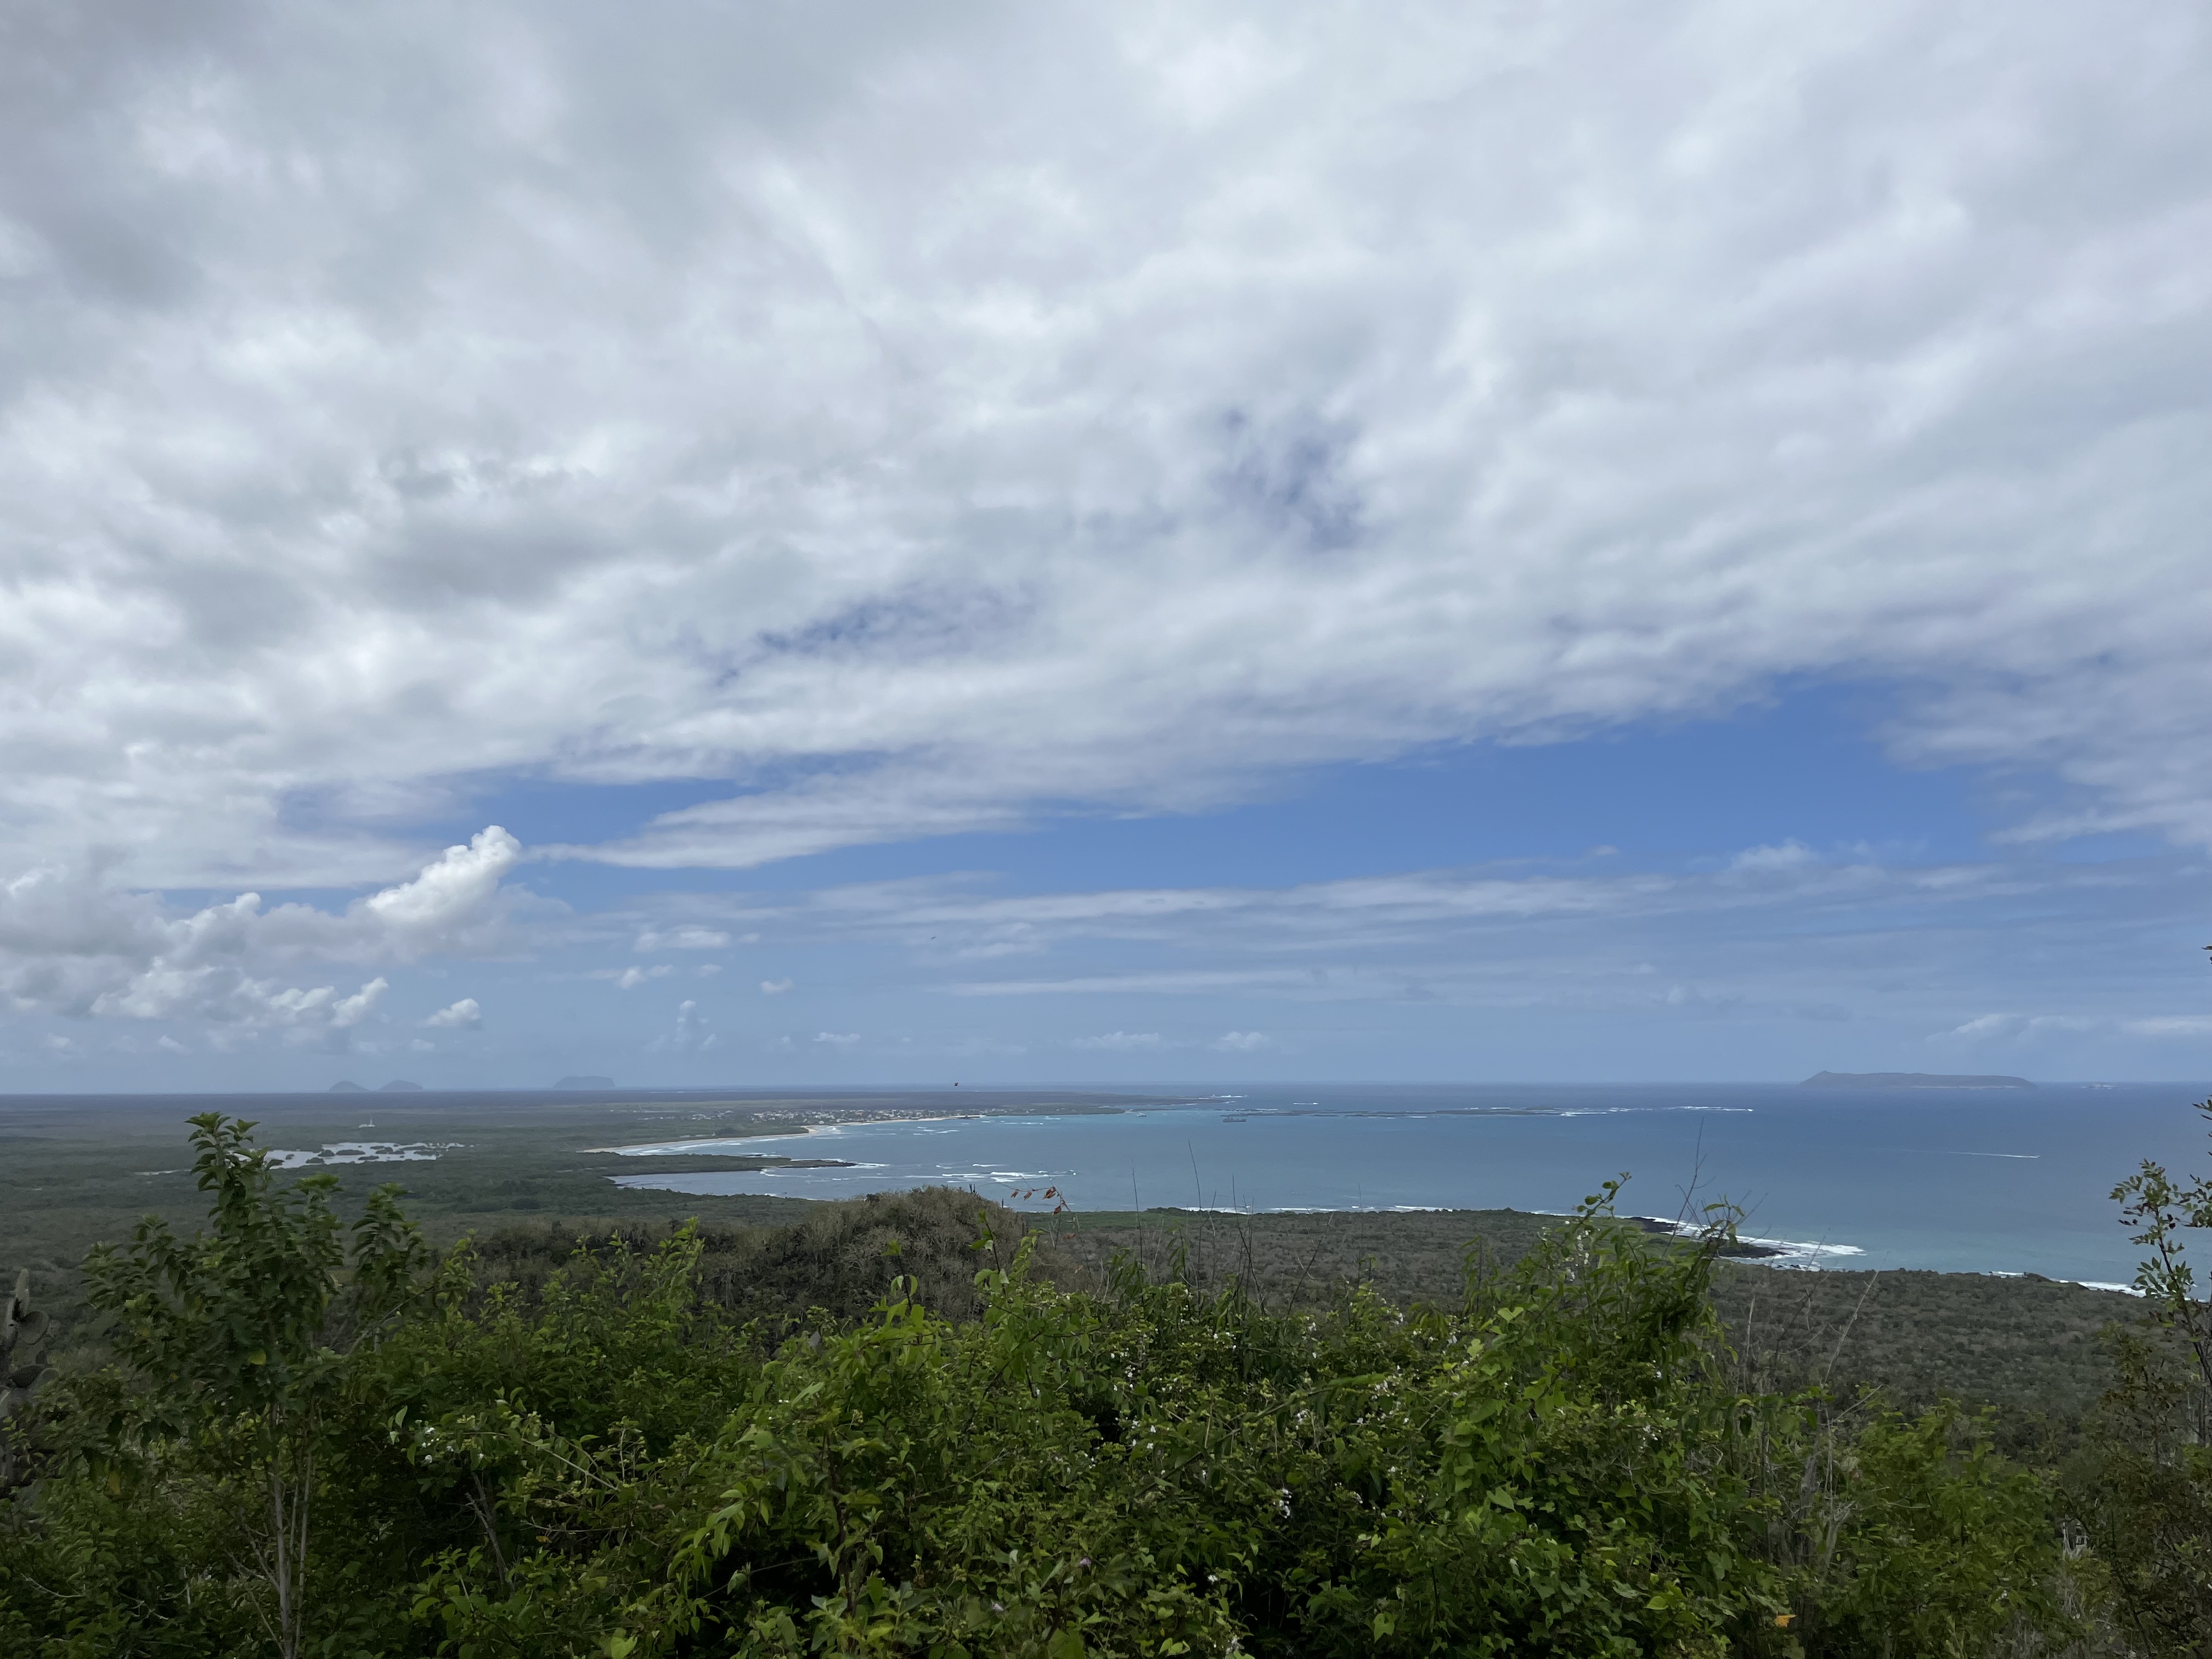
The Wall of Tears is the main attraction but not the final destination. Keep following the trail up (maybe 30 minutes?), and you’ll reach El Radar, where the old radar station used to be. Now, it’s a beautiful viewpoint.
The El Radar viewpoint.
Oh, and by the way. I got a flat tire on my way home because, of course, I did. It’s no wonder my legs were on fire; I was biking with a flat!
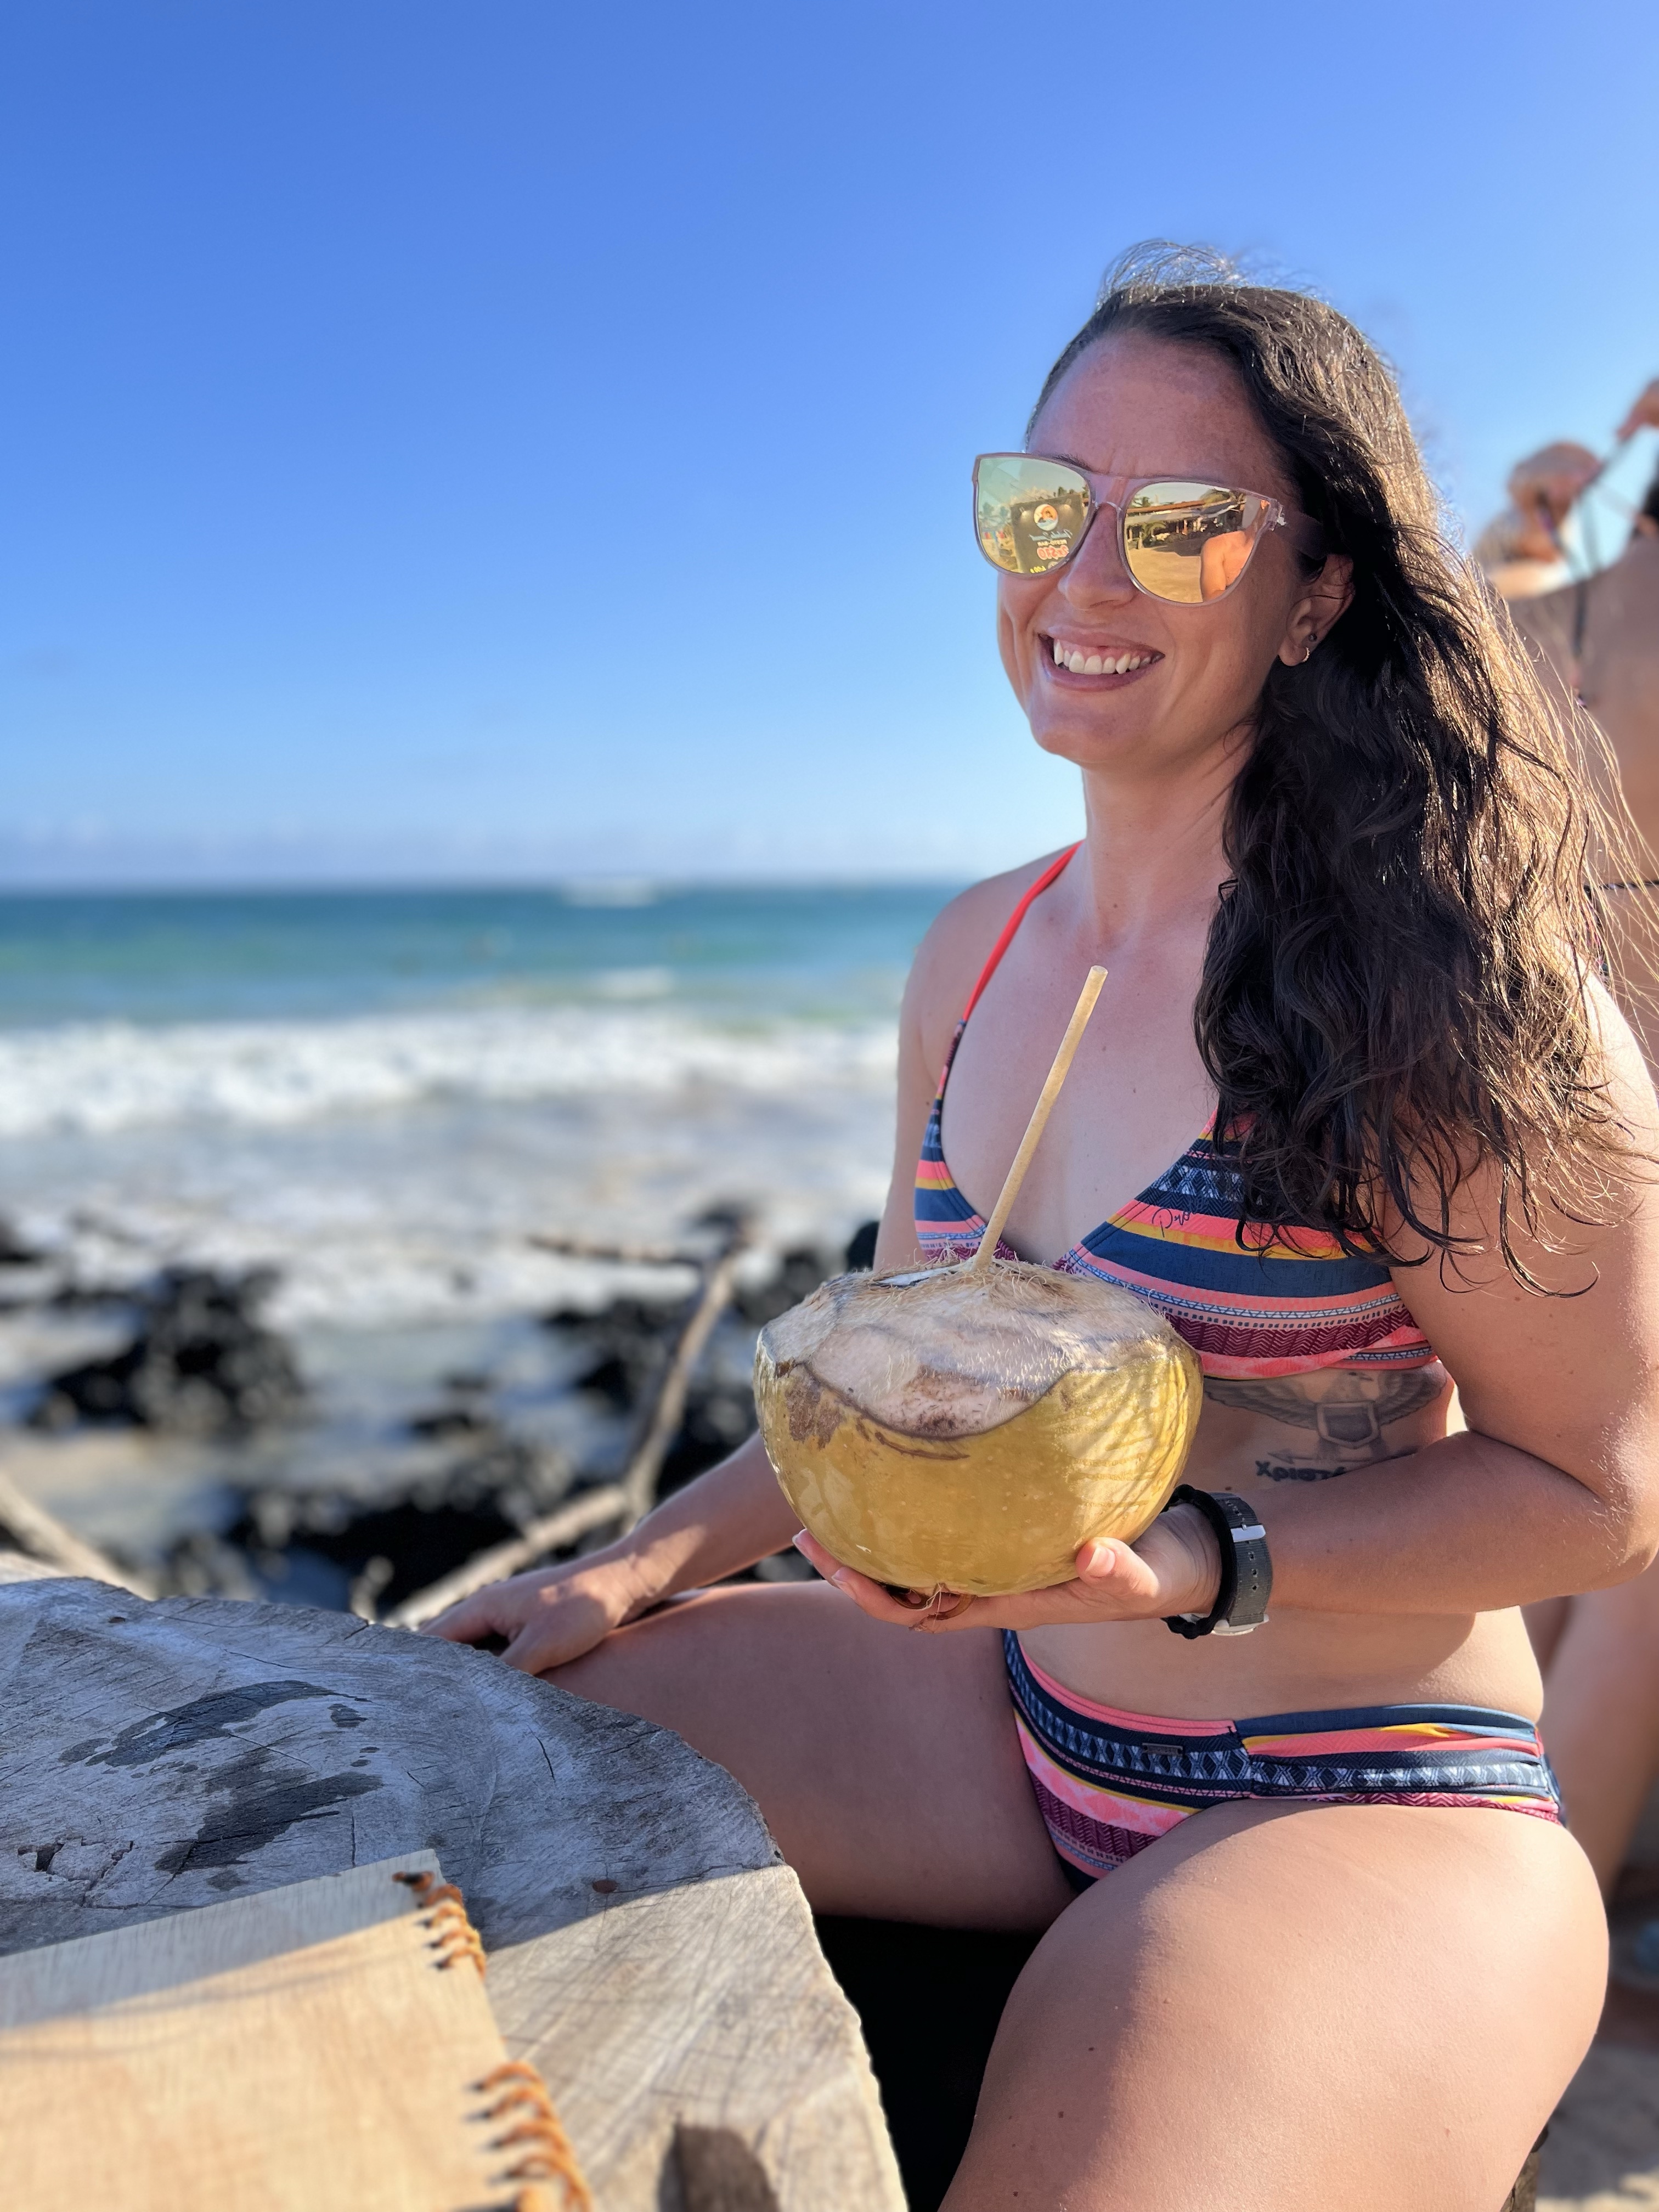
And that about wraps up our time on Isabela! Like I said before, this island had a way more laid-back, beach town feel. So, mostly, we spent the morning checking out a new activity and the afternoon playing in the ocean until happy hour. Coco locos are THE drink (but not my fave).
We did have the very unfortunate experience (more so for him, obviously) of helplessly watching a person get caught in a riptide and drown. So, this is your public service announcement to take care at the beach and swim with caution, especially in places like here, where there are no beach lifeguards or readily available emergency services.