

Do you know what I hate? Not rules. I actually don’t mind rules. I may not always agree with them, but I know what to expect from the situation.
What I hate is ambiguousness.
When it comes to bureaucratic nonsense, I get it. There are going to be hoops to jump through. But, I want to live in this new country. So, if The Man says “Jump!”, I’ll say, “How high?!”. However, if you say “Jump 3 feet,” and I do. Then, you say, “Just kidding, 4 feet!” and I jump again, and it’s STILL not the correct height. Then, I have a problem.
I’d say this sums up our experience getting a visa in Ecuador, which is something I never expected.
The Professional Visa is one of the most popular visas in Ecuador because the qualifications are pretty straightforward. You need:
- At least a Bachelor’s degree.
- Proof of a minimum $400 per month income.
- A valid passport.
Sounds simple right?
Ok, so theoretically, it IS simple, IF you know what you need. Here’s the problem. The website is woefully unclear about specific details that will get your application rejected… twice if you’re lucky like us.
So, here’s what we had to do for Shane to get a Professional Visa. I applied for a dependent (Amparo) visa, which I’ll also cover. If this information saves only one person from the headache that we went through, it was worth the effort of writing.
Don’t care about the details? Feel free to stop reading here. I won’t be offended.
TLDR
Getting a visa in Ecuador requires jumping through more hoops than expected. Start early, expect missing documents and delays, and be patient. In the end, it’s worth it!
Quick Disclaimer: The rules around visas change quite often. For example, the rules for the Professional visa changed in February of 2020. So, double-check the Professional visa and Amparo visa rules before you get started.
Part 1: Before Arrival
You will need to bring the following documents with you to Ecuador.
- The original diploma or a certified copy of your highest academic degree, with an apostille.
- Original or certified copy of your transcripts from your highest academic degree, with an apostille.
- Note: If transcripts are unavailable for whatever reason, you must obtain an official letter from the university stating why there are no transcripts.
- An official letter from your university stating the mode of study, with an apostille. Ecuador prefers face-to-face instruction versus online.
- Note: This letter can be combined with the transcript letter (if applicable).
- Background checks (i.e., certificate of good conduct) for each place you lived in the past 6 years, with an apostille.
- If you’re American, this means State and Federal background checks.
- Passport photos (5 cm x 5 cm).
Important: The background checks are only valid for 6 months. So, plan accordingly!
For the Amparo visa:
Since this is a dependent visa, you don’t have to prove your education status. However, you do need:
- Background checks (i.e., certificate of good conduct) for each place you lived in the past 6 years, with an apostille.
- Original or certified copy of a marriage certificate (or equivalent), with an apostille.
- If you’re bringing dependent children: an original or certified copy of their birth certificate, with an apostille. Background checks are only required for persons over 18 years old.
Part 2: After Arrival
Step 1: Register with Senescyt
Senescyt is the governmental body responsible for higher education. All degrees in Ecuador are registered with Senescyt, including international degrees. So, if you want a Professional Visa, then your degree must be recognized and registered with Senescyt.
Now, this is where things start to get complicated because Senescyt takes *theoretically* up to 45 days to process your application and register your diploma. However, for Shane and Lucie, this process was longer.
Tip: Register your diploma with Senescyt as soon as you arrive in Ecuador.
Enter on a 90-day tourist visa, start the Senescyt registration process, then apply for the visa towards the end of the 90 days.
Once they grant the visa, you have three months to register your diploma, or they revoke the visa.
So, if you apply for the visa, then start the registration process, you will likely run out of time, as in Shane’s case. He had to contact a lawyer to help get an extension with the visa office. It worked, but avoiding that situation would be better.
Other blogs have detailed the process of registering with Senescyt, so I won’t go into detail. However, some notable points:
- Documents in English or Spanish are accepted.
- If you don’t have an original diploma (e.g., a certified copy), then you must get a notarized statement (in Ecuador) explaining why you don’t have the original. They will reject your application without this.
- After you submit the documents online, you will have to appear in person for someone to verify them. We had to make a special trip to Quito for this.
- A copy of your thesis is required online, but a printed copy is not required in person. Take a digital copy. This is for a plagiarism check.
- It IS possible for them to reject the application even after you’ve passed the online and in-person check… speaking from experience.
- Registration costs are $30 and must be paid in cash at a specific bank.
Once everything has been submitted to the online portal, it takes anywhere from a few hours to a few days for them to accept the application. After that, you’ll be invited to pay. Only after the payment has been processed (another few hours to ~24 hours) will you be able to make an appointment for the in-person document check.
….then, you wait!
Step 2: Translations
Don’t bother translating anything before you arrive.
We did, and then we paid to translate everything again because apparently, the visa office “can’t trust translations done in other countries.” 😐
Mmmhmm.
Anyway.
You’ll need to translate:
- Diploma + apostille
- Background checks + apostille
- Marriage/birth certificates + apostille (Amparo visa only)
Tip: All translations should have a Sworn Affidavit.
We used TranslatorsEcuador and have only glowing things to say about them. They were fast, responsive, and really worked with us in a time crunch. They also speak English.
Step 3: Visit the Notary
If you want power in Ecuador, become a notary!
Seriously, our experiences at various notaries reaffirmed that they are the gatekeepers for all things bureaucratic. Oh, and don’t expect consistency. However, mentally prepare for it to take forever and for the entire interaction to be in Spanish (it’s required).


So, you’ll need notarized copies of the following for the visa application. Also, the visa requirements do NOT indicate that your documents must be notarized but trust me. They do.
- Diploma + apostille.
- The letter explaining an alternative diploma (if applicable).
- Three months of bank statements (you will have to log in to your bank account before the notary and print your transaction list. (Weird? Absolutely.)
- Marriage certificate/birth certificates + apostilles (for the Amparo visa only).
Tip: Bring the translations to the notary. They won’t notarize documents in English or other languages if a certified translator isn’t present.
Also, you will need to translate the bank statements.
Pro-tip: Use Google Chrome at the notary and discreetly auto-translate the website to Spanish before they print and notarize it.
Step 4: Apply for the Visa
The visa application appointment itself is pretty easy, and it’s straightforward if you have all the required documents.
The visa office is located at Platforma Gubernamental Sur, in the south of Quito. The building is HUGE and fairly new.
First, request an appointment online. I say request because you don’t actually get to select an appointment time. Also, we got appointments extremely fast. We requested the appointment after hours and had early morning appointments the next day.
Tip: This is Ecuador. The appointment “times” are flexible.
So, don’t stress if you’re a bit late. They only seemed to care about the appointment date, not the time.
When you arrive at the offices, first head across the street to one of the many print shops. You’ll need to buy a folder (ask for a carpeta), hole-punch all your documents, and print the appointment confirmation (the confirmation email doesn’t tell you this).
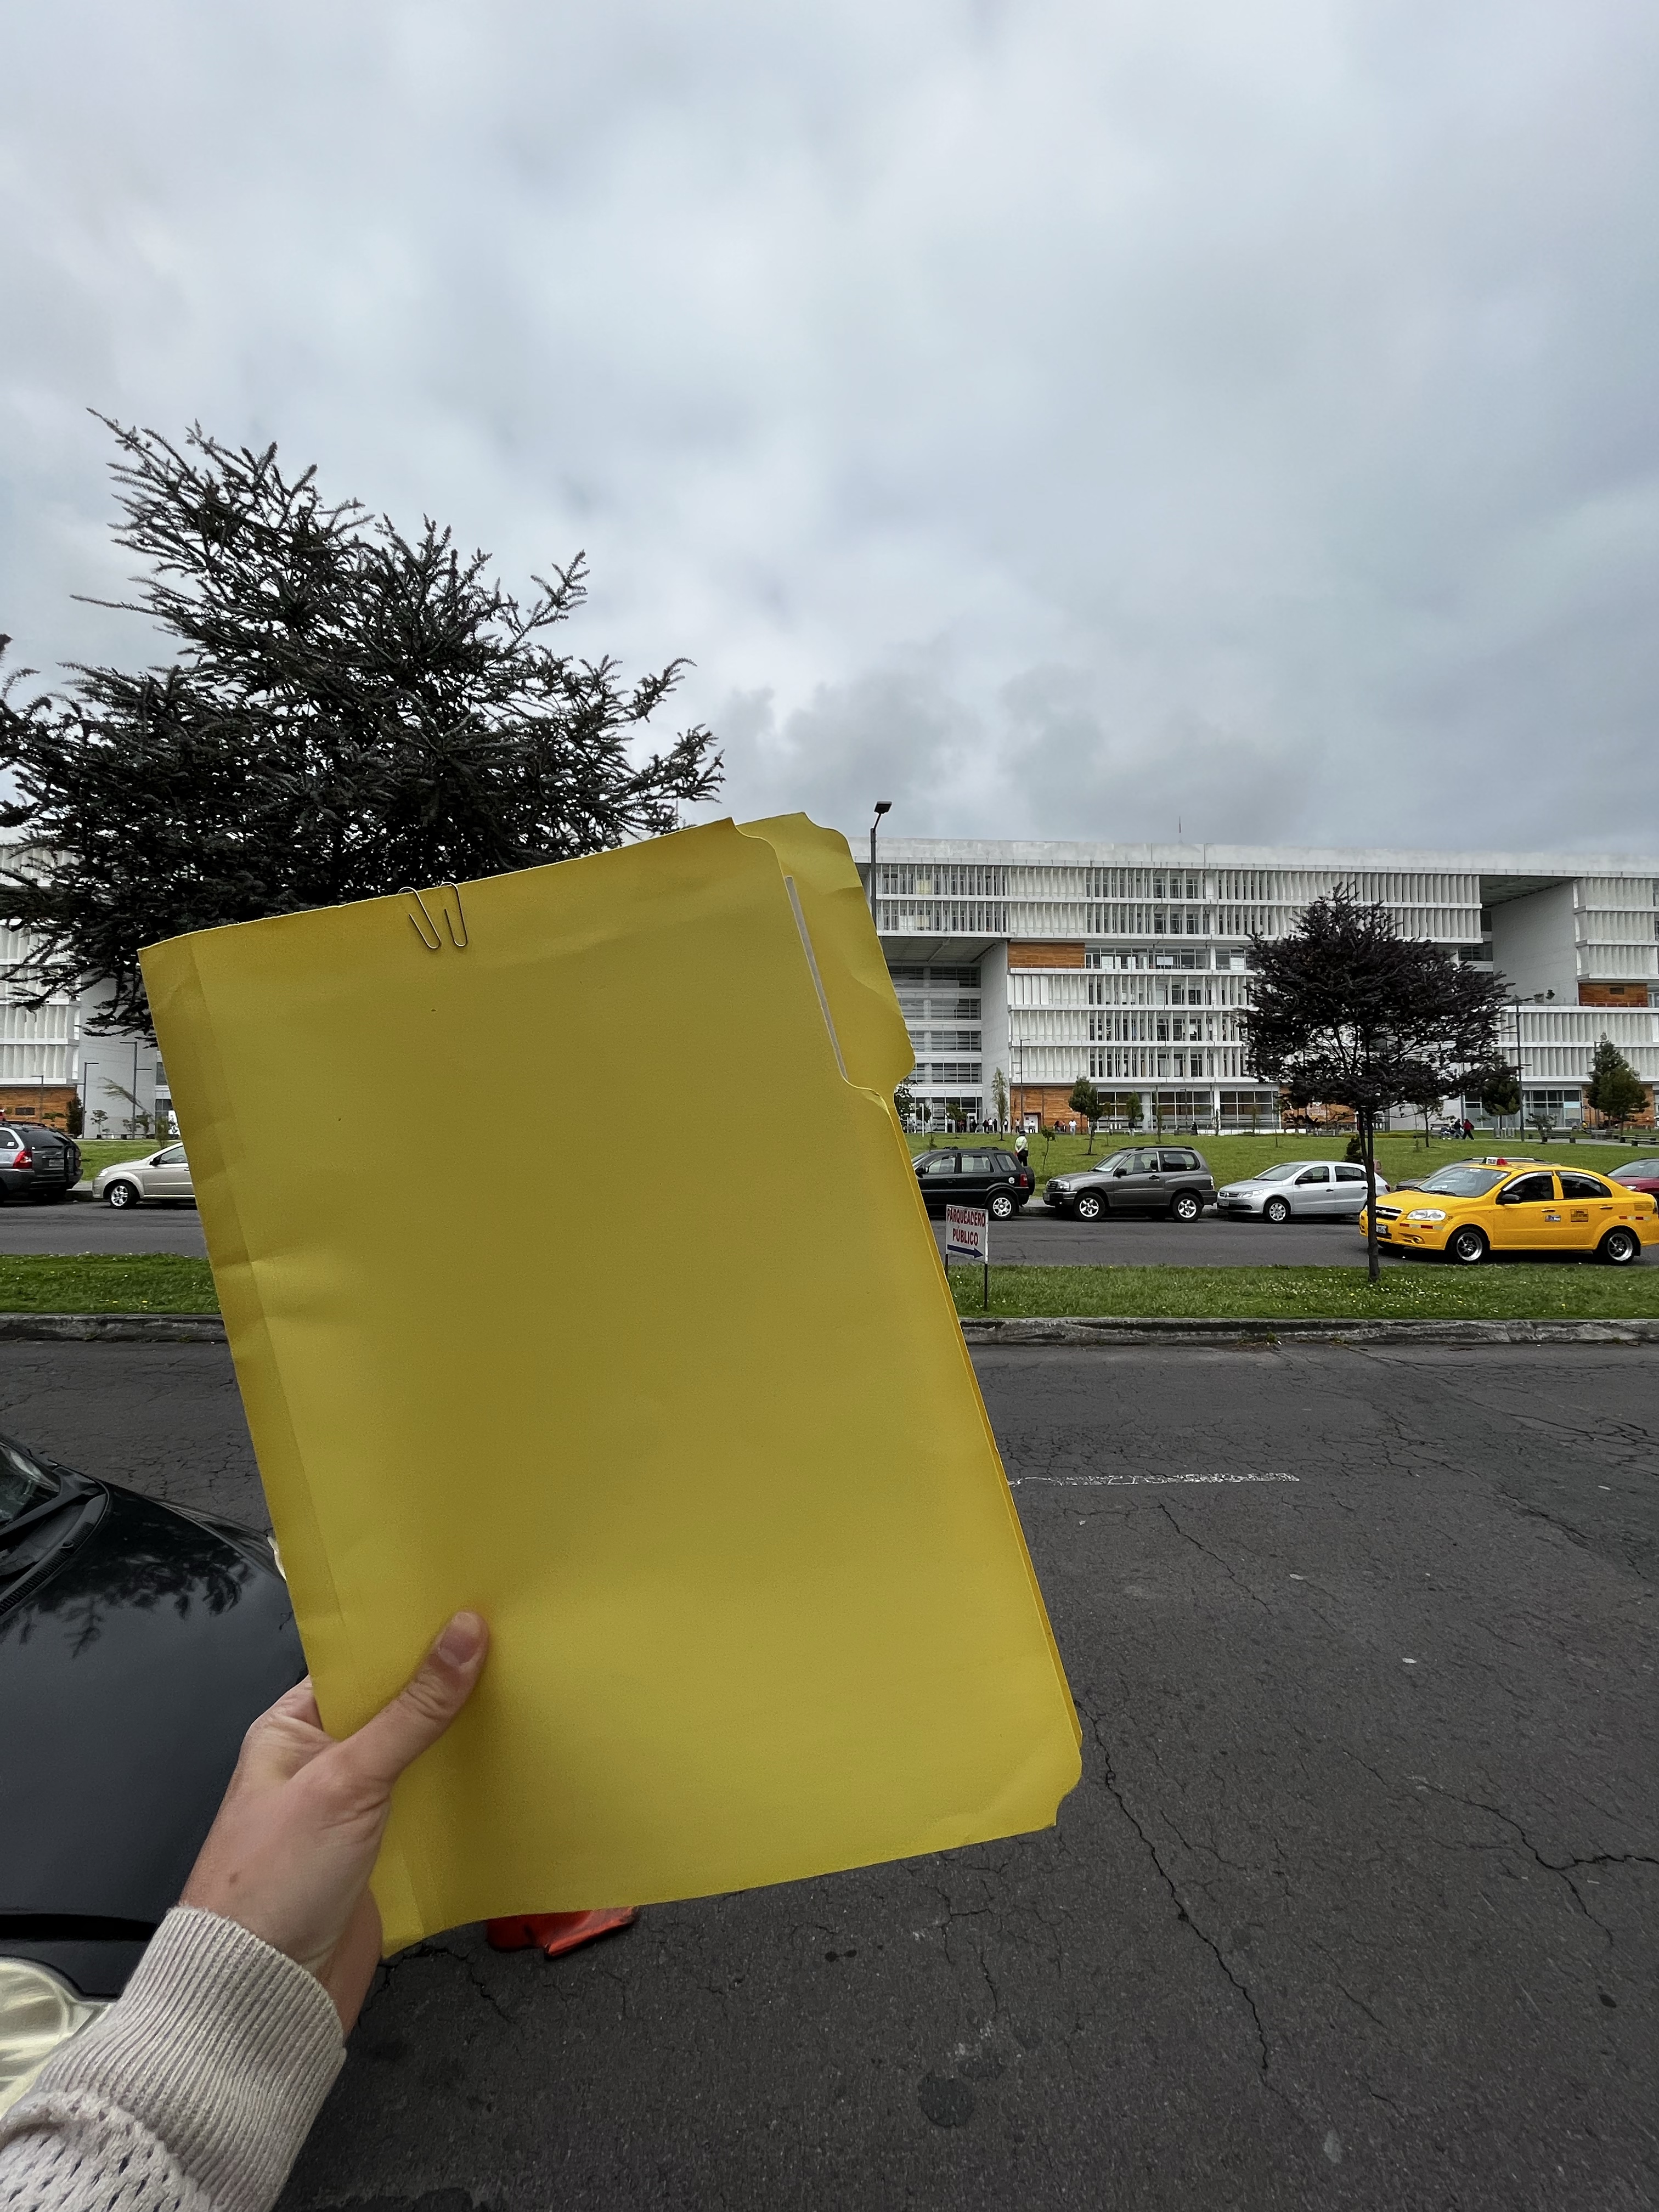
Include in the carpeta (one per person):
- Appointment confirmation (put this first)
- Notarized copy of the diploma/title (Professional visa only)
- The original translation of the diploma/title (Professional visa only)
- Passport copy (no notary/translation required).
- Certificate of Migratory Movement
- Marriage certificate (Amparo visa only)
- Birth certificates (if applicable, Amparo visa only)
- Notarized bank statement.
- Original background checks.
- Original translations of the background checks.
- Proof that you lived in the country where the background checks were issued** (e.g., a driver’s license copy, residence permit, apartment lease, etc.). Translation and notary is not required.
** This is NOT listed in the visa requirements. However, we were nearly rejected for not having this information. Luckily, they let us leave to print proof and come back.
For the residency proof, translation and notarization isn’t required. However, for example, if you lived in country 1 from 2018 to 2020, then the document must indicate that you were in that country in 2018. So, we used copies of driver’s licenses and residence permits that had issue and expiration dates.
Once your folder is in order, just head inside and get in line (there are signs). You’ll receive a number and just wait to be called.
Tip: Be prepared to wait.
There were only 2 (maybe 3) people processing visa applications. So, depending on how many people are ahead of you, it takes a while. Bring a snack and some water! However, if you need reliable wifi or want a real meal, I recommend this place, across the street.

Tip: Bring cash.
You’ll pay for the visa while you’re with the processing employee (there is a bank inside). However, they only accept cash.
If everything is correct, you’ll receive your visa by email in a matter of hours. You’ll have to sign a confirmation document, though. So, recommend lunch across the street while you wait.
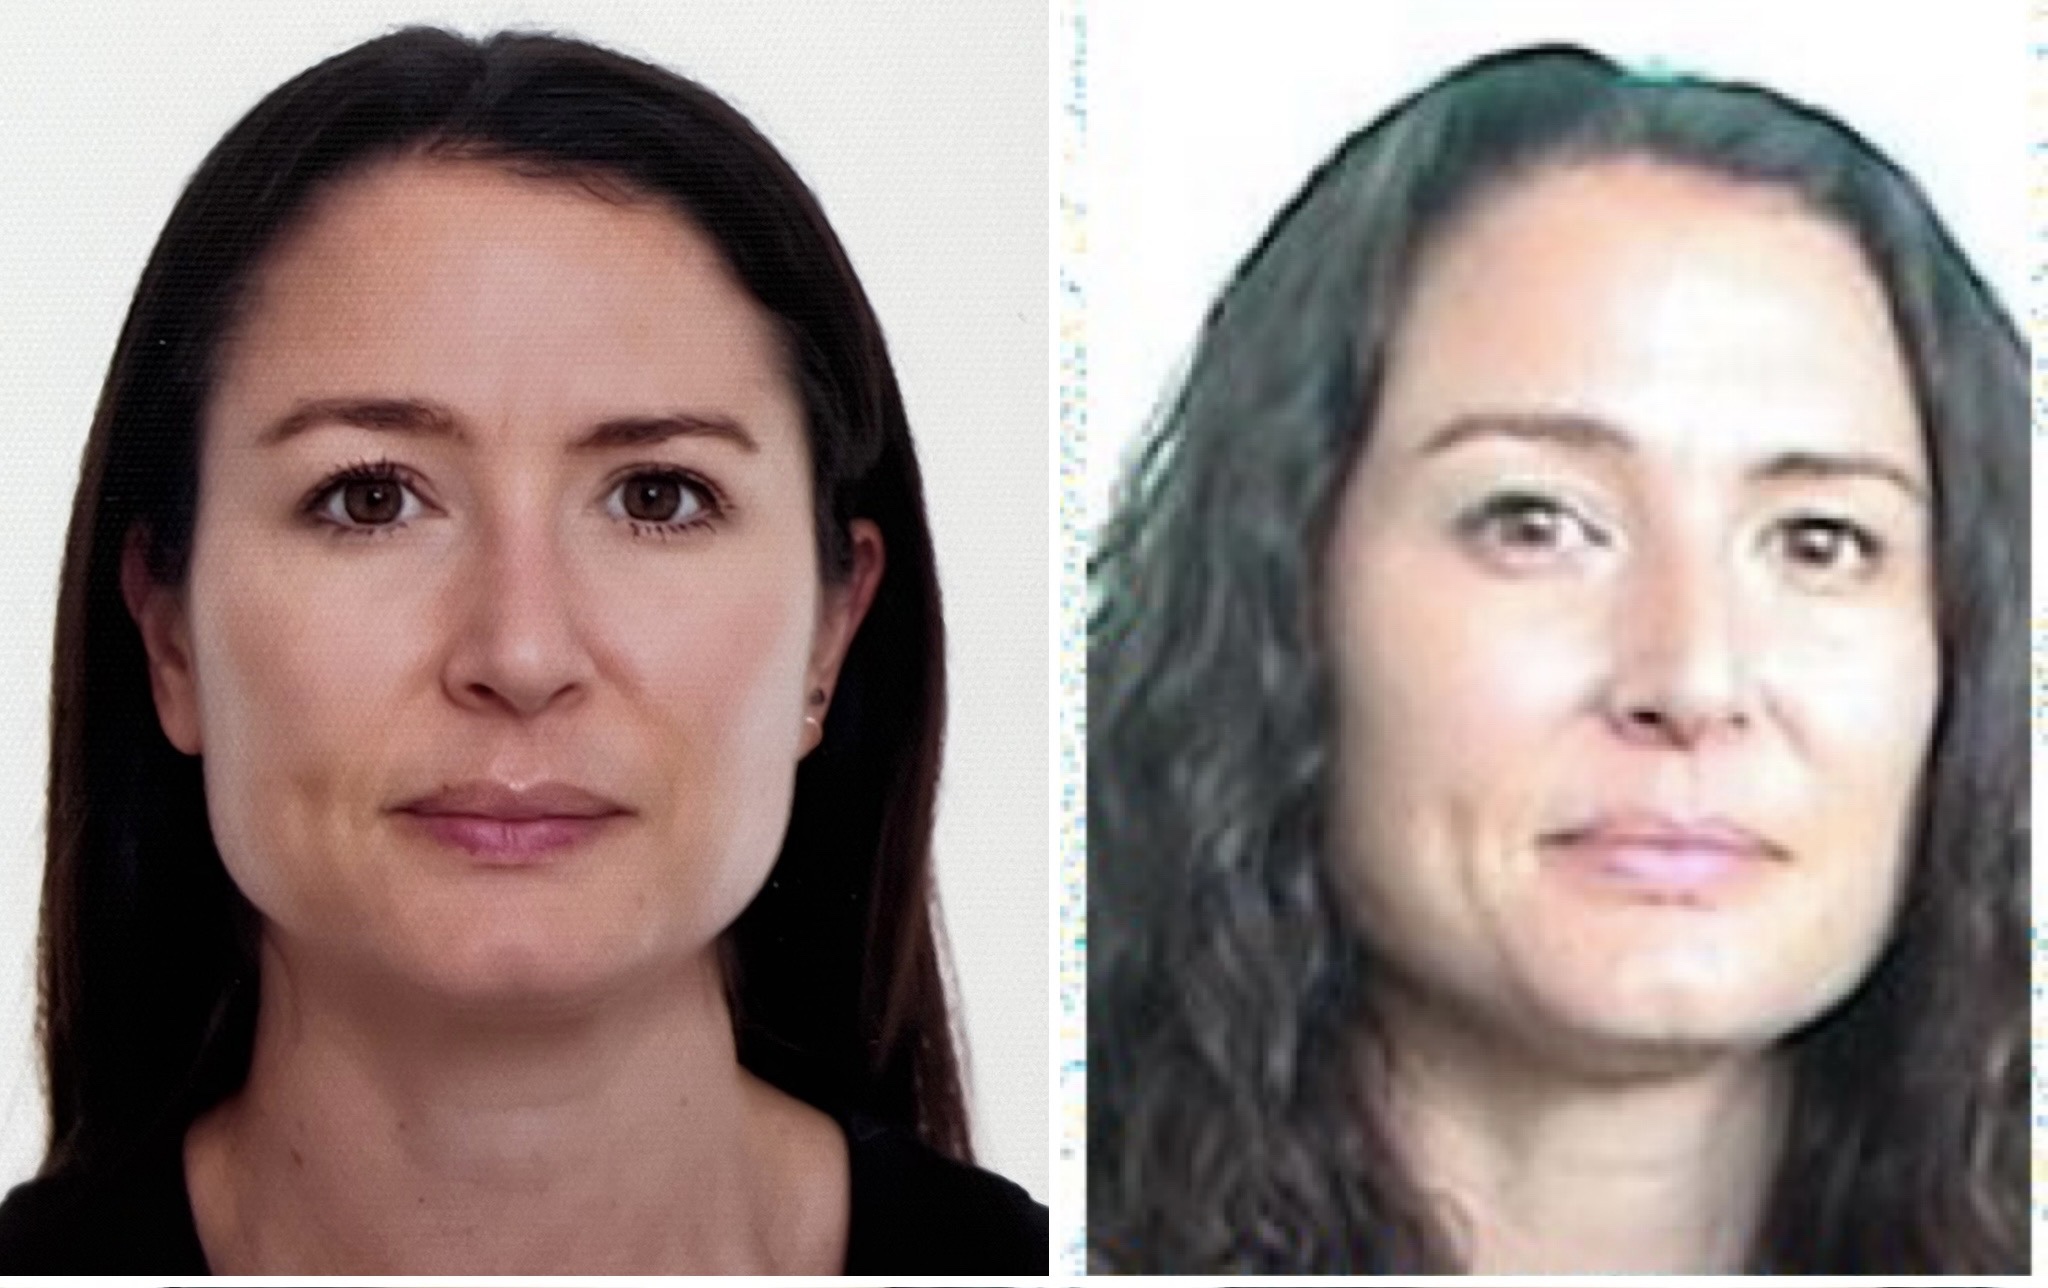
Oh, and you know that pretty passport photo you brought with you? They won’t use it. Instead, they’ll take a new one with you half looking at their sh*tty webcam.
If something goes wrong, then don’t stress. Ask them to write down what is missing so you can correct it and try again. If you’re running out of time on your 90-day tourist visa, you can extend it once and give yourself another 90 days.
Three trips to the visa office, four online Senescyt attempts, and two in-person Senescyt trips later, we have visas (for two years, at least)!
You can see how this process takes way more time than expected. For us, it took 4 months (October to February). So, start early, expect delays, and be patient (easier said than done, I know).
In the end, it’s worth it.

Hasta luego,

1 Comment