
It’s hard to believe, but by the time you’re reading this, we will officially have less than a month left in Ecuador! Two+ years here have simultaneously flown by and gone slowly, but that’s for another post.
I’ve been to Quilotoa before when my friend Mary Beth visited, but it was only a day trip. Since then, hiking the Quilotoa Loop has been on my Ecuador bucket list. In fact, we were supposed to go for our anniversary back in September, but the butterflies dictate the schedule. So, here we are, two months late but doing it nonetheless!
The name Quilotoa Loop is a bit misleading because the hiking route is not a loop at all. The “loop” starts and ends in the city of Latacunga, with a 2-hour bus ride on both sides of the hiking portion.
We used this detailed description by Chasing Advntr, so I won’t go into too much trail detail. However, a few points:
- Download offline maps and check them frequently. You WILL get lost. Two hostels have marked the trail in yellow/red and blue (less frequent), and signs exist along the route to point you in the right direction. Yet, the trail wasn’t marked at some key intersections. The hostels also offer trail maps/descriptions, but they are sometimes confusing. So, offline maps are key for getting back onto the correct trail. We used maps.me (use walking directions from hostel to hostel), but AllTrails also has a version of the hike.
- Bring snacks! The hostels offer a box lunch ($3 per person), which comes with water, a sandwich, chips, and fruit. But you’re hiking at elevation, which made me more hungry. So, I recommend extra snacks.
- Bring sunscreen and long sleeves. The sun is strong, but the wind is cold. We brought light long sleeves for at night (which does get chilly) and as sun protection. In my experience, you burn much faster here, so be prepared! We also brought raincoats, but luckily, we didn’t need them (in November).
- You can take your time. The longest hike is the last day, ranging between 5-6 hours. Walking slowly (out of necessity, ha), we finished in 5.5 hours, at ~14:30, including three longer breaks for snacks/lunch. So, you can take your time on the trail. Once you’re at the hostel, there’s not much to do given the size of the villages. So, enjoy the hike!
- It’s an inexpensive trip. The bus from Quito to Latacunga and the rides on either end of the hike are $2.50 per person, and the hostels are ~$40 for two, including dinner and breakfast. The rest of your expenses are box lunches ($3 pp), extra snacks, and your Latacunga hotel cost. We spent ~$200 total for this 5-day (2 travel days, 3 hiking days) adventure.


On to the good stuff, the pictures!
Day 1: Sigchos to Isinliví
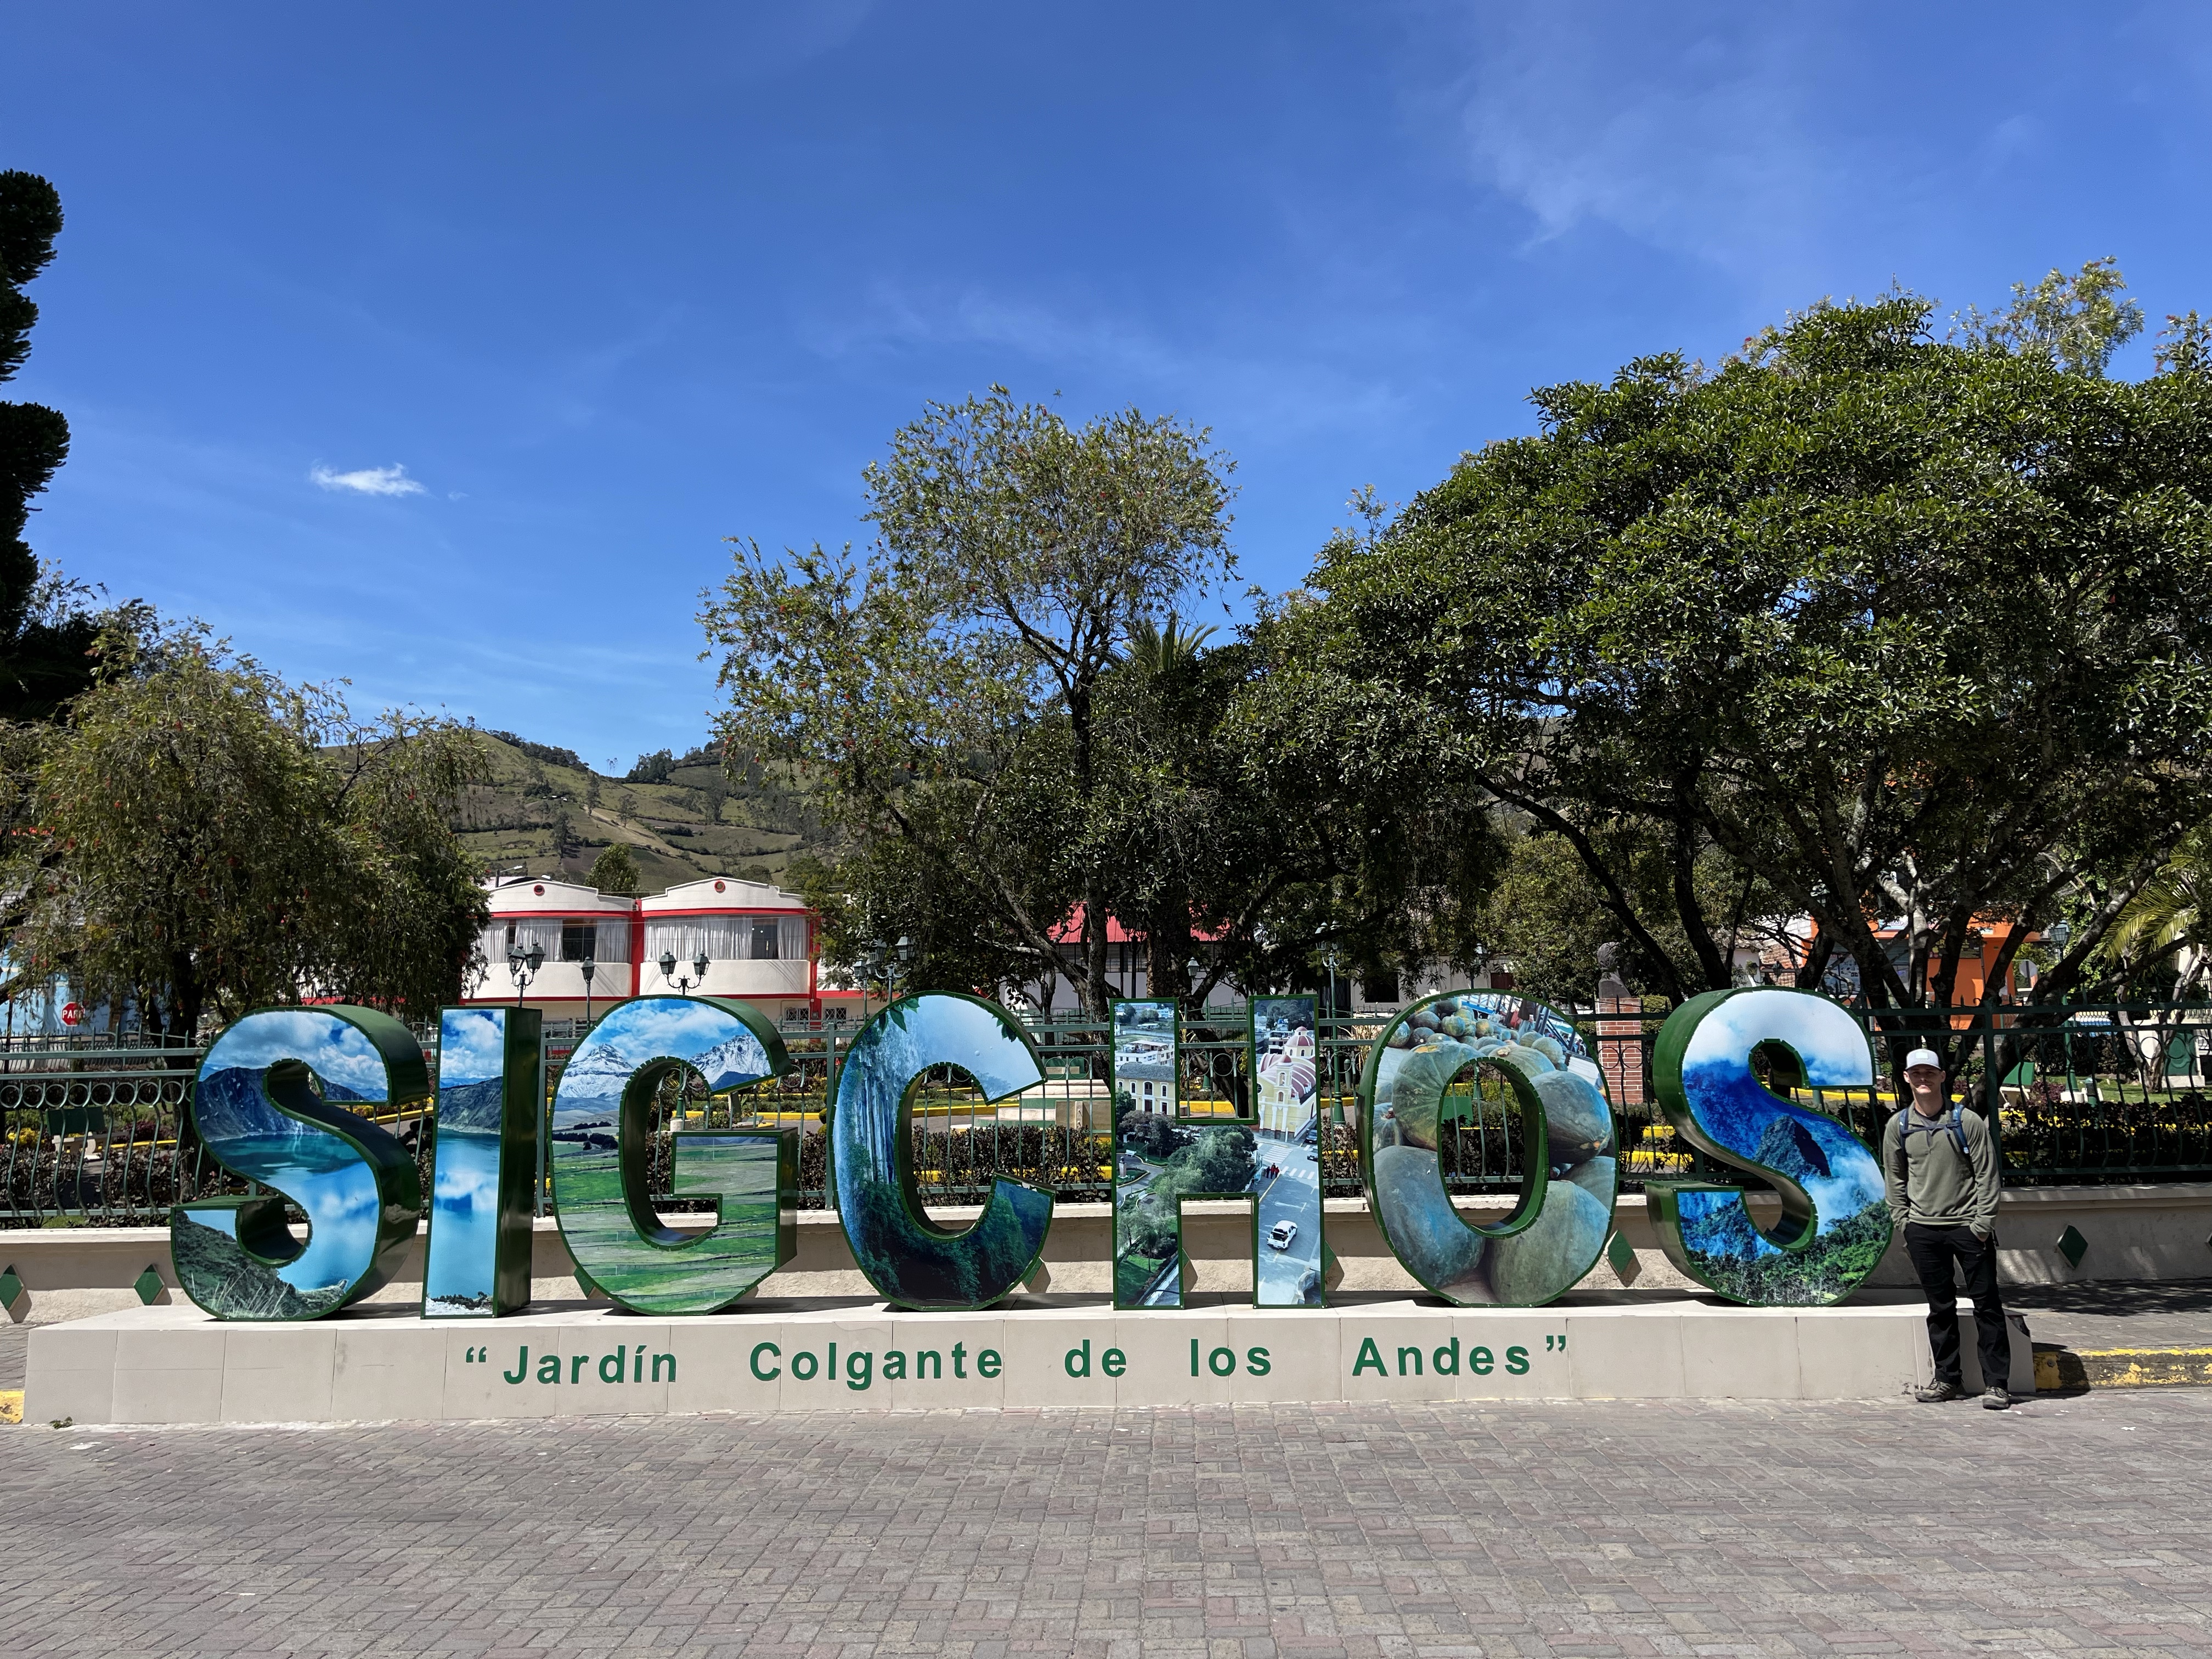
The bus from Latacunga to Sigchos leaves from the Terminal Terrestre at 5, 6, and 8 am, then nearly every hour on the hour from 10 am. We chose the 8 am bus to make sure we had plenty of time, but we ran into people who took the 10 and 11 am buses, and they also arrived with plenty of daylight left. So, it’s personal preference!
And, FYI. You can buy your tickets ahead of time at the counter or just hop on the bus and pay in cash on the way. This applies to all buses in Ecuador. Just be sure to have semi-exact change (for example, they likely won’t be able to break a $20 for $5 bus fare).

Finding the start of the trail is easy; it has been marked on maps.me, and is well-signed (head towards the Starlight Inn).


As I mentioned before, we were following the map and the written directions from Chaising Adventr, and here is where we first messed up. The directions were:
“As you follow the road downhill you will get to a bridge across the river – the best hiking trail from here turns right just before the bridge and follows the river on the west side of the river.”
Two things. First, we weren’t paying attention. We got to the bridge and just kept on walking, not stopping to check the maps. Second, the trail is not marked at this intersection, or if it is, we didn’t see the marker. Consequently, we walked the road to Isinliví and missed the trail, which was fine–we got where we needed to go, but we missed an entire section!
Second, we noticed an error.
“At the top of the hill you will reach a road. Turn left for a short distance and then follow the trail to the right to Isinlivi. The walk on the road is about 1.5 km.“
You should turn right at the top of the hill and follow the road for a short distance. The trail to the right to Isinliví is marked. However, we also missed this trail since we didn’t realize we should follow the red/yellow blazes at this point. 🤦♀️
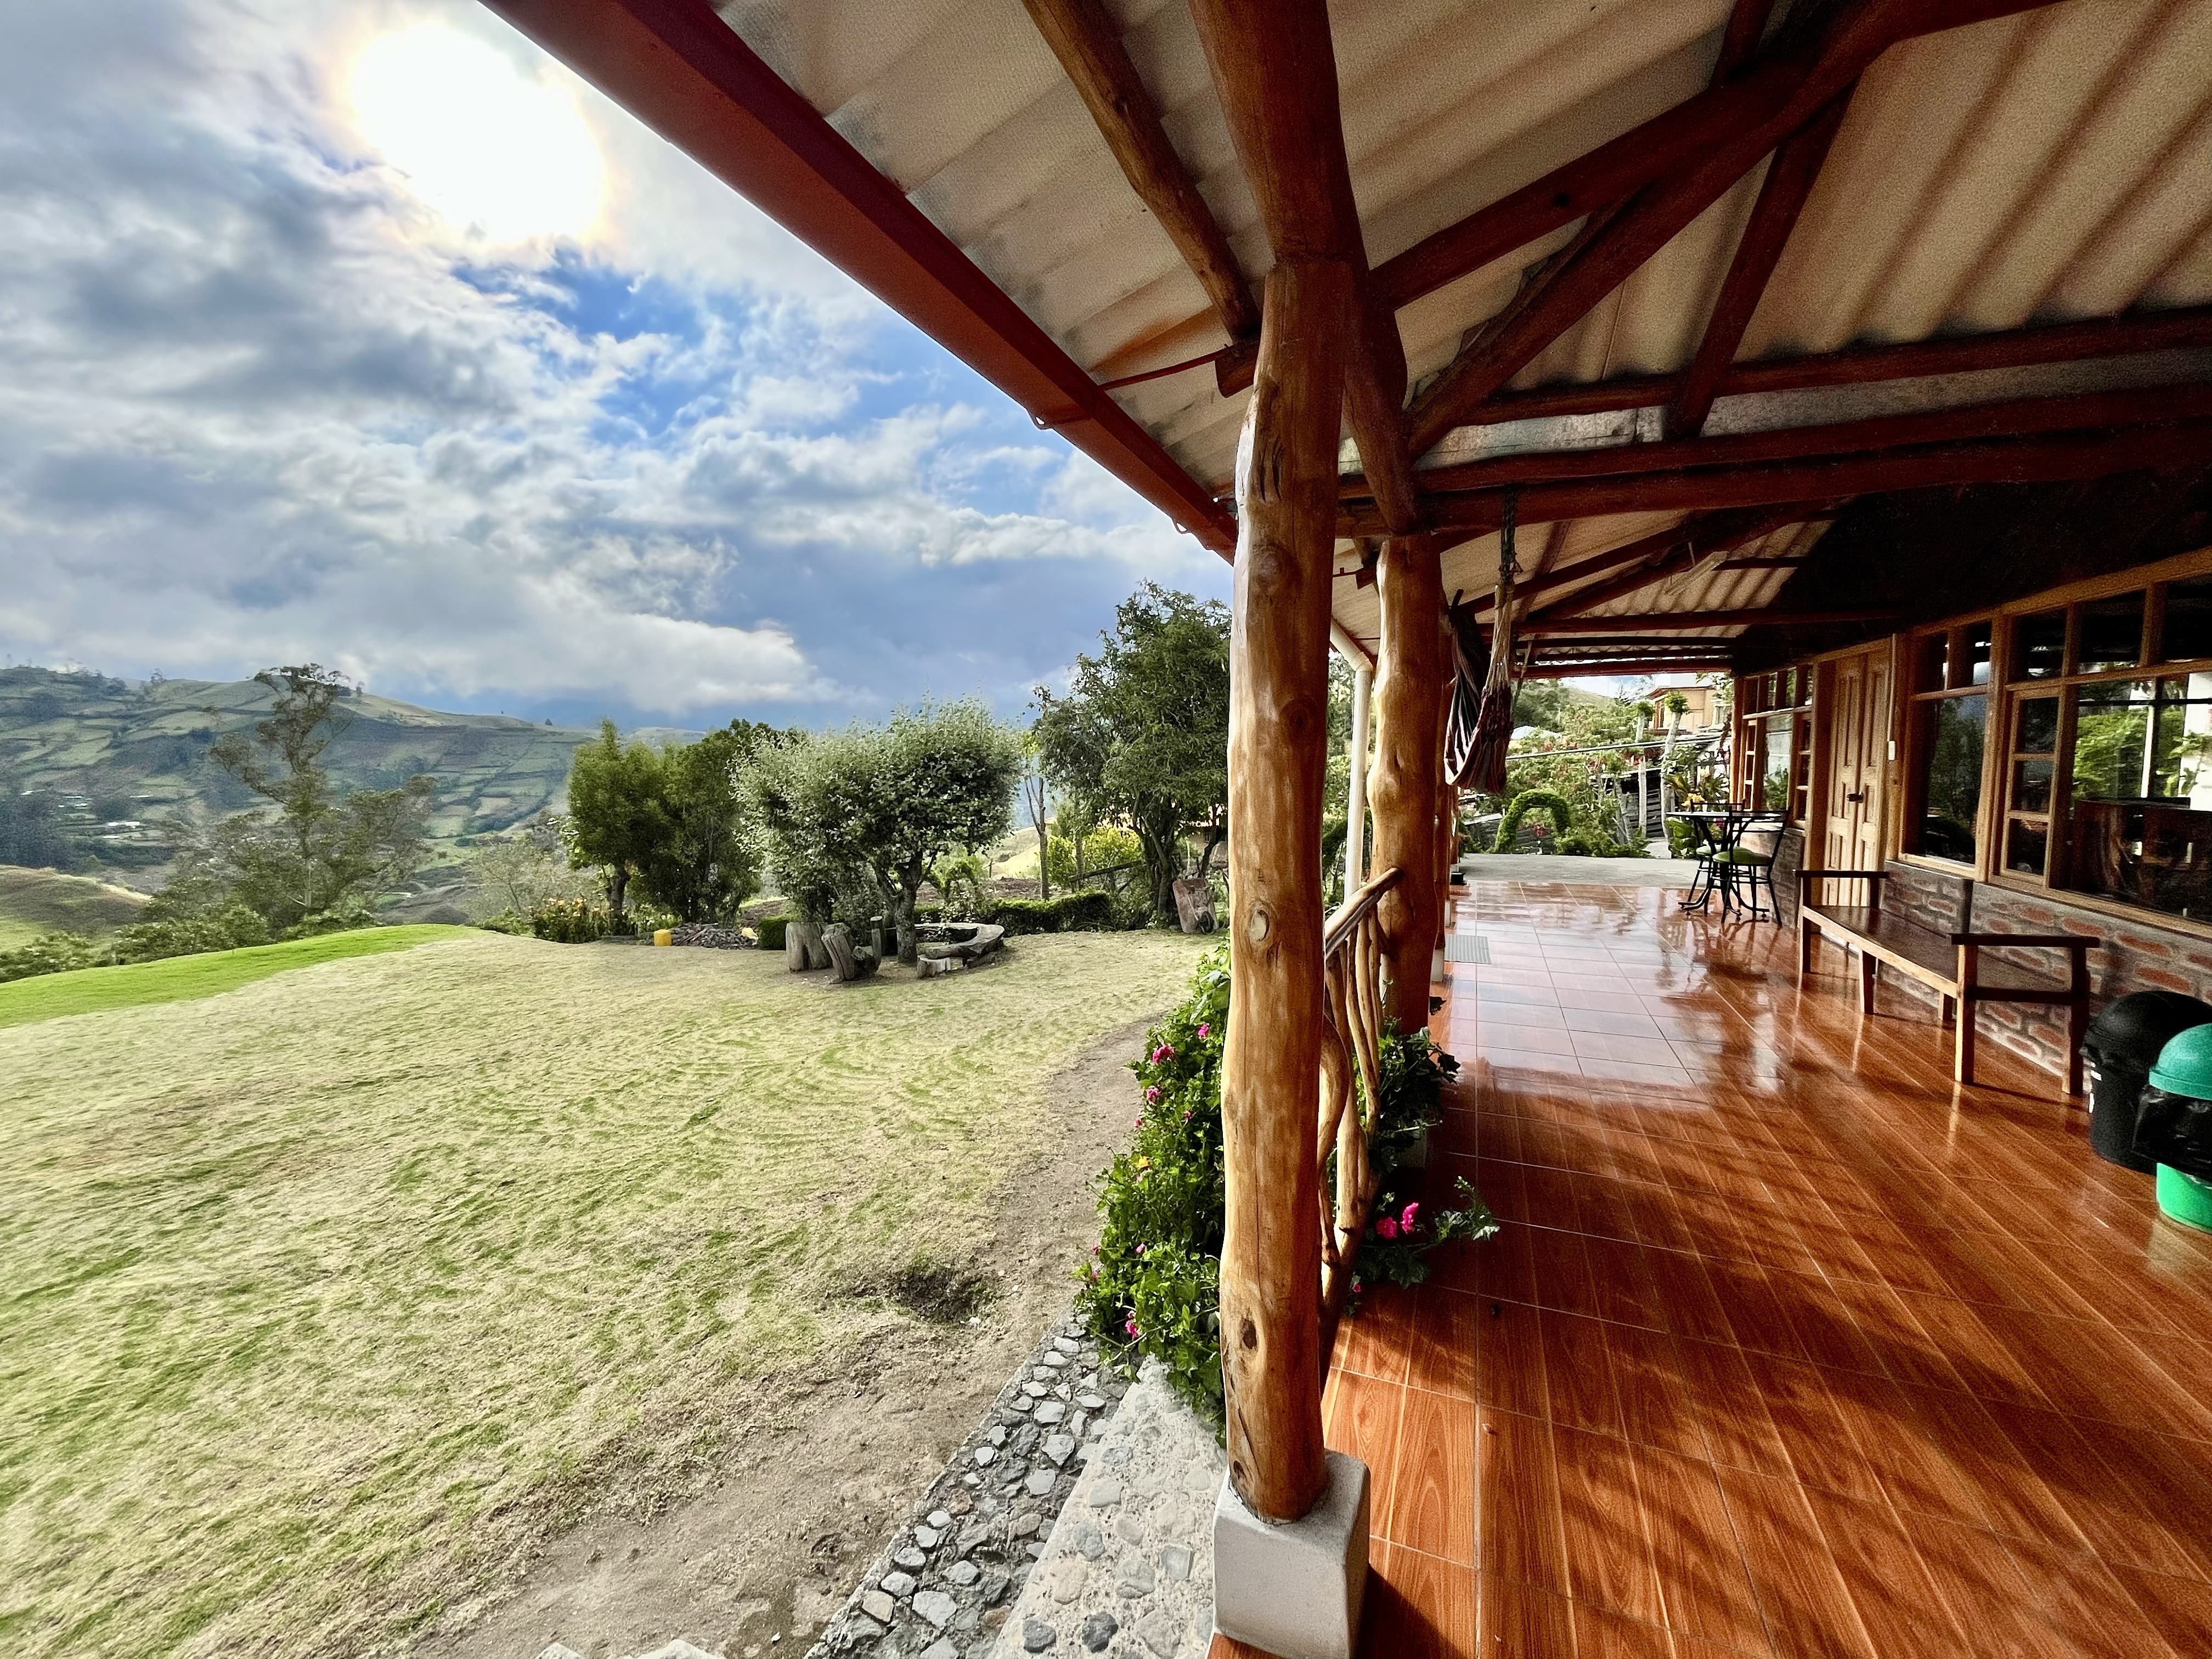
Nonetheless, we made it! There are exactly two hostal options in the sleepiest town I think I’ve ever seen: Hostal Taita Cristobal and Llullu Llama Mountain Lodge. We stayed at Hostal Taita Cristobal, which has very photogenic on-site llamas if that affects your decision.


Day 1 Summary:
Distance: ~11 km / 7 miles
Time: 4 hours (suggested time: 3–5 hours)
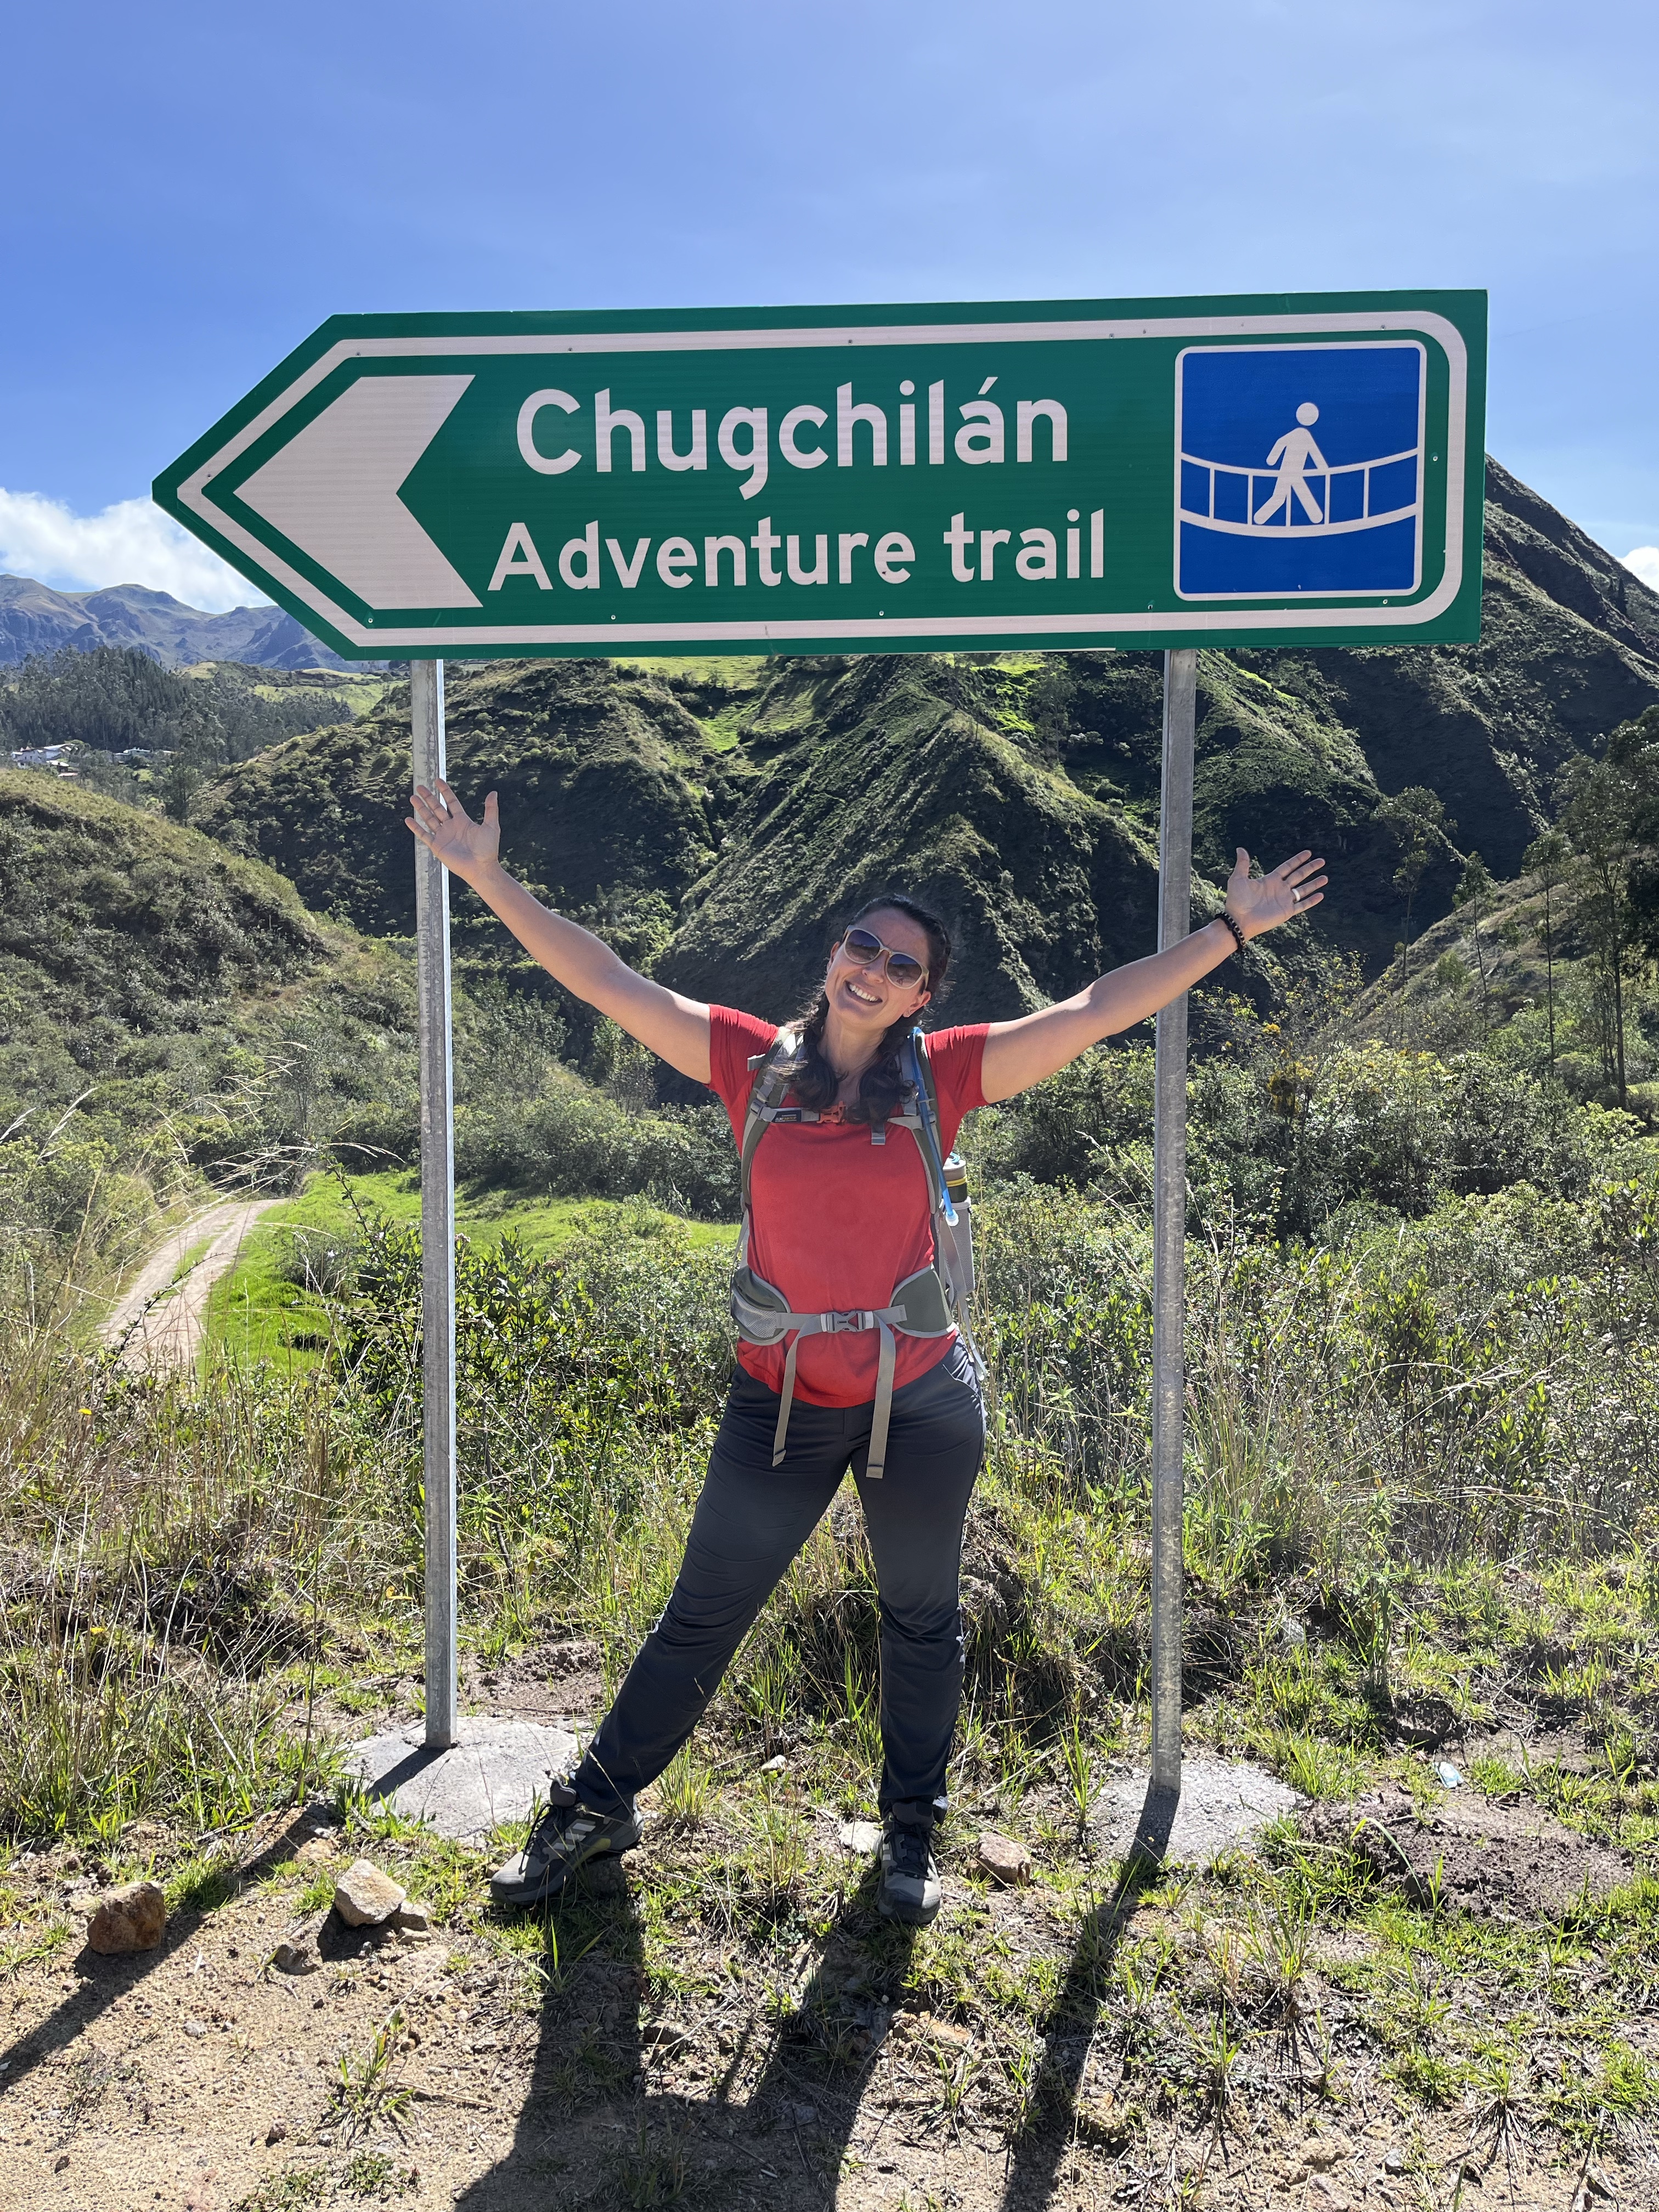
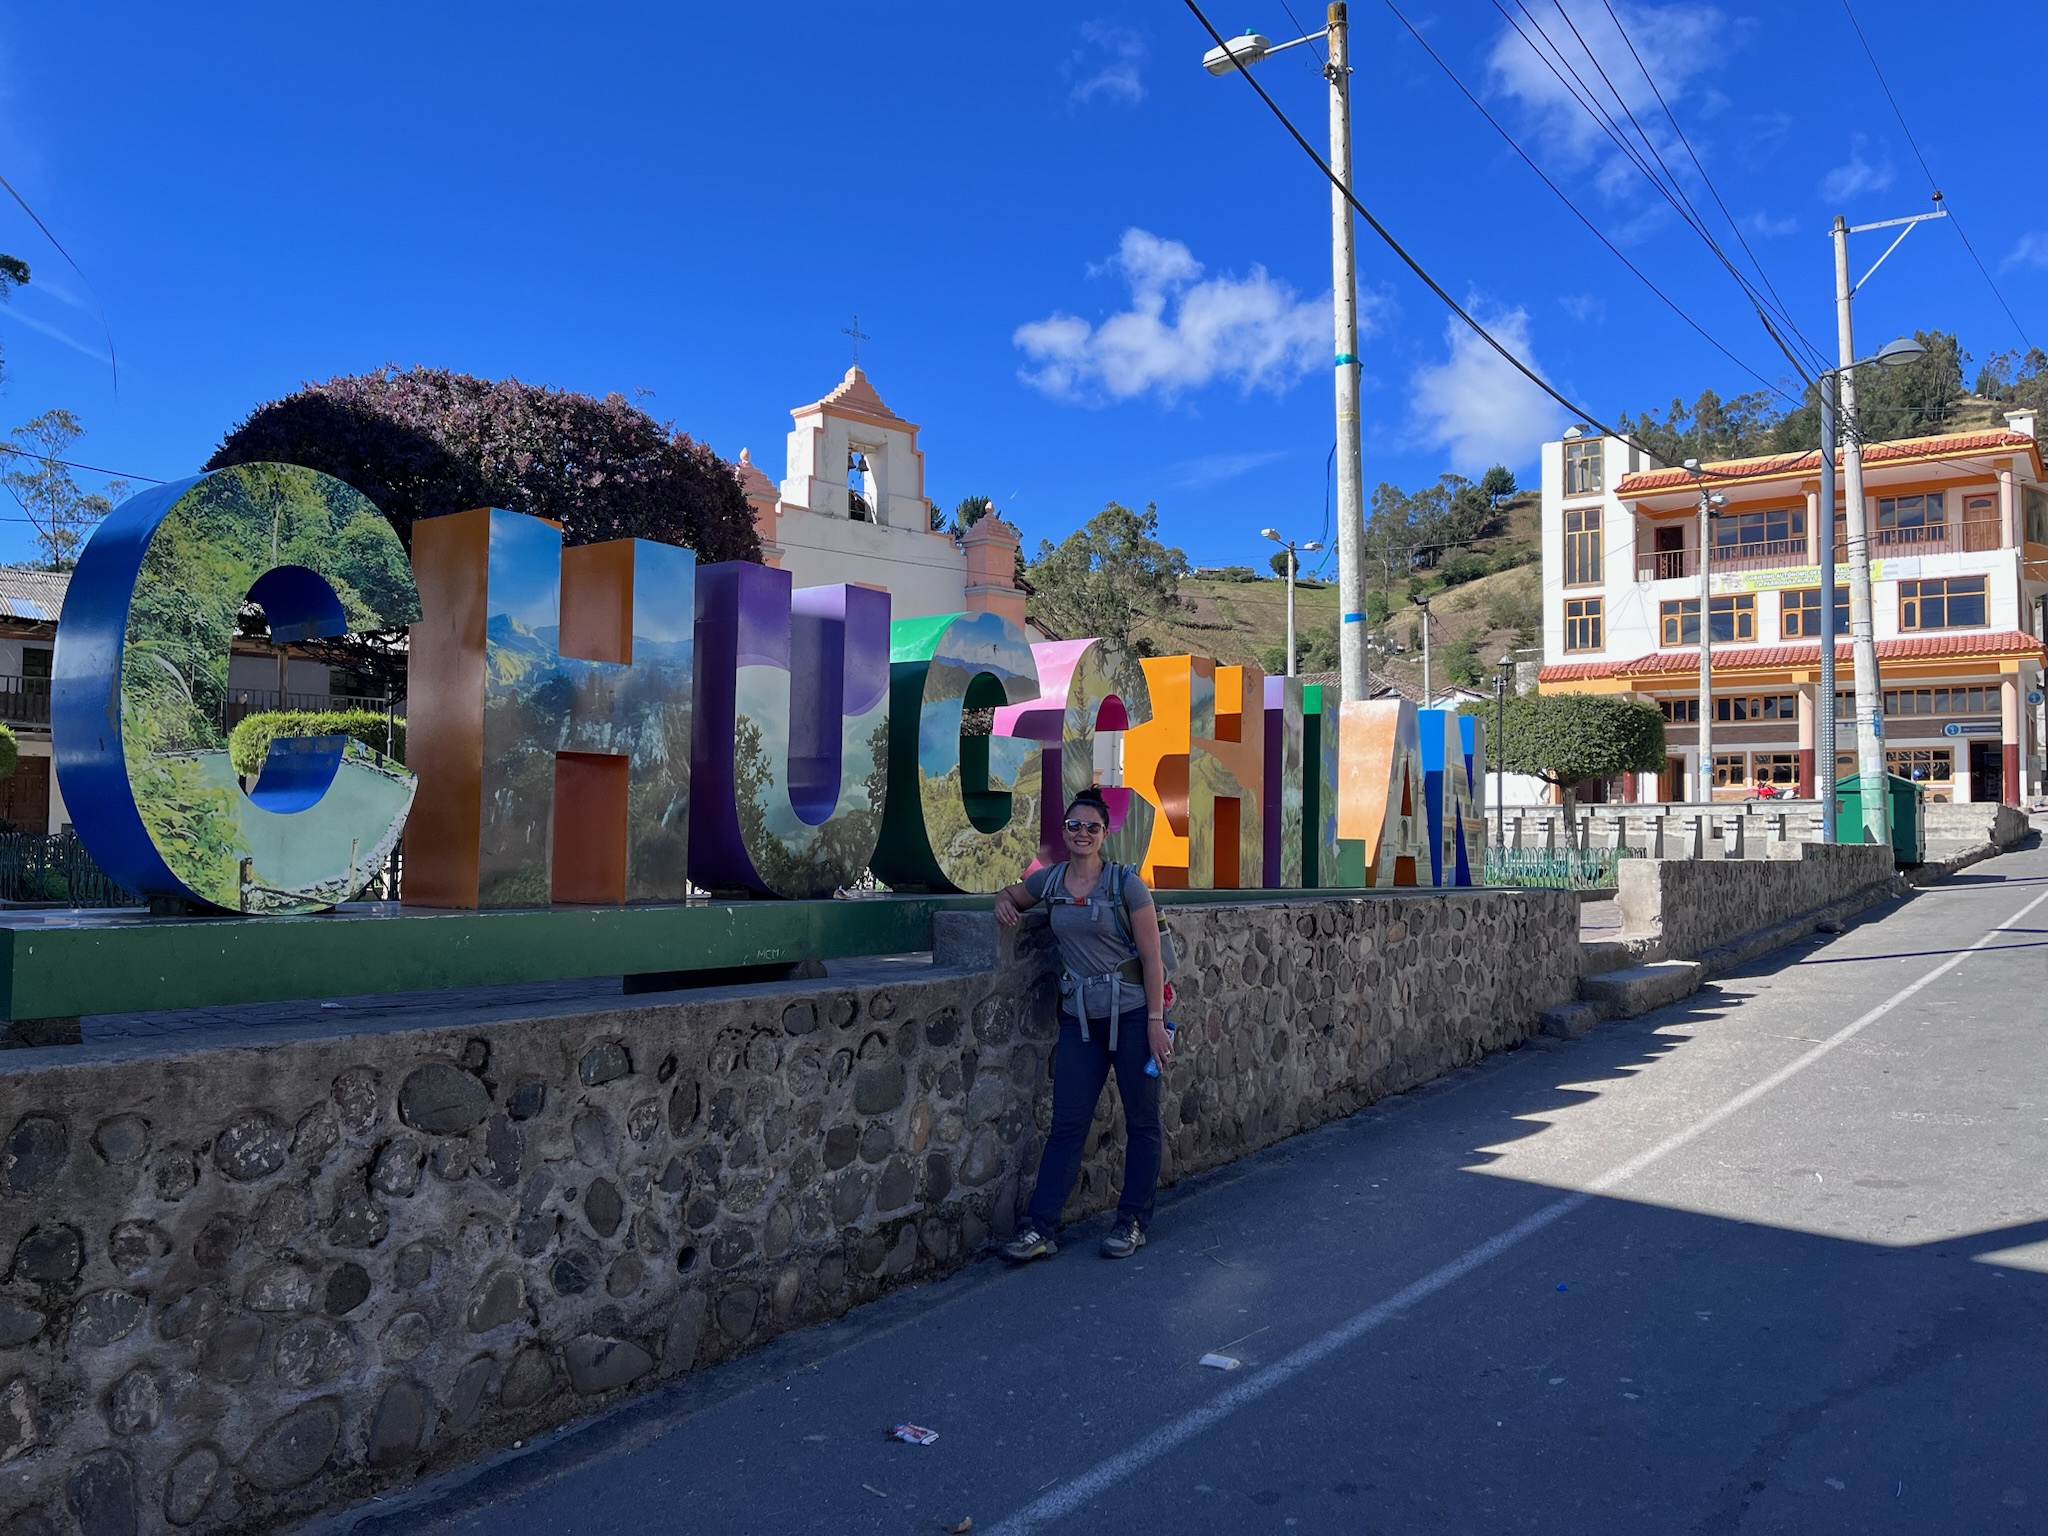
Day 2: Isinliví to Chugchilán
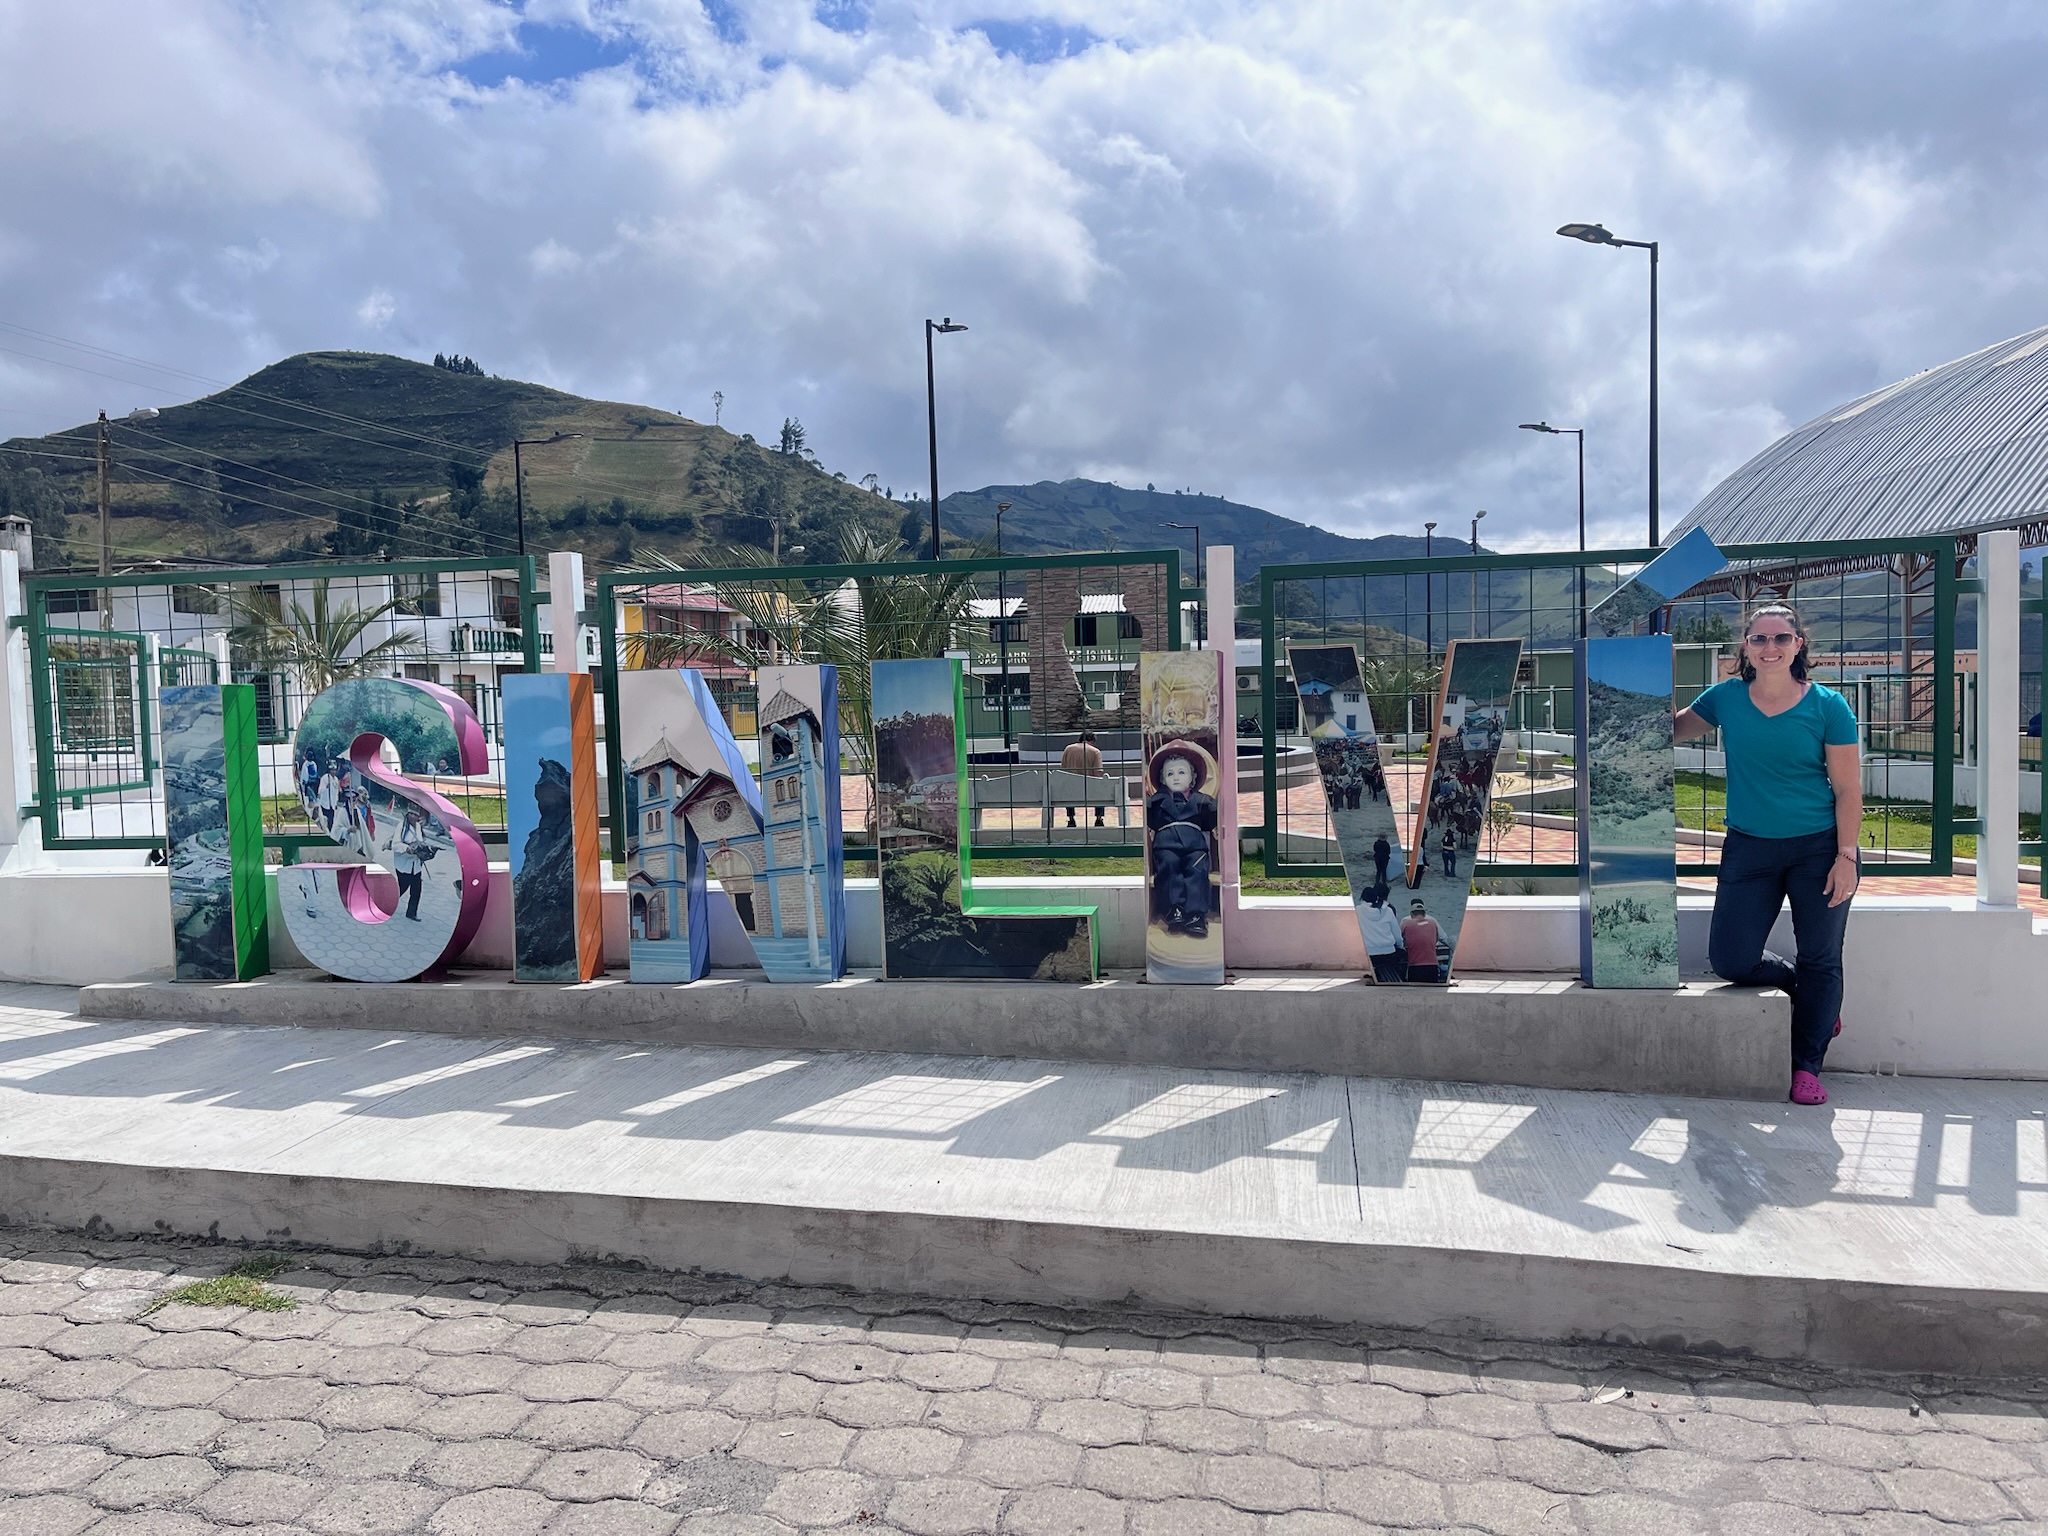
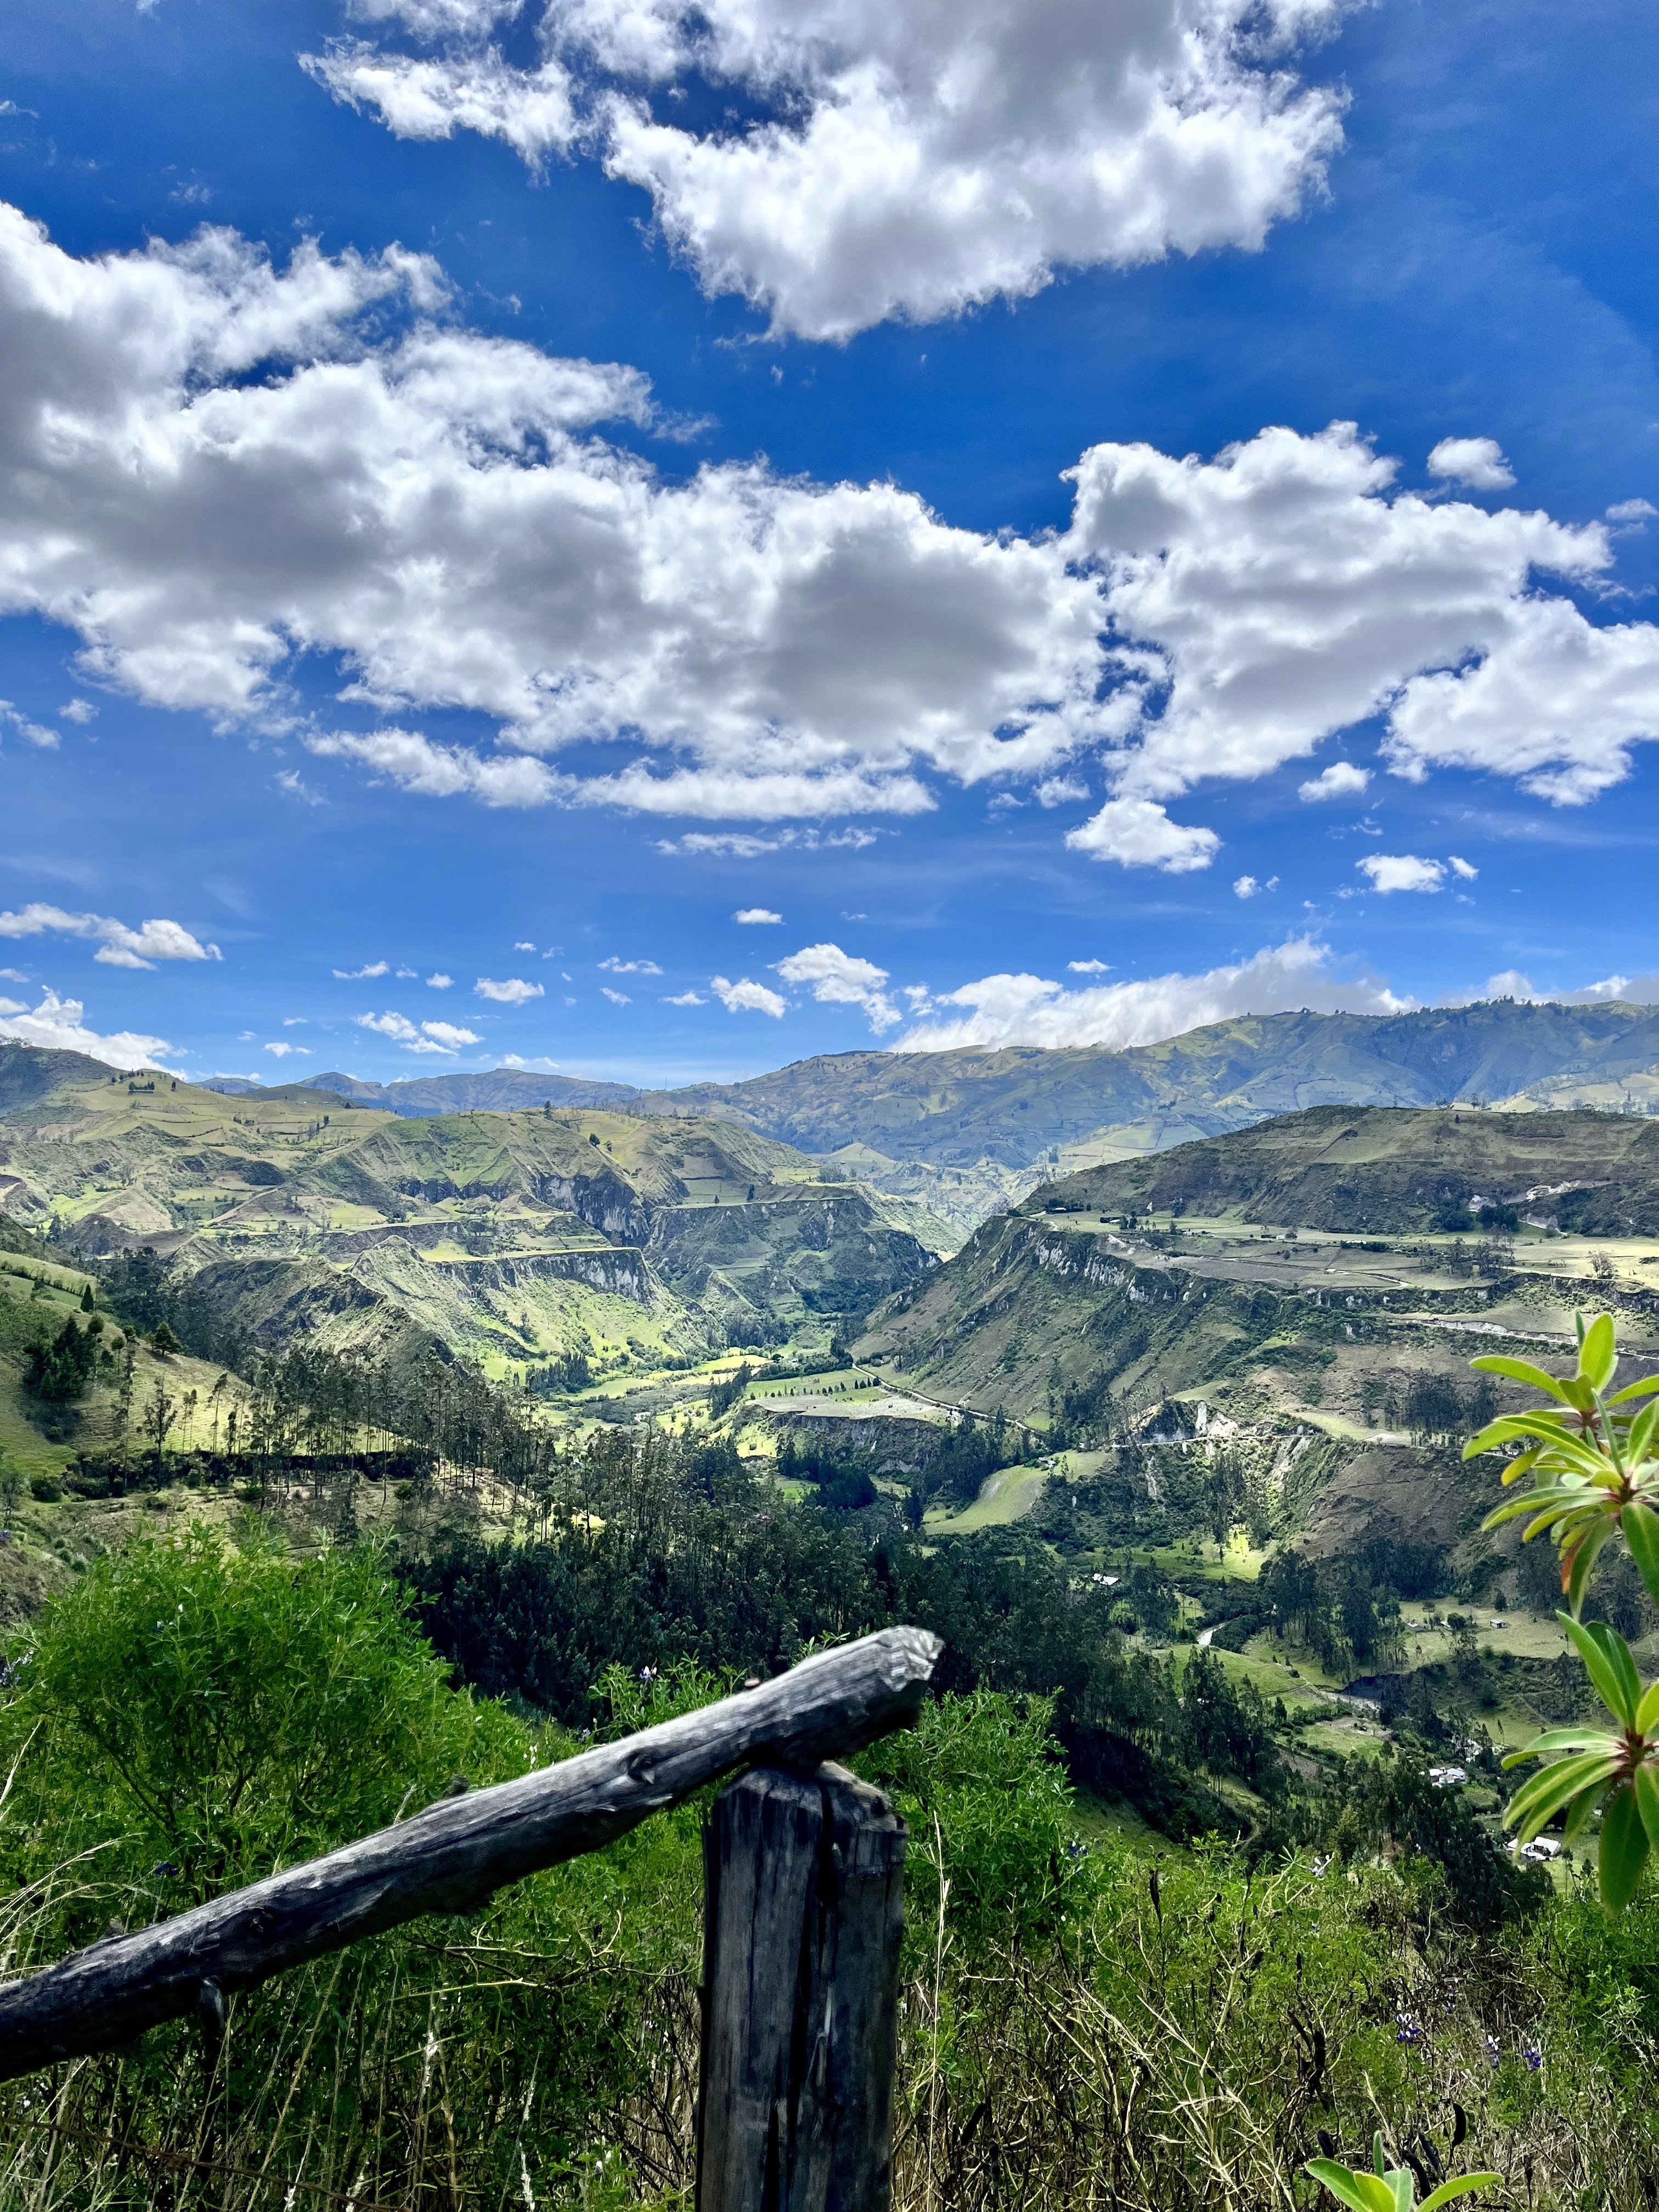
We left Isinliví after breakfast, ~9 am. Again, the start of the trail is easy to find since it’s directly behind the hotel! The day starts with a deceivingly easy walk into the valley, where you have two options: the “safe” route or the “adventure” route. Naturally, we chose the adventure route.
Remember how I said you would get lost? Well, we did it again. We came to an intersection with one way blocked by a fence and the other open. What would you do? We took the open path and scrambled to the top of this particular cliff, only to realize we should have read the written directions again, which clearly stated to take the trail down to the river. 🤦♀️ Well, jokes on them (whoever them is) because we had a lovely snack break with a sweeping view (and then backtracked to the correct trail).


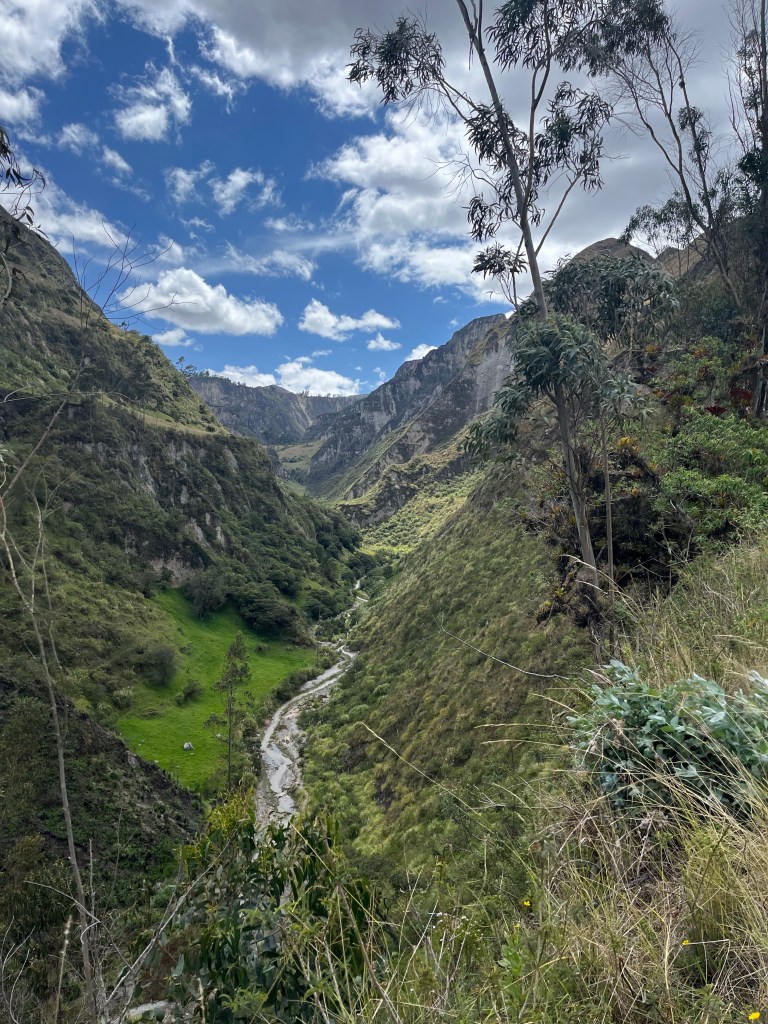
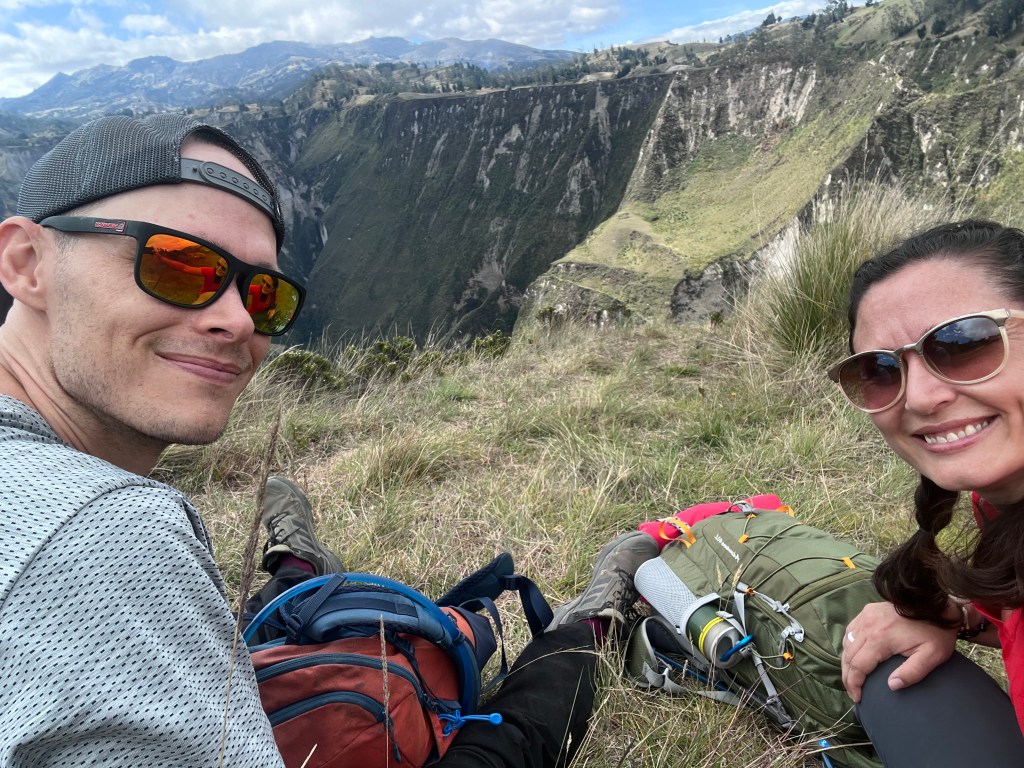
The safe and adventure trails meet about halfway but split again after that. We chose to stick with the adventure trail, which continues on the other side of the village of Itualo (the safe trail continues before entering the village) and takes you into the Toachi Canyon. This hike was definitely more challenging and adventurous in that some areas were exposed, and there were some drop-offs, but the views were worth it!
Of note, we also got lost here, again, owing to an unmarked intersection. Once you reach the top of the hill (trust me, you’ll know which hill), you can turn left and continue up or go straight and start descending. At this point, Shane checked the map, which indicated we should take the trail up to the left instead of straight and down. So, we started walking, and the GPS indicated that we were on the trail, until suddenly we weren’t… by a lot.
The plus side is there are tons of trails to choose from since the locals frequently walk the area. So, we pointed ourselves toward the official path and ended up back on the correct trail without much effort or time lost. However, this final part of the trail was one of the hardest sections of the entire day since it was essentially a straight shot up out of the canyon. You’ve been warned!


We stayed at the Hostal Cloud Forest, but there are several other options in Chugchilán. For example, Hostal el Vaquero looked nice from the outside and seemed to have a better mountain view than Hostel Cloud Forest.
Day 2 Summary:
Distance: ~14 km / 8.5 miles
Time: 5 hours (suggested times: 4–6 hours)
Day 3: Chugchilán to Quilotoa
We started our final day of the hike ~9 am, after breakfast. And, again, there is a deceivingly easy downhill trek into the valley to start the day. Just know, what goes down must come back up… to nearly 4,000 m / 13,100 feet.
Props to us because we didn’t lose the trail on the last day! Don’t get me wrong, we almost did a handful of times, but we checked the map in time. Like the other days, if you happen to veer from the path, it’s easy to get back on track.


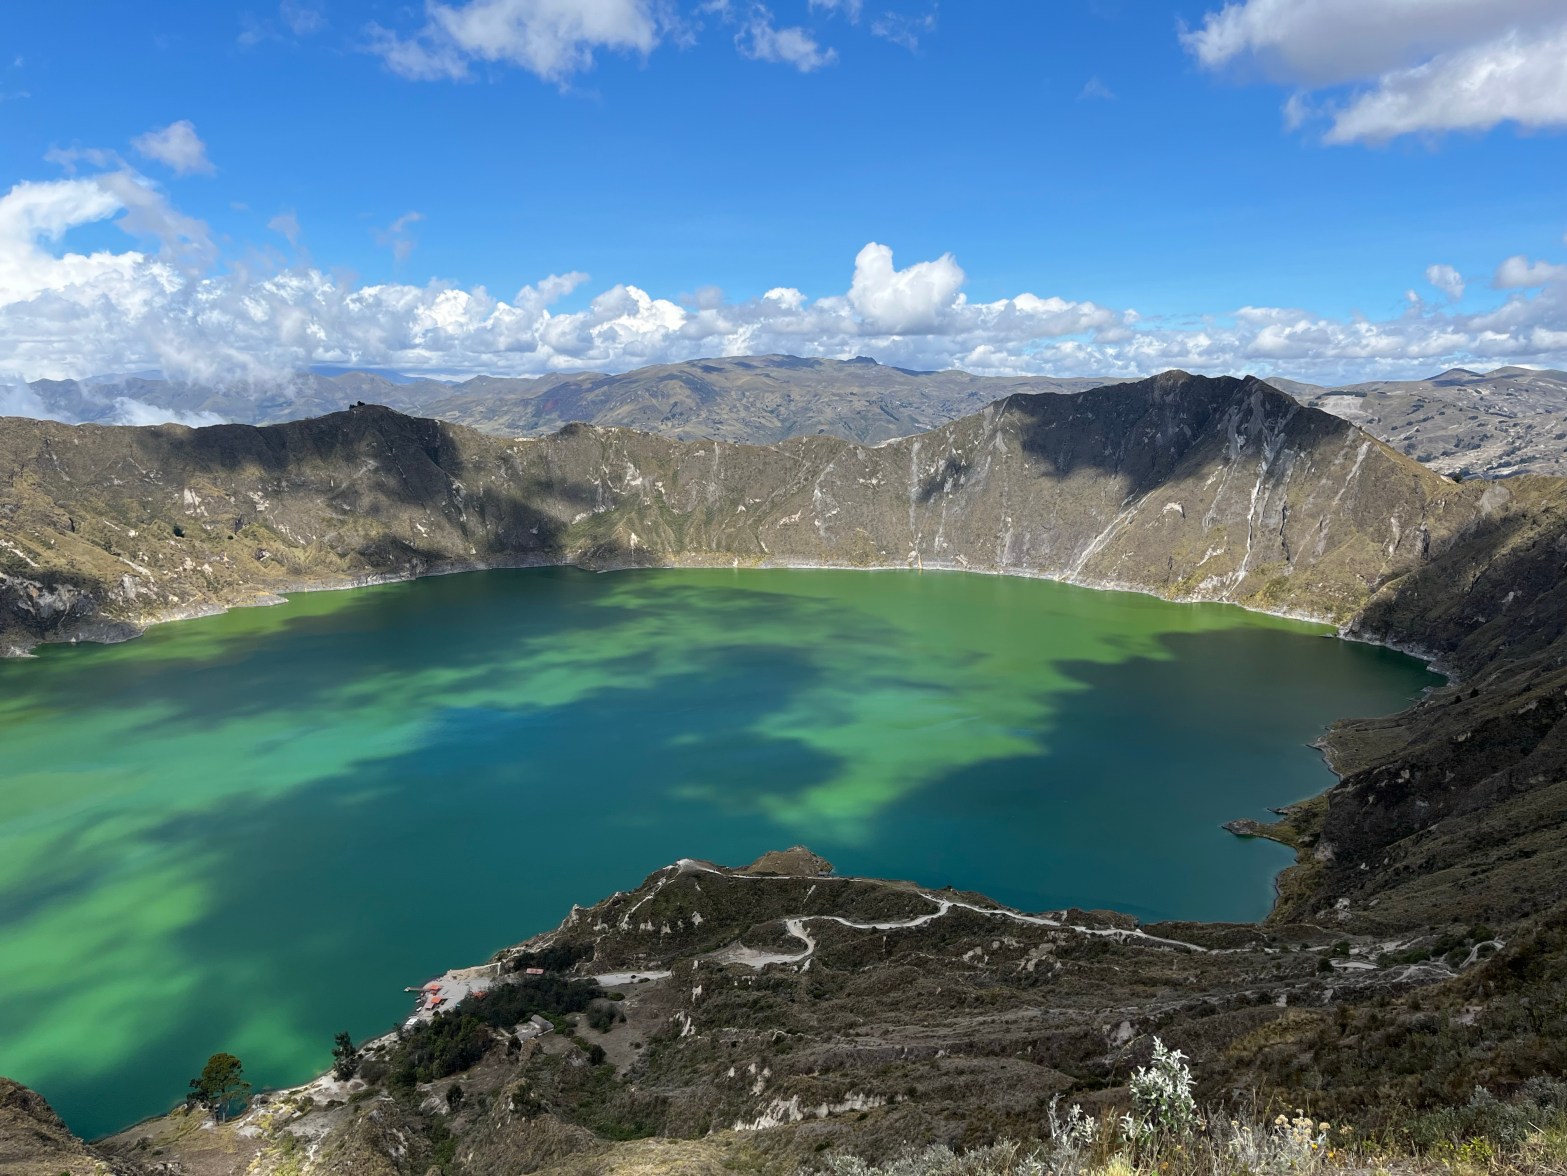
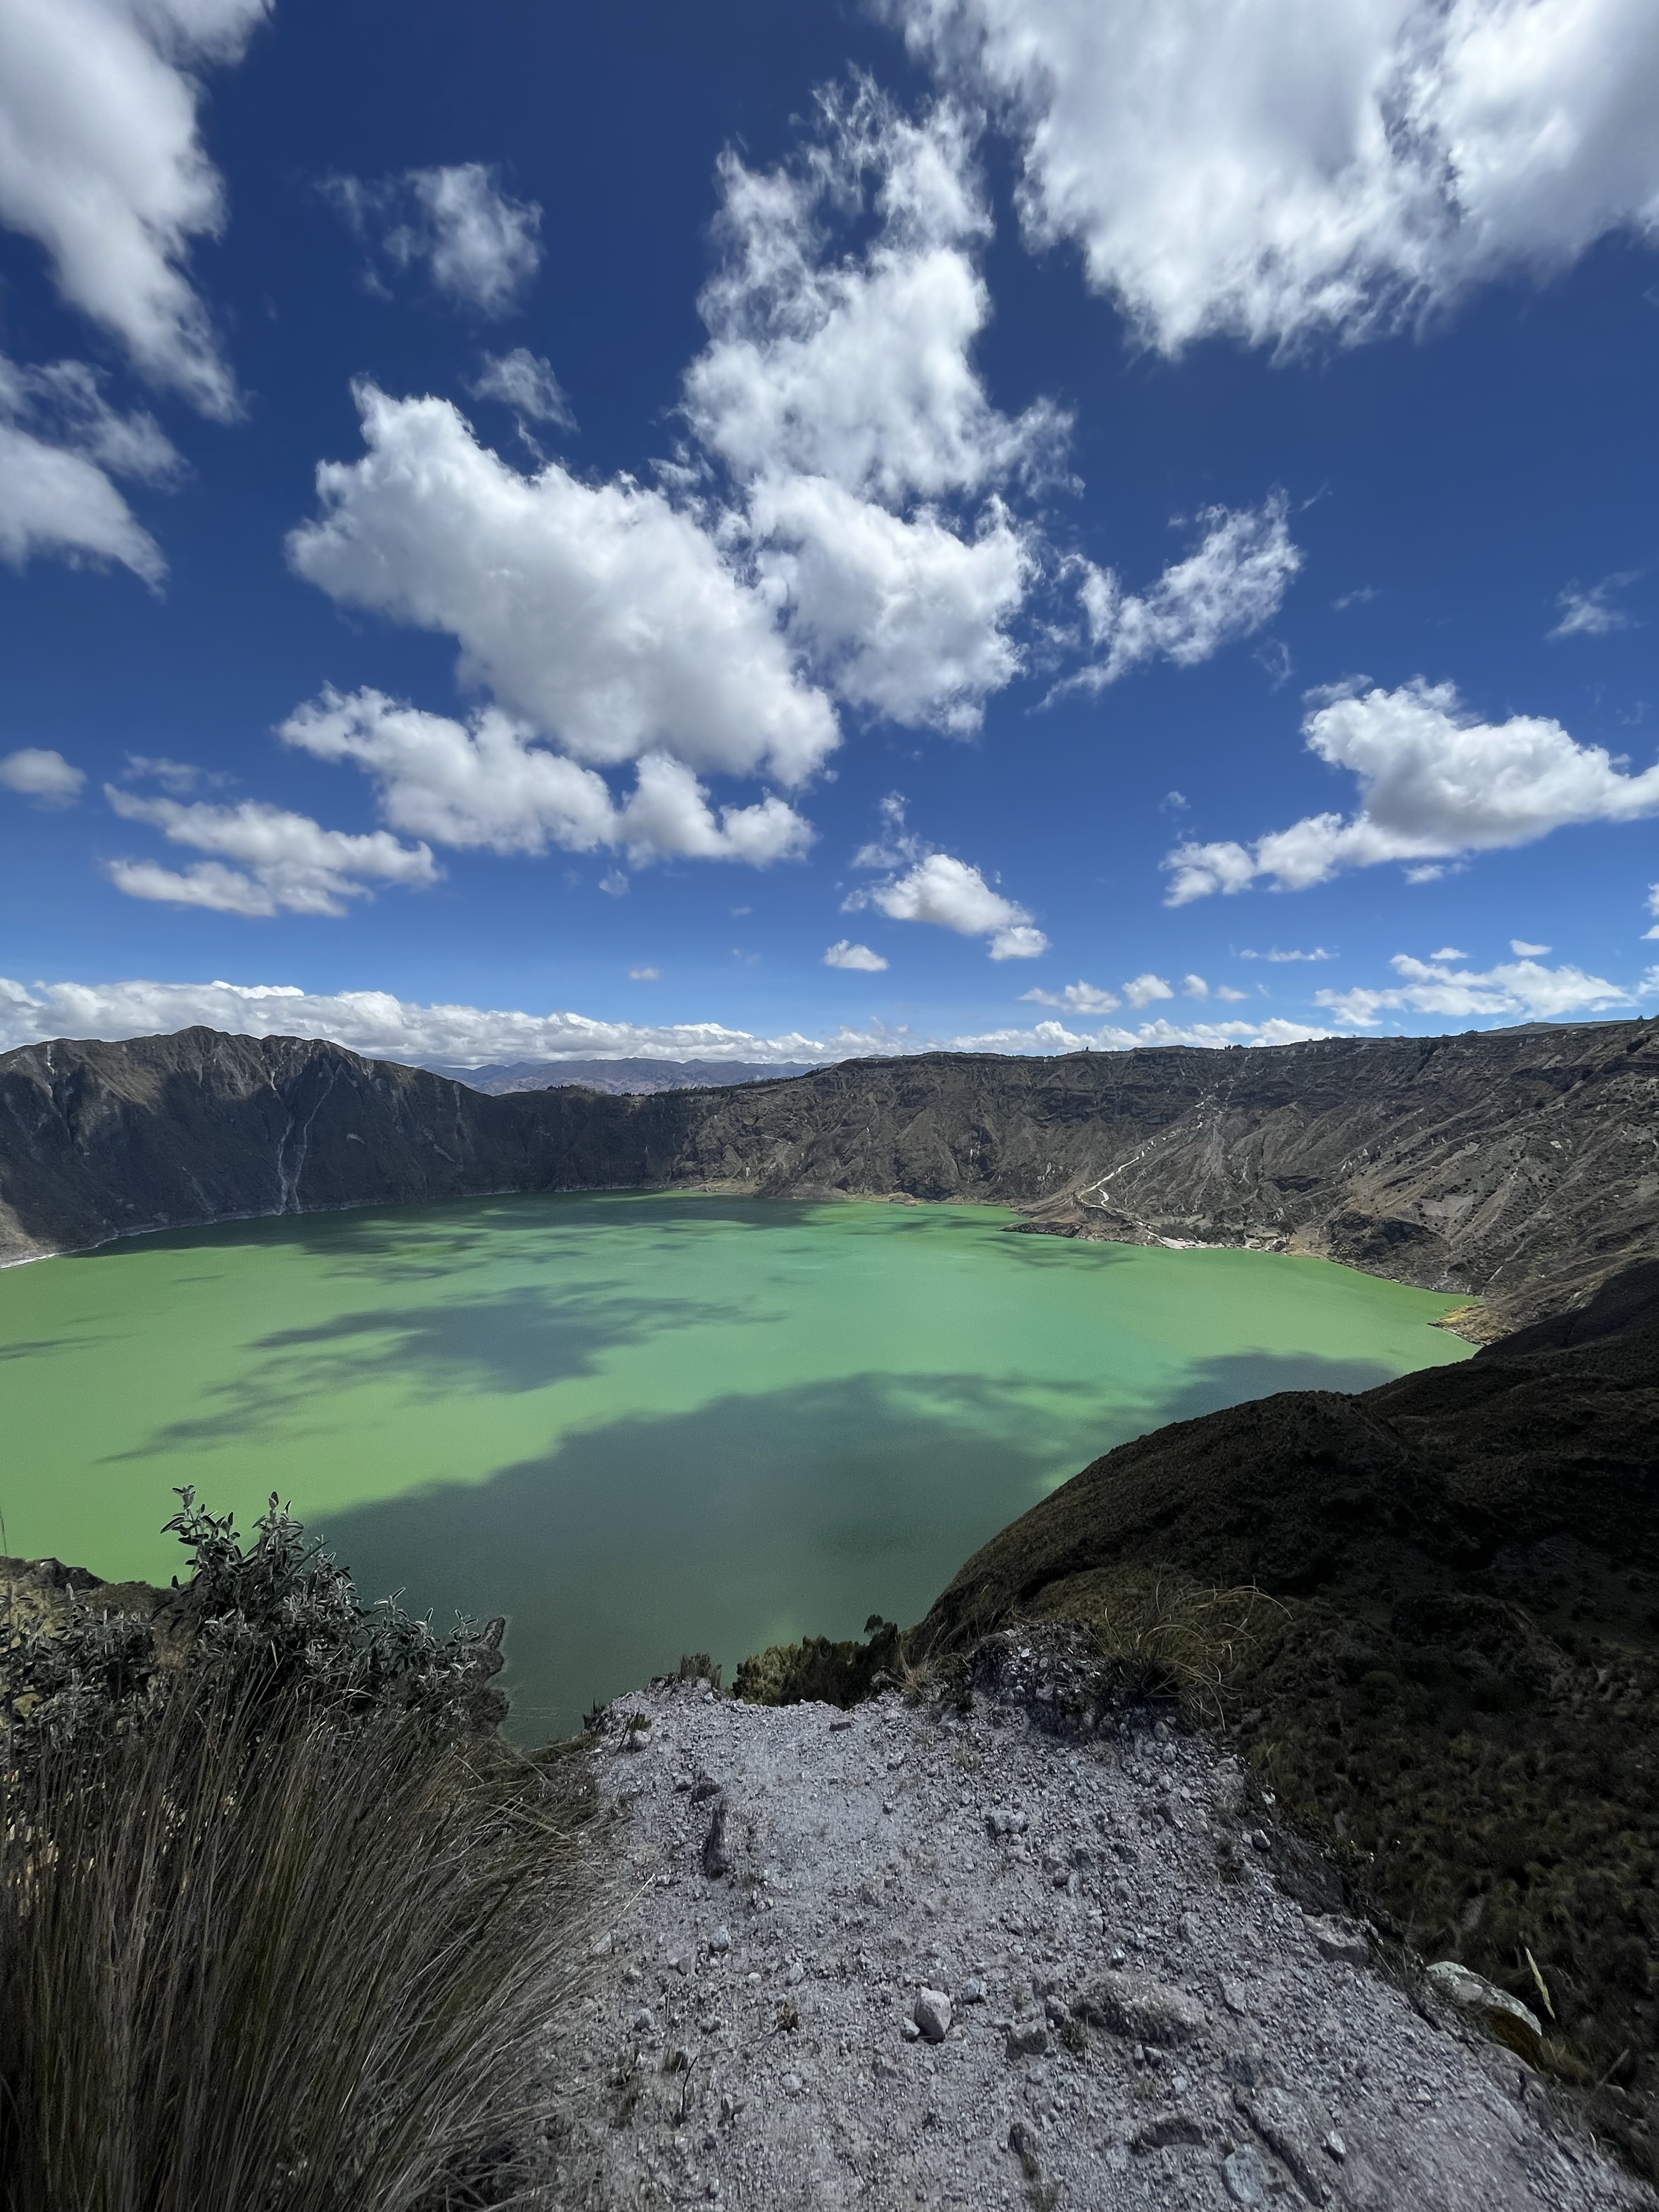
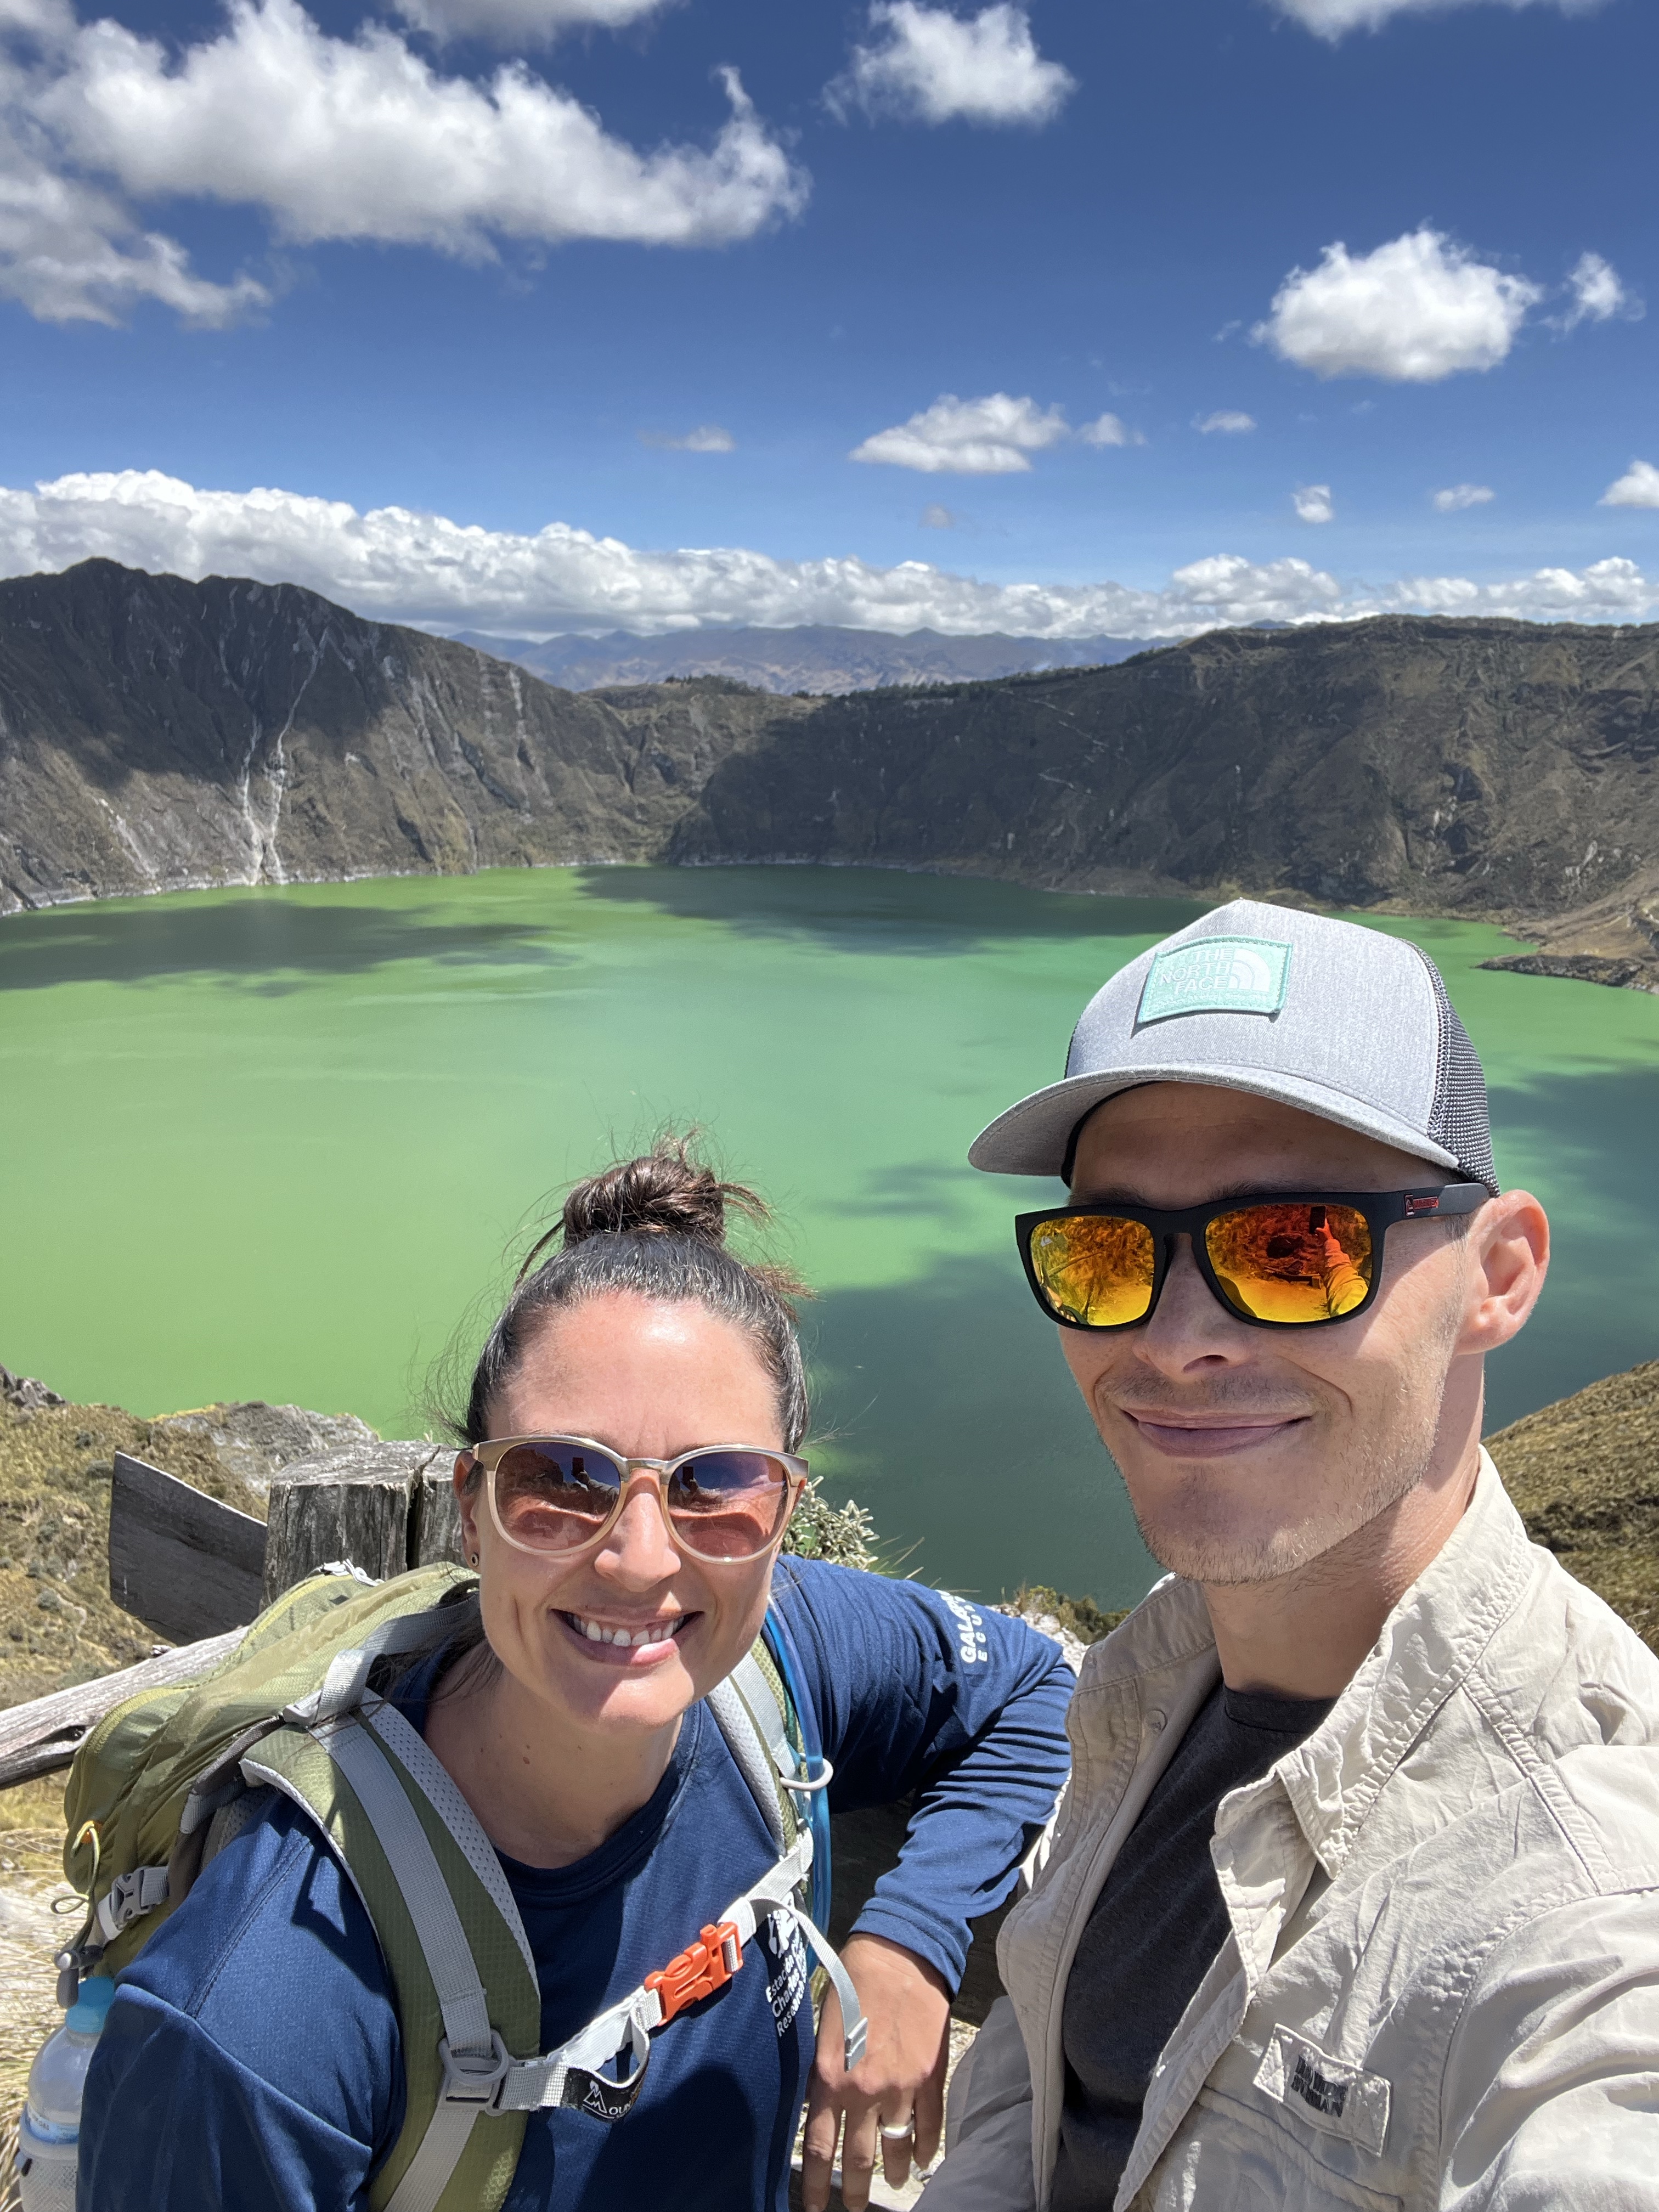
Shane and I disagree on this, but I think the last day was the most challenging (he thinks day 2 was). The plus side to day 3 is you’re rewarded with a view of Quilotoa! But don’t get too excited; you have about an hour and a half of walking once you hit the crater’s rim trail. The hike ends at the viewing platform in Quilotoa Village.
When you’re ready to head back to Latacunga, turn left out of the viewing platform and walk down the road past an entrance checkpoint. You’ll see a sign on the left side of the road with bus times to Latacunga. Just flag down the first one that comes!
Day 3 Summary:
Distance: ~14 km / 8.5 miles
Time: 5.5 hours (suggested time: 5–6 hours)
Shane has done multi-day hikes in the past, but this was my first multi-day trip, and I really enjoyed it! I found that the hostels were a nice compromise and made the trip much simpler since you don’t need to worry about packing sleeping gear and food. Shane also admitted that 37-year-old him was much happier with a hot shower and meals prepared for him at the end of the day versus ~22-year-old him, packing all his camping gear and food. 😆
On one hand, the altitude makes this hike challenging, and the uphill parts can really suck. On the other hand, you’ve got three beautiful days in the Andes of Ecuador, and there are enough downhill and flat parts to make you forget the uphill pain (lol). Moreover, the locals we met on the route were so friendly, and the trail wasn’t crowded. In fact, we didn’t see anyone else on the route until the final day, and we were far enough behind them that we didn’t cross paths. So, I’d highly recommend this trip to anyone who is moderately fit.
This is definitely a trip we won’t forget!

Nos vemos,

Wow this is such a stunning landscape! I can’t wait to visit Ecuador one day 😀
Yes, it’s absolutely beautiful! I highly recommend visiting Ecuador and Quilotoa if you can. ☺️